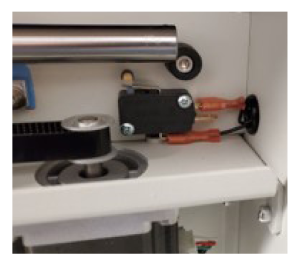
This guide covers replacing a y-axis bearing block assembly on the Fusion Maker, Fusion Edge and Fusion Pro 24 and 36. The x-axis assembly is lifted off the bearing blocks, and the y-axis assembly is removed from its guide rail supports.
Parts Required
- Y-axis bearing block assembly (varies by model)
Tools Required
- 5/32" and 7/64" Allen Wrenches
- Phillips Screwdriver
Safety First: Ensure the engraver is completely powered off and the power cord is disconnected before removing any panels or touching internal components.
Y-Axis Bearing Block Assembly Removal
Turn Off Engraver
Turn off the engraver.

Disconnect from Power
Unplug the engraver from its power source.
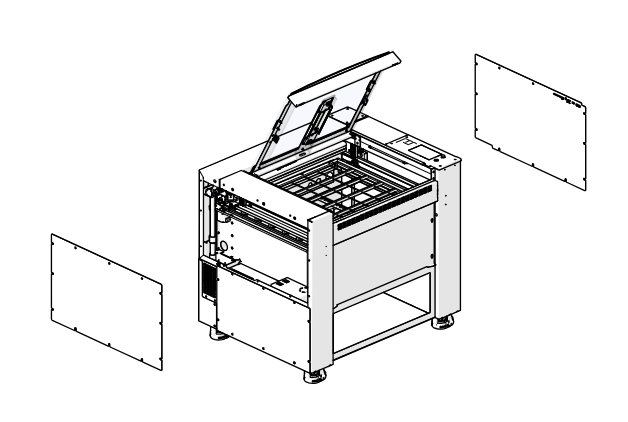
Remove Side Panel
Remove the left or right panel of the engraver, on the side of the bearing block assembly you are replacing.
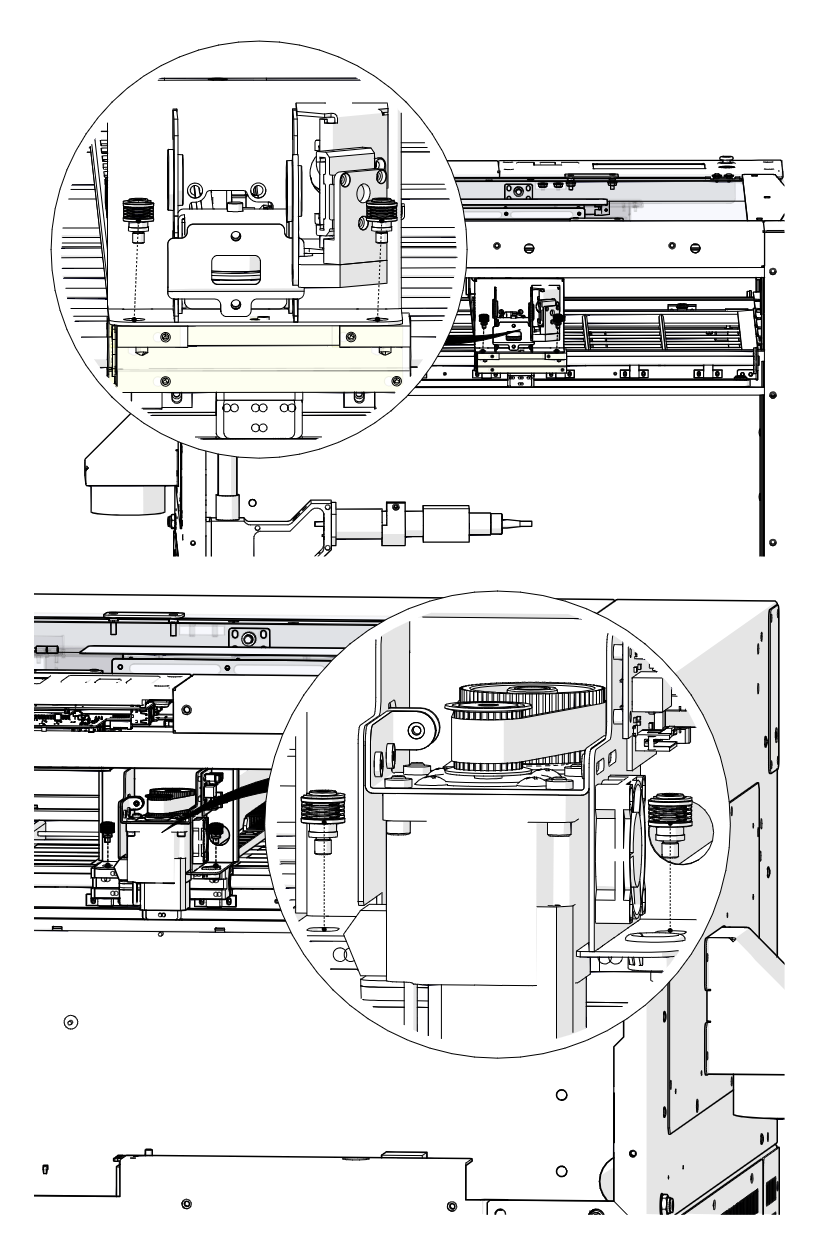
Loosen X-Axis Fasteners
Loosen or remove the four 5/32" fasteners that secure the x-axis assembly to the y-axis bearing blocks: two on the right side and two on the left side.
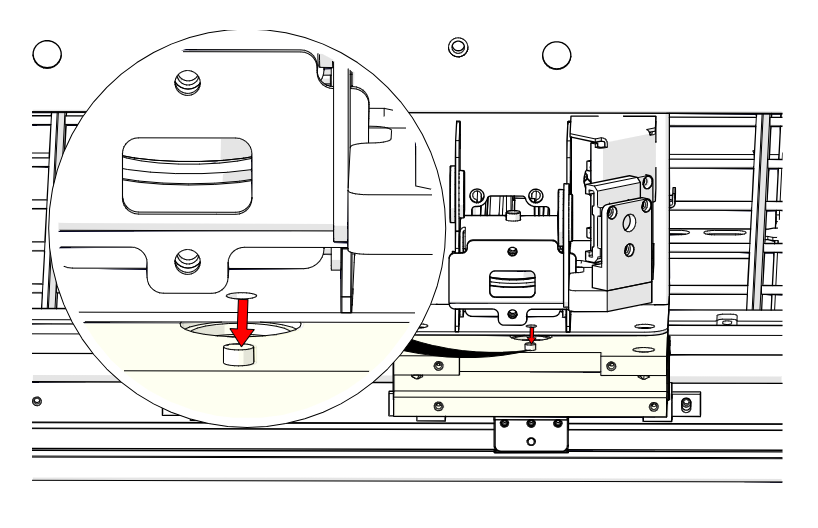
Lift the X-Axis Assembly
Gently lift the x-axis assembly off the locator pins on the y-axis bearing blocks and rest it on the engraver chassis.
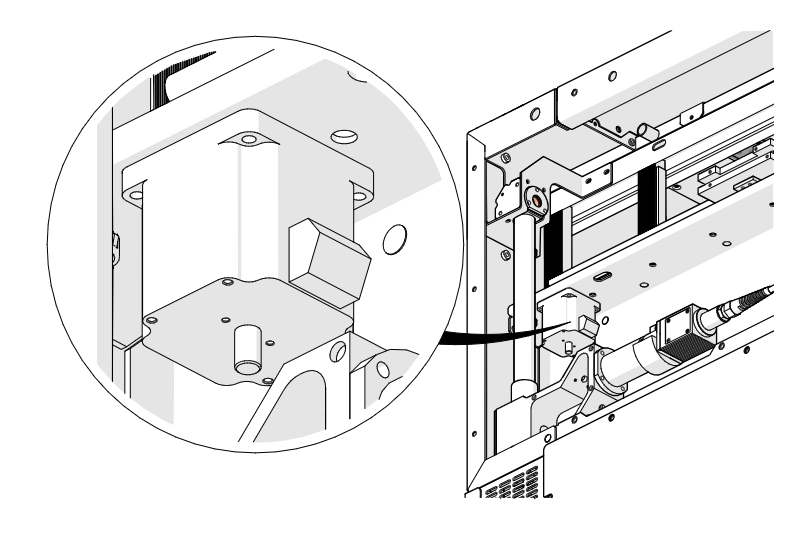
Remove Y-Axis Motor Screws
Loosen and remove the four Phillips screws that secure the y-axis motor.
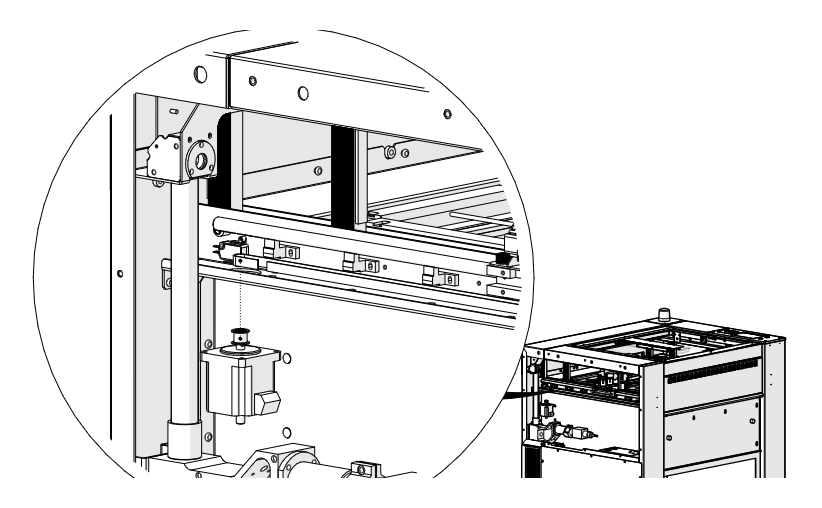
Lower the Y-Axis Motor
Remove the y-axis motor from the y-axis assembly so you can reach the motor harness.
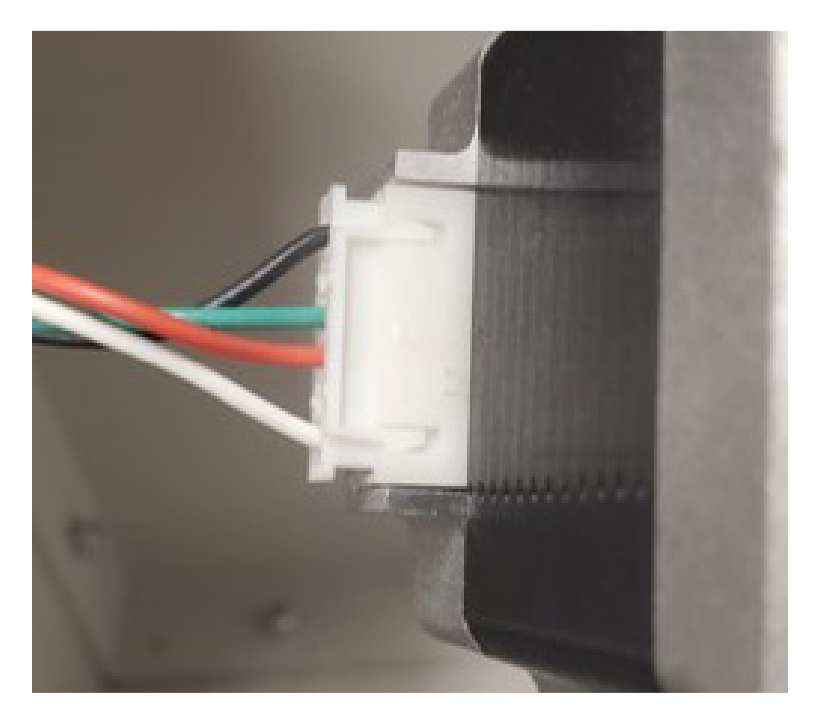
Disconnect Motor Harness
Disconnect the motor harness from the y-axis motor.
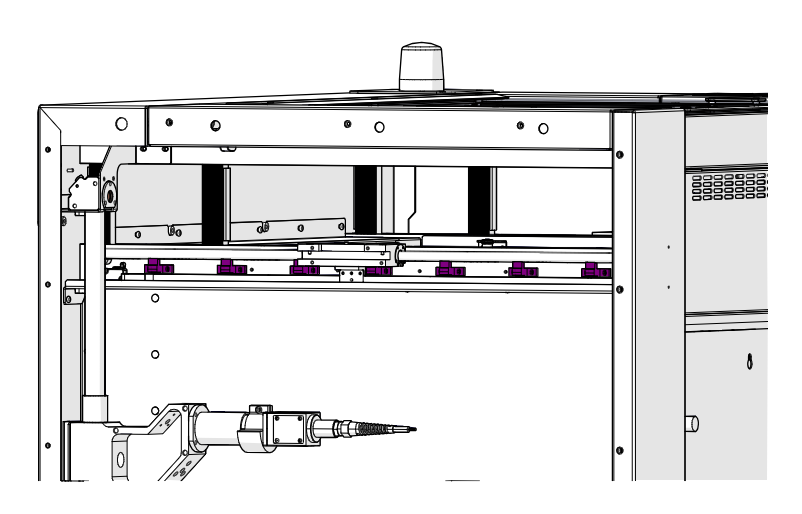
Locate the Guide Rail Supports
The y-axis bearing blocks ride on the y-axis guide rails, which are fastened to the y-axis guide rail supports (highlighted in purple).
Remove Guide Rail Screws
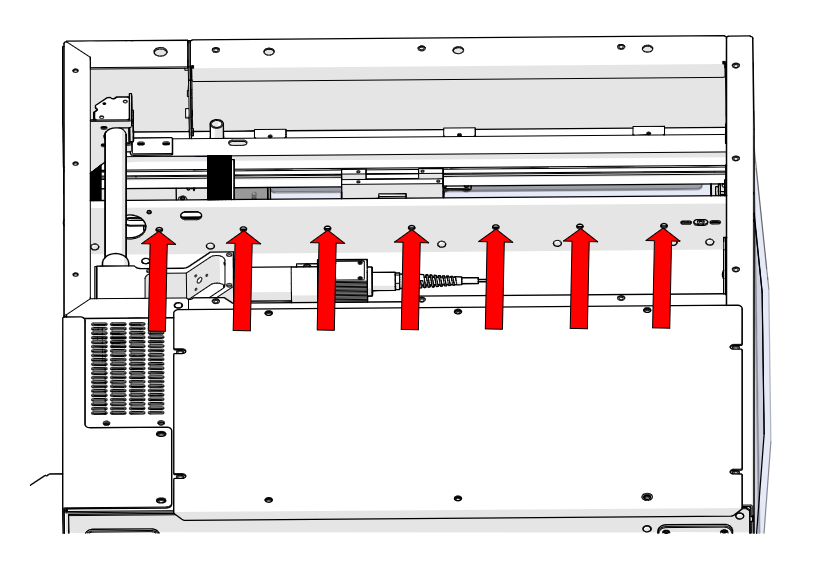
Loosen and remove the four to seven 7/64" Allen screws that secure the y-axis assembly to the guide rail supports, reaching through the circular cutouts under the guide rail (red arrows).
Important: The y-axis guide rail supports are calibrated and shimmed at the factory to be parallel. Do not remove the guide rail supports.
Remove the Rubber Bumper
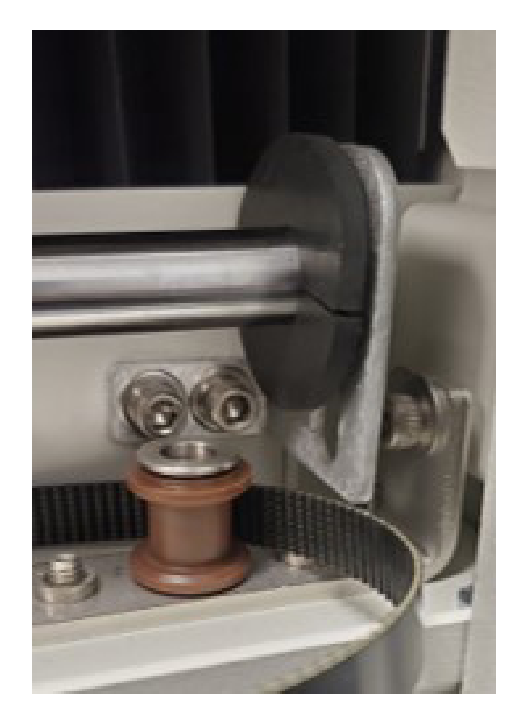
Remove the rubber bumper from the front of the y-axis guide rail.
Remove the Bearing Block Assembly
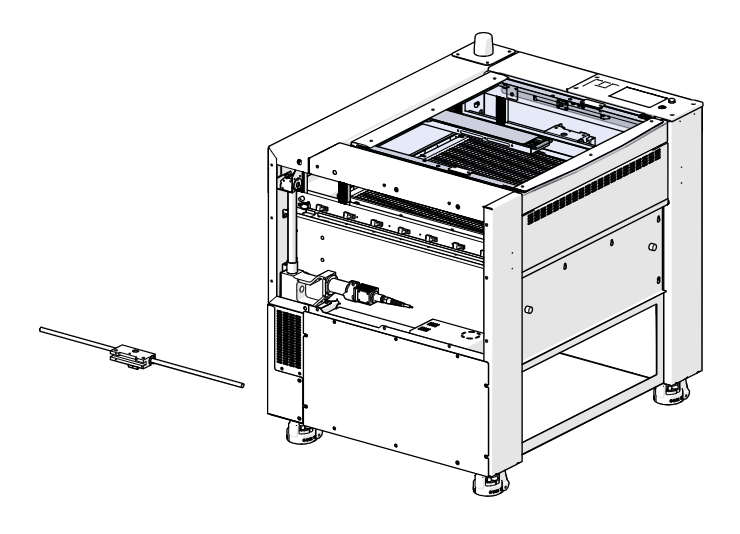
Remove the y-axis bearing block assembly from the engraver.
Y-Axis Bearing Block Assembly Installation
Place the New Assembly
Set the new y-axis assembly on top of the y-axis guide rail supports, with the threaded holes facing down.
Install the Rubber Bumper
Install the rubber bumper on the y-axis guide rail and make sure the guide rail is pushed fully forward in the engraver.
Install Guide Rail Screws
Install, but do not fully tighten, the four to seven 7/64" Allen screws through the circular cutouts under the guide rail.
Tighten in Order
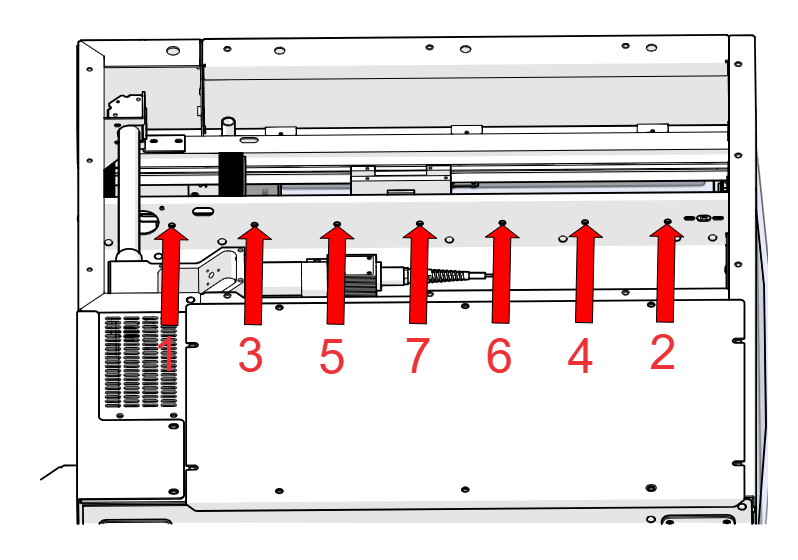
Once all the guide rail screws are loosely installed, tighten them fully in the order shown: 1 at the rear, 2 at the front, then alternate toward the middle.
Connect Motor Harness
Connect the motor harness to the y-axis motor.
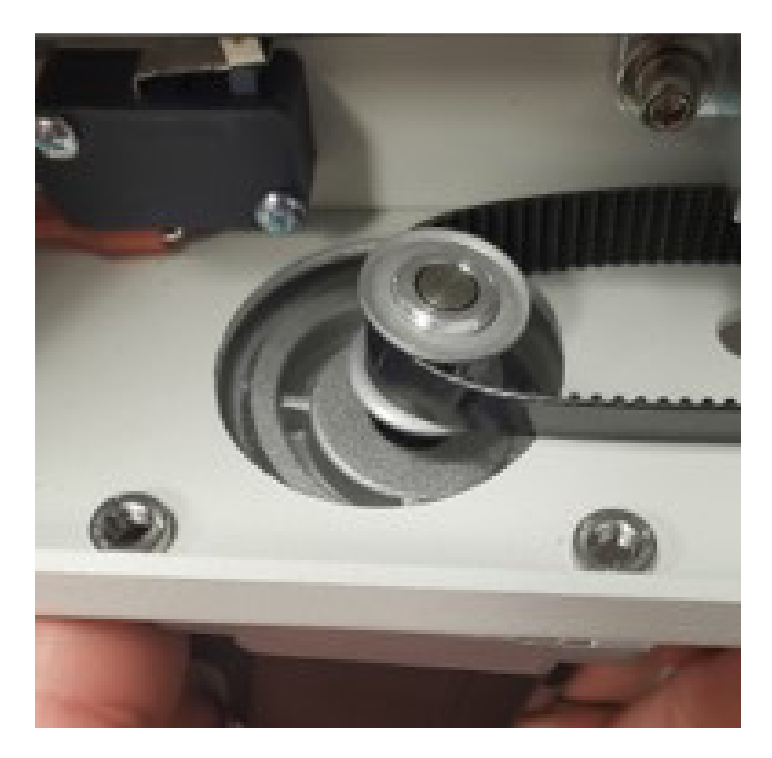
Position the Motor
Position the y-axis motor in the y-axis assembly and loop the y-axis belt around the y-axis drive pulley.
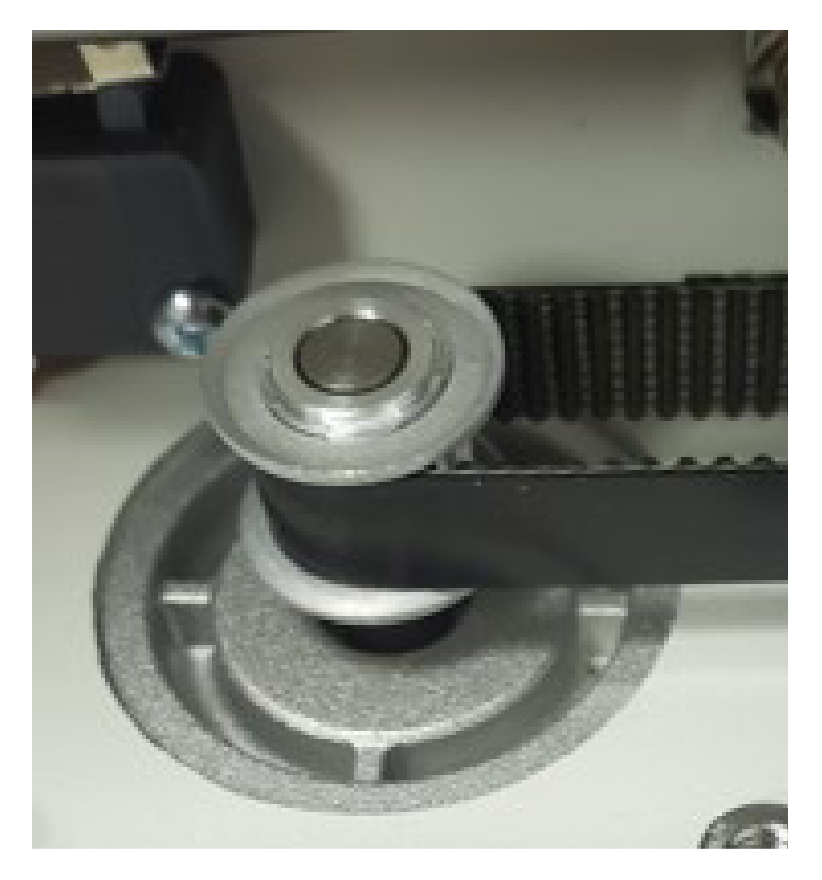
Check the Motor Is Seated
Make sure the y-axis motor is properly seated in the y-axis assembly.
Install Y-Axis Motor Screws
Install and tighten the four Phillips screws that secure the y-axis motor.
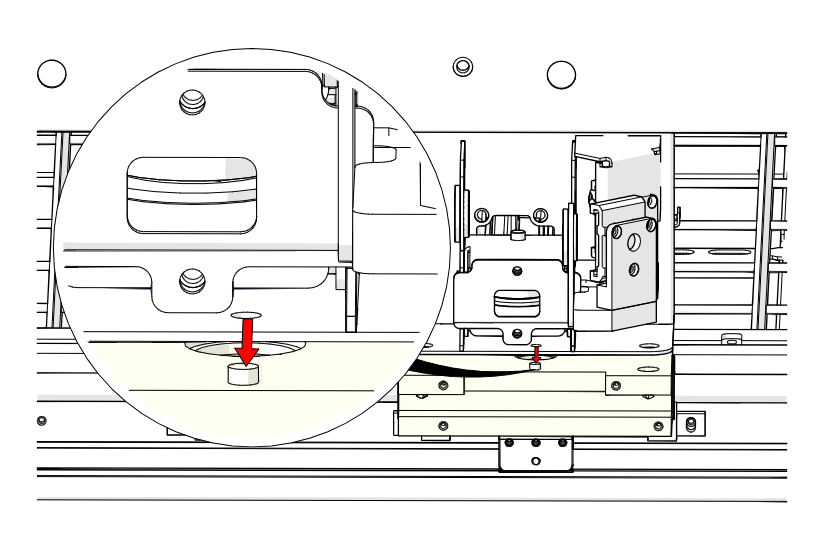
Seat the X-Axis Assembly
Set the x-axis assembly back on the y-axis bearing blocks, on the locator pins.
Install X-Axis Fasteners
Install and tighten the four x-axis assembly fasteners.
Install Side Panel
Install the side panel of the engraver.

Power On
Reconnect the engraver to power and turn it on.