
The Fusion Edge Stand is an essential accessory designed to support your laser system with stability and ease of mobility. Whether you’re setting up a new machine or replacing an existing stand, this guide provides step-by-step instructions to help you assemble the stand safely and efficiently. By carefully following each section, you’ll ensure a secure fit and proper alignment between the stand and your Fusion Edge laser system.
Stand Components
- 1 – Wide End Cap (front caster attached)
- 1 – Narrow End Cap (front caster attached)
- 1 – Shelf
- 1 – Rear Panel
- 2 – Rear Casters
Getting Started
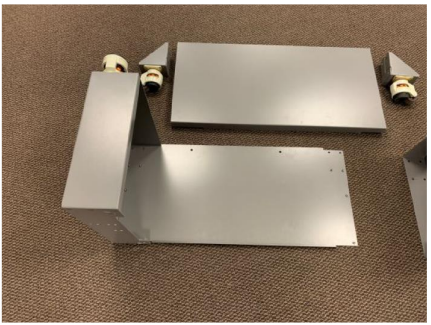
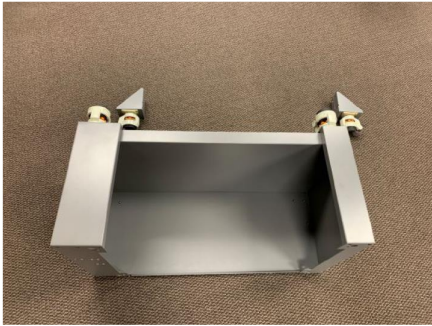
Open the box and unpack all the materials. Lay the parts out on as shown below
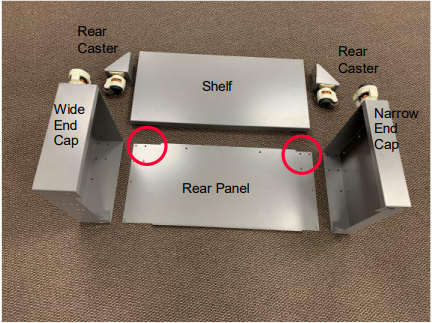
Note: There is a wide side and a narrow side to the stand. The Shelf and the Rear Panel are both notched to fit into their respective End Caps. The wide side of the Rear Panel and Shelf have a longer notch as compared to the narrow side of the Rear Panel and Shelf
Hardware Kit
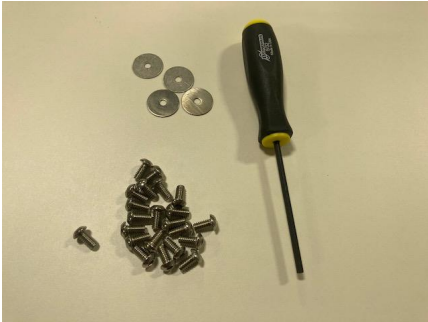
Note: The hardware kit is in the padded envelope with the casters. The screws will be used to assemble the stand and the washers are used to attach the stand to the machine. There should be two extra screws when assembly is complete.
Assembly
-
Slide the Rear Panel into the Wide End Cap.
-
Tip up the Shelf and slide it in place inside the End Cap,
making sure the Shelf and Rear Panel notches line up.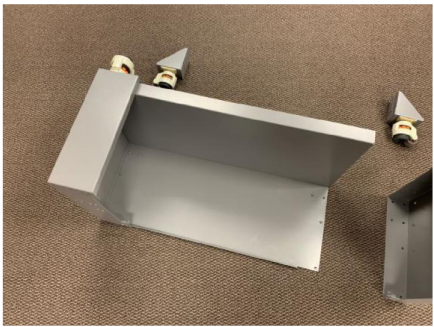
-
Slide the Narrow End Cap in place. Make sure the Rear Panel and the Shelf are both inside the Narrow End Cap.
-
ASSEMBLY TIP: Do not fully tighten the screws until the final step!
Install three of the screws on the outside wall of the Wide End Cap, attaching the End Cap to the Shelf. Repeat the three-screw installation on the Narrow End Cap.
-
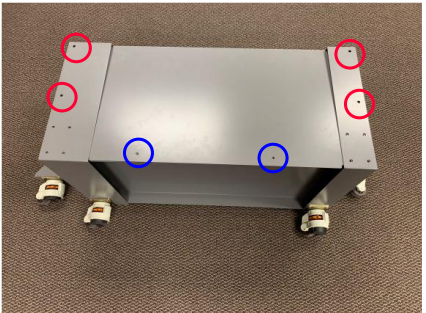
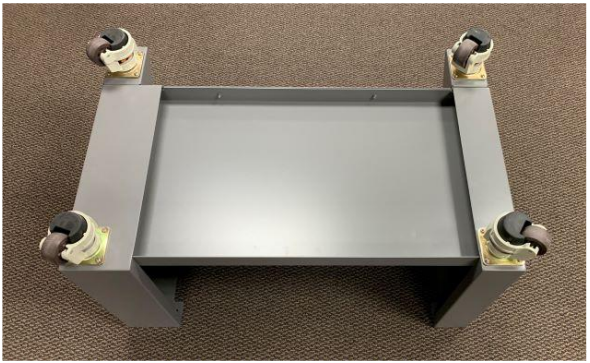
Position the stand as shown below.
Install two screws on each side, attaching the Rear Panel to the End Caps.
Install two more screws along the bottom of the Rear Panel, connecting the Rear Panel to the Shelf
-
Connect the Rear Casters using 4x screws for each Rear Caster.
-
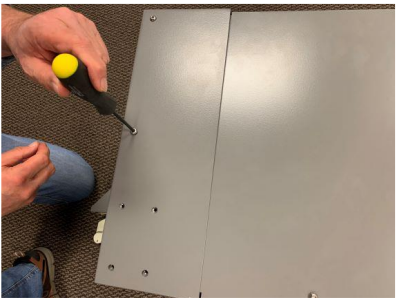
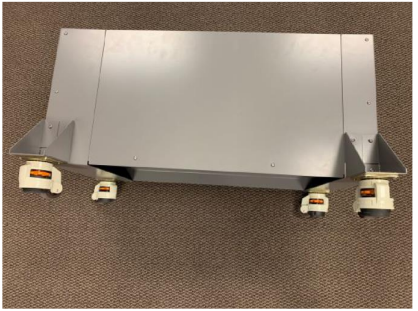
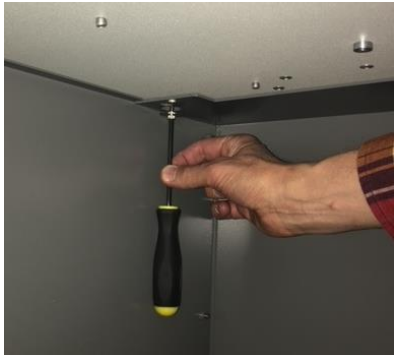
ASSEMBLY TIP: Flip the Stand onto the top surface for final screw tightening. This will help the alignment of the top surface of the Stand
that interfaces with the bottom of the Edge laser system.Tighten all screws. (20x total).
Attaching the laser to the stand:
-
Flip the Stand assembly on the casters.
-
Move the stand close to the Edge laser system and prepare for final assembly.
-
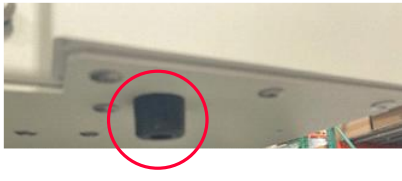
The Edge has four rubber feet, located near the corners of the machine. These feet interface with the large holes on the top of the stand.

-
Place the Edge laser system on the stand and make sure the rubber feet drop into the holes on top of the stand.
-
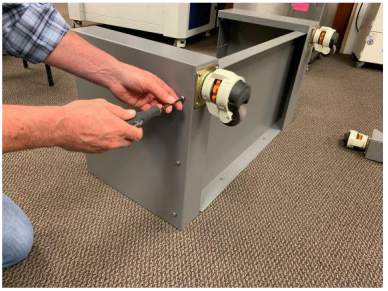
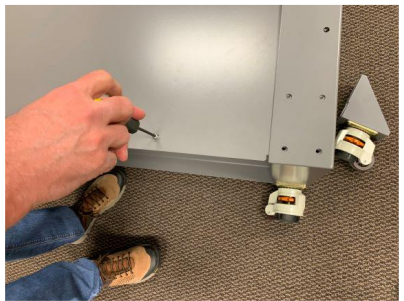
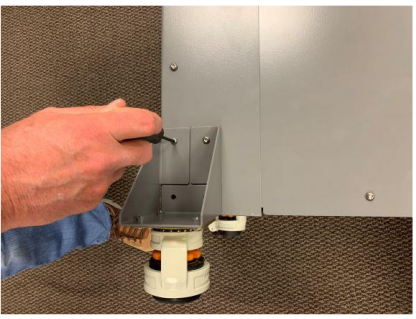
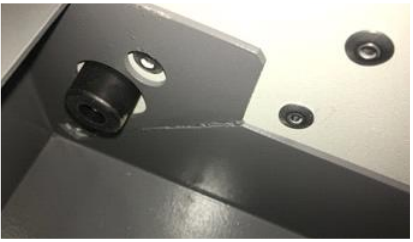
Reach inside the Stand and remove the rubber feet from the laser system.
-
Remove the fastener from the rubber feet.
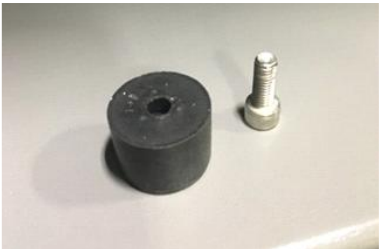
-
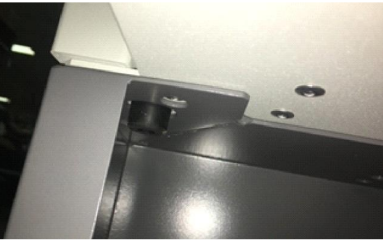
Place the fastener in the washer.
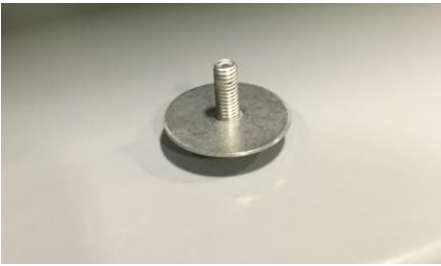
-
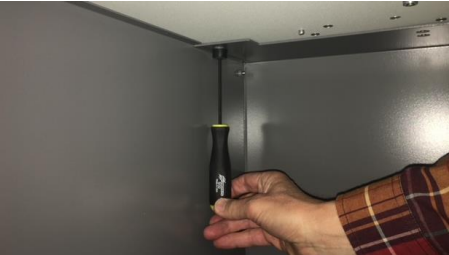
Reinsert all four fasteners in the same locations.
Assembly is complete.
