
This procedure outlines the steps required to safely and effectively replace the Autofocus Switch on the Fusion Maker, Edge, and Pro, laser system. The Autofocus Switch is a critical component responsible for maintaining the proper focal distance during operation. This document provides detailed instructions to ensure proper removal, and installation of the switch, minimizing downtime and ensuring continued operational accuracy. Please review all safety precautions and required tools before beginning the procedure.
Removing the Autofocus Switch
-
Power OFF the machine.
-
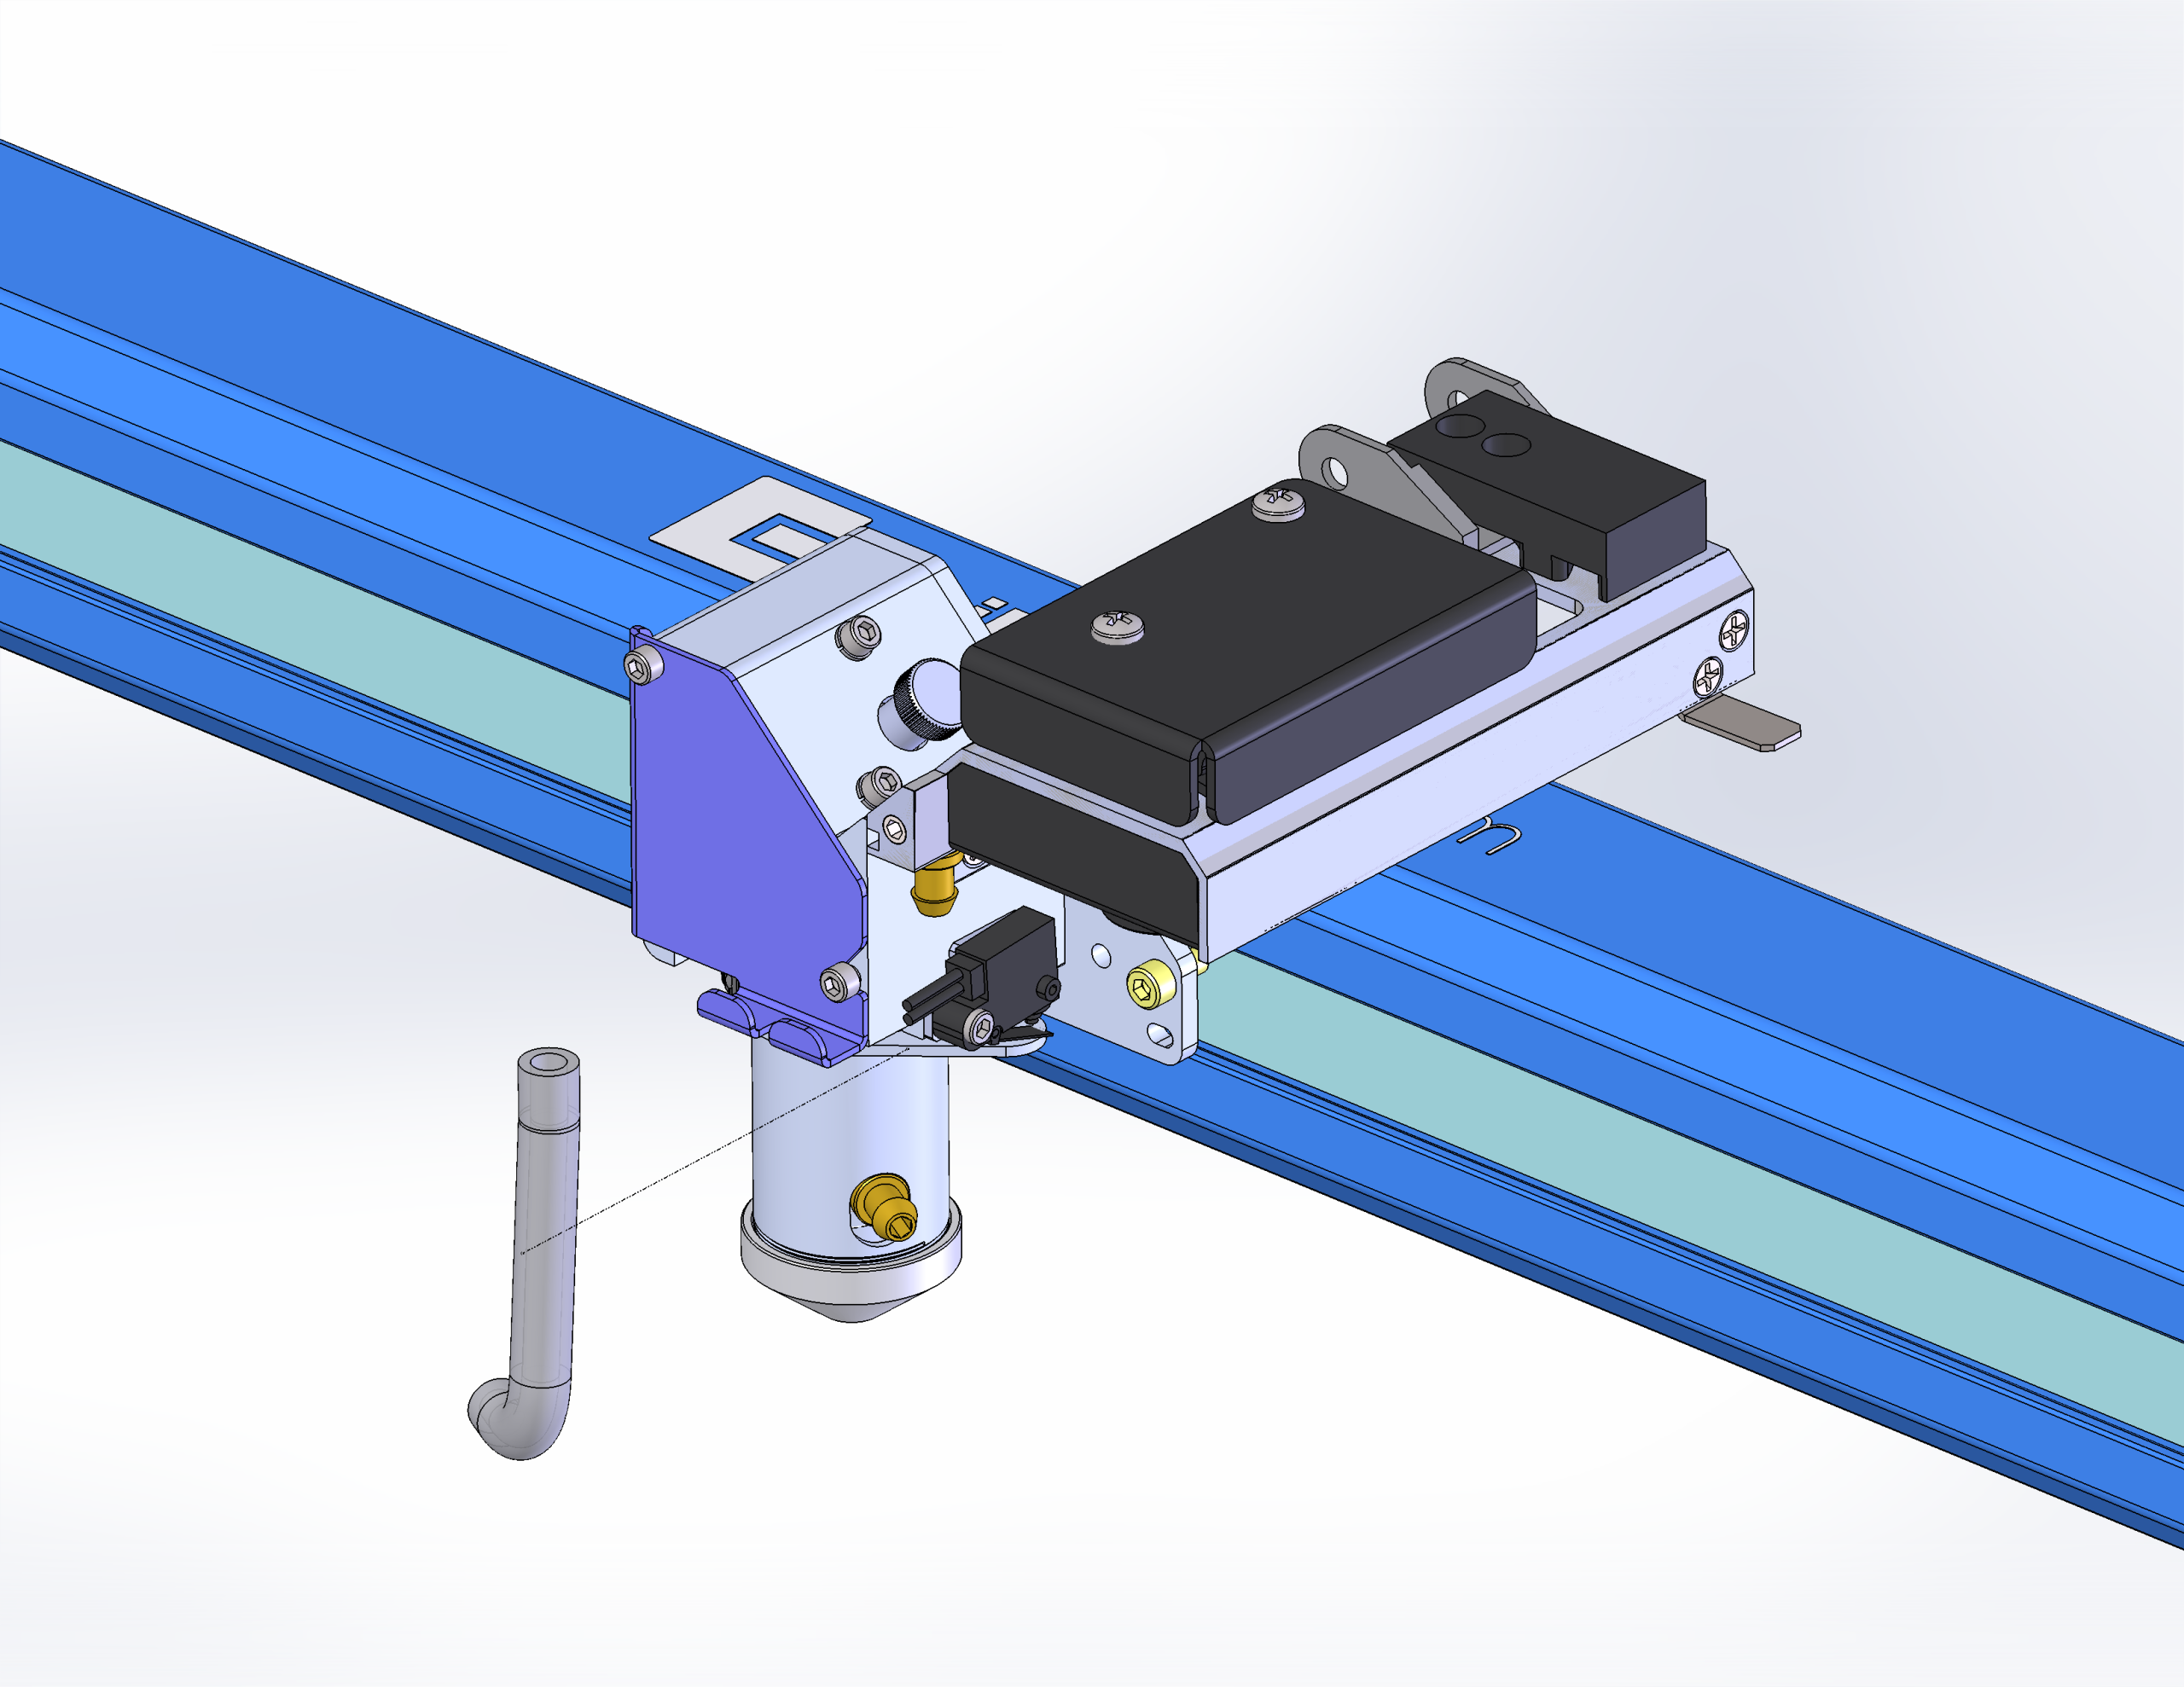
Remove the air assist tubing.
-
Remove the carriage cover.
Note: Not all machines are equipped with the carriage cover. If your machine doesn’t have these parts, skip to the next step.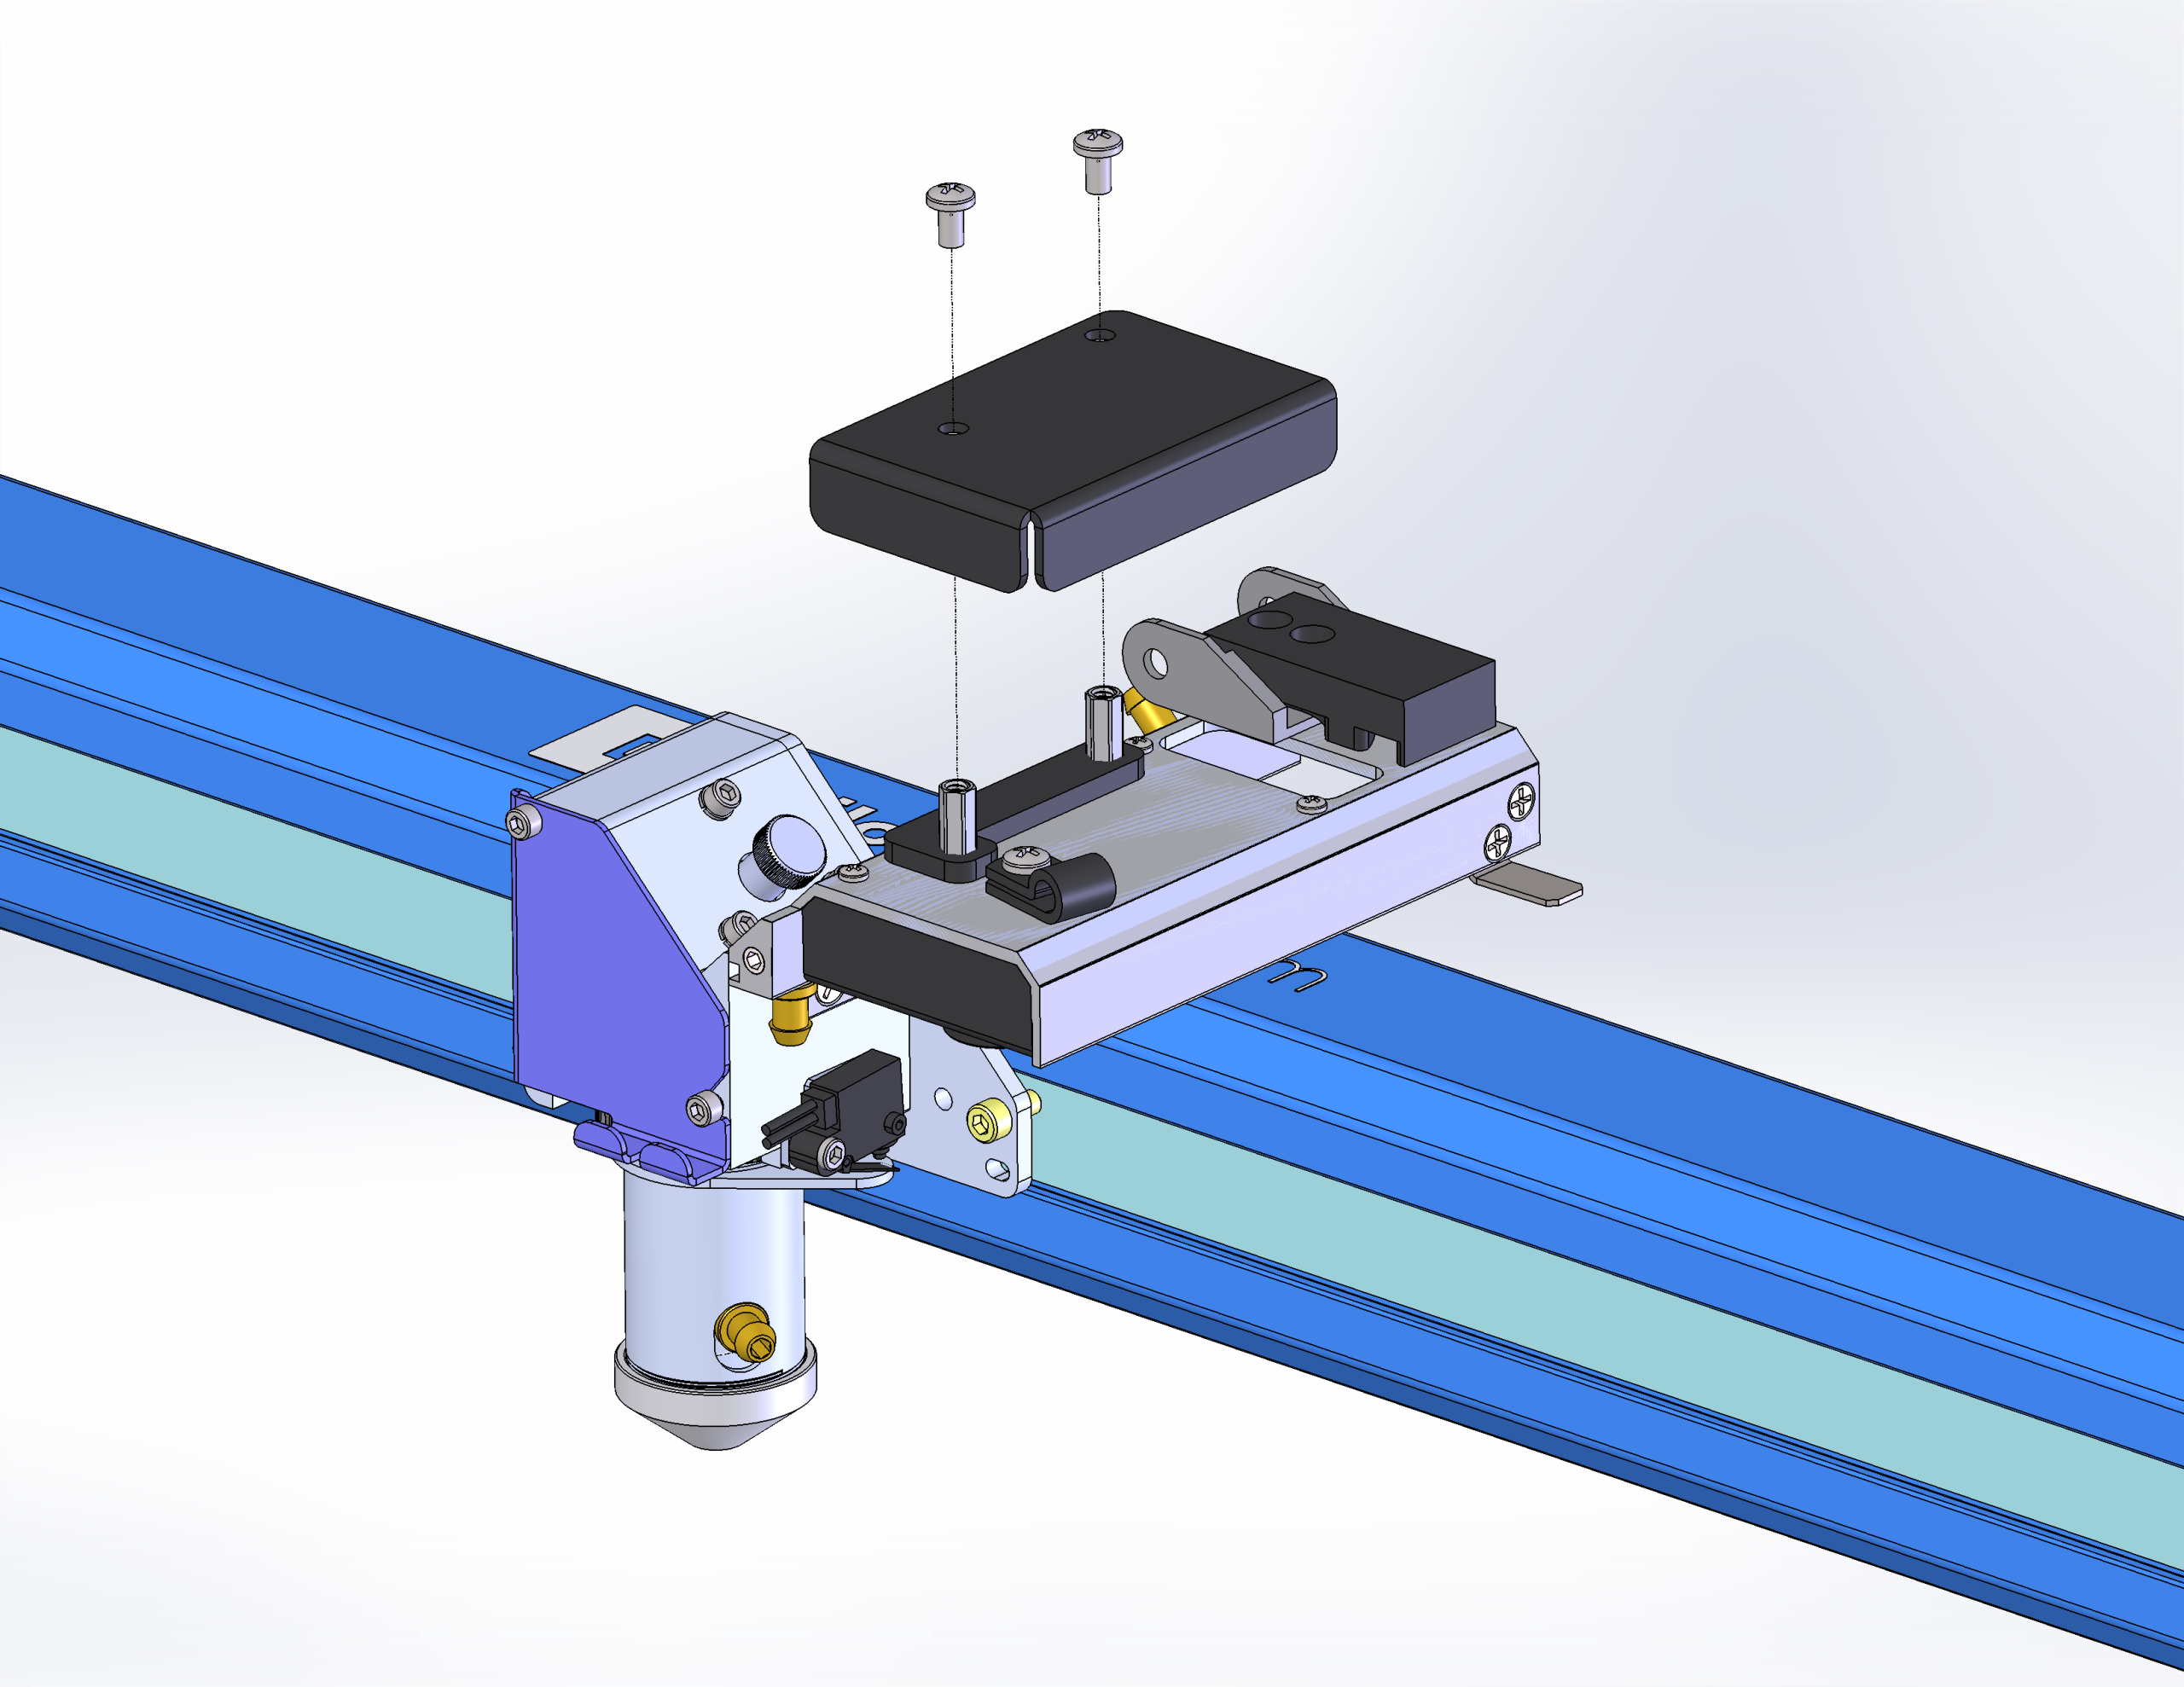
-
Remove the cable fastener.
Note: Not all machine models have this fastner.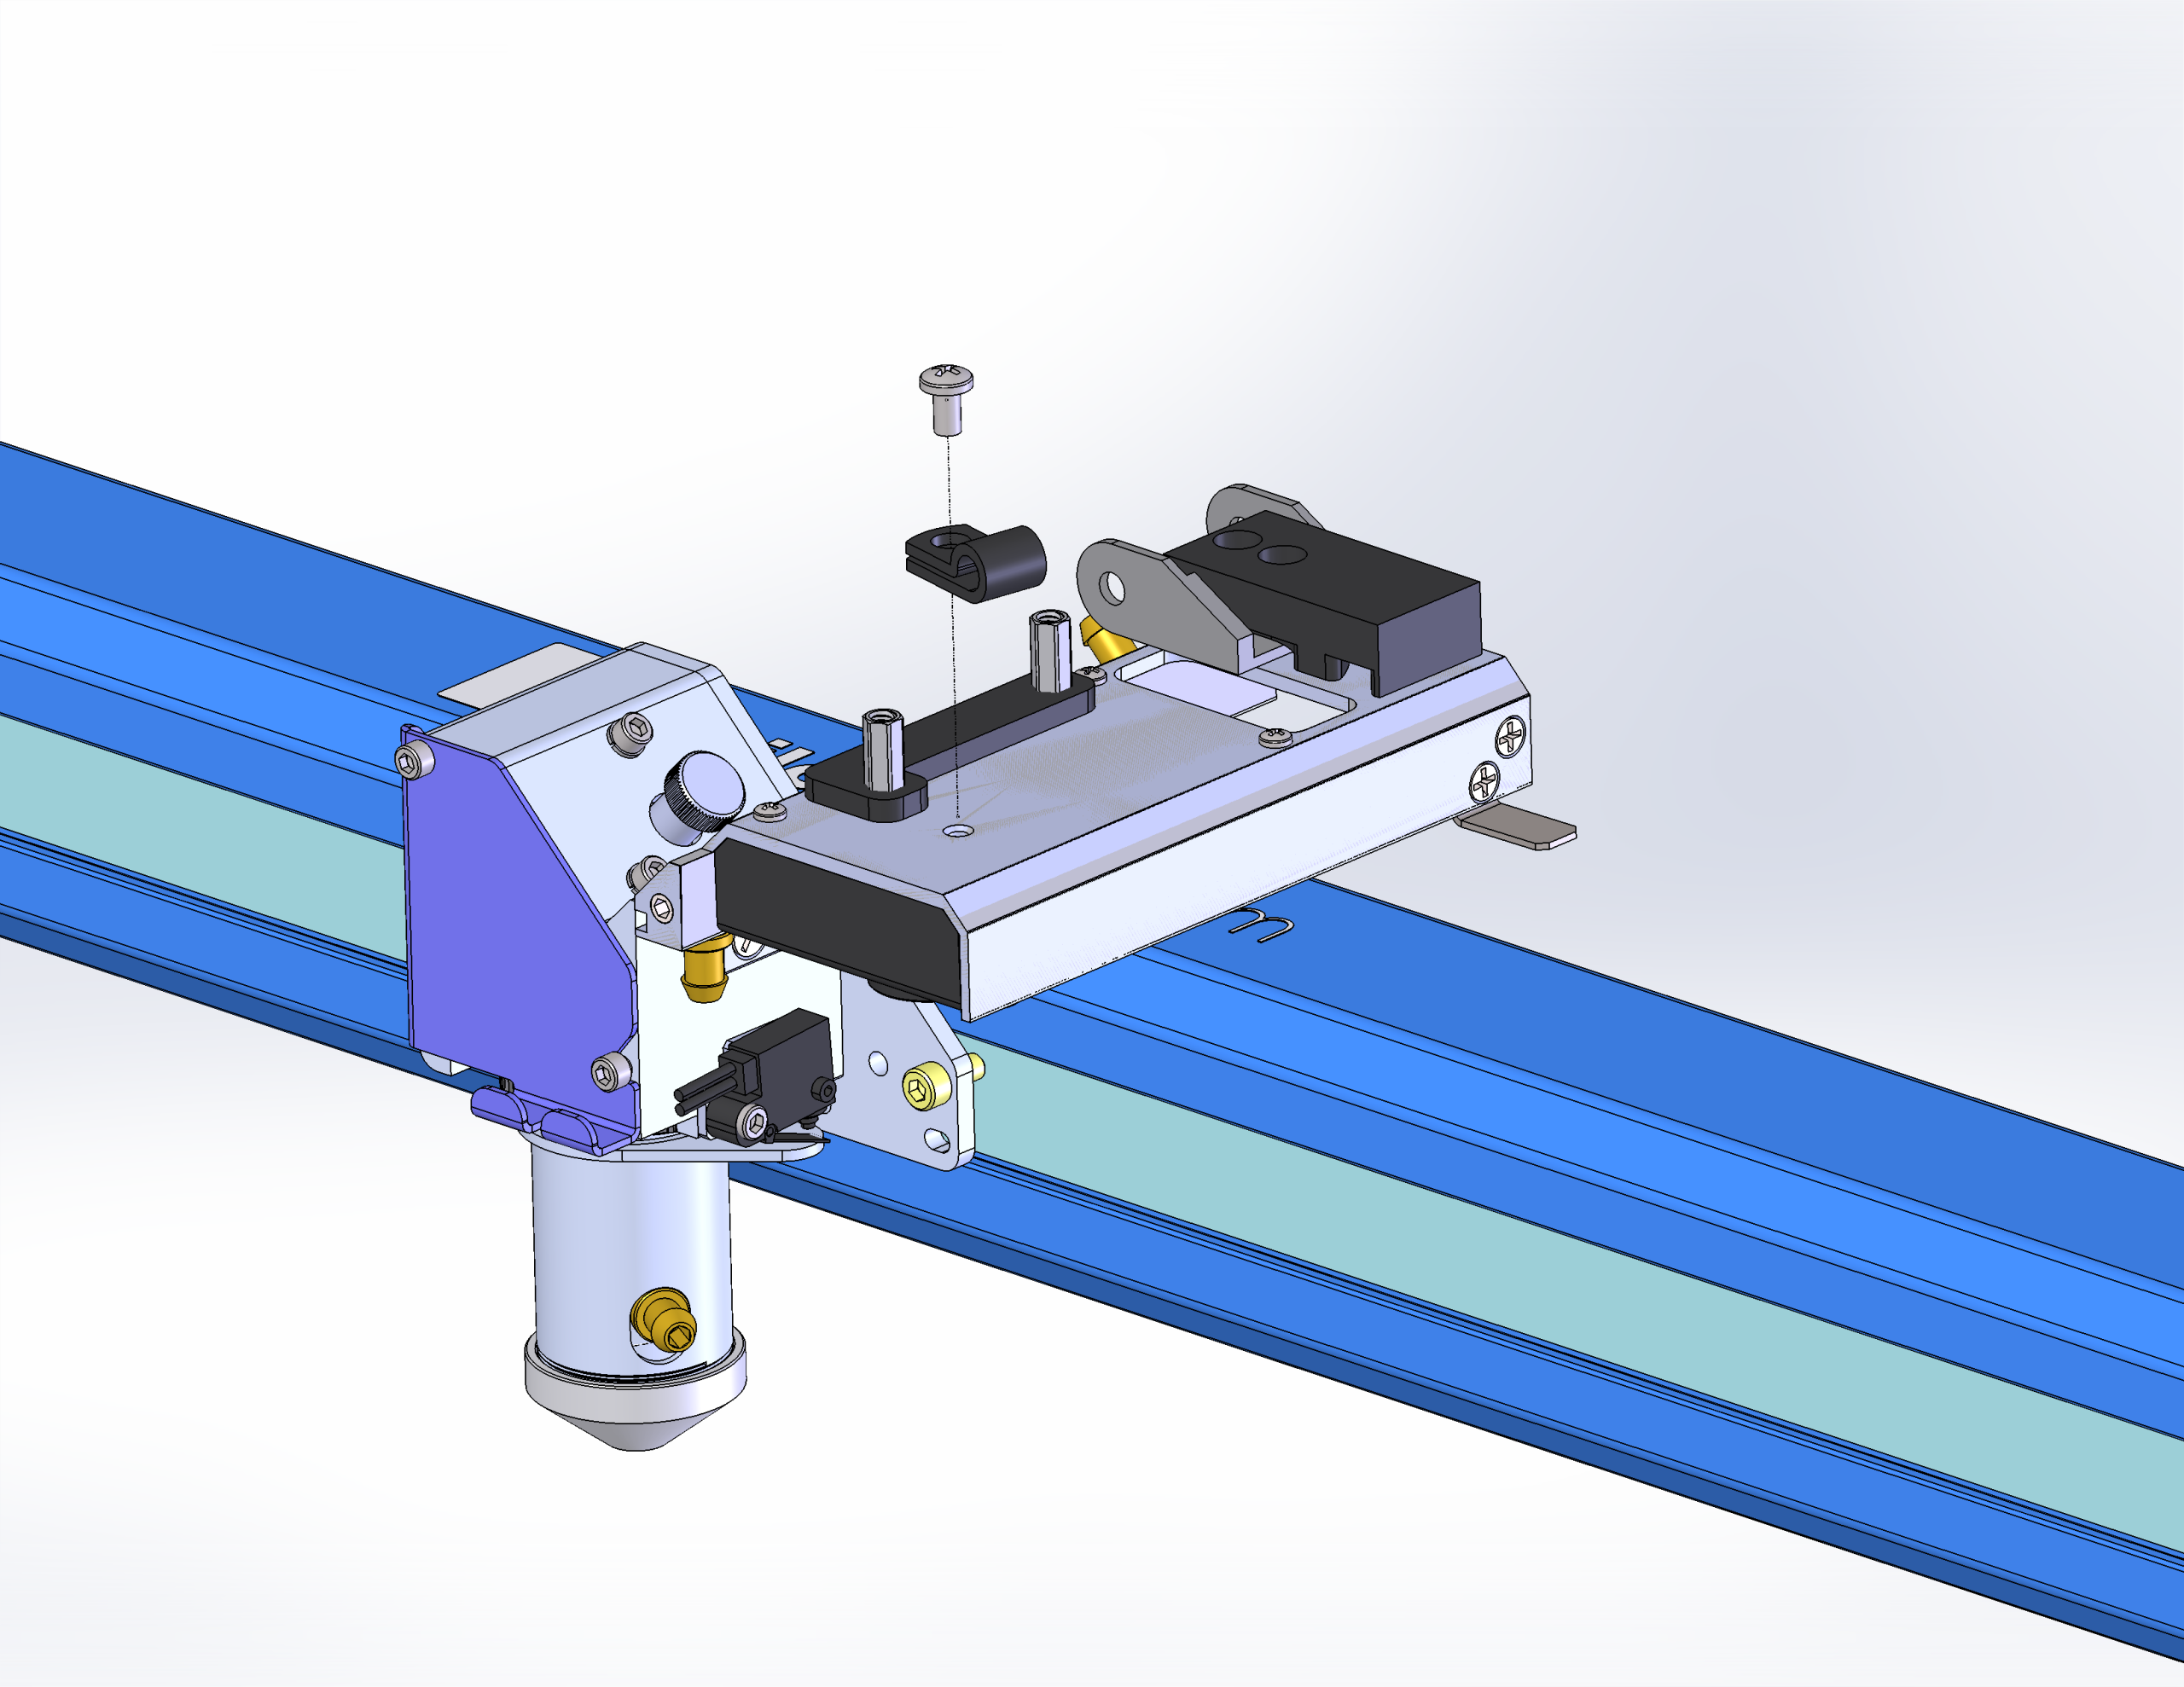
-
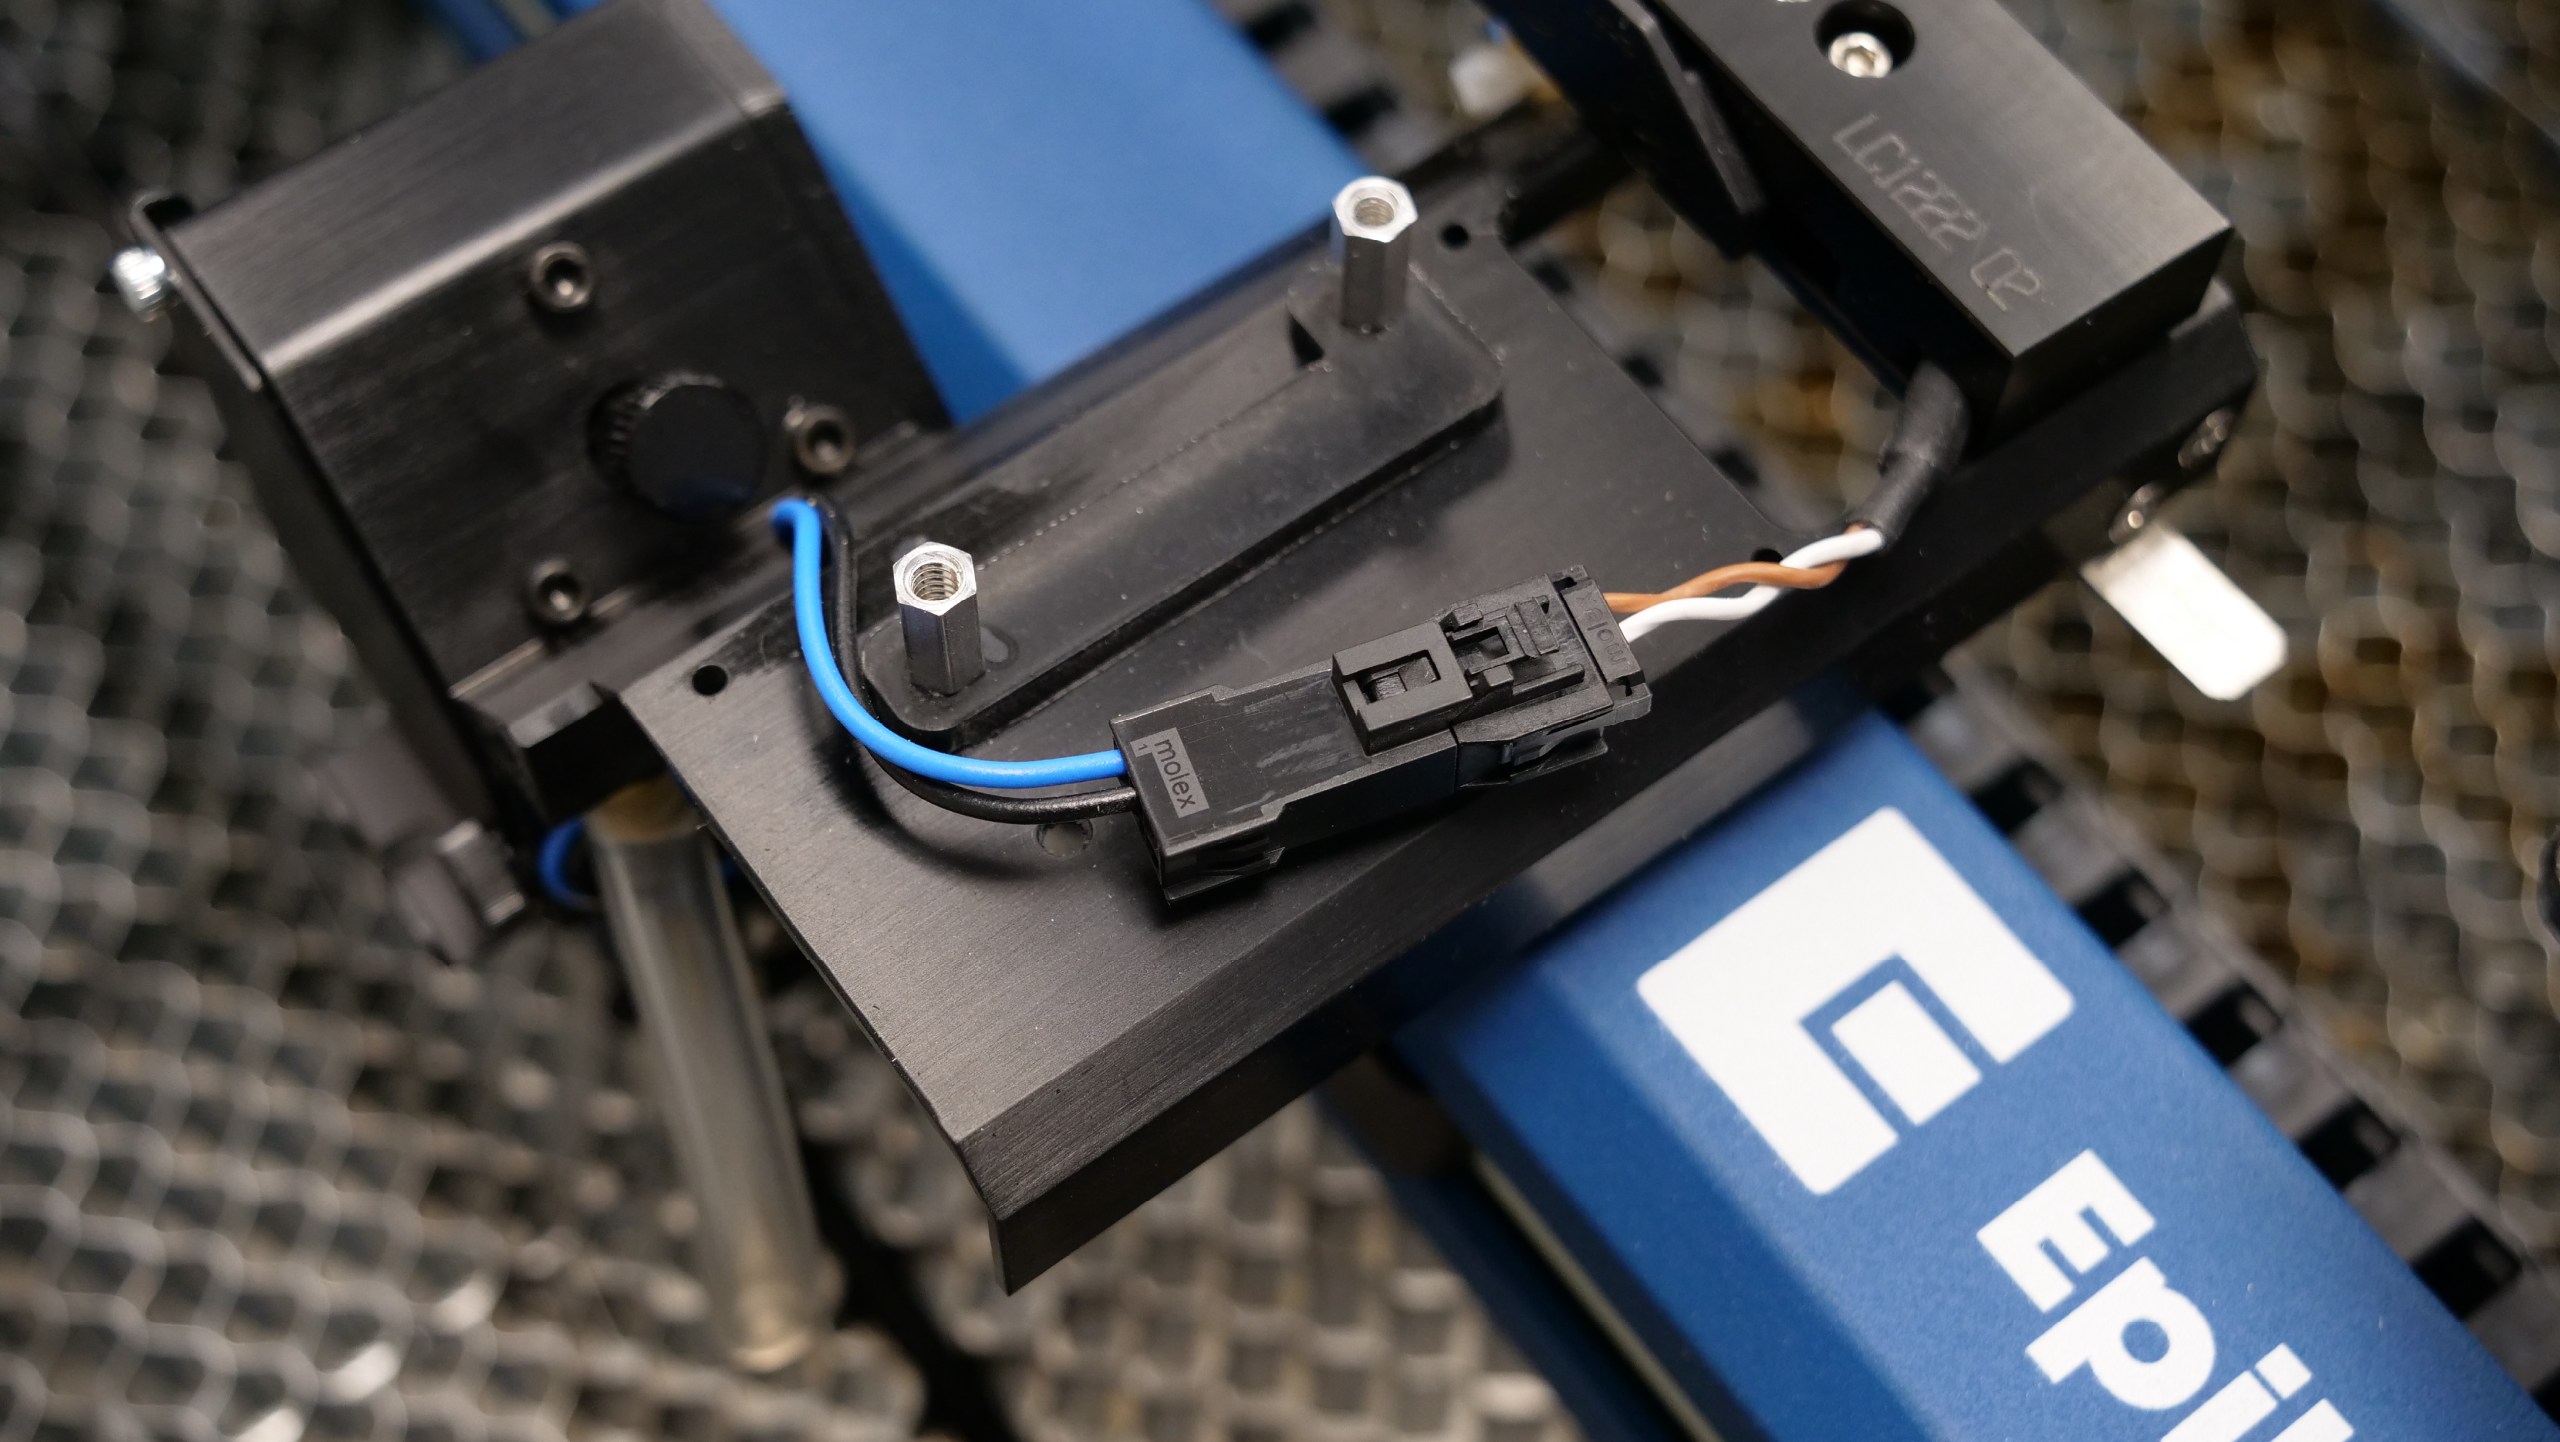
Disconnect the harness.
-
Remove the two screws holding the lens assembly to the camera housing.
Note: These screws may be in different locations depending on the model of machine.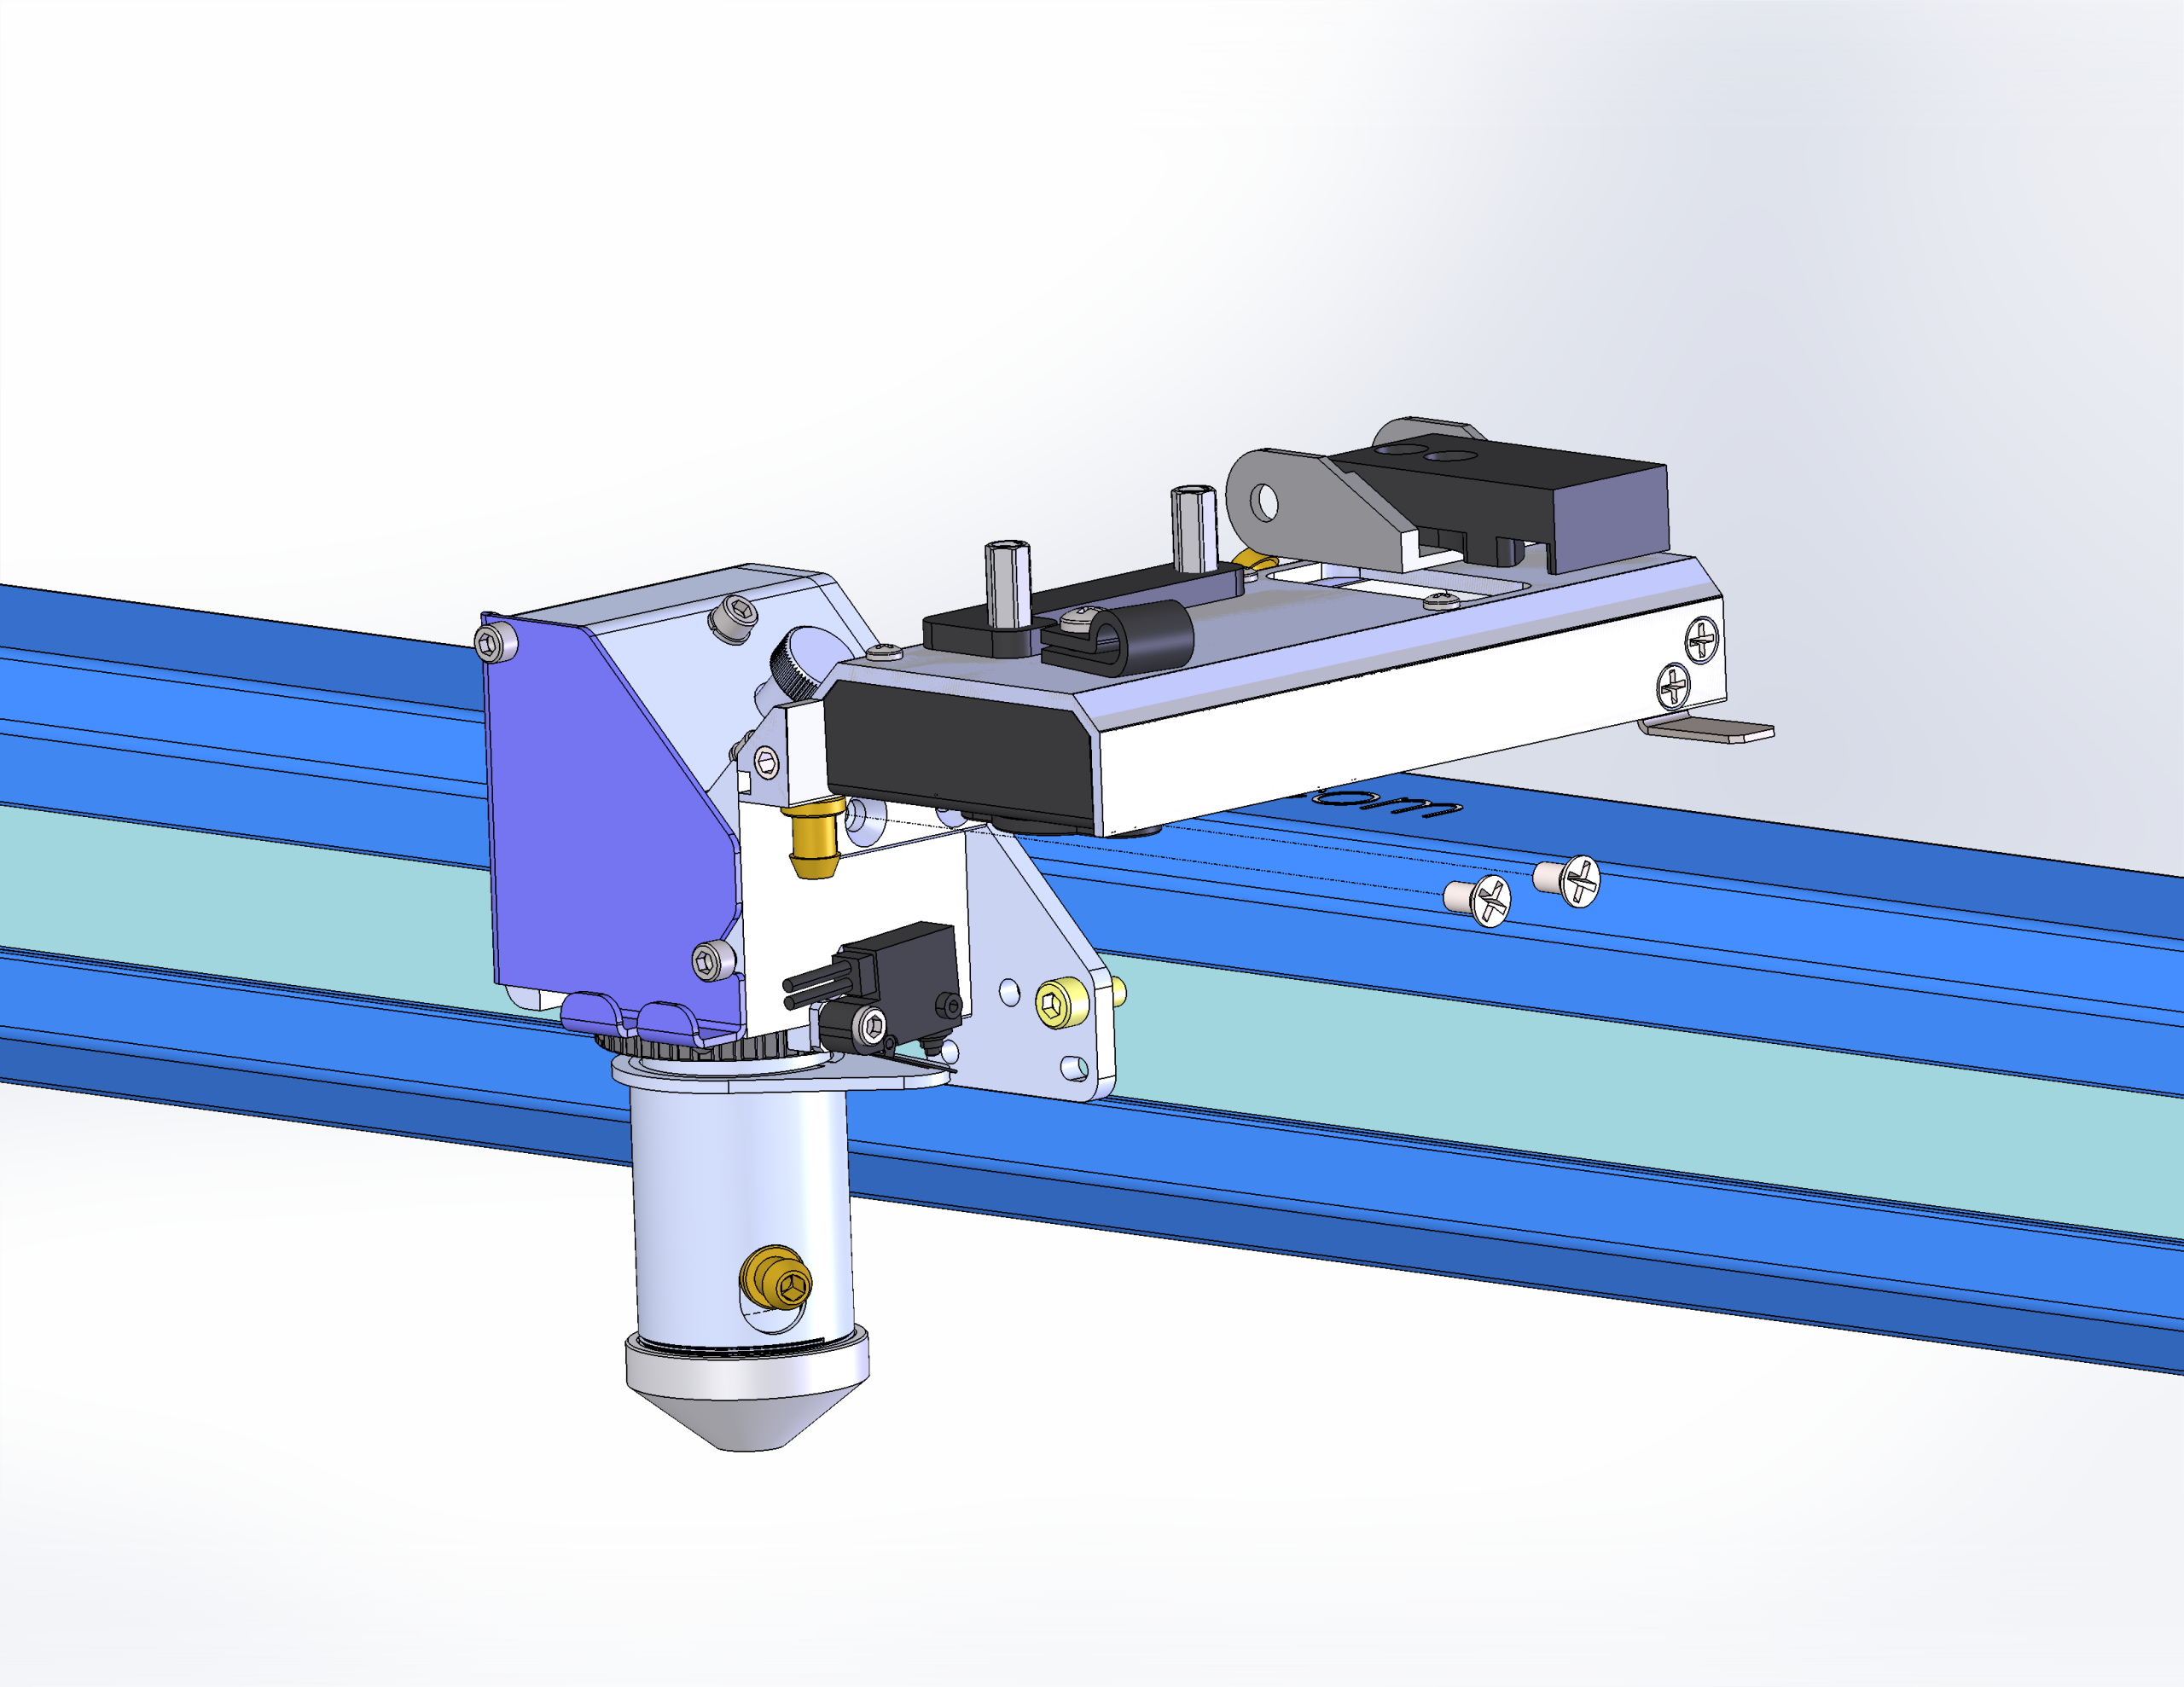
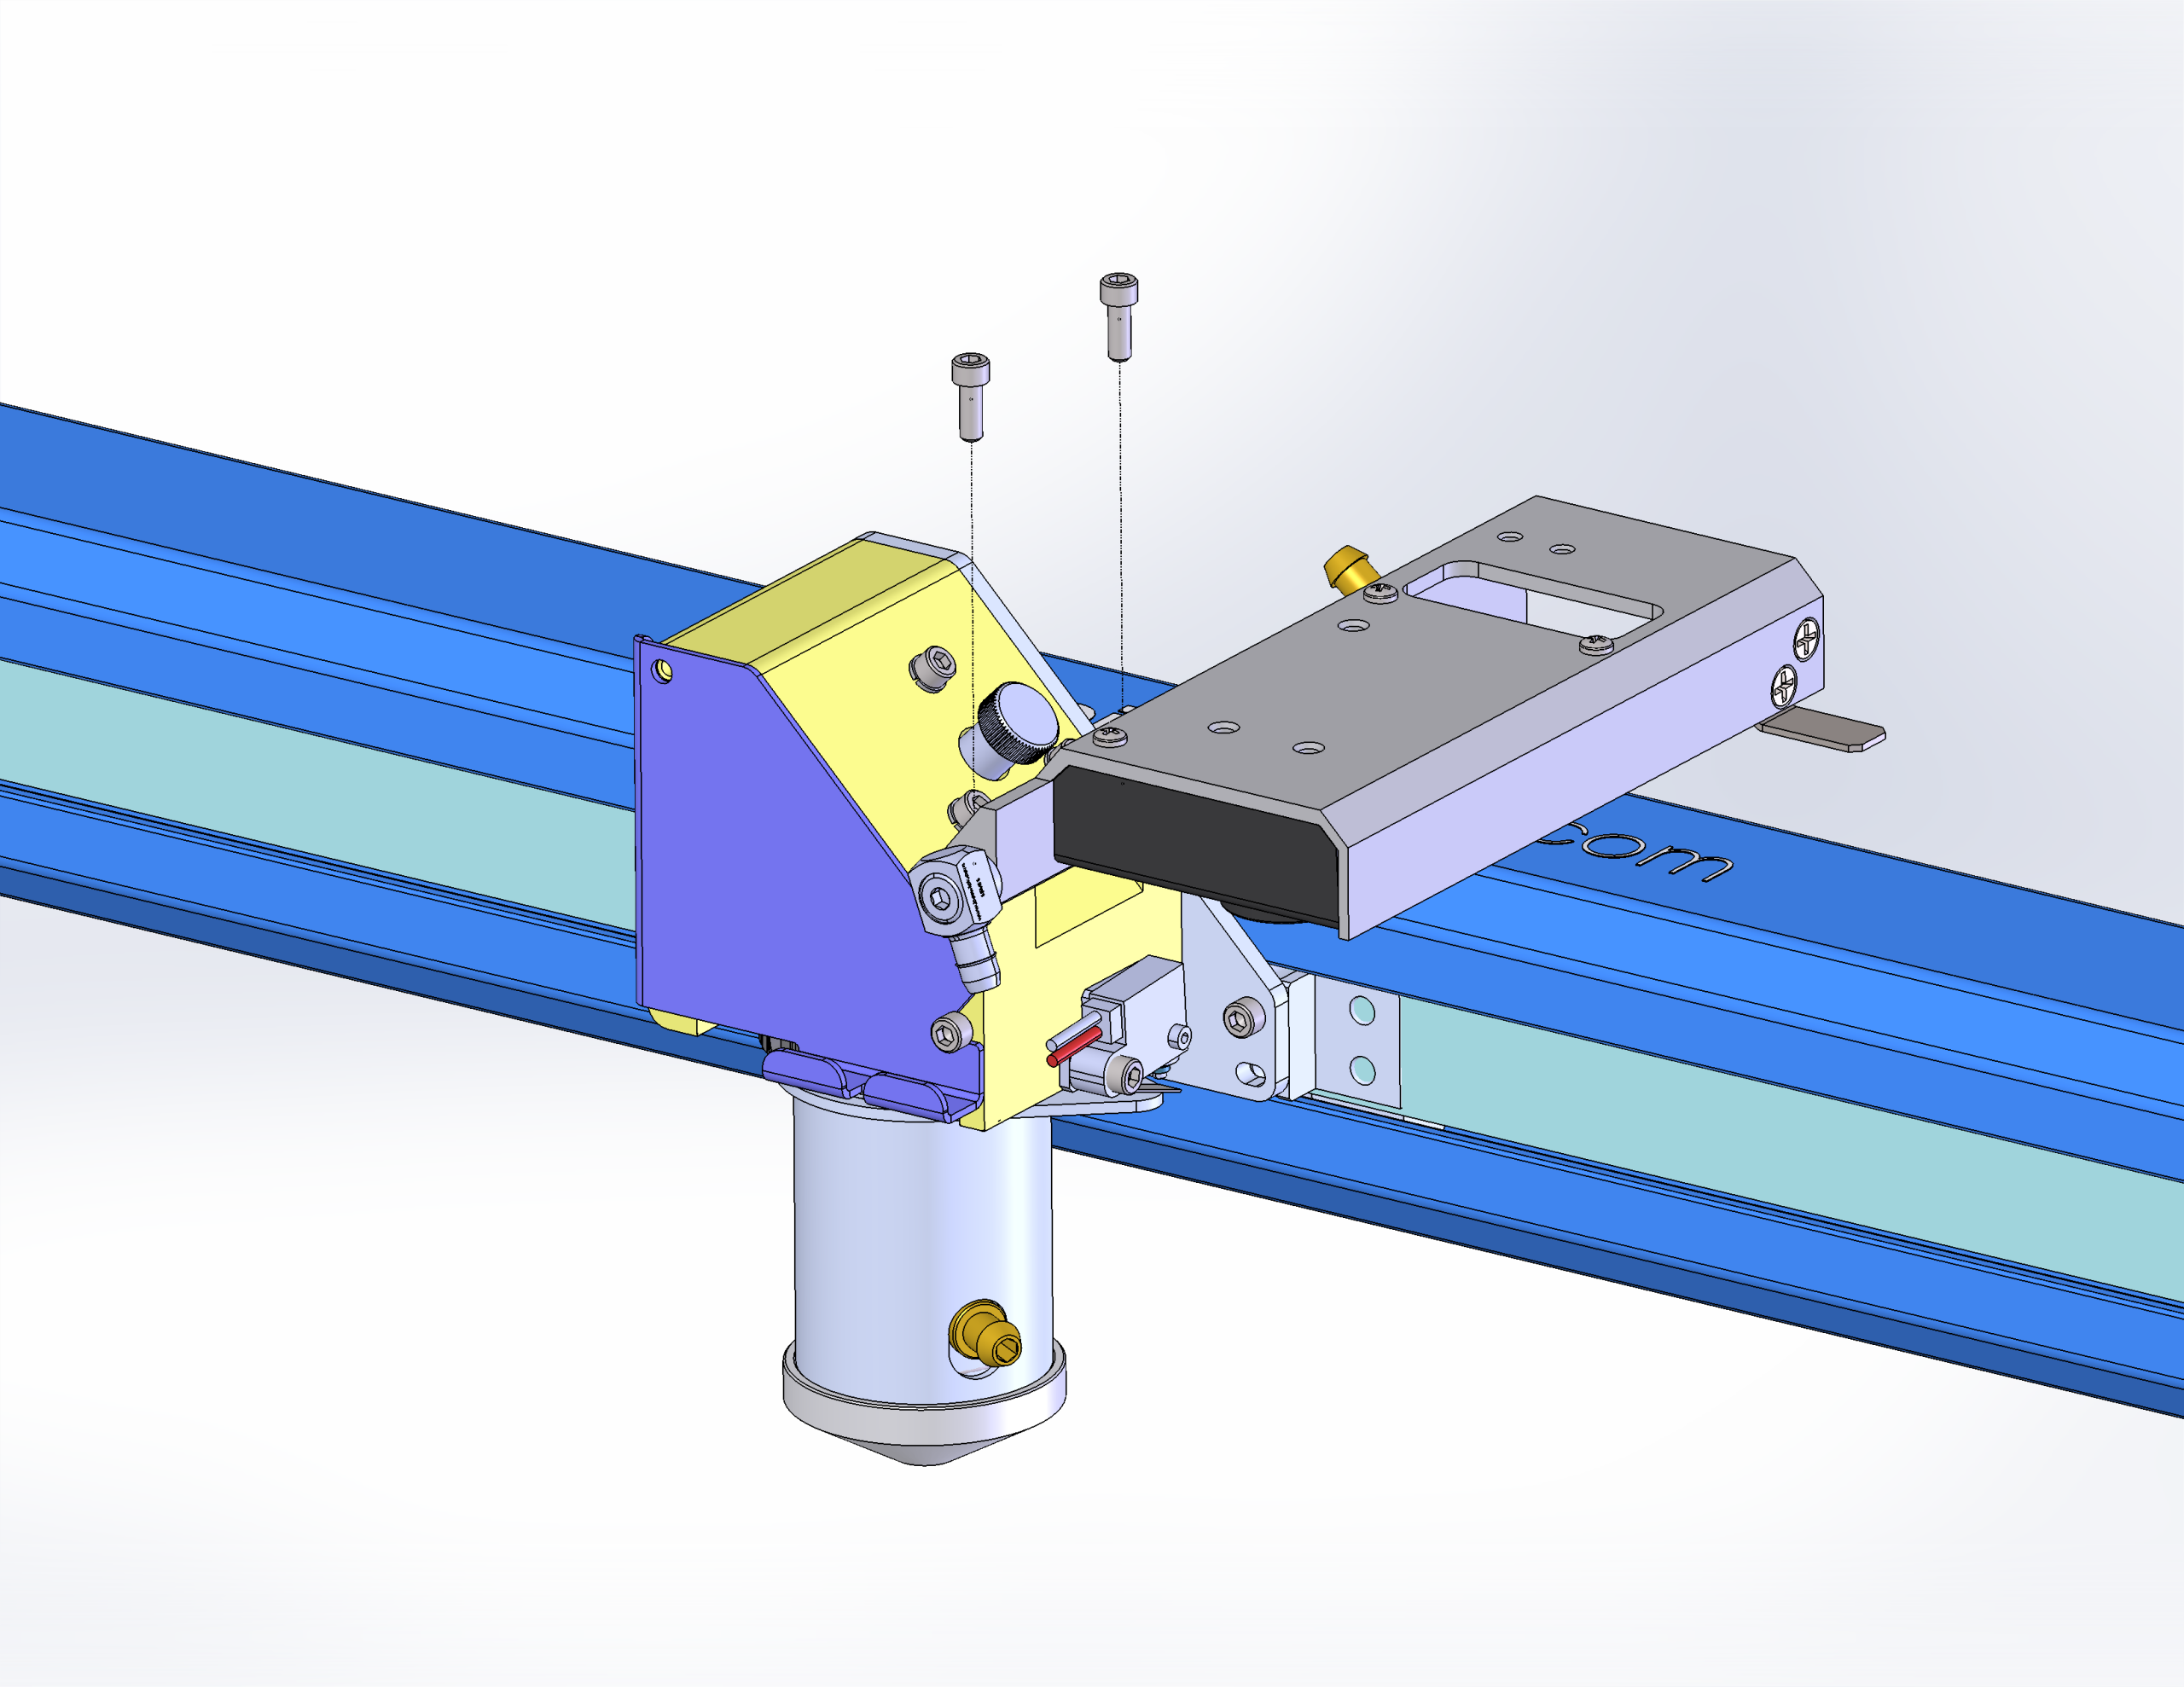
-
Separate the lens assembly from the carriage camera housing.
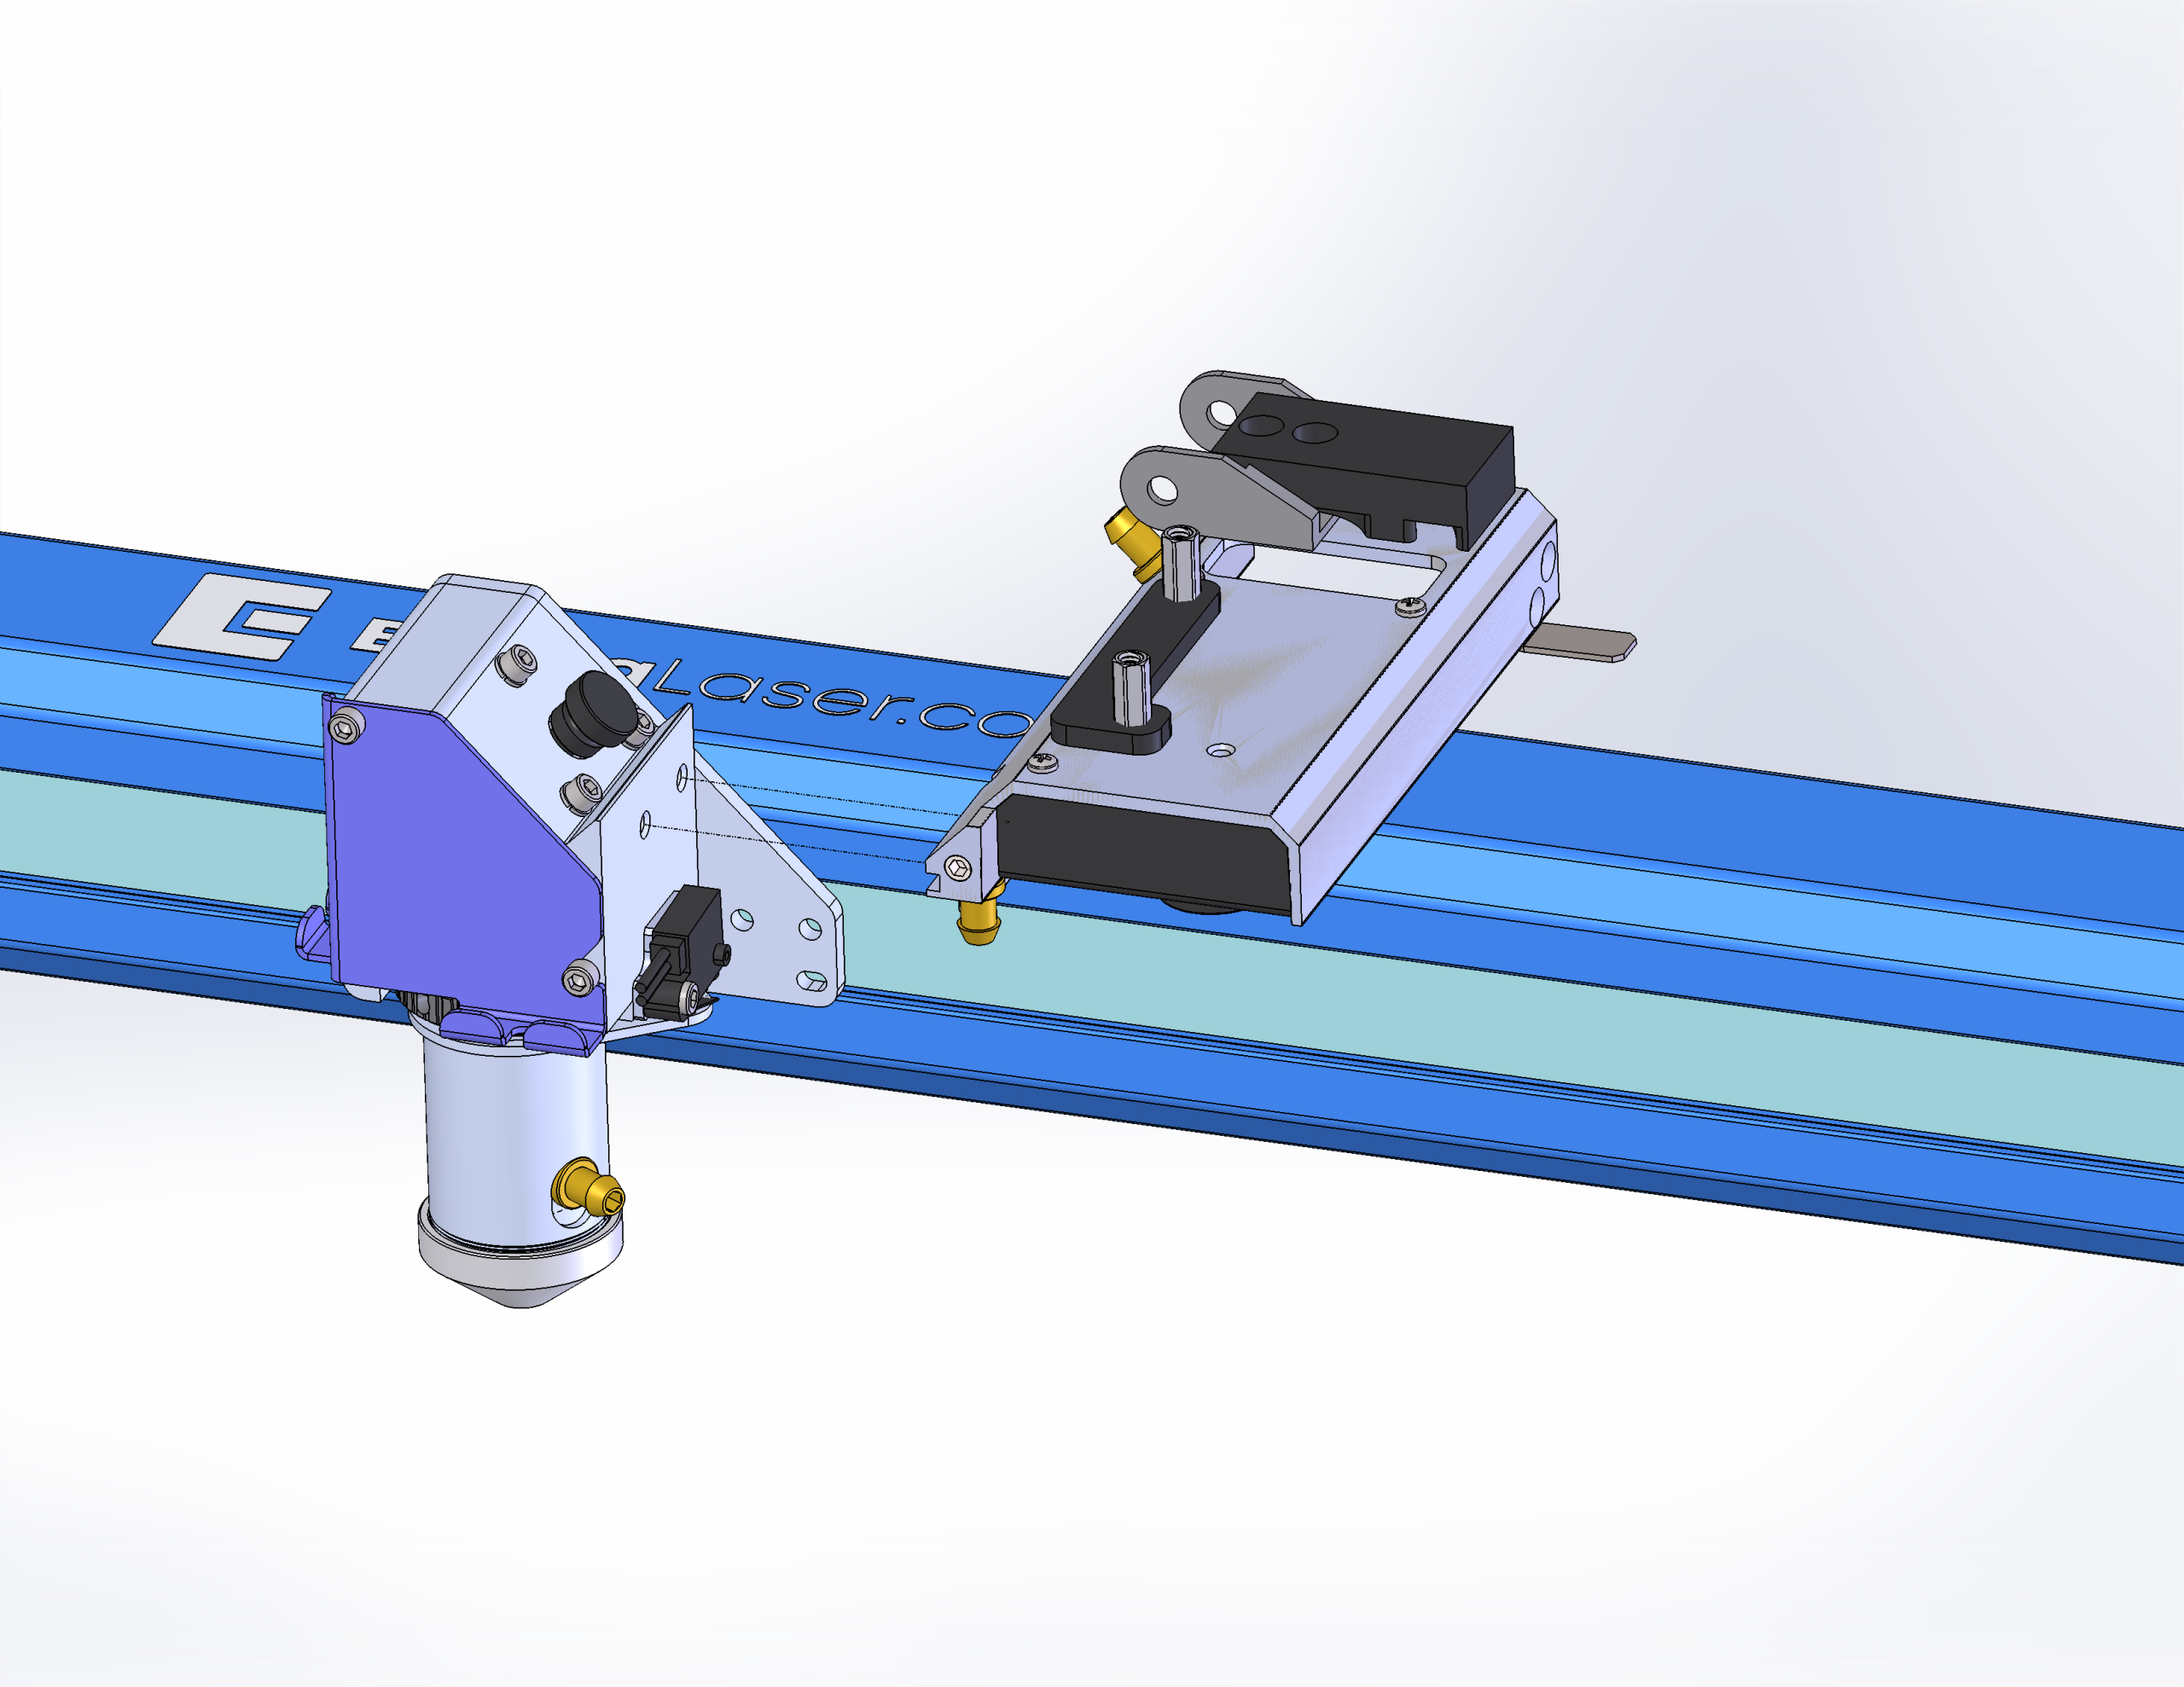
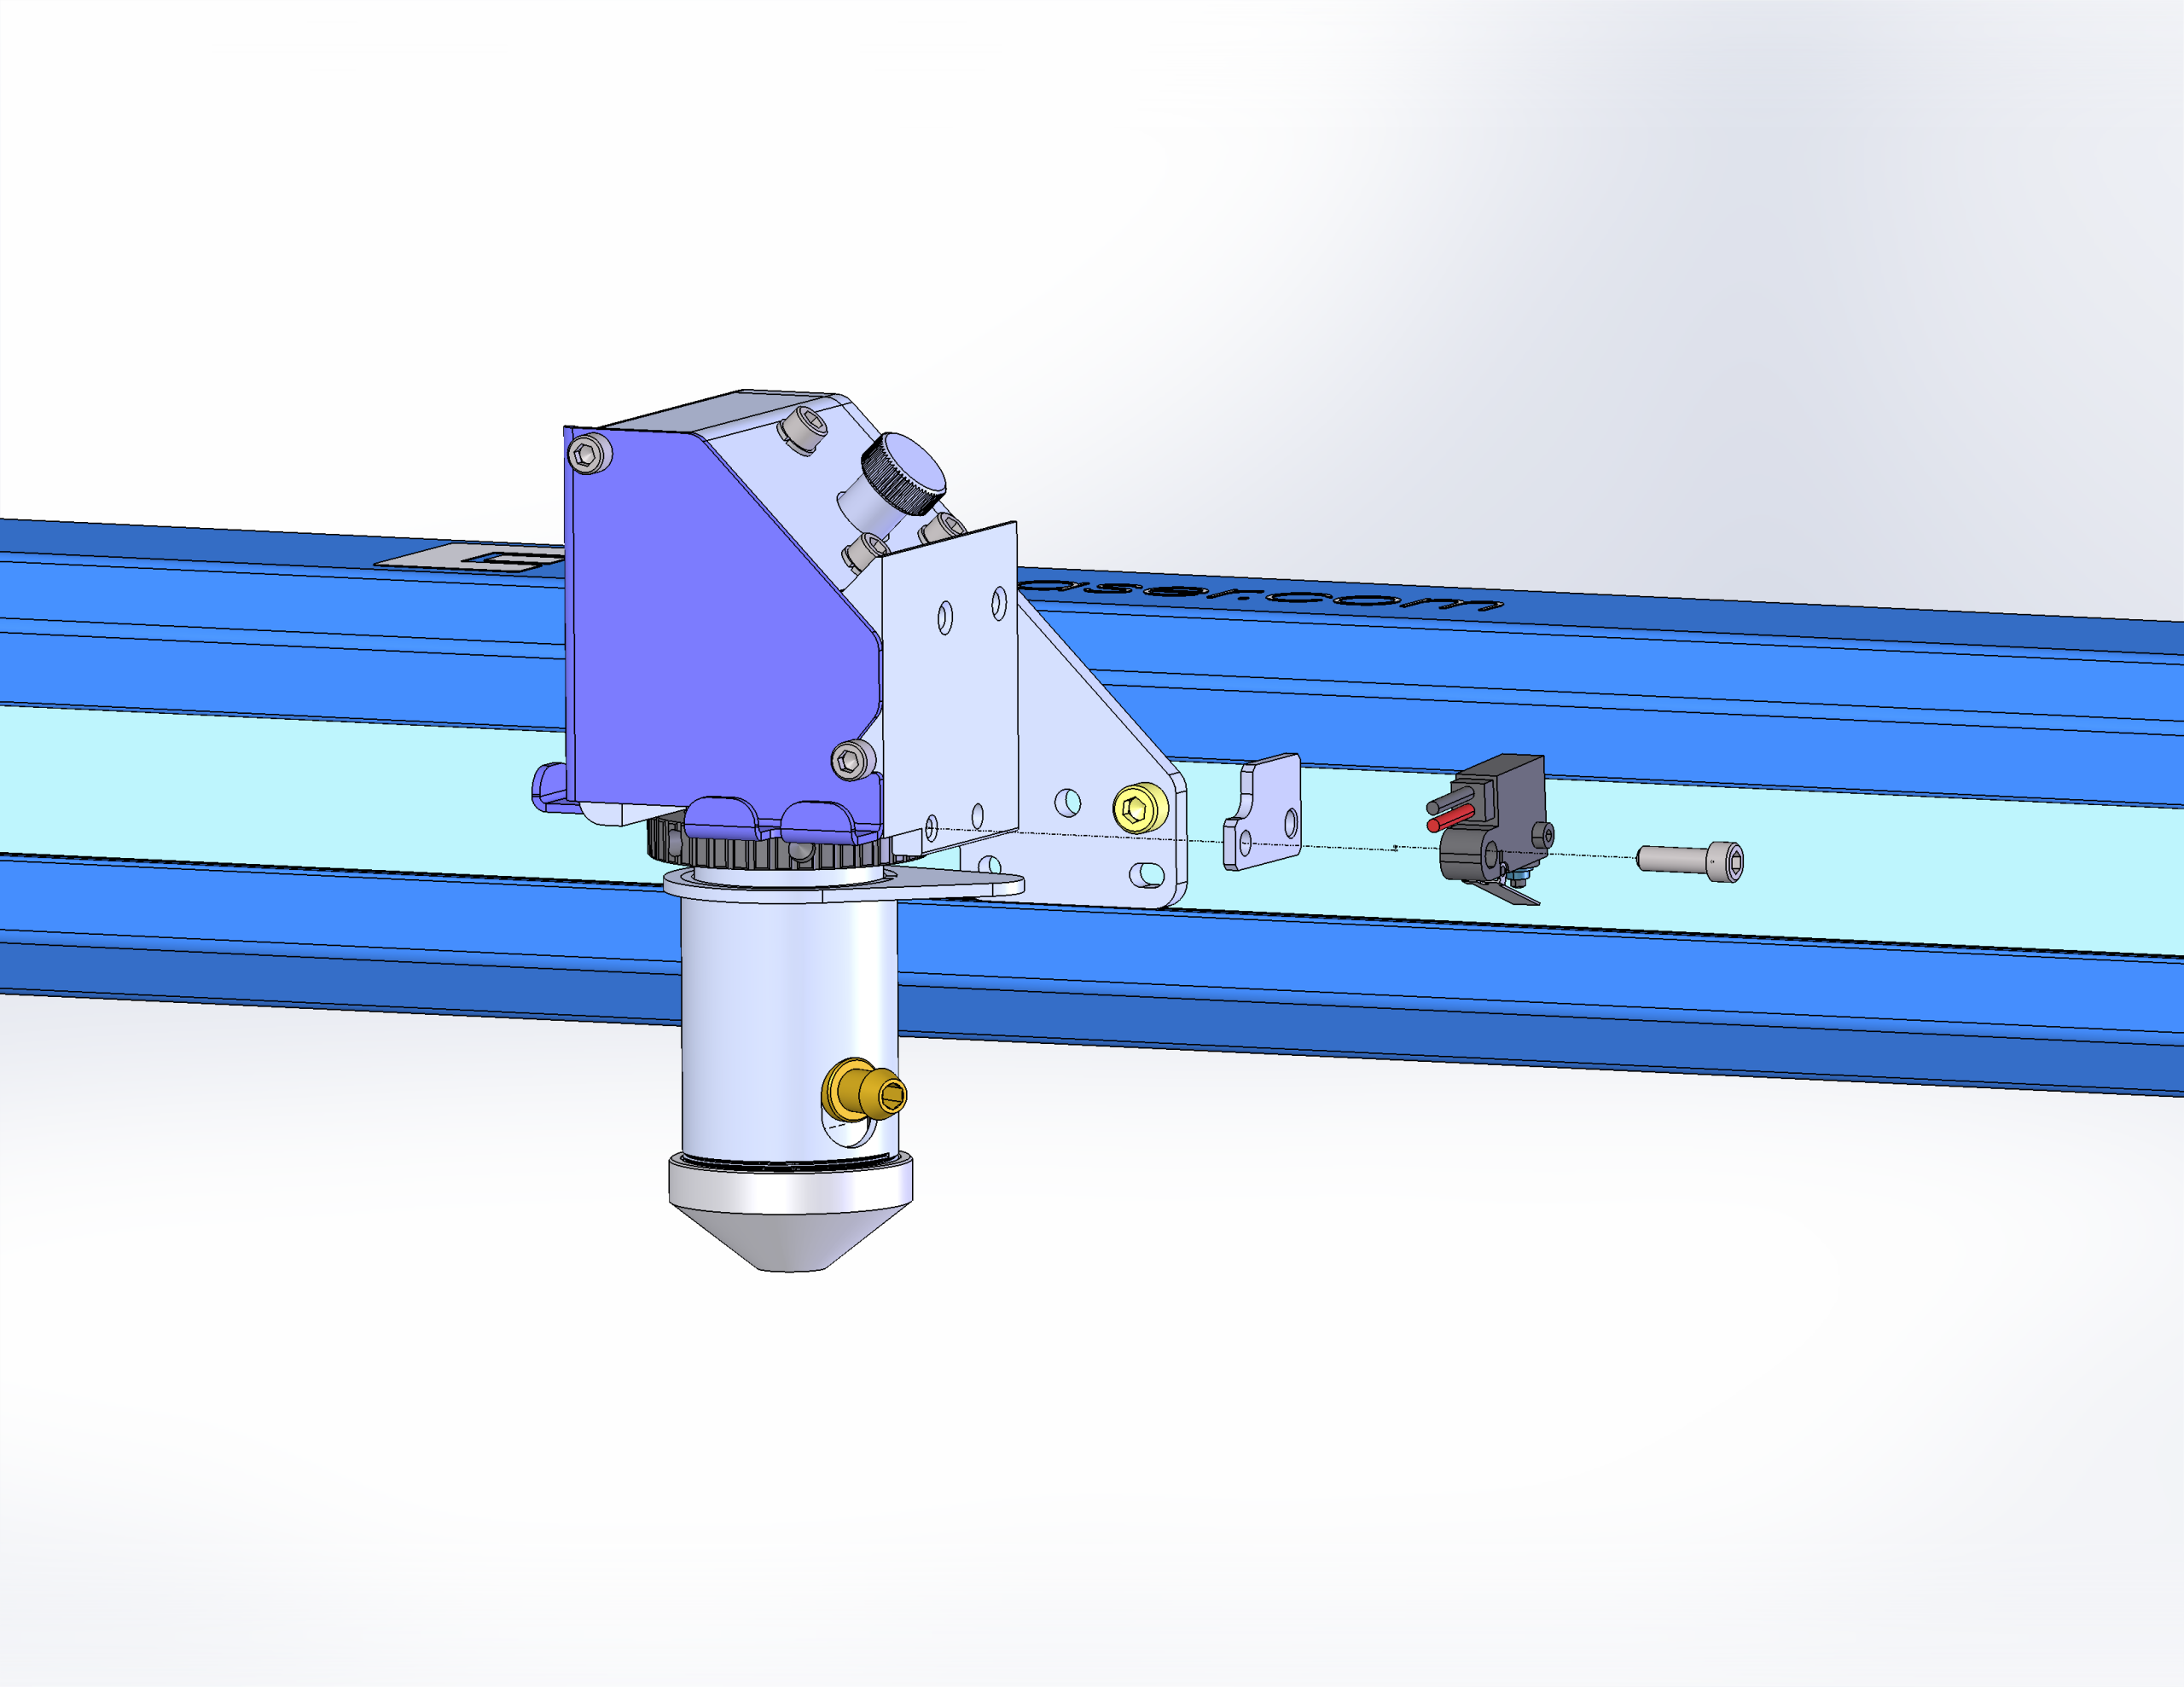
-
Remove the autofocus switch.
Installing the Autofocus Switch
-
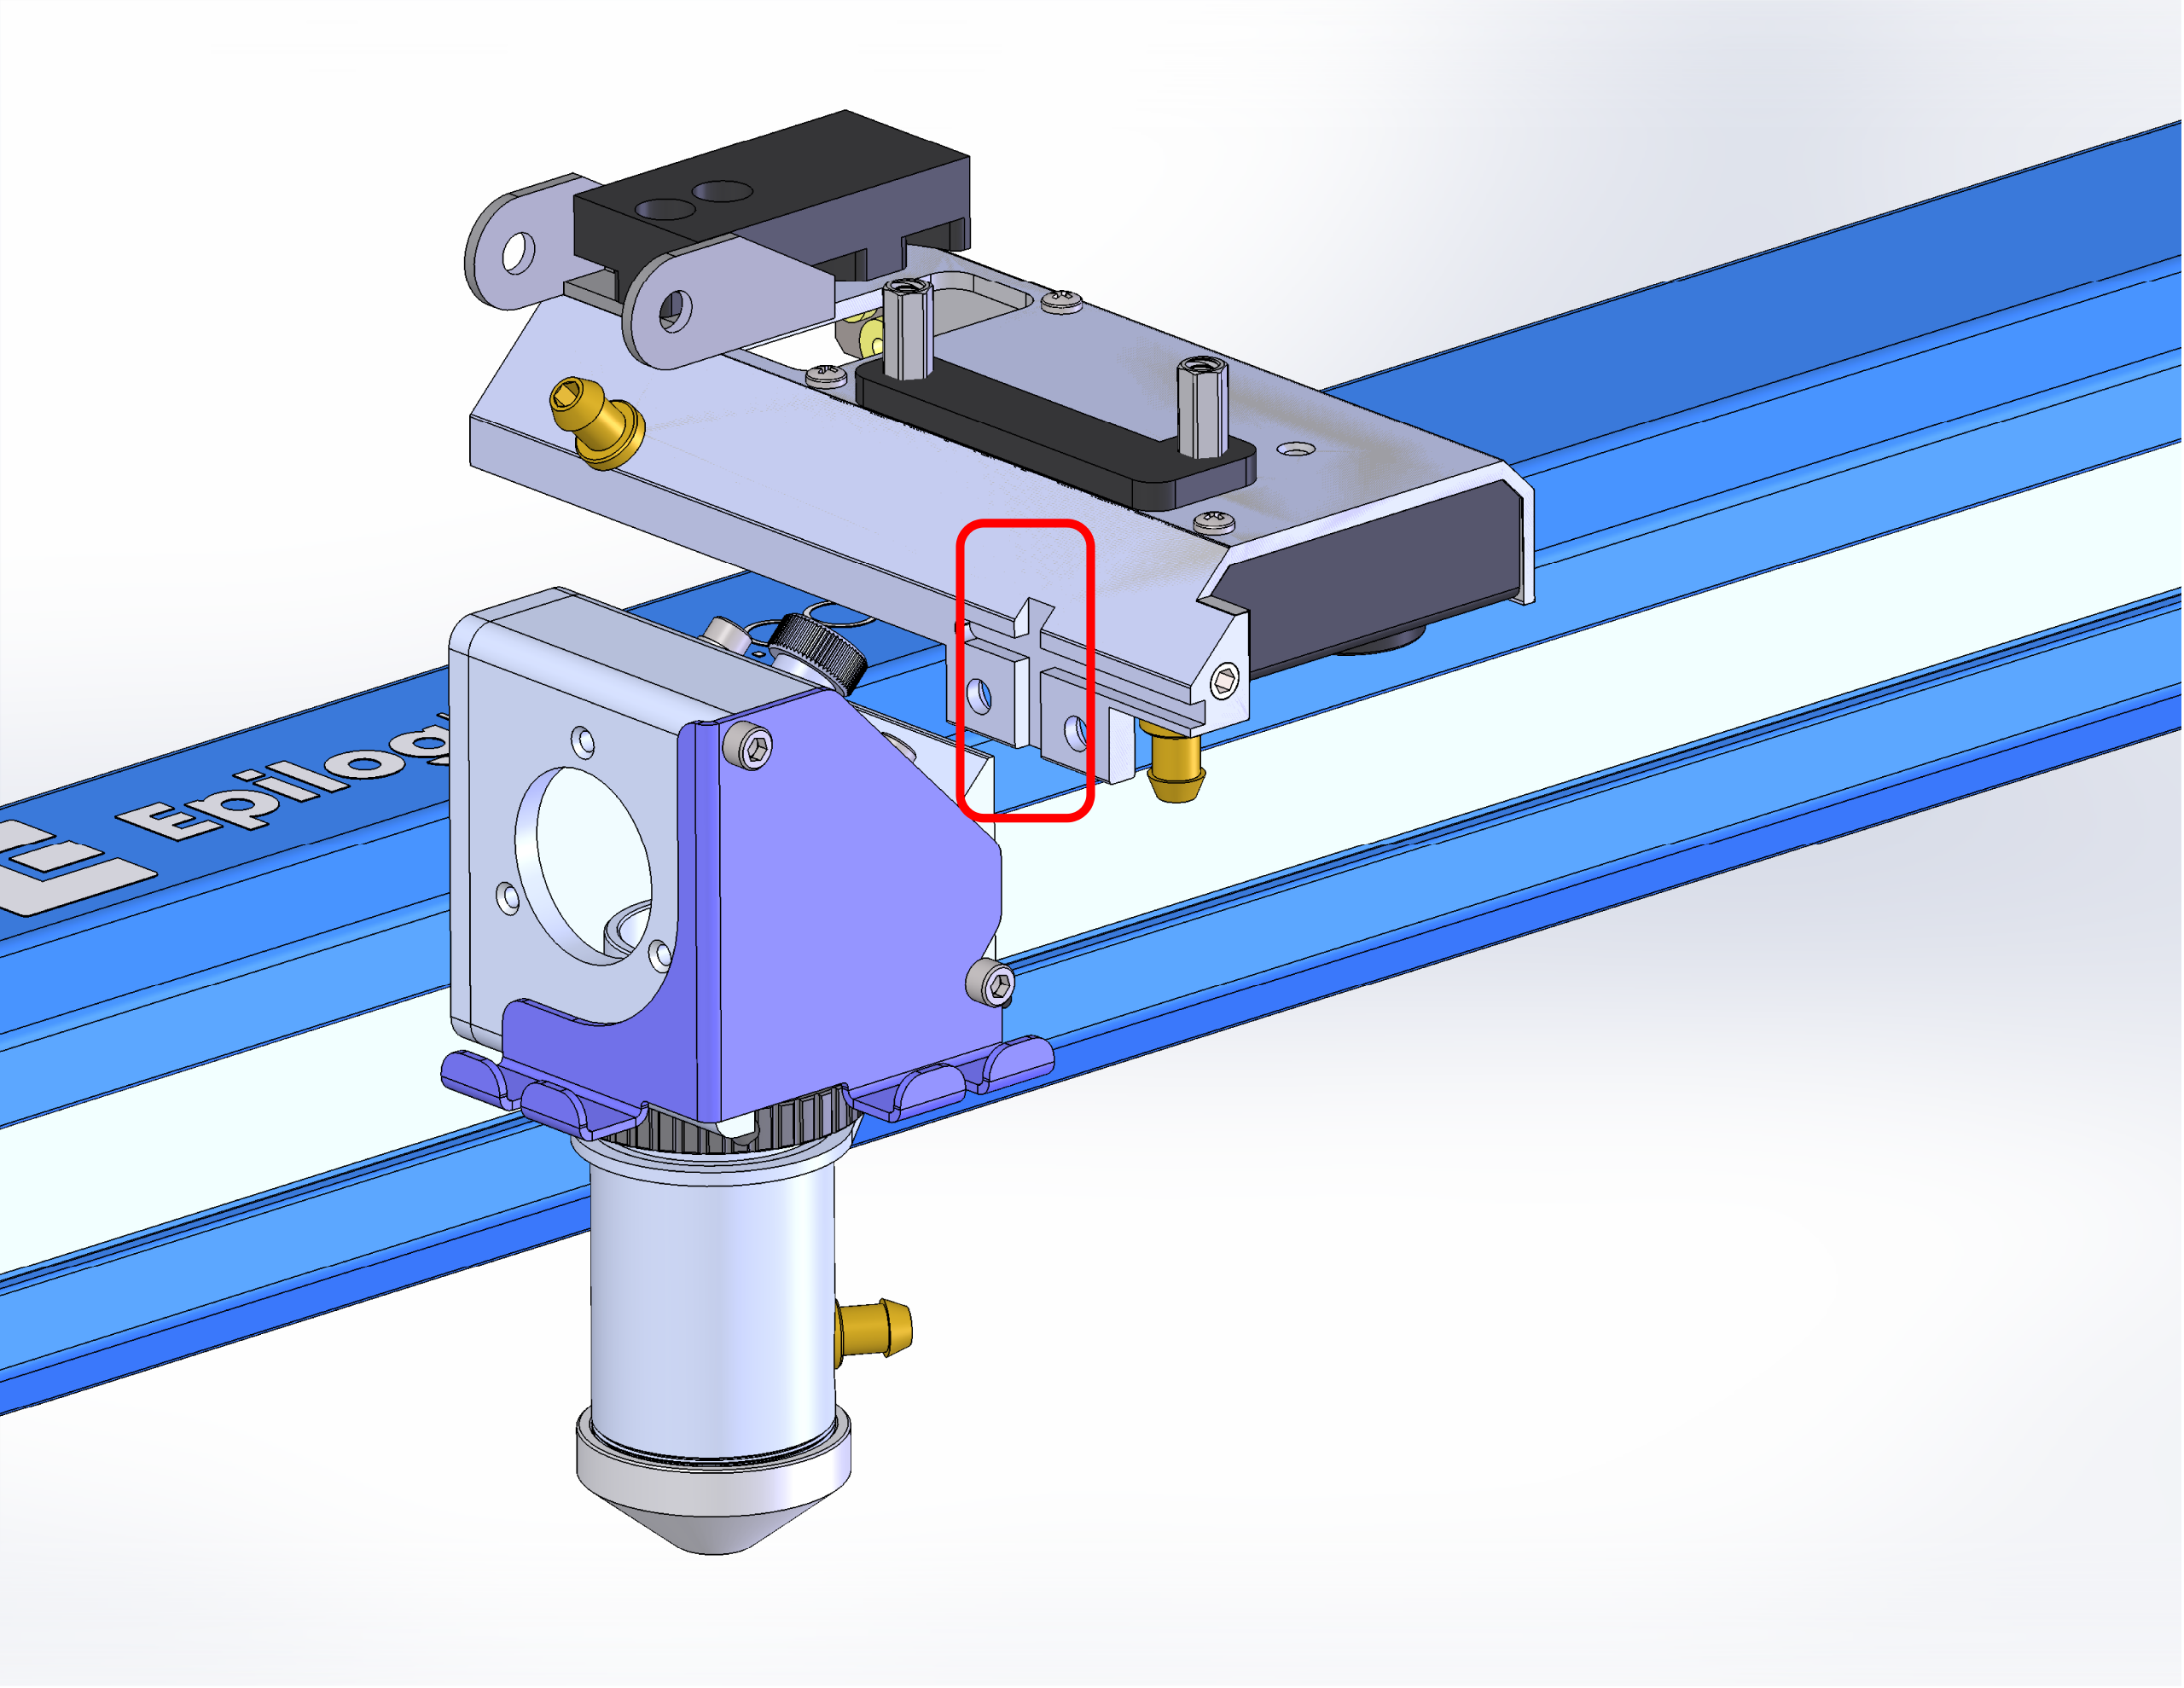
Install the autofocus switch with the adapter plate between the lens assembly and switch.
-
Route the cable through the channel between the carriage camera housing and the lens assembly.
Note: The channel varies between models.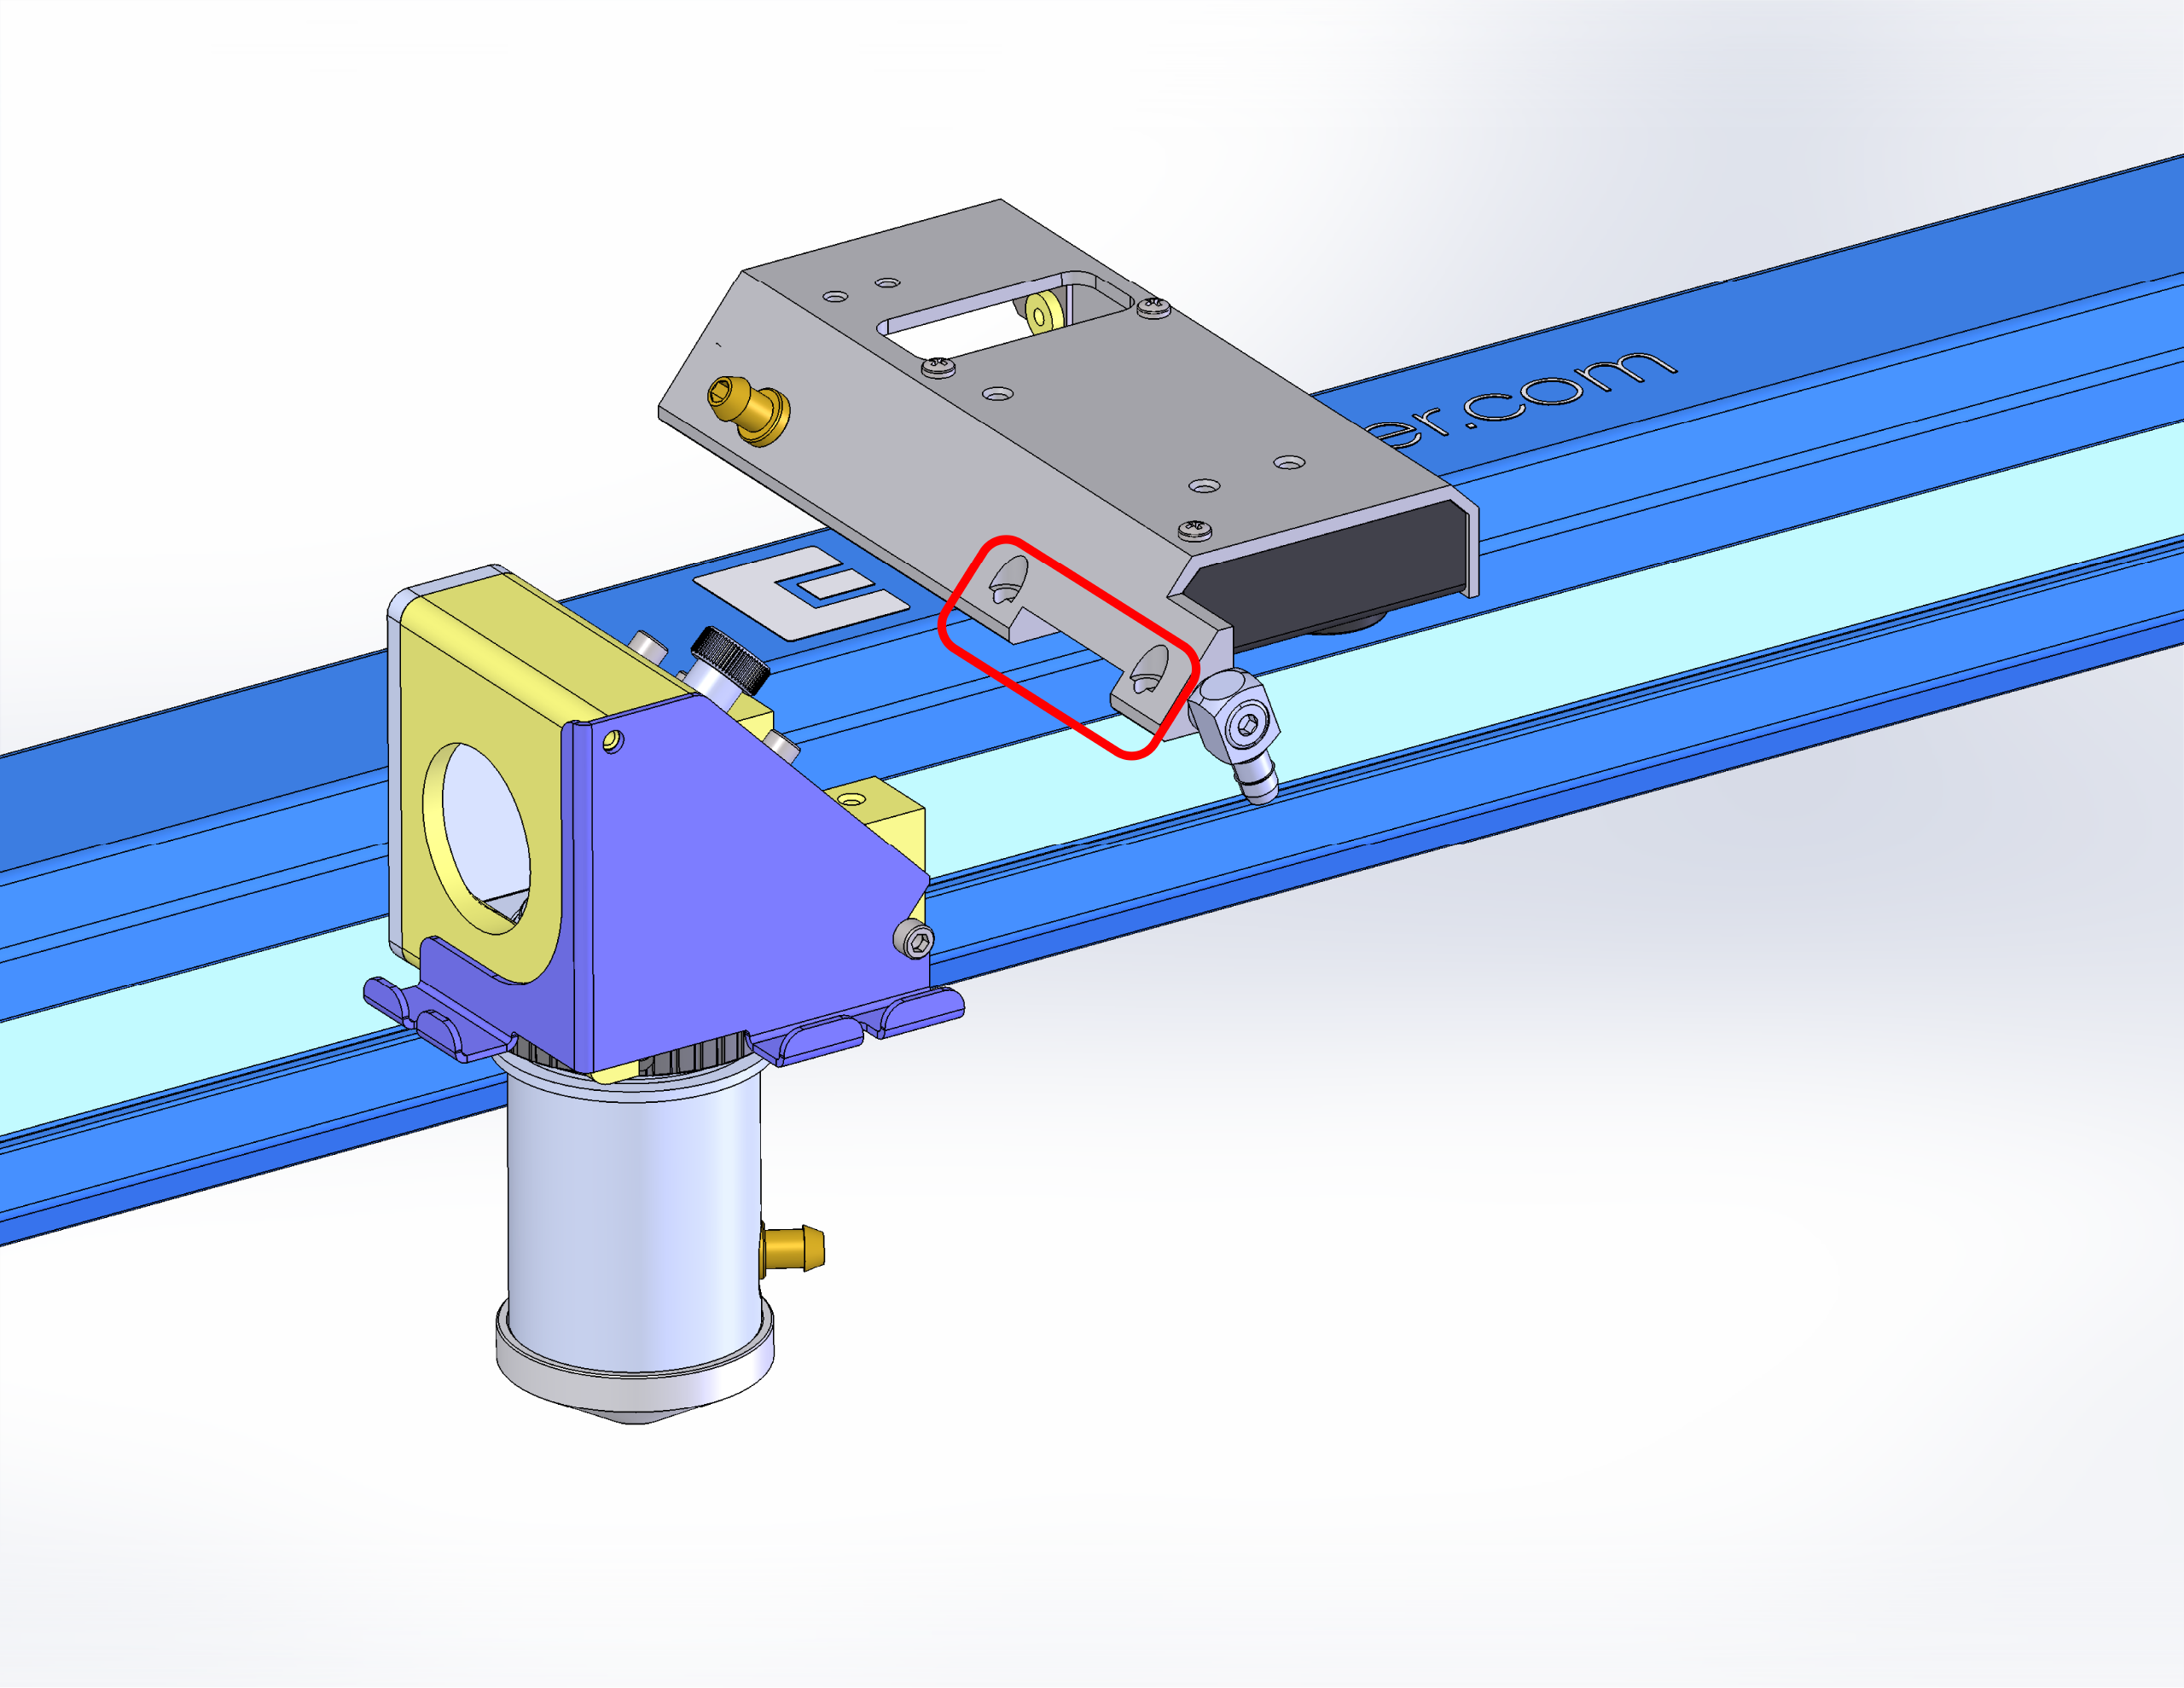
-
Attach the lens assembly to the camera housing.
-
Connect the harness.
-
Attach the cable fastener to secure the cable.
Note: Not all machine models have this fastner.
-
Attach cover.
Note: Not all machines are equipped with the carriage cover.
-
Install air assist tubing.
