In this lesson we’ll walk through cleaning and greasing the Epilog Mini and Helix’s Bearing Rail

Remove Assembly Cover
To begin the cleaning and greasing of the bearing rails, shut off the laser and remove the power cord from the machine.

Loosen, but do not remove, the five Phillips head screws along the back of the X-Axis Assembly, as well as the two screws on the front.


Lift and remove the X-Axis Assembly cover.

Clean Bearing Rail
Position the lens assembly to one side.
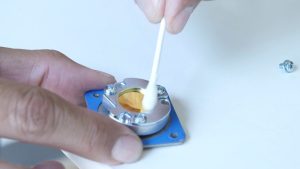
Apply rubbing alcohol to a cotton swab.

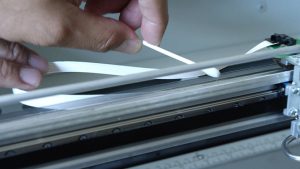
Clean one end of the rail by running the cotton swab along the top and bottom of the rail. Repeat this process until the cotton swab comes away clean, using new cotton swabs when the old ones become dirty.


Move the lens assembly along the X-Axis towards the end of the bearing rail you just cleaned.

Apply rubbing alcohol to another cotton swab.
On the remaining, uncleaned portion of the bearing rail, run the cotton swab along the top and bottom of the rail, repeating until the cotton swabs come away clean.


Apply Bearing Grease to Bearing Rail
Next, apply a small amount of bearing grease to one spot on the top and bottom of the bearing rail.


Move the lens assembly left and right along the length of the rail at least five times to spread the grease evenly across the assembly’s path.

Reinstall Assembly Cover
Return the cover to the X-Axis Assembly, sliding it over the loosened screws.

Tighten all seven Philips head screws.

Plug the machine in and turn it on.