In this lesson we’ll walk through replacing the Epilog Mini/Helix Y-Motor Assembly.
Shut off the laser and remove the power cord from the machine.

Remove Right Panel
Remove the right side panel by removing the 6 screws, 4 located on the side of the machine, two located on the back of the machine.


Remove Old Y-Motor
Open the front access door.
Locate the Y-Motor on the right hand-side of the machine.


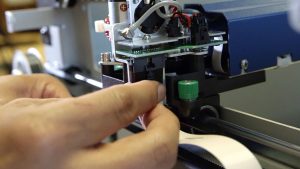
Remove the spring holding the motor. Let the spring hang from the bottom peg.

Loosen the four screws holding the motor bracket. With the four screws loosened, slip the Y-Motor belt around and off the large Y-Axis drive pulley.


Now remove the four Philips head screws completely.

Disconnect the motor lead. This connector is in the inside of the machine.

Pull the entire assembly out.

Install New Y-Motor
Insert the new motor assembly into position with the belt pointing up, while minding the wires surrounding the motor.

Loop the Y-Motor belt over the large Y-Axis drive pulley.

Start threading the four Phillips head screws but do not tighten them down all the way.

Place the spring on the upper peg and on the farthest back notch.

Tighten the four screws.

Reconnect the motor lead.

Reinstall Right Panel
Replace the right side panel.


Close the front access door.
Plug the machine in and turn it on.