Estimated time: 15–20 minutes • Skill: Basic
This guide walks you through installing the legacy driver for your Epilog Laser system. The process includes configuring your network settings and installing the printer driver. This procedure applies to Mini/Helix, Zing, EXT, and older Fusion/M2 models using an Ethernet connection.
To begin, you’ll need to connect your laser to your computer with an Ethernet cable and ensure the machine is powered on. The installation process is straightforward and requires only basic computer skills.
Network Configuration
-
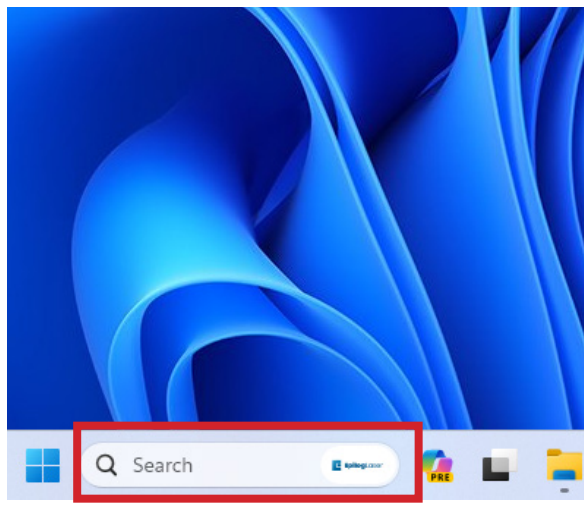
Open Windows Settings
Click the Windows Start button and type “Settings”, then click to open.
-
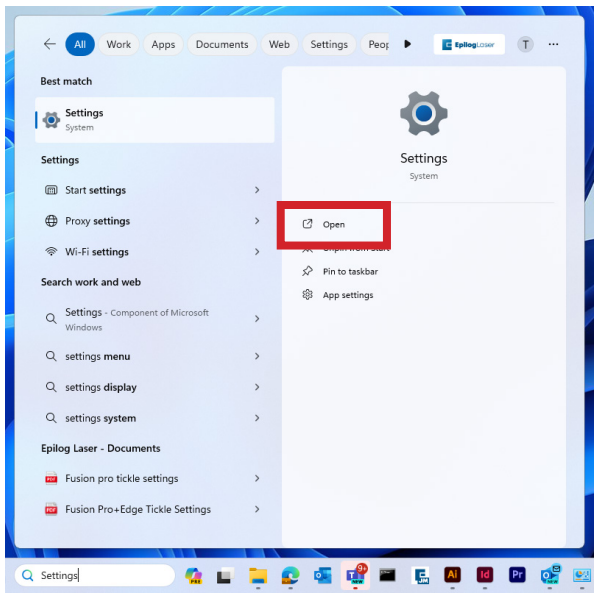
Access Settings
Click “Open” when Settings appears in the search results.
-
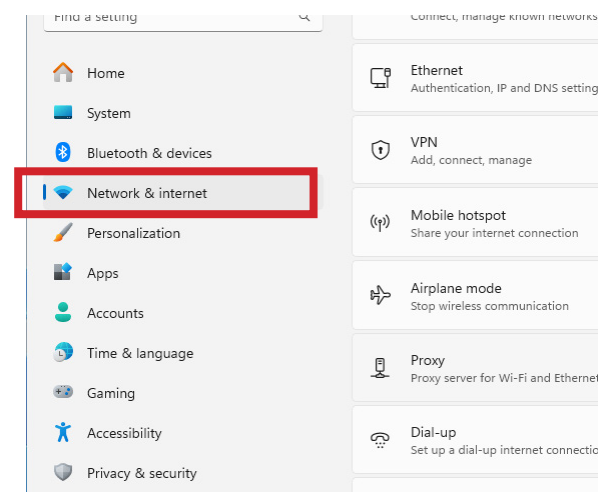
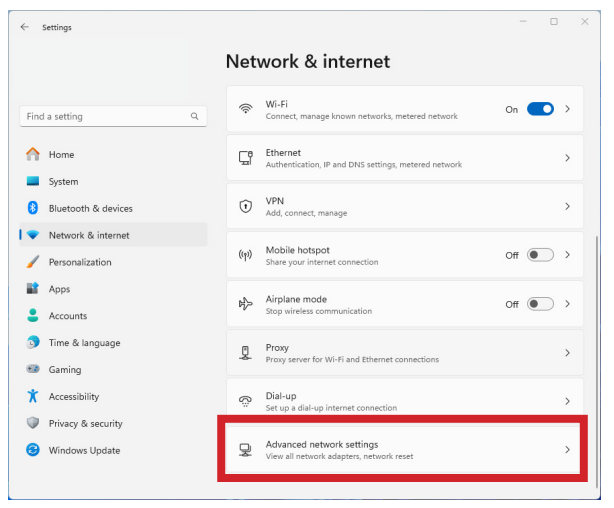
Network Settings
Select “Network & Internet” from the main Settings menu.
-
Advanced Settings
Click “Advanced network settings” at the bottom of the Network & Internet page.
-
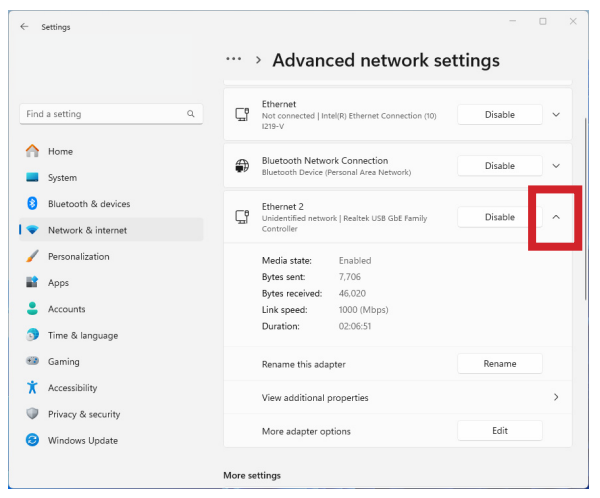
Select Network Adapter
Find and click the dropdown arrow next to your Ethernet connection (often labeled as “unidentified network”).
-
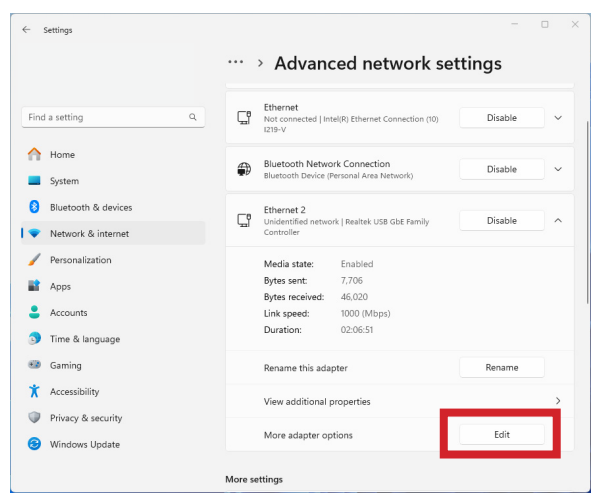
Edit Adapter Settings
Click “Edit” next to “More adapter settings”.
-
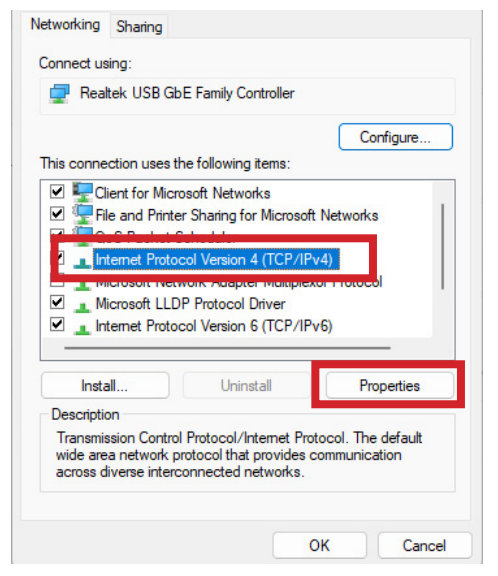
TCP/IP Properties
Select “Internet Protocol Version 4 (TCP/IPv4)” and click “Properties”.
-
Configure IP Address
Select “Use the following IP address” and enter “192.168.3.3”. The subnet mask will automatically populate as “255.255.255.0”.
Note: The default IP address for most Epilog systems is 192.168.3.4. Your computer’s IP address must be different from the laser’s IP address but in the same range.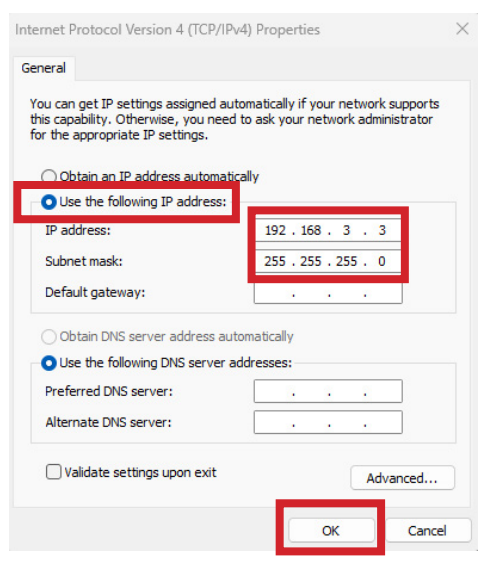
Driver Installation
-
Download Driver
Visit the Epilog Laser Legacy Drivers page and download the appropriate driver for your machine.
-
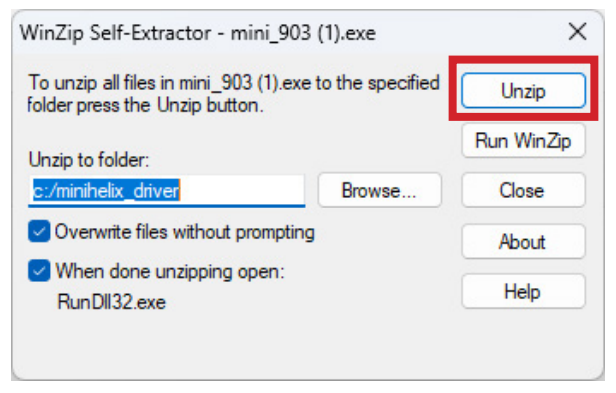
Extract Files
Open the downloaded file and extract its contents to your computer.
-
Add Printer
The Add a Device window will open up. Click “The printer that I want isn’t listed.”
 Note: To manually add the printer Open Windows Settings, go to “Bluetooth & devices”, select “Printers & scanners”, then click “Add device”.
 -
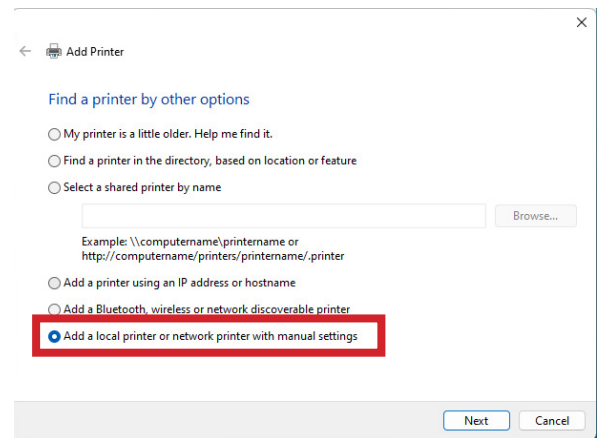
Add Local Printer
Select Add a local printer or network printer with manual settings.
-
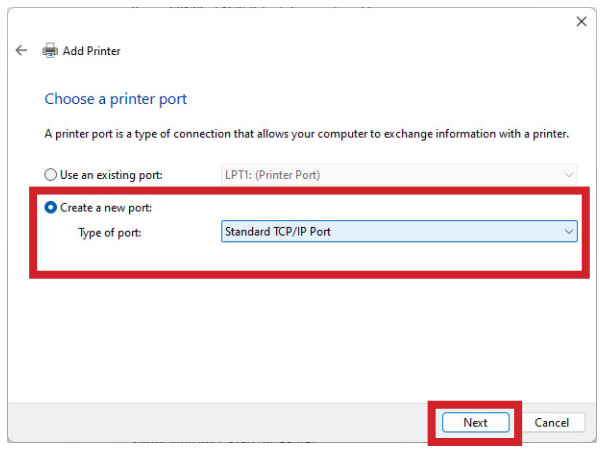
Create Port
Choose “Create a new port” and select “Standard TCP/IP Port” from the dropdown menu.
-
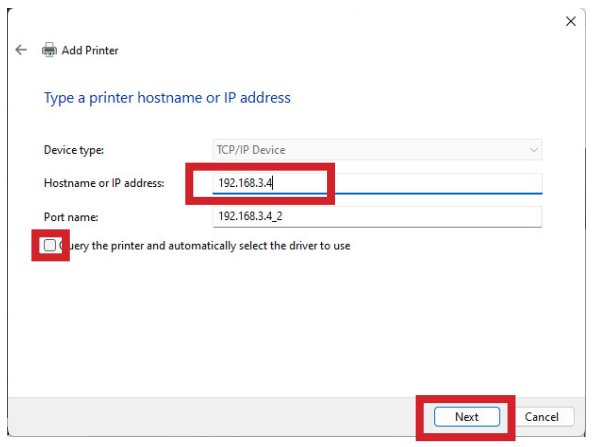
Configure Port
Enter your laser’s IP address (default is 192.168.3.4) and deselect “Query the printer”.
-
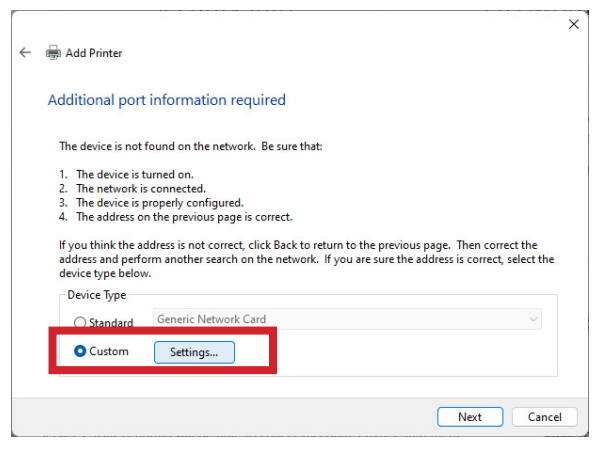
Custom Settings
Select “Custom” configuration and click “Settings”.
-
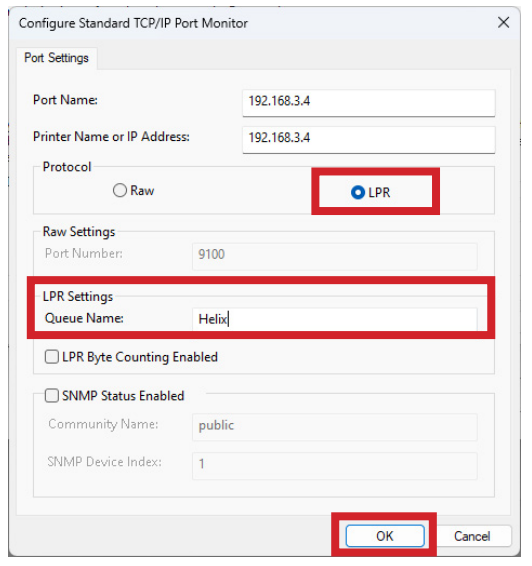
Port Settings
Choose “LPR” protocol and enter your machine model in the “Queue Name” field.
-
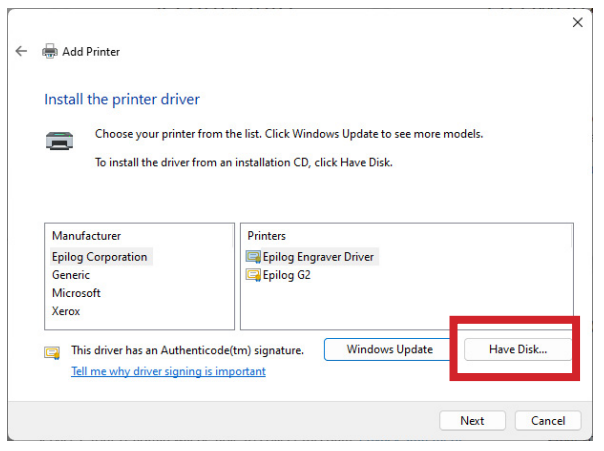
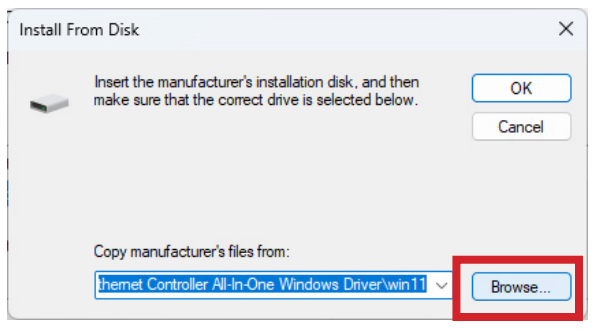
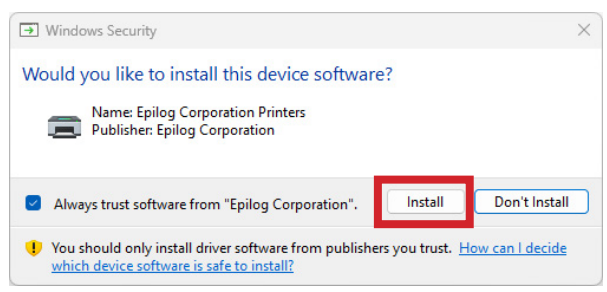
Install Driver
Click “Have Disk”, browse to the extracted driver files, and select the .inf file for your model.
-
Complete Setup
Follow the remaining prompts to name your printer and complete the installation.
- Verify the IP address of the laser matches what was entered during driver installation
- Ensure the USB cable is NOT connected when using Ethernet
- Test your Ethernet cable if connection issues persist
- Confirm your firewall settings allow printer communication