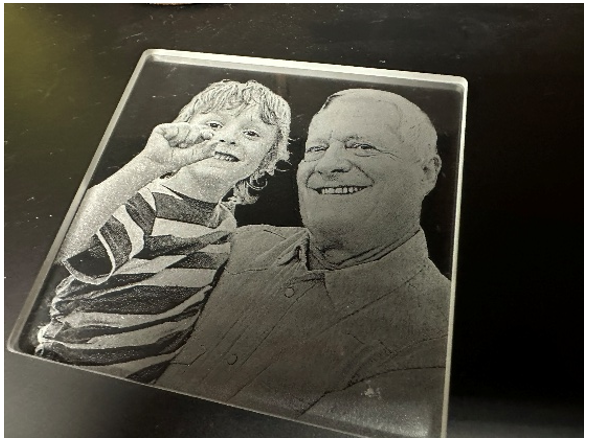
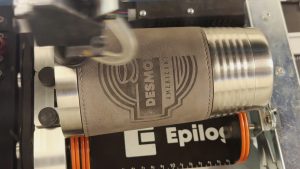
A short walkthrough of the steps for preparing a photo for glass engraving in Photoshop, based on Epilog Laser’s Laser Master Class: Glass Engraving Techniques, Ideas, and Inspiration video.
Glass Engraving Steps
-
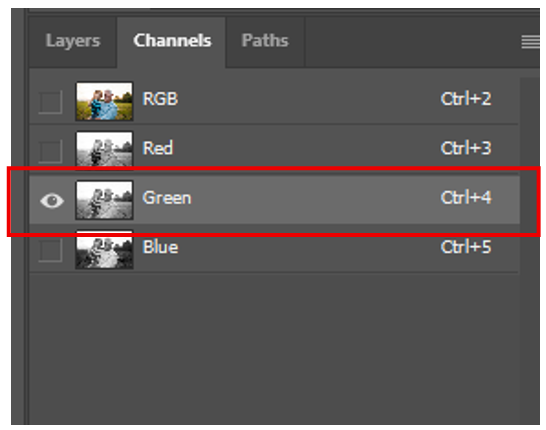
In the Channels tab, select only the Green channel.

-
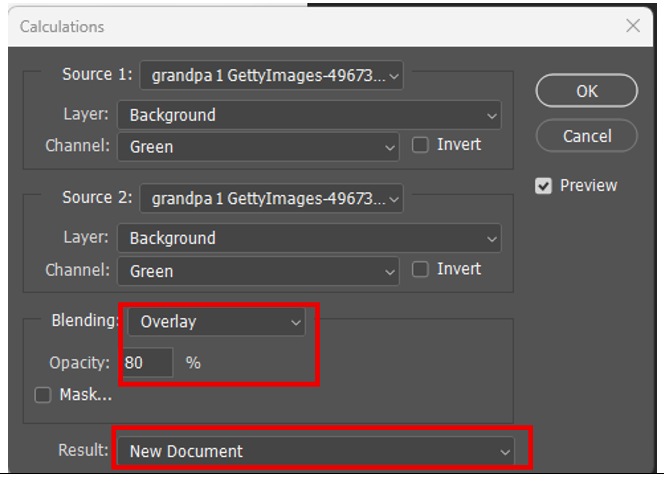
Go to Image > Calculations.


-
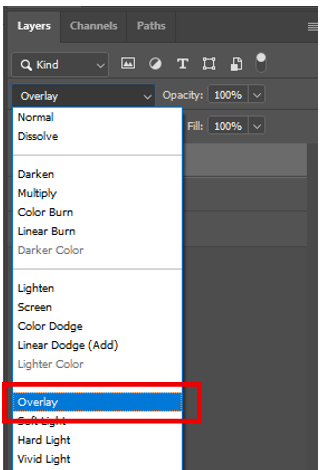
Set the Blending to Overlay, adjust the opacity to approximately 80%, and set the Result to New Document.
-
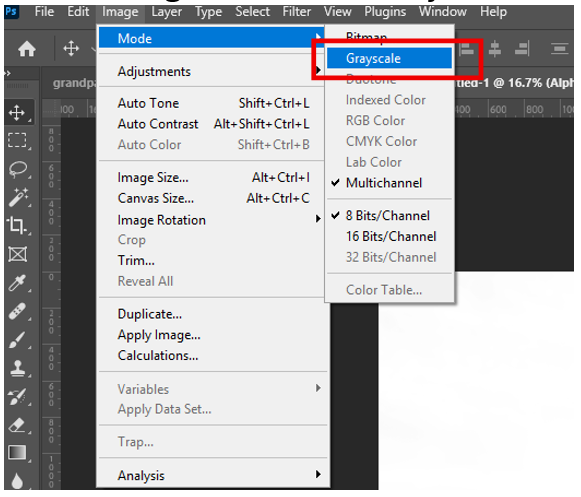
Go to Image > Mode > Grayscale.

-
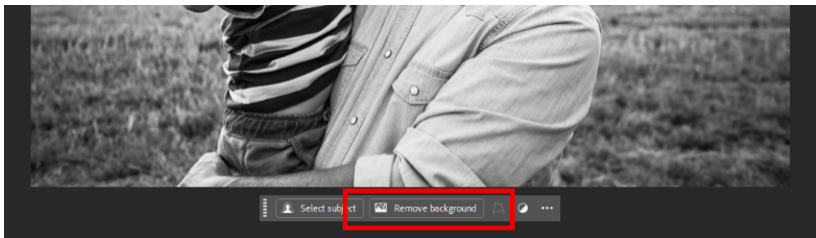
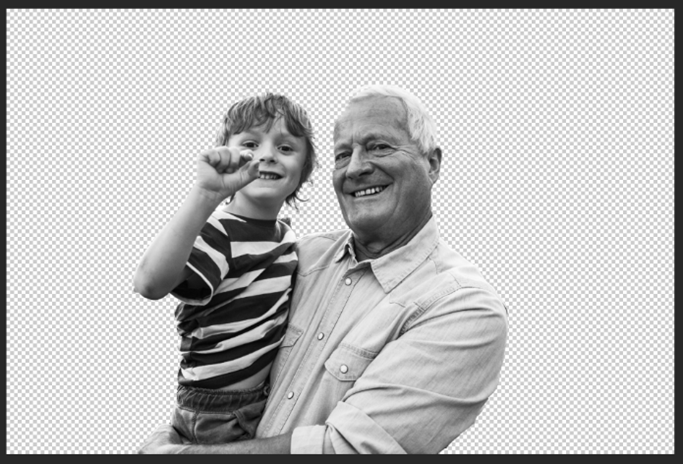
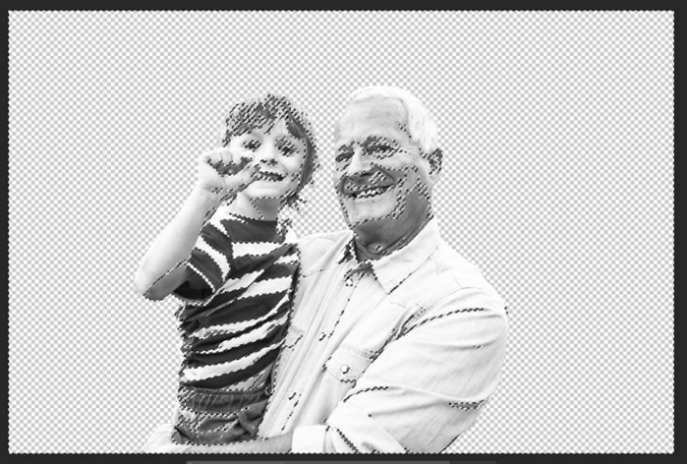
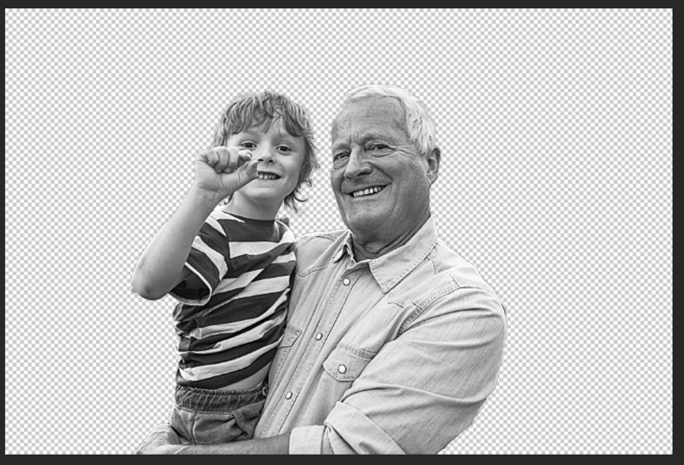
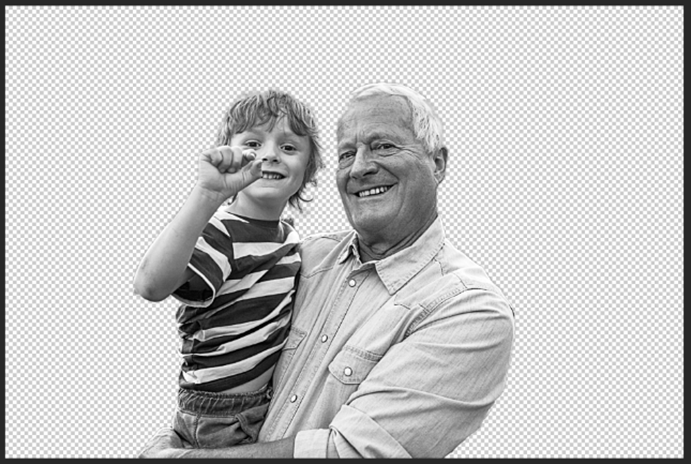
With the photo selected, click Remove Background.
-
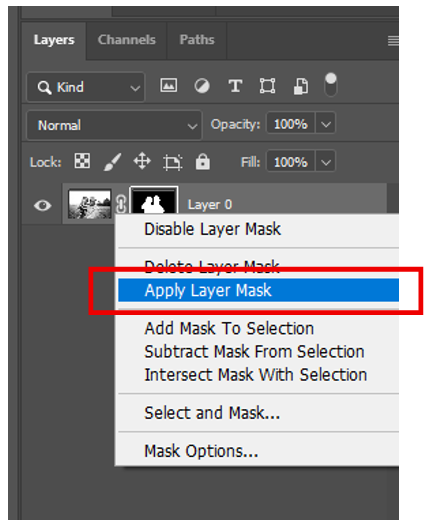
Right-click on the mask and select Apply Layer Mask.
-
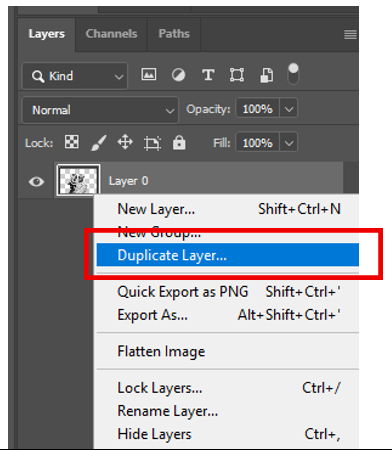
Duplicate the layer.
-
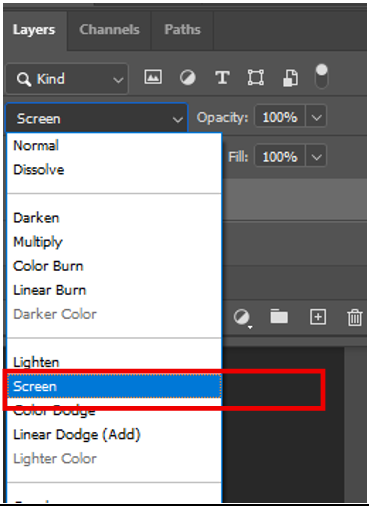
Change the blending mode from “Normal” to Screen for the new layer.

-
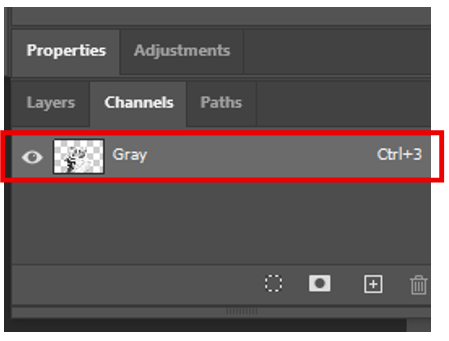
Go to the Channels tab and Ctrl + Click on the Gray channel.
-
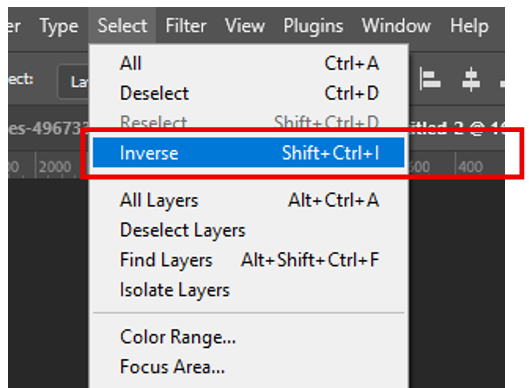
Go to Select > Inverse.
-
In the Layers tab, click the Mask button.

-
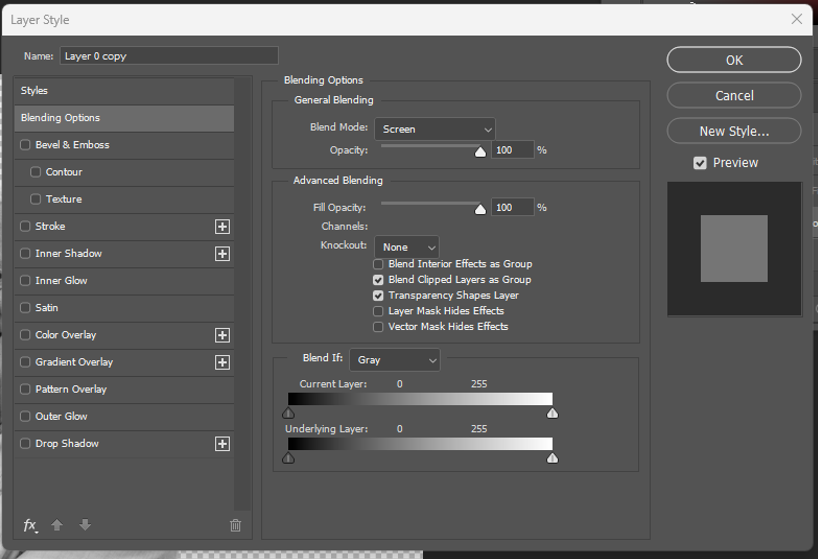
Double-click the copy layer to open the Layer Style menu.
-
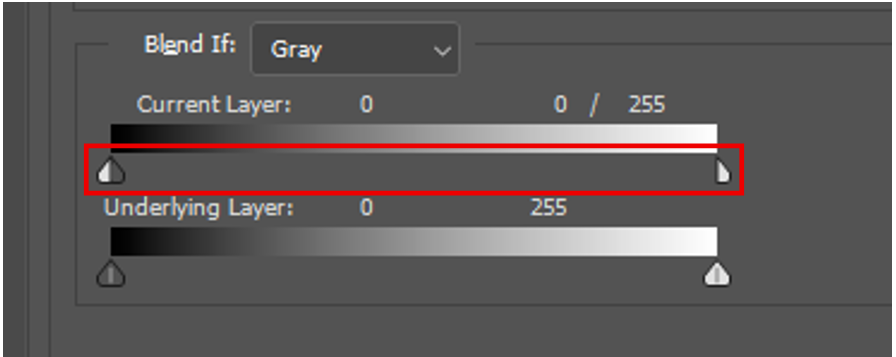
Hold down Alt and click on the white arrow under Current Layer. Drag it all the way to the left and click OK.
-
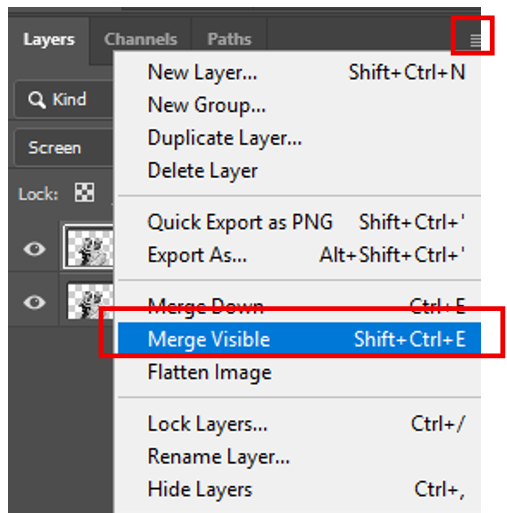
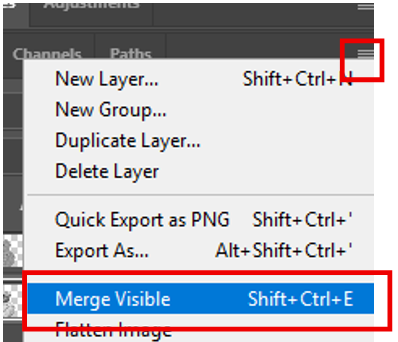
Click the Expand Menu button, then select Merge Visible.
-
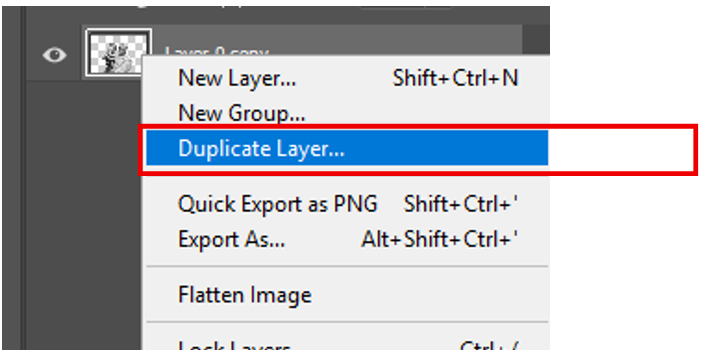
Right-click on the merged layer and choose Duplicate Layer.
-
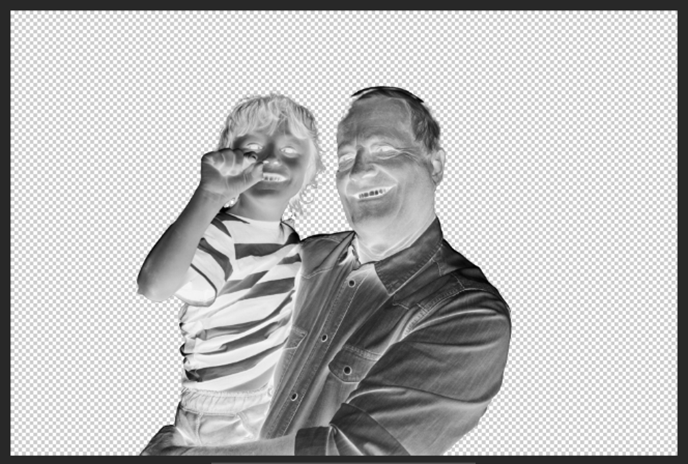
Go to Image > Adjust > Invert.

-
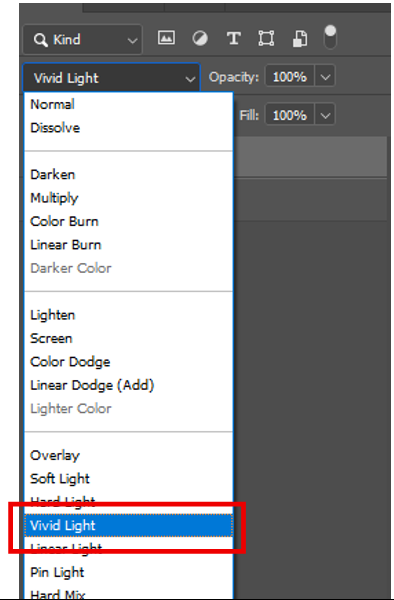
Change the blending mode from “Normal” to Vivid Light.
-
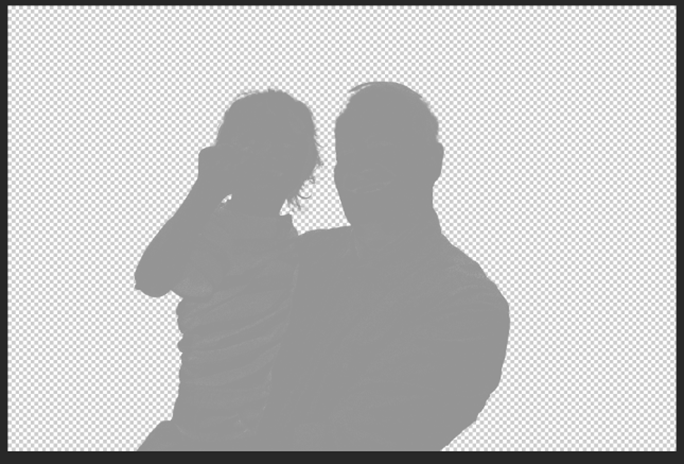
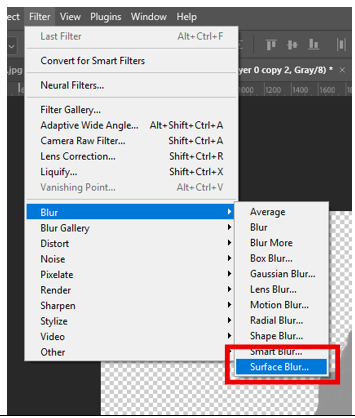
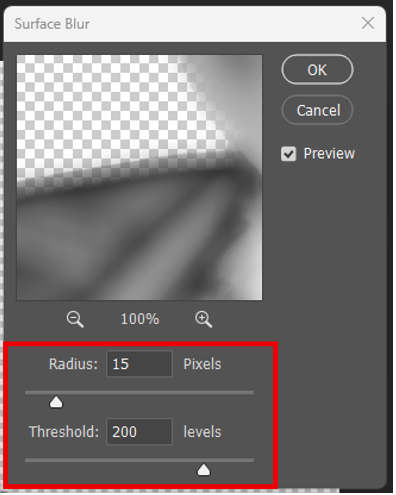
Go to Filter > Blur > Surface Blur.
-
Set the Radius to ~15 and the Threshold to ~200.
-
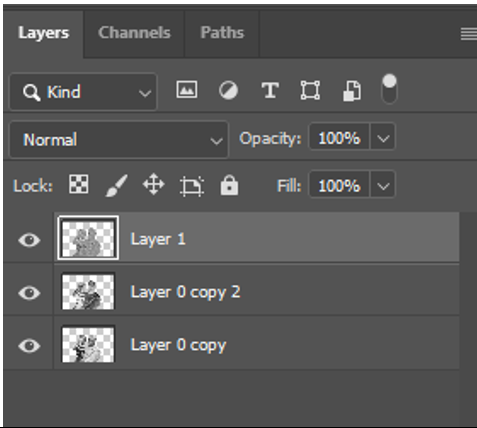
Hold down Ctrl + Shift + Alt + E to duplicate the visible layers into a new merged layer.
-
Change the blending mode of the new layer from “Normal” to Overlay.
-
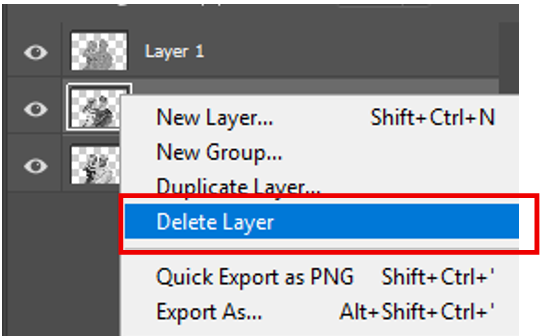
Right-click on the Vivid Light layer (the middle layer) and select Delete Layer.
-
Click the Expand Menu button and choose Merge Visible.
-
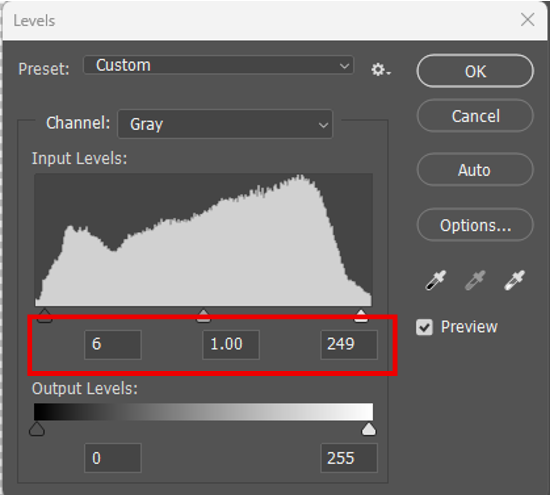
Go to Image > Adjustments > Levels.

-
Move the left and right sliders inward to adjust the image contrast and brightness as needed.
-
Go to Image > Adjustments > Invert.


-
Resize the image and print it to the laser Dashboard.