Estimated time: 20–30 minutes • Skill: Basic
This guide explains how to replace the encoder strip and reader assembly on the Epilog Mini, Helix, or FiberMark laser system. The encoder strip is the thin clear plastic strip that the encoder reader reads to determine X-Axis position; replacing it restores reliable position feedback.
You’ll need a 3/32″ Hex wrench and a Phillips (#1) screwdriver. The job involves removing the X-Axis cover, detaching the encoder reader, replacing the strip and support, then re-installing the reader and verifying alignment.
Installation
-
Power down and open the machine.
Turn off the engraver and disconnect it from its power source. Open the access window so you can reach the X-Axis assembly.
-
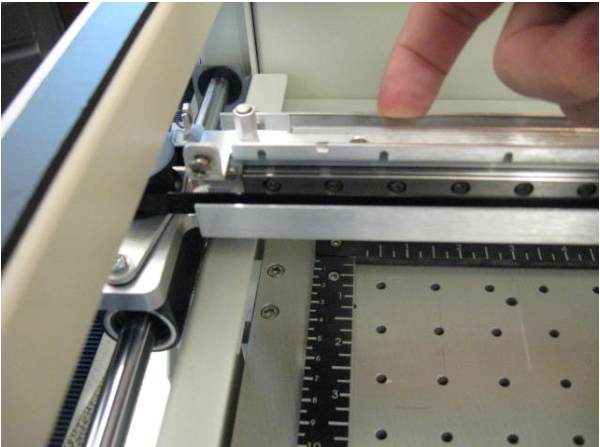
Center the X-Axis assembly.
Manually move the X-Axis assembly and lens carriage to the center of the engraver for easier access to the covers and encoder area.
-
Remove the X-Axis cover.
Loosen, but do not remove, the seven screws (two on the front and five on the rear) that secure the X-Axis cover. Remove the cover and set it aside.
-
Disconnect the encoder ribbon cable and remove the reader.
Directly behind the lens carriage you will find the encoder reader assembly with a white ribbon cable attached. Depress the cable clip and pull the connector to the left to unplug it. Remove the 3/32″ Hex screws that secure the reader board to the lens carriage and lift the reader out.
-
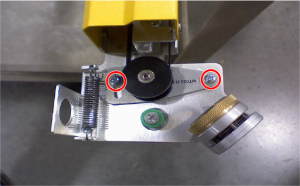
Locate and remove the encoder strip.
The encoder strip is the thin clear plastic (about the thickness of a sheet of paper) that sits vertically in the X-Axis. Pull the X-Axis assembly to the front of the engraver — the screws that hold the strip and its support are accessible only from the rear of the rail. Remove the 13 screws that secure the encoder strip and the small aluminum encoder strip support, then remove the strip and support.
Picture 1: Encoder strip location (front view). -
Install the new encoder strip.
When installing the replacement strip, stand in front of the machine so the text on the encoder strip is upside-down and backwards (facing the back of the machine). Position the encoder strip and the support so their screw holes line up, then loosely start the 13 screws. After all screws are in place, go back and tighten them evenly.
Note: Clean both sides of the installed strip with a soft Q-tip dampened with a mix of distilled water and a drop of mild dish soap.
-
Re-install the encoder reader and reconnect the cable.
Reinstall the encoder reader with the 3/32″ Hex screws, making sure the reader properly straddles the encoder strip. If the reader does not straddle the strip correctly the X-Axis may slam on restart. Reconnect the white ribbon cable to the reader assembly.
-
Replace the X-Axis cover.
Reinstall the X-Axis cover and tighten the seven screws previously removed.
-
Power up and test.
Reconnect the engraver to its power source and restart the machine. Observe motion to ensure the X-Axis moves smoothly and that there are no sudden impacts or crashes — if there are, power down and re-check the reader alignment.