This document provides detailed instructions for identifying, removing, and replacing power supplies in Fusion Pro engravers. It includes power supply locations for different configurations (CO₂-only, Fiber-only, and Dual Source), as well as step-by-step procedures for safe removal and installation.
Power Supply Locations
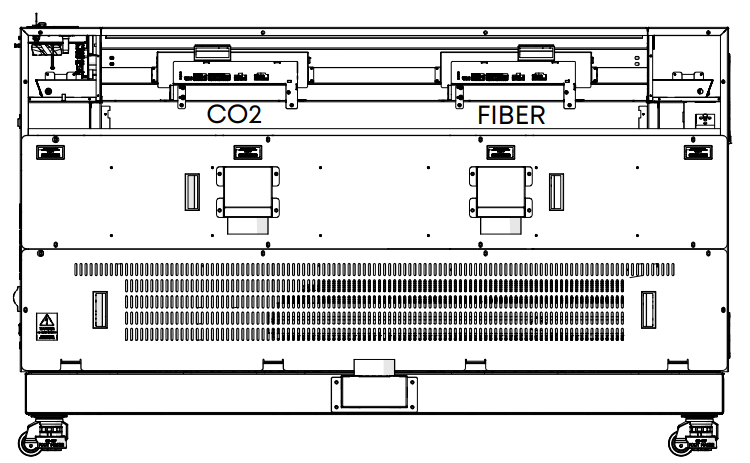
CO2- Only Fusion Pro
This model will contain only the CO2 power supply shown above.
- One (1) 48V 2kW power supply
Fiber- Only Fusion Pro
This model will contain the CO2 and fiber power supplies shown above
- One (1) 48V 2kW power supply
- One (1) 24V 1kW power supply
Dual Source Fusion Pro
This model will contain both the CO2 and
fiber power supplies shown above
- One (1) 48V 2kW power supply
- One (1) 24V 1kW power supply
WARNING: Servicing the power supply while the engraver is powered on can cause serious injury or damage to internal components. Always disconnect all power sources before beginning.
Power Supply Removal
-
Turn off the engraver.
-
Disconnect engraver from power.
-
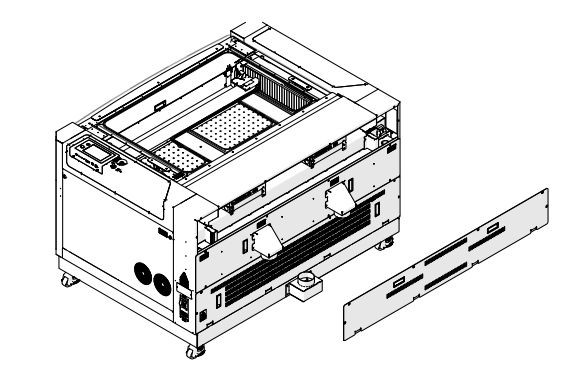
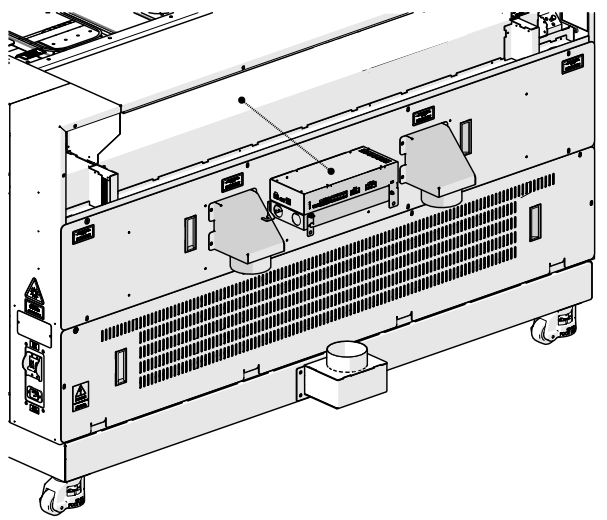
Remove the upper rear panel of the engraver.
-
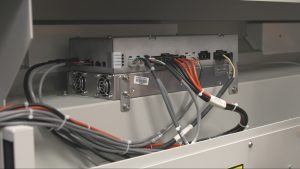
Disconnect the electrical harnesses from the power supply.
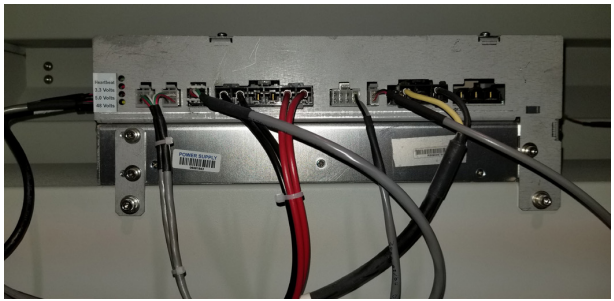
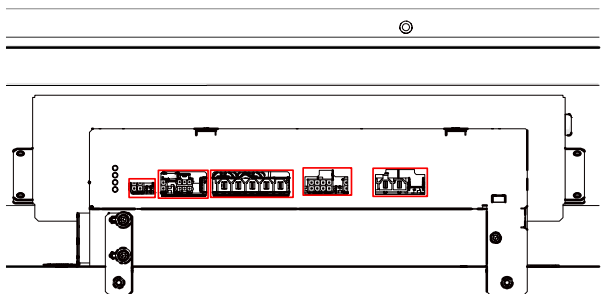 Note: Depending on which power supply is currently installed in the machine, the amount of and type of connectors may vary. Both the CO2 and fiber power supply connections are shown below:
CO2 Power Supply
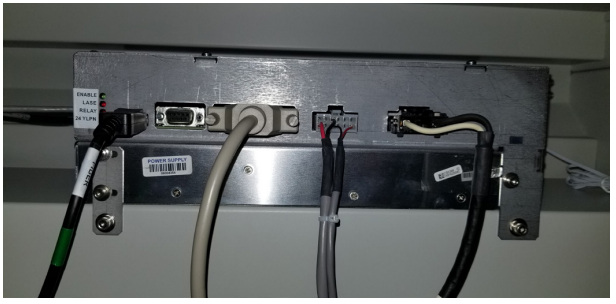
Fiber Power Supply
-
Loosen and remove the four (4) 5/32” Allen screws that secure the power supply to the engraver chassis.
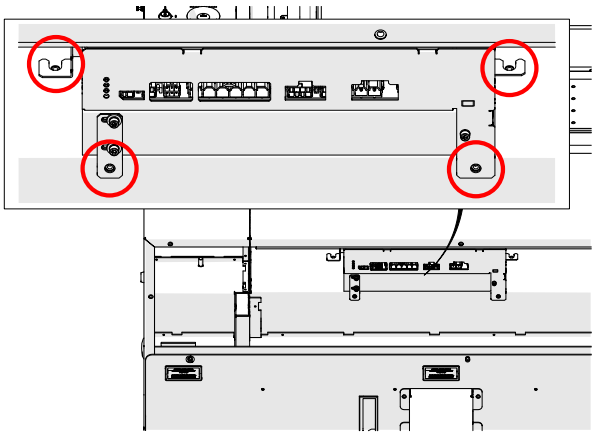
-
Remove the power supply from the engraver.
Power Supply Installation
-
Place the power supply in the engraver.
-
Install and tighten the four (4) 5/32” Allen screws that secure the power supply to the engraver chassis.
-
Connect the electrical harnesses to the power supply.
-
Replace the upper rear panel of the engraver.
-
Reconnect to power and turn on the engraver.
Programming the Peripherals
-
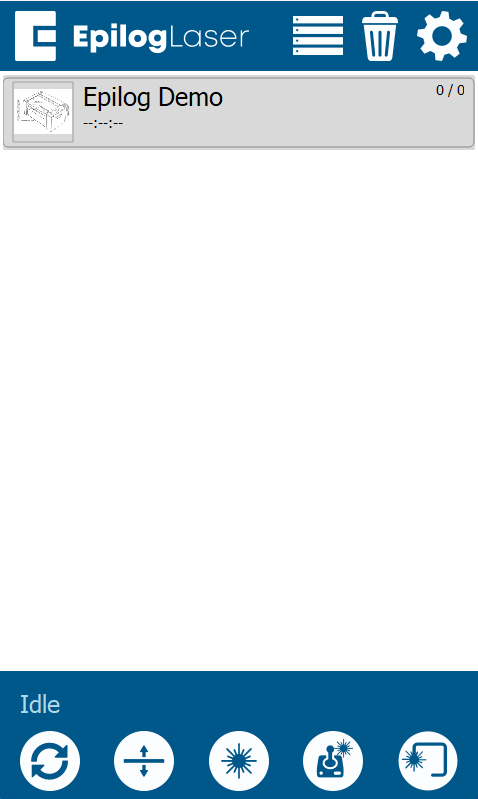
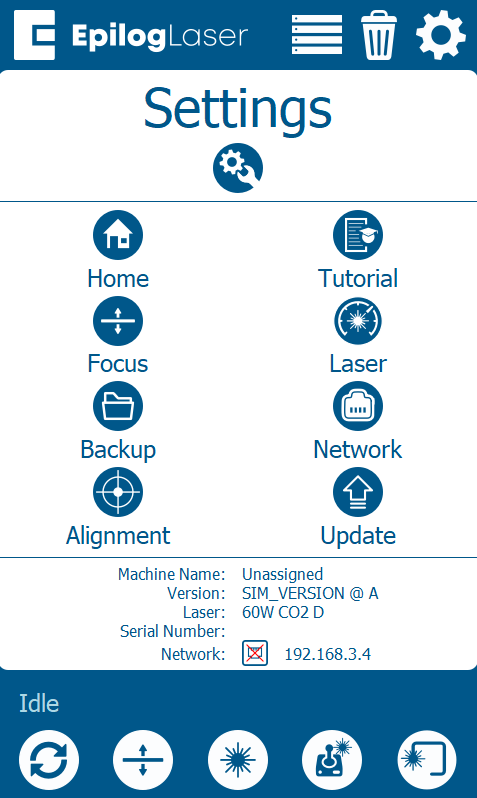
At the display panel, press the gear icon in the upper right-hand corner of the display to open the Settings menu
-
Press Update.
-
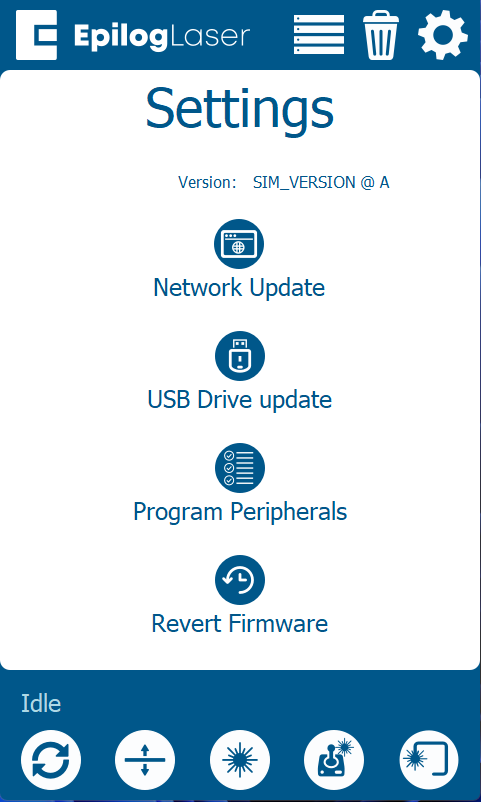
Press Program Peripherals.
-
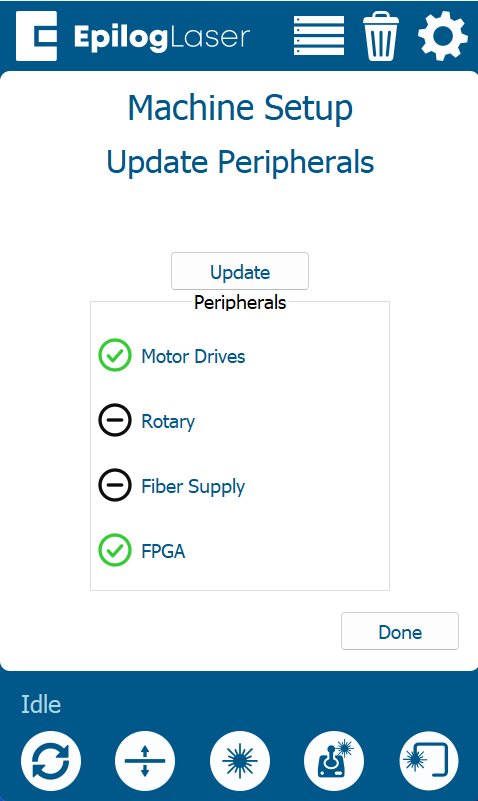
Once in the Peripheral Update menu, select Power Supply and press Update
-
Allow the engraver to run the update process.
Warning: Do not power off the engraver during the update process. It is normal for the display to go dark temporarily. Once the update is complete, the system will prompt you to restart the engraver.
-
Once the engraver prompts you to restart, power cycle the engraver.