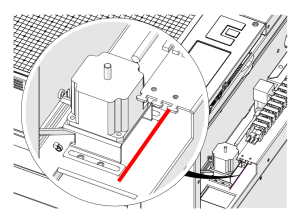
This guide covers replacing the table switch board (z-axis PCB) on the Fusion Maker, Fusion Edge and Fusion Pro 24 and 36. The board is mounted at the front right of the engraver. After replacing it, the focus calibrations must be completed.
Parts Required
- LC0802 – PCBA, Z Switch (24 x 12 tables)
- LC0824 – PCBA, Z Switch, 24 (24 x 24 and 36 x 24 tables)
Tools / Materials Required
- 5/32" Allen Wrench
- 5/16" Nut Driver or Adjustable Wrench
- Anti-Static Strap
- Pencil or Marker
Safety First: Ensure the engraver is completely powered off and the power cord is disconnected before removing any panels or touching internal components.
Table Switch Board Removal
Turn Off Engraver
Turn off the engraver.

Disconnect from Power
Unplug the engraver from its power source.
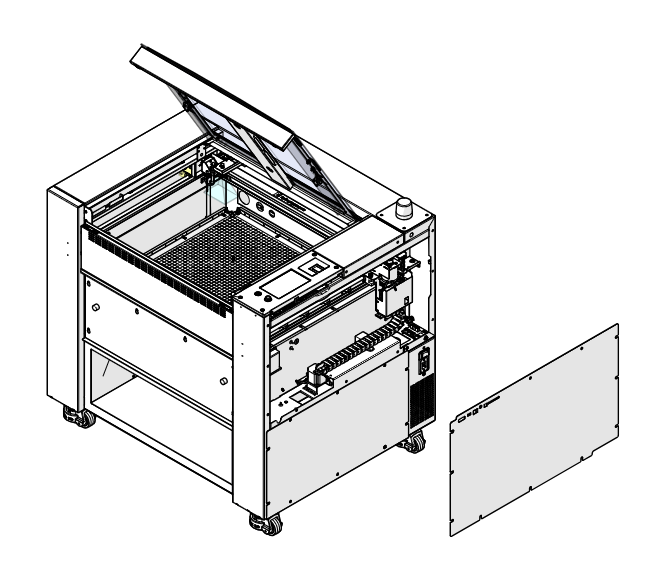
Remove Right Panel
Remove the right panel of the engraver.
Put On Anti-Static Strap
Place the anti-static strap around your wrist and attach the clamp to a bare metal surface on the engraver.
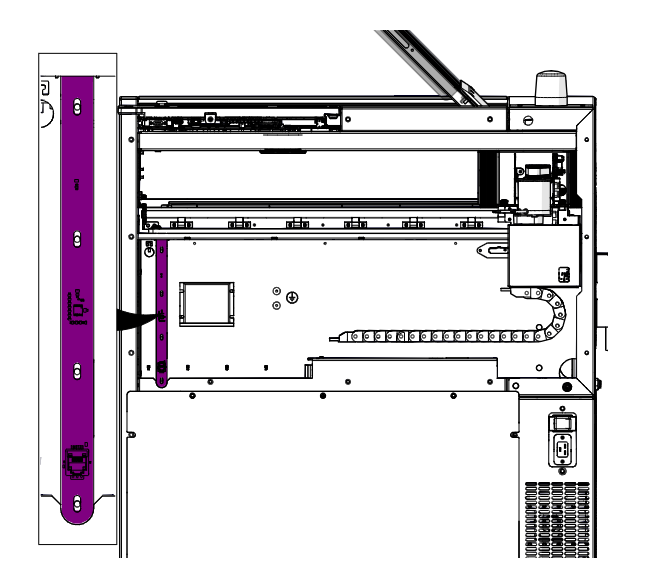
Locate the Table Switch Board
Locate the table switch board (z-axis PCB, highlighted in purple) at the front right side of the engraver.
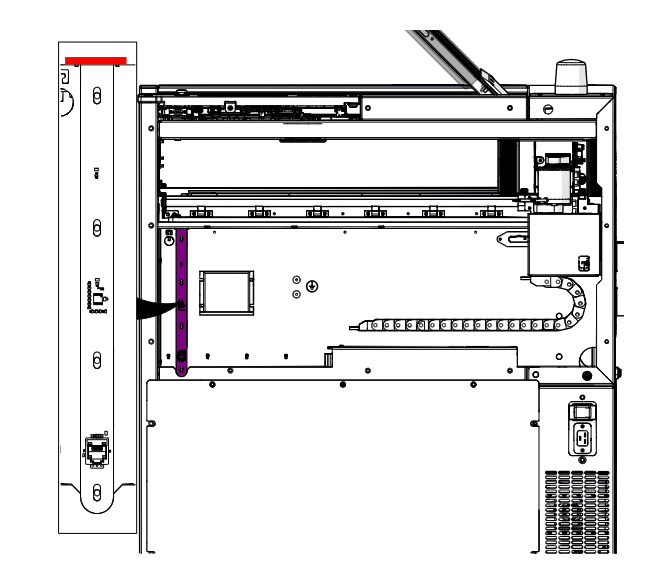
Mark the Board Height
Use a pencil or marker to mark the engraver chassis at the top edge of the board (shown in red). This mark is used to position the new board.
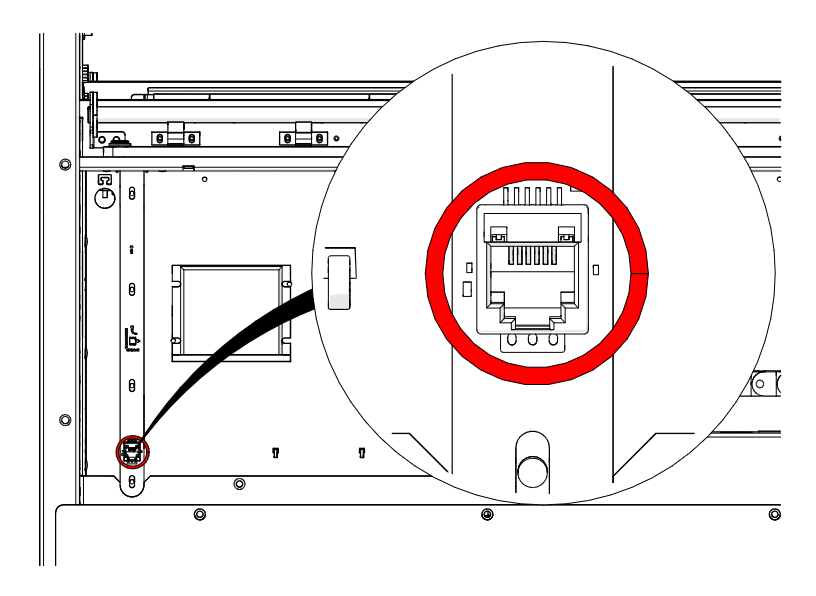
Disconnect Data Cable
Disconnect the data cable from the board (circled in red).
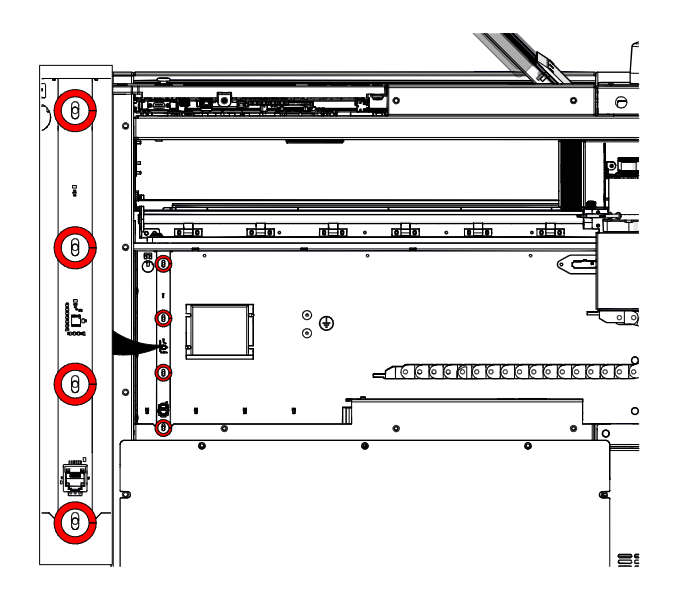
Remove Board Nuts
Loosen and remove the four 5/16" nuts that secure the board to the engraver chassis (circled in red).
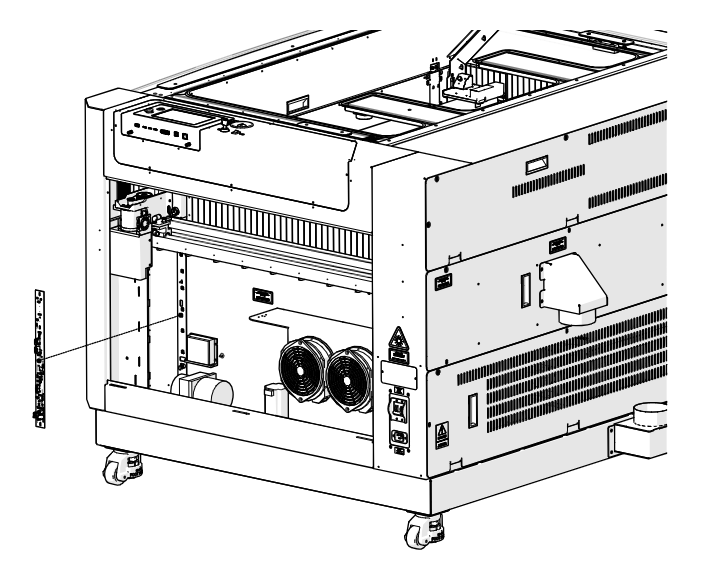
Remove the Board
Remove the table switch board from the engraver.
Table Switch Board Installation
Check the Anti-Static Strap
Make sure the anti-static strap is still around your wrist and clamped to bare metal on the engraver.
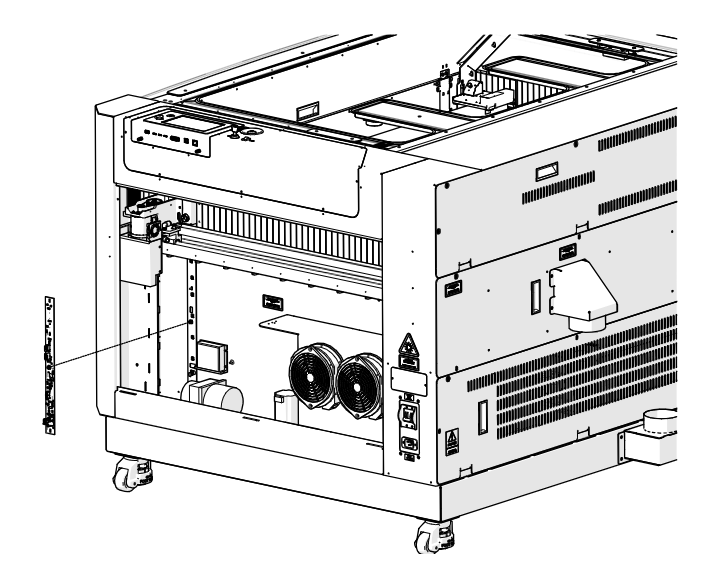
Place the New Board
Place the new table switch board over the mounting studs: LC0802 for 24 x 12 tables or LC0824 for 24 x 24 and 36 x 24 tables.
Install Board Nuts
Install, but do not fully tighten, the four 5/16" nuts that secure the board to the engraver chassis.
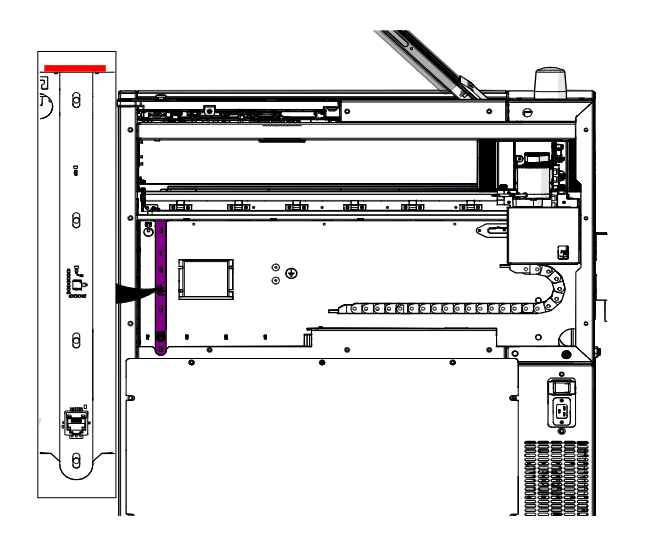
Align With the Mark
Lift the board until its top edge lines up with the mark made in step 6.
Tighten Board Nuts
Tighten the four 5/16" nuts.
Connect Data Cable
Connect the data (communication) cable to the board.
Install Right Panel
Install the right panel of the engraver.

Power On
Reconnect the engraver to power and turn it on.
Calibrate the Focus
After replacing the table switch board, complete the table calibration, the CO2 and/or fiber focus calibration and the autofocus calibration. See Focus Calibrations.