Installing an SD card in the Fusion Galvo laser system is a crucial step for maintaining system functionality and ensuring smooth operation. This guide provides detailed, step-by-step instructions for safely removing and replacing the SD card, including necessary precautions such as using an anti-static bracelet to prevent damage. Additionally, it covers how to program the new SD card through the engraver’s display panel to complete the installation process. Following these guidelines will help users successfully replace and update their SD card while avoiding potential issues during setup.
SD Card Removal
-
Turn OFF engraver.
-
Disconnect from power.

-
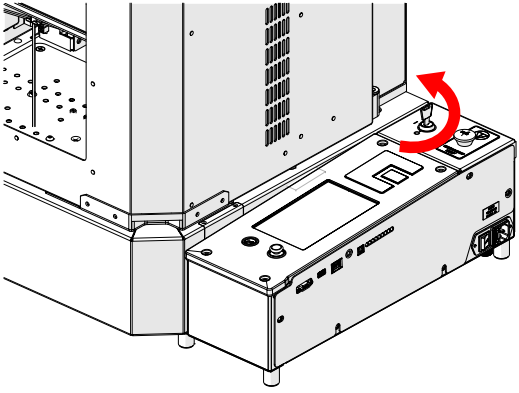
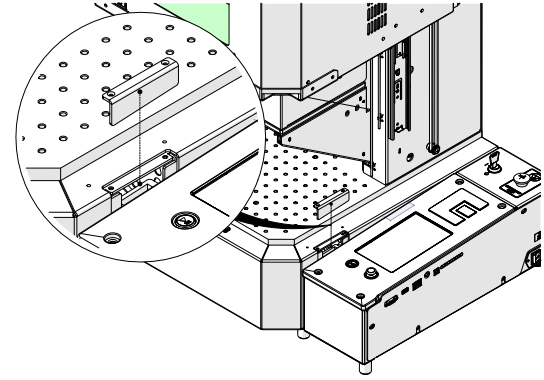
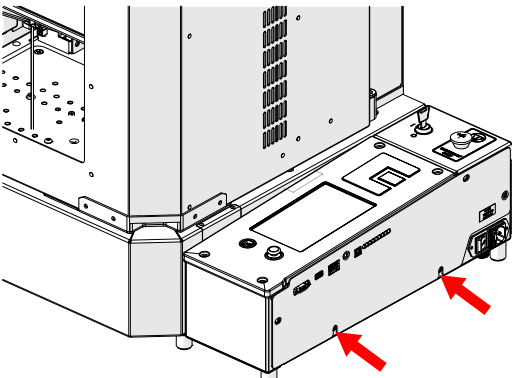
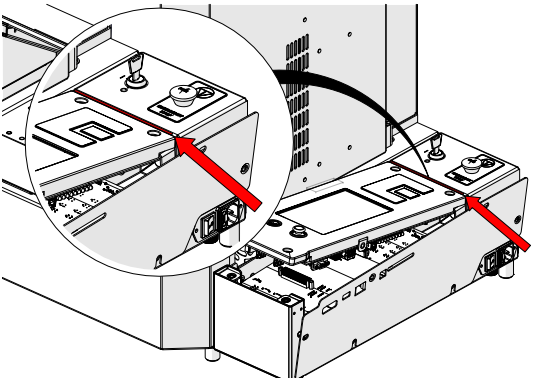
Locate door handles.
-
Open door.
-
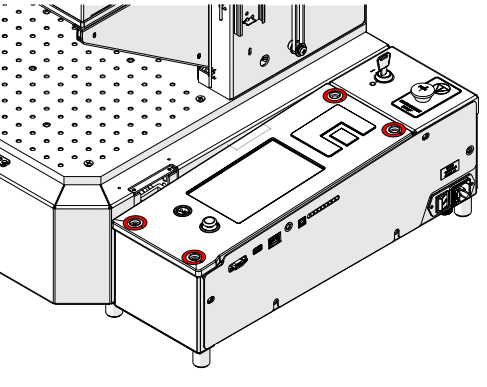
Loosen and remove.
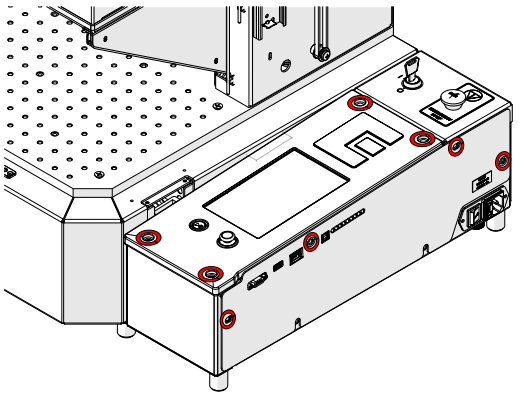 Note: Two of the control module mounting screws are longer than the others. These longer screws should be installed in the rear mounting positions to properly secure the top side of the control module.
 -
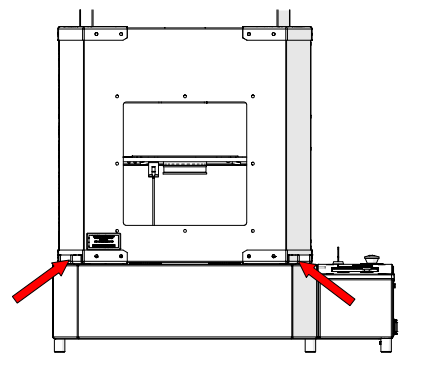
Loosen, but do not remove.
-
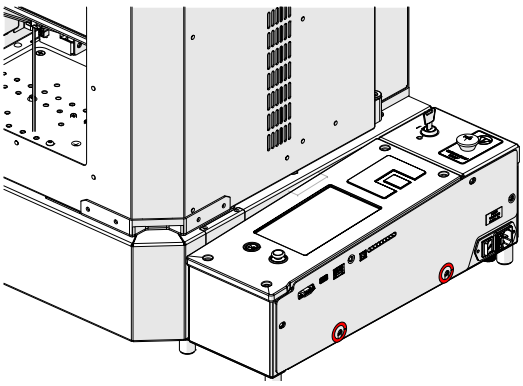
Loosen and remove.
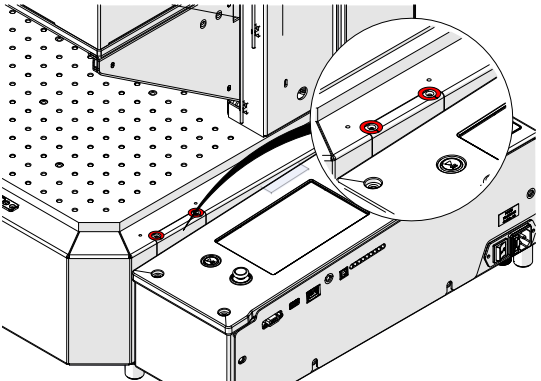
-
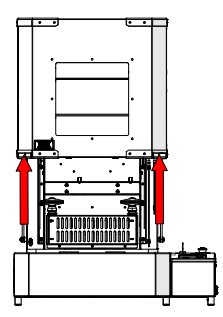
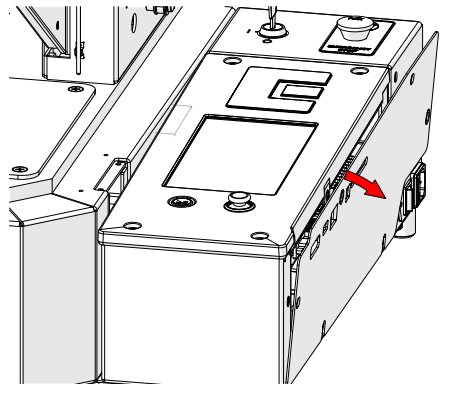
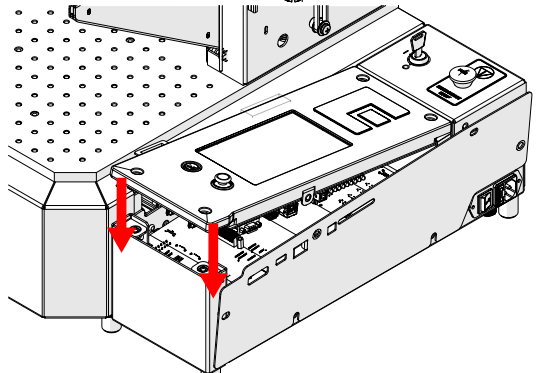
Remove cover.
-
Tilt away from engraver.
-
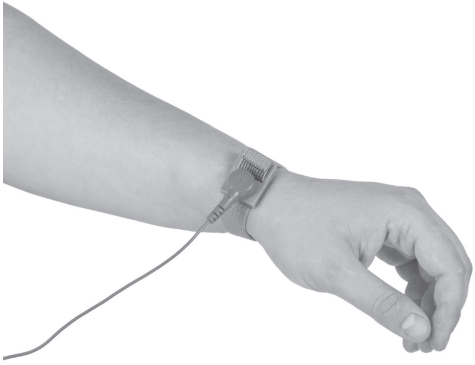
Place anti-static strap on wrist.
-
Attach anti-static strap clamp on side panel screw.
-
Gently lift control board and remove.

-
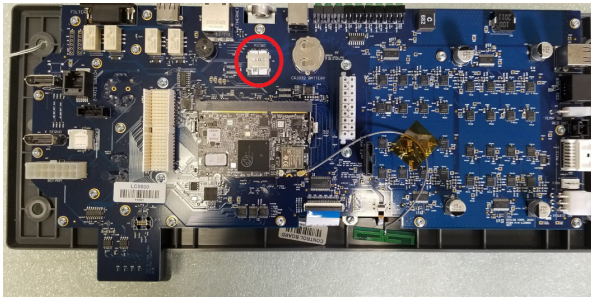
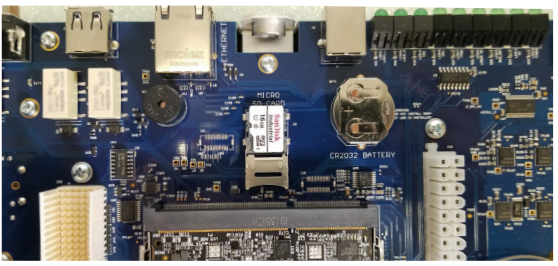
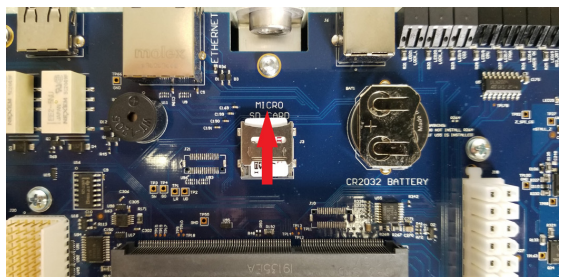
Flip control board over and locate SD card.
-
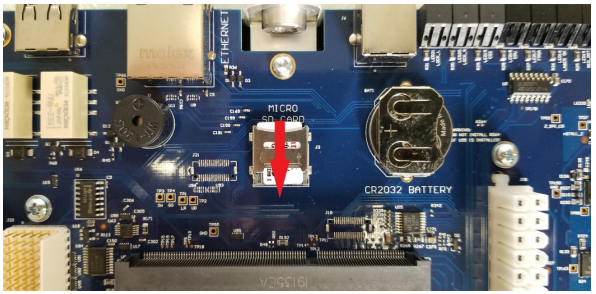
Slide SD card latch down to unlock. Carefully lift and remove SD card.
Installation
-
Insert replacement SD card.
 Note: Ensure the orientation of the SD card is correct. Copper terminals should face down towards the control board.
 -
Press down on the SD card latch and slide up to lock.
-
Align control board with engraver chassis.
-
Slowly press down to seat the control board connector.
-
Install with the two longer screws towards the rear and tighten.
-
Install and tighten.

-
Install cover.
-
Install and tighten.
-
Reconnect, and power ON.

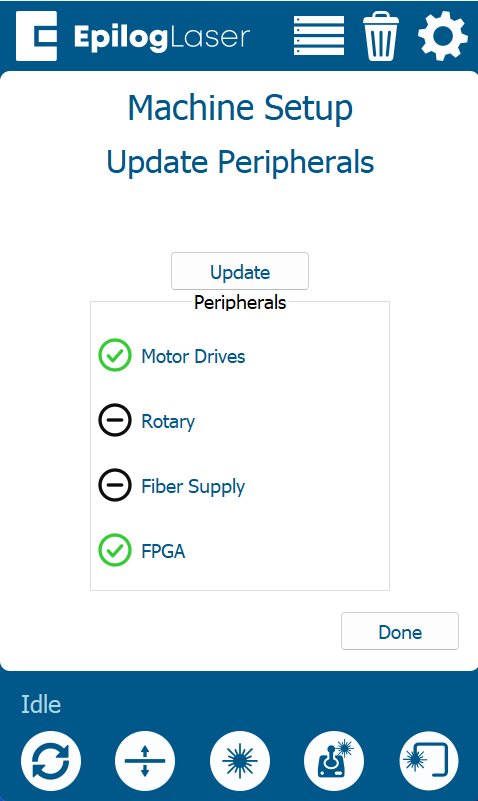
Programming the SD Card
-
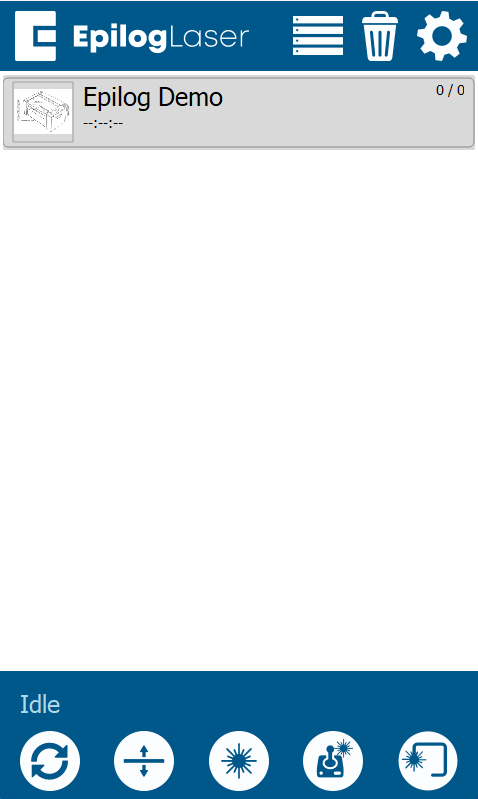
At the display panel, press the gear icon in the upper-right corner to open the Settings menu.
-
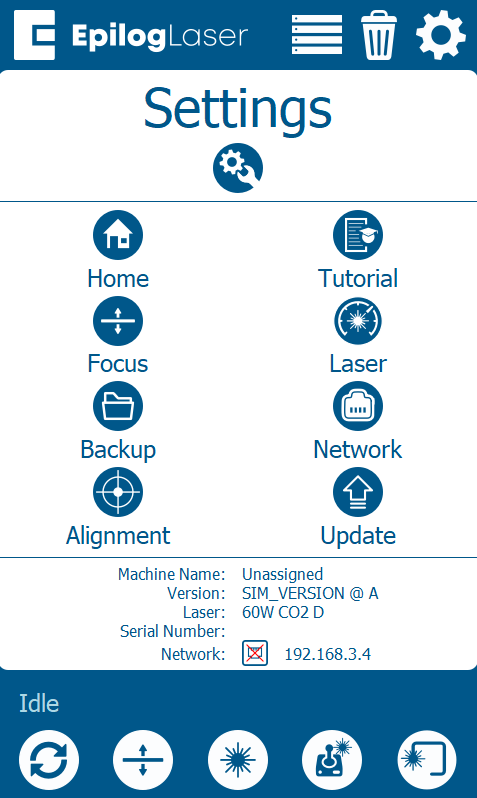
Press Update.
-
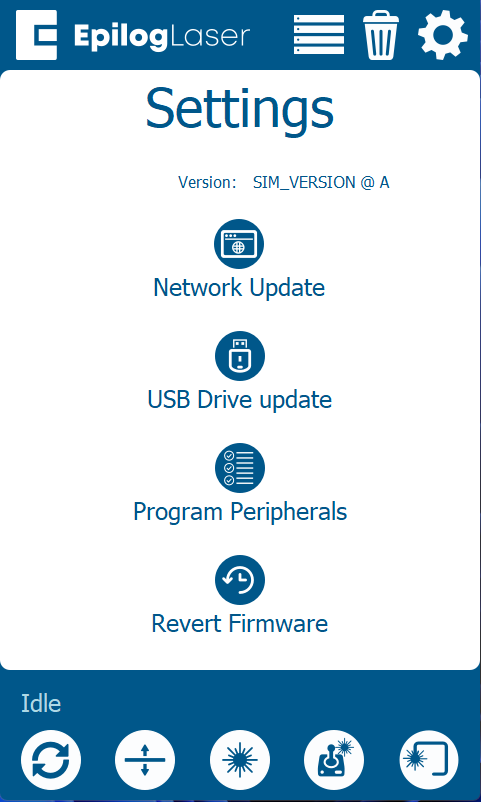
Press Program Peripherals.
-
Once in the Peripheral Update menu, select All Available Peripherals and press Update.
-
Allow the engraver to complete the update process.
Warning: Do not power off the engraver during the update. The screen may go dark temporarily—this is normal. Once the update is complete, the system will prompt you to restart the engraver.
-
When prompted, power cycle the engraver to complete the update.