
Estimated time: 10–15 minutes • Skill: Beginner
This procedure describes how to correctly adjust the top door bumpers so the top door interlocks remain fully engaged during machine operation. This adjustment should only be performed if the machine is reporting top-door interlock faults after verifying that the doors close properly.
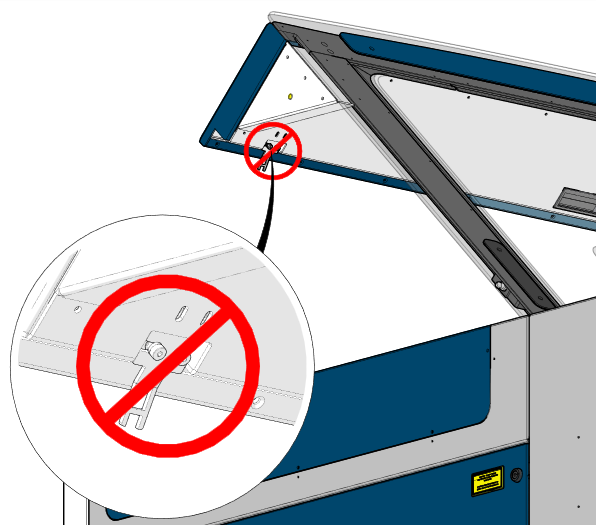
Important: Do not adjust the switch actuators inside their mounts. These are factory-set so the actuator tines enter the door safety interlock switches correctly. Changing this alignment can prevent the actuators from fitting properly into the switches.
Top Door Interlock Adjustment Procedure
-
Disconnect the machine.
Power the system off and unplug it from the power source before beginning any adjustments.
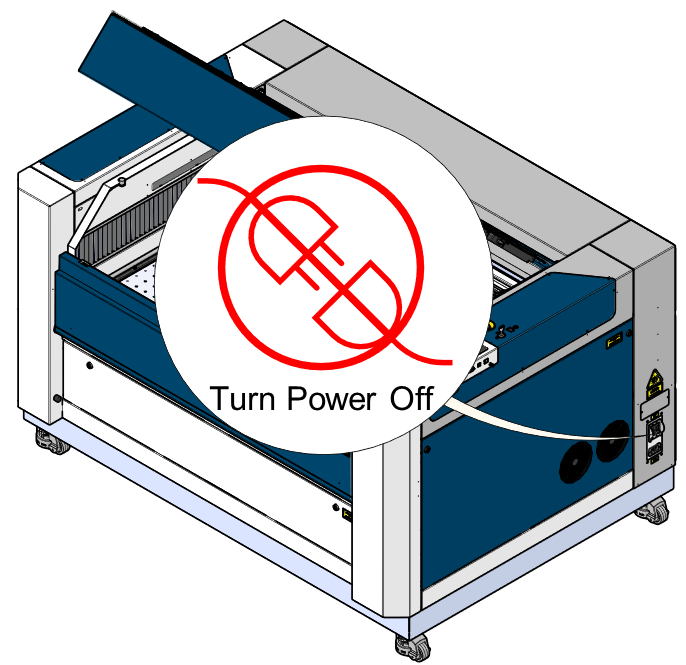
Figure 2: Machine powered off before performing adjustments. -
Open the top door.
Fully raise the top lid to access the upper interlock components.
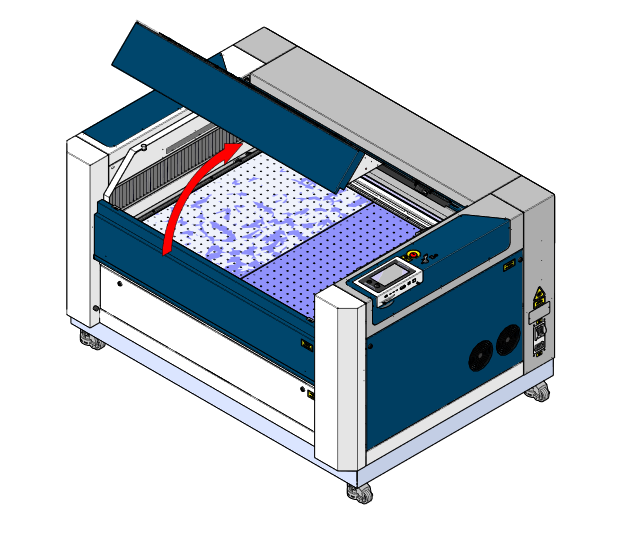
Figure 3: Top door fully opened for access to interlock components. -
Open the drop-down front door.
This exposes the two top-door interlock switches mounted to the door panel.
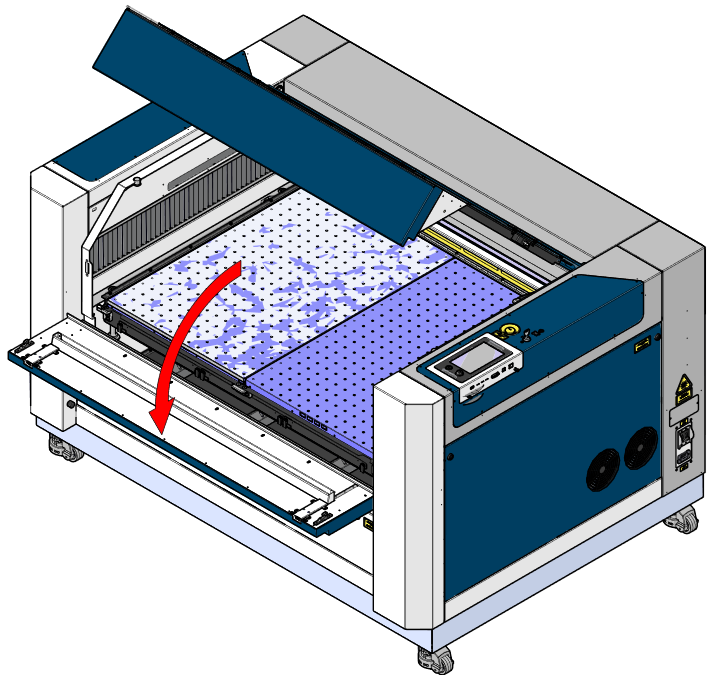
Figure 4: Front door opened revealing interlock switches. -
Locate both top-door interlock switches.
The switches are positioned on the inside surface of the drop-down front door.
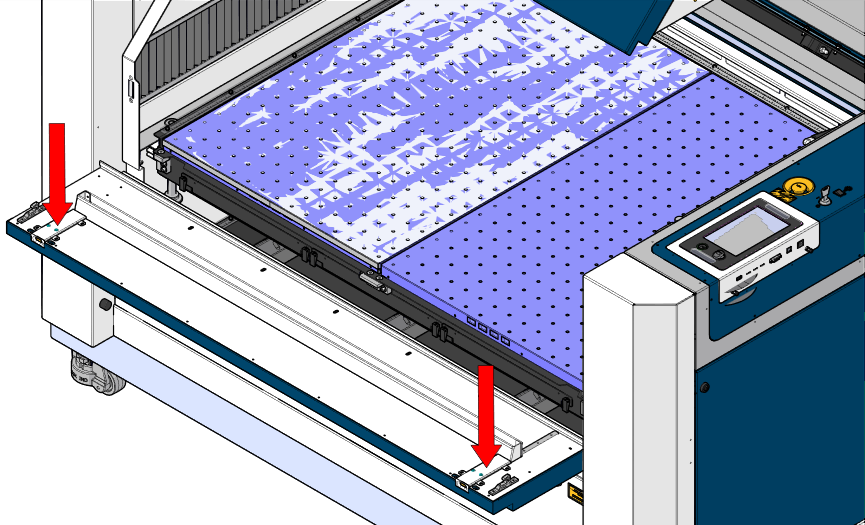
Figure 5: Location of the top door interlock switches. -
Loosen the four mounting screws.
Loosen—but do not remove—the screws that secure the interlock mounting plate. This allows the plate to slide upward.
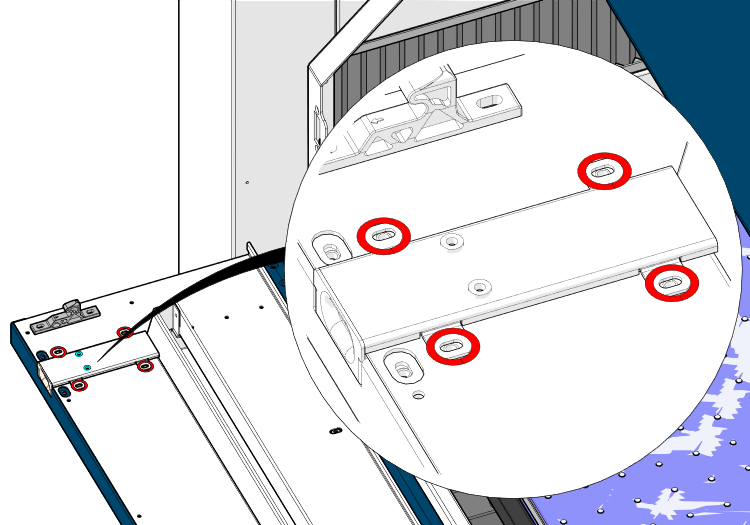
Figure 6: Loosening the interlock mounting screws. -
Raise the interlock mounting plate.
Move the plate as high as possible within the available adjustment range. Two screws located inside the switch body limit movement, so the plate may only shift a small amount.

Figure 7: Raising the interlock mounting plate. -
Tighten the mounting screws.
Once the plate is positioned as high as it will go, tighten the screws to lock it in place.
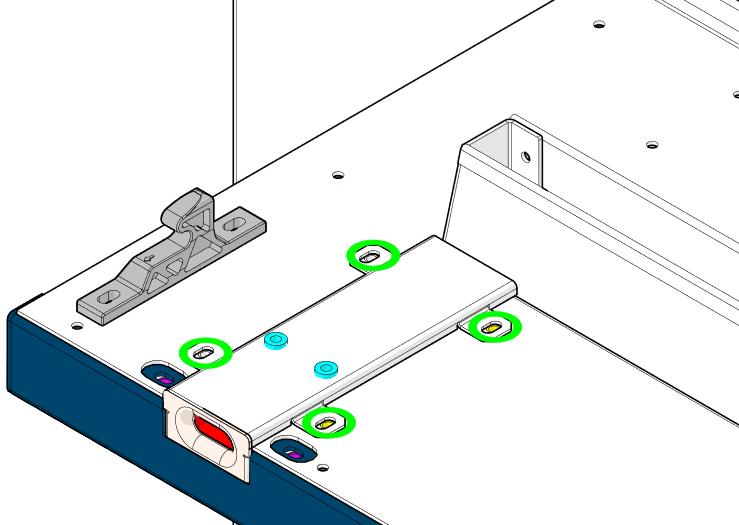
Figure 8: Tightening the interlock plate screws. -
Locate the top-door bumpers and brackets.
Two rubber bumpers (one on each side) support the top door when closed. These must be adjusted so the interlocks close properly.
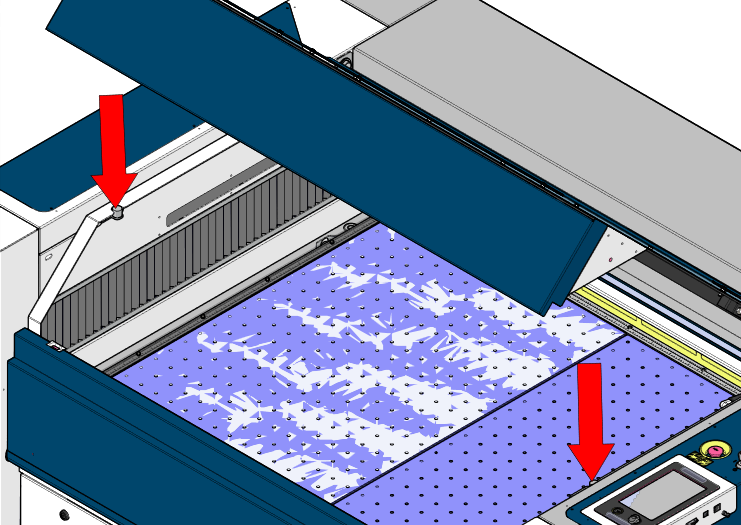
Figure 9: Door bumper location inside the cabinet. -
Loosen the bumper bracket nuts.
Loosen the nuts securing each bumper bracket by 1/4 to 1/2 turn. They should be snug but not tight, allowing the bracket to shift.
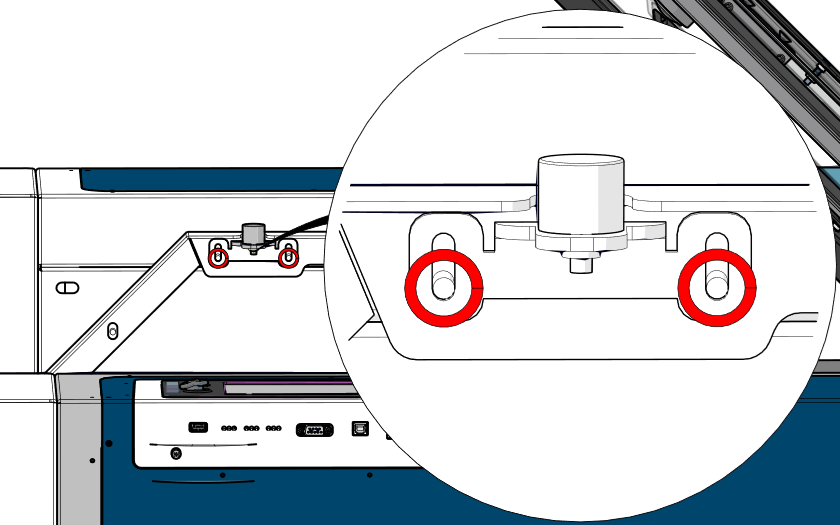
Figure 10: Loosening the door support bracket nuts. -
Lower the top door to set the bumpers.
Slowly close the top door. As it approaches the closed position, the interlock switches will click—this indicates proper switch engagement.
Stop at the click, then reopen the door. This motion forces the bumper brackets into their correct alignment. -
Tighten the bumper brackets.
Once the brackets are aligned, fully tighten both bumper bracket nuts on each side.
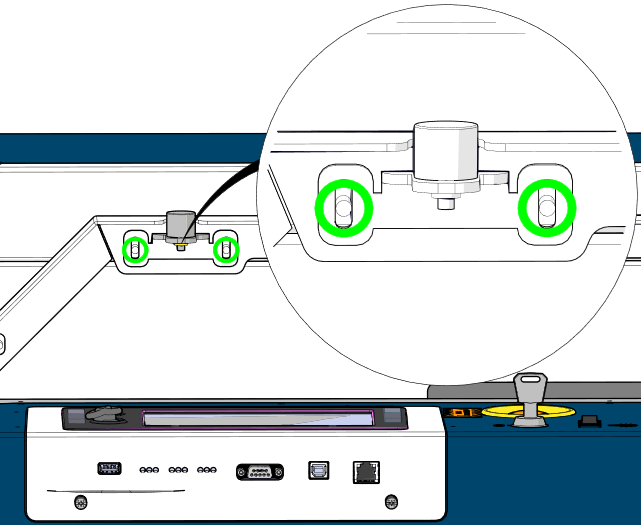
Figure 11: Lowering the top door to position the bumpers. -
Close all doors.
Close the top door and front door completely.
-
Reconnect the machine to power.
Restore power and verify that the top door interlocks engage correctly during operation.
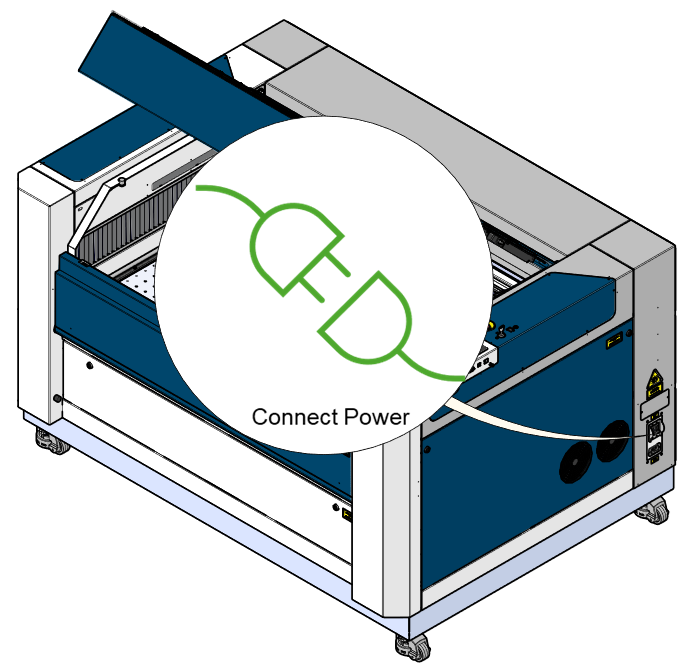
Figure 12: Reconnect the machine to power.
