
We’re going to walk you through replacing the Laser Tube on the Fusion Edge & Fusion Pro.
Remove Panels
Shut off the laser and remove the power cord from the machine.
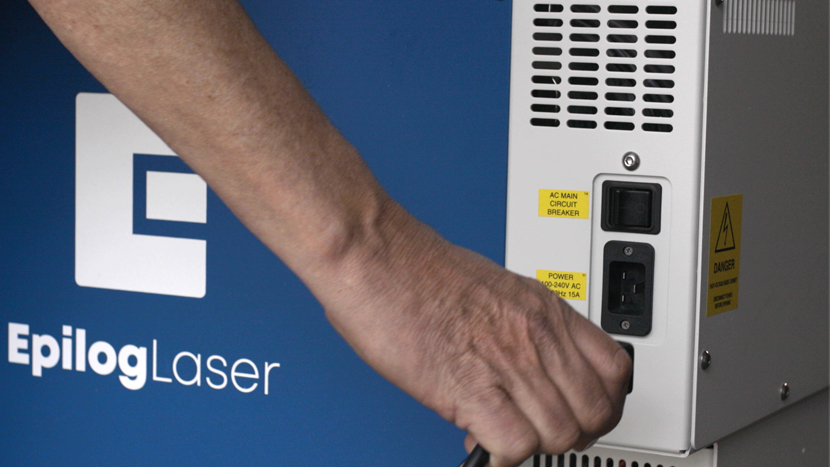
For this procedure you will need access to the back of the machine.
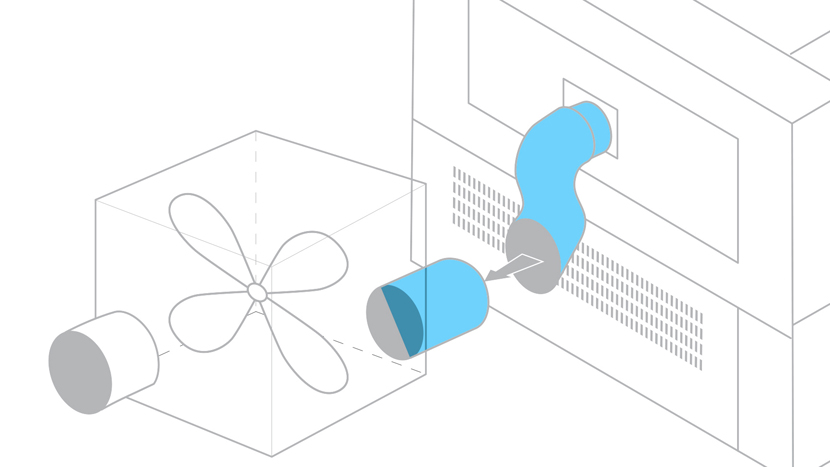
Disconnect all exhaust system hoses from the rear of the machine.
Using a 5/32” hex key, remove the screws that secure the rear panel of the machine.
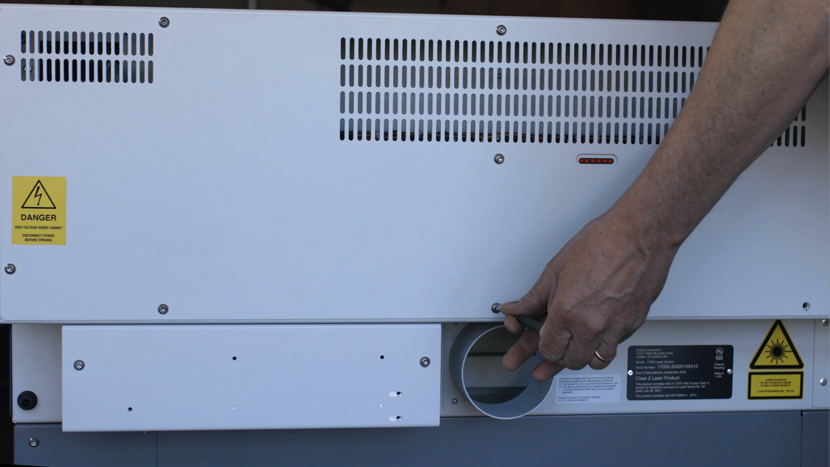
The Fusion Edge and Fusion Pro have 9 Screws on the rear panel of the machine
Then remove the screws from the optics housing cover to the right of the rear panel.
Both the Fusion Edge & The Fusion Pro have 4 screws
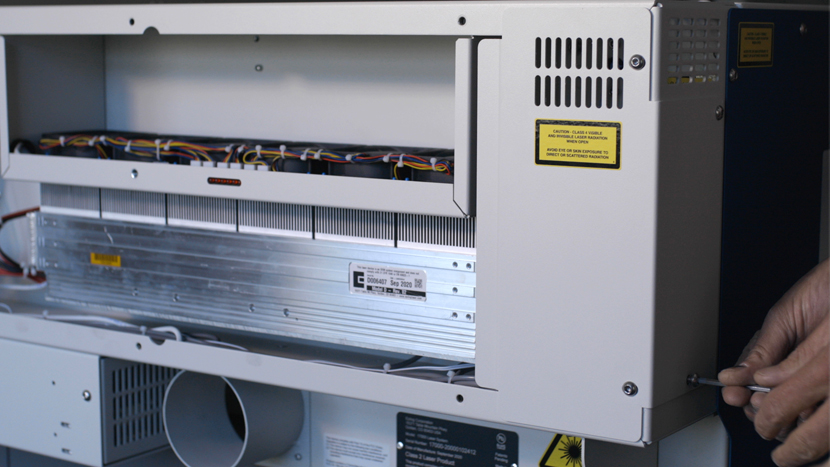
When both panels are removed, locate the laser tube assembly.

Remove Old Laser Tube
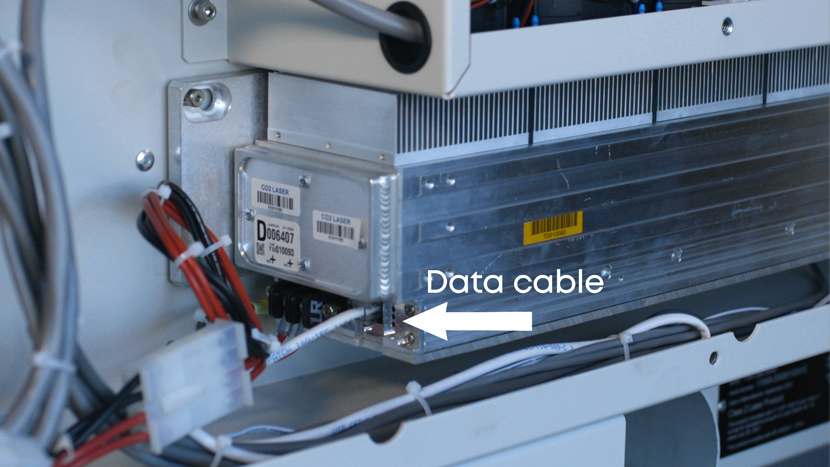
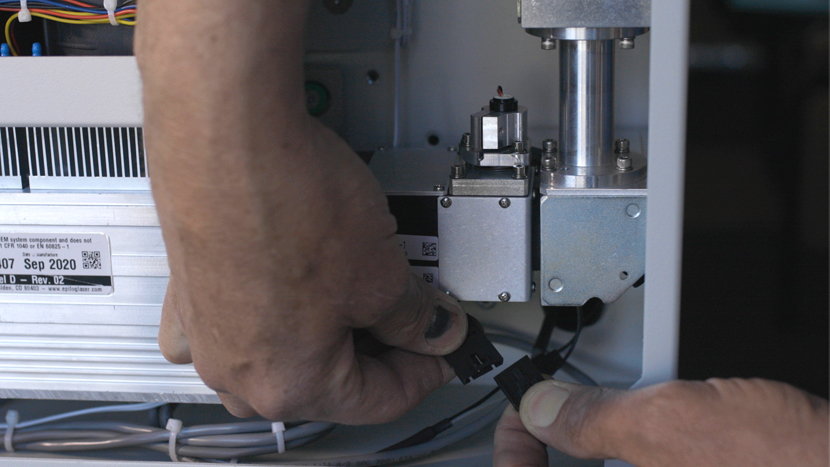
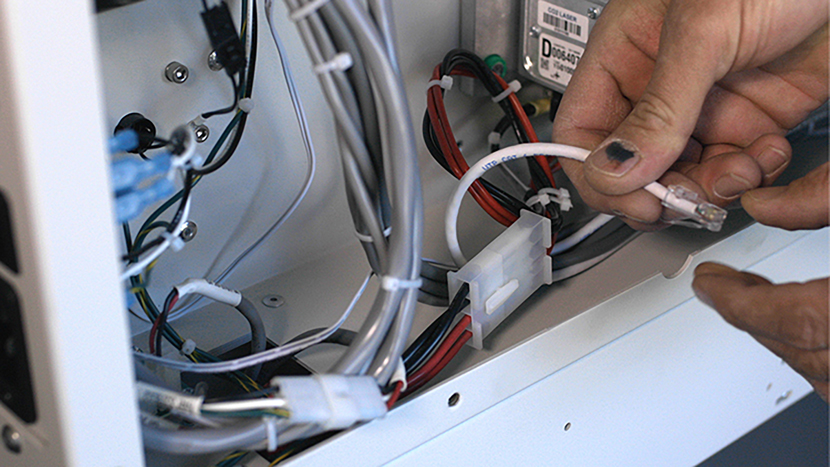
Now disconnect the power and data connections on the left-hand side of the laser assembly. The data cable is a small grey cable that resembles an ethernet cable. Depress the small tab at the bottom and the cable can be removed from the laser assembly.
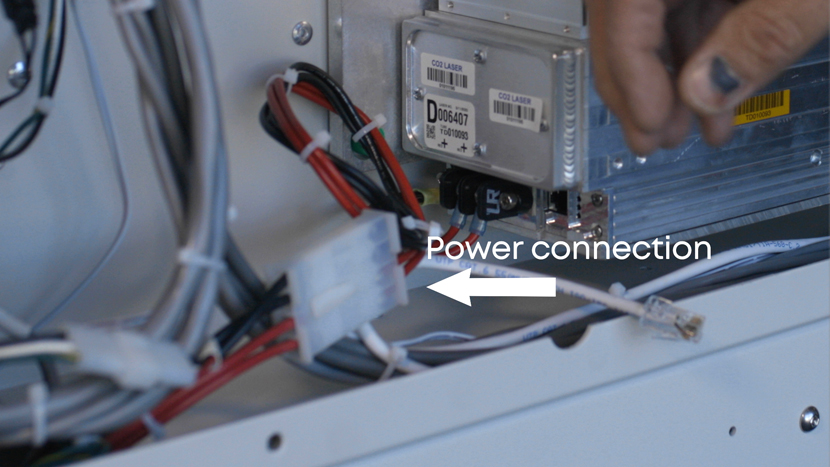
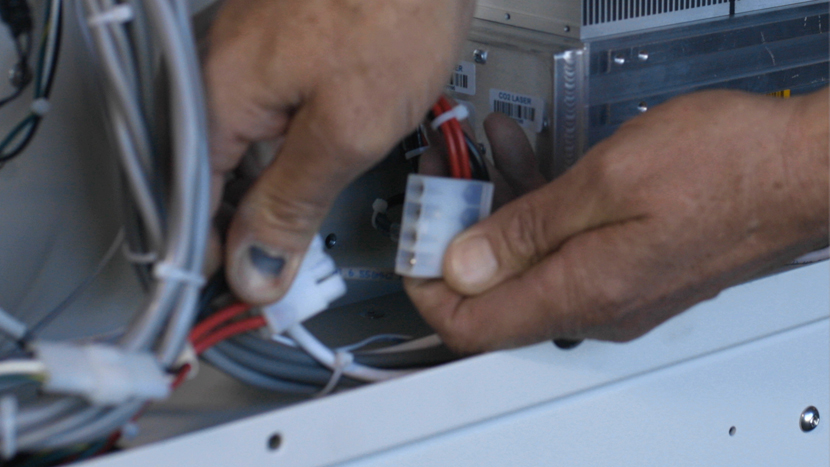
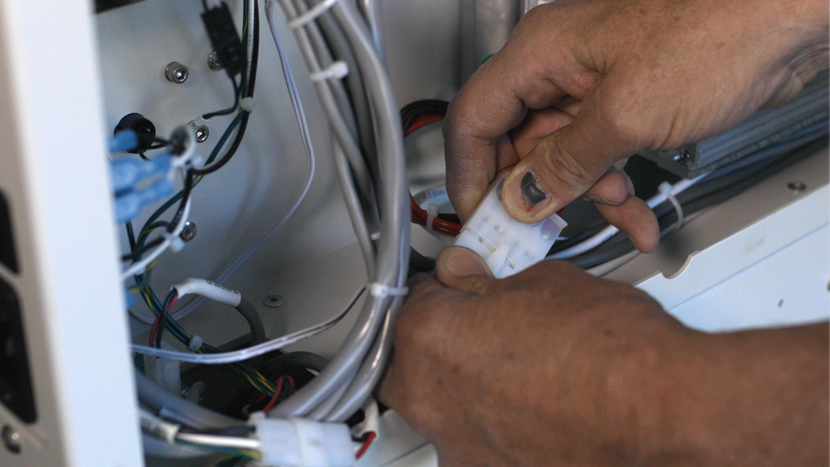
Locate the red and black wires coming from the laser. Part way down the wires, there is a large white connector. One side of the connector has a lock on it. Depress the lock and pull the two sides of the connector apart.
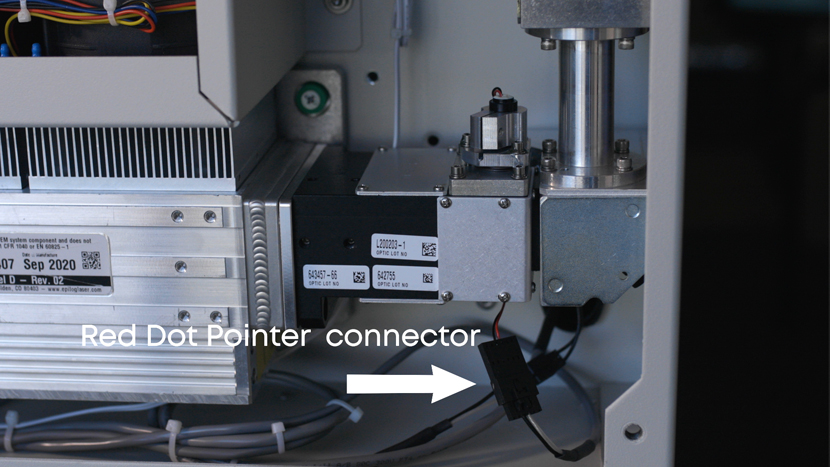
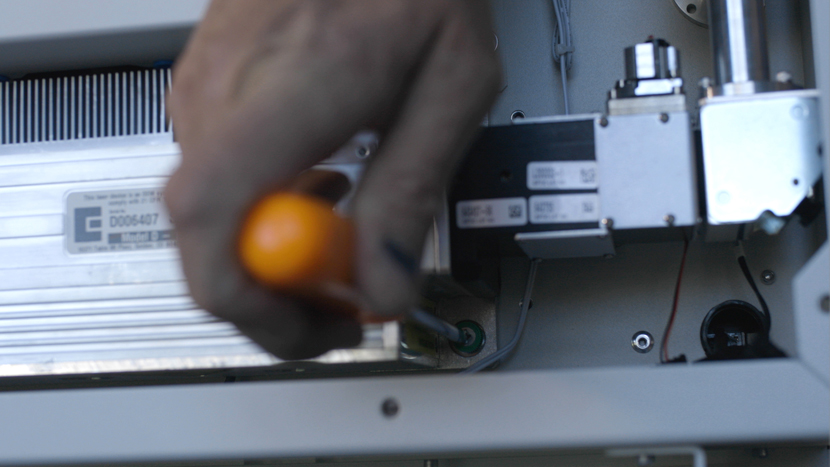
Move to the right-hand side of the laser assembly and locate the red dot pointer power wires. Follow the wires back to the black connector. These wires are routed behind the laser assembly. This connector also has a lock on it, depress the lock and gently pull apart the two halves of the connector.
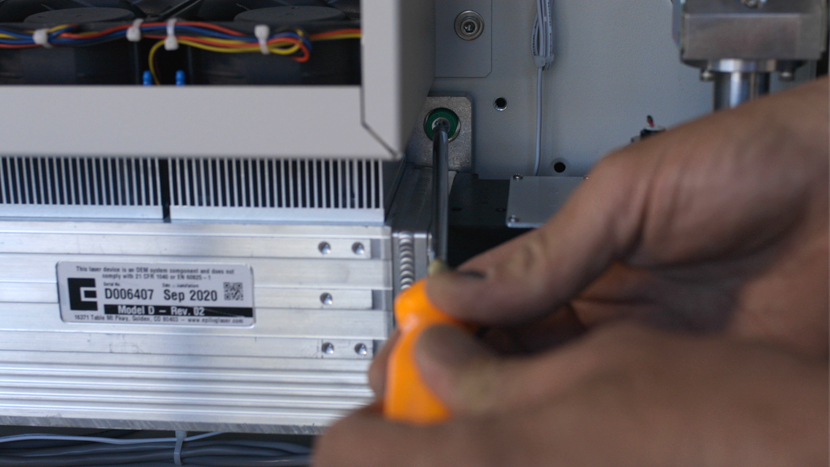
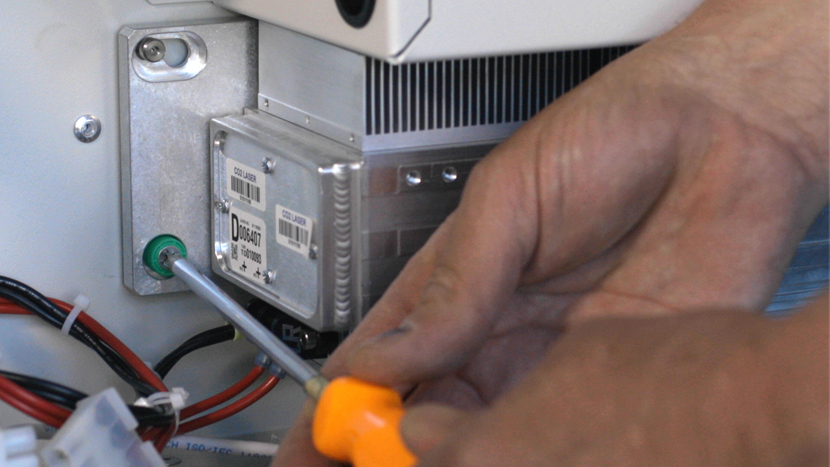
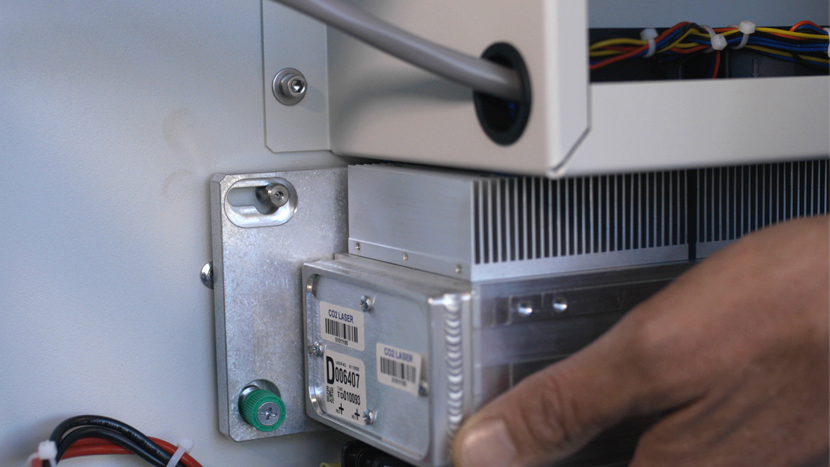
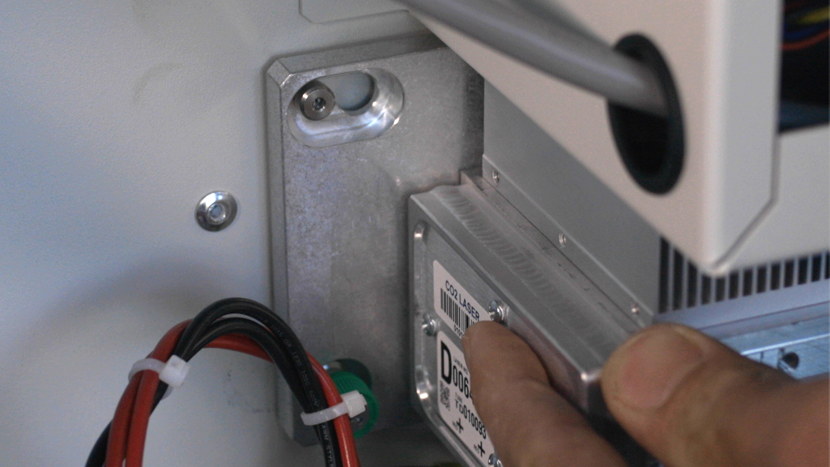
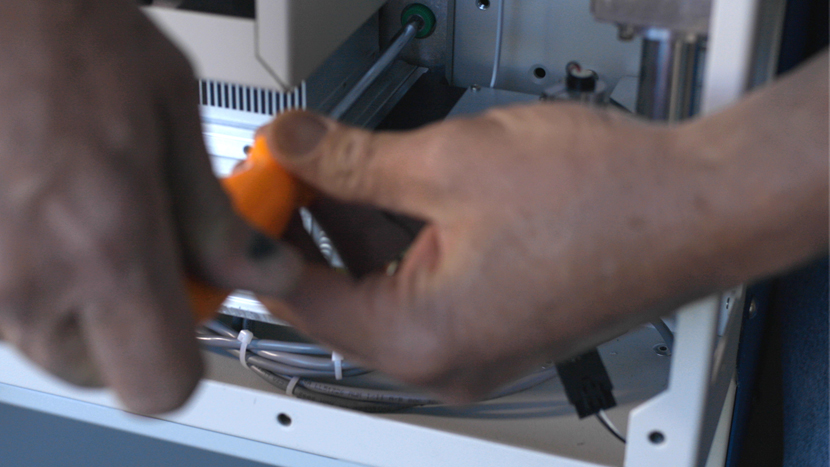
Using the #1 Phillips screwdriver, loosen the 3 Green captured screws that secure the laser to the machine’s chassis. Two are located at the front of the laser tube, and one is located at the rear.
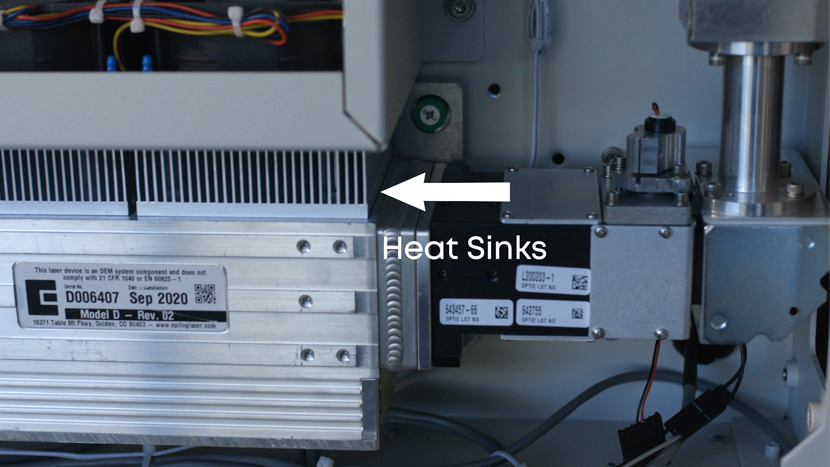
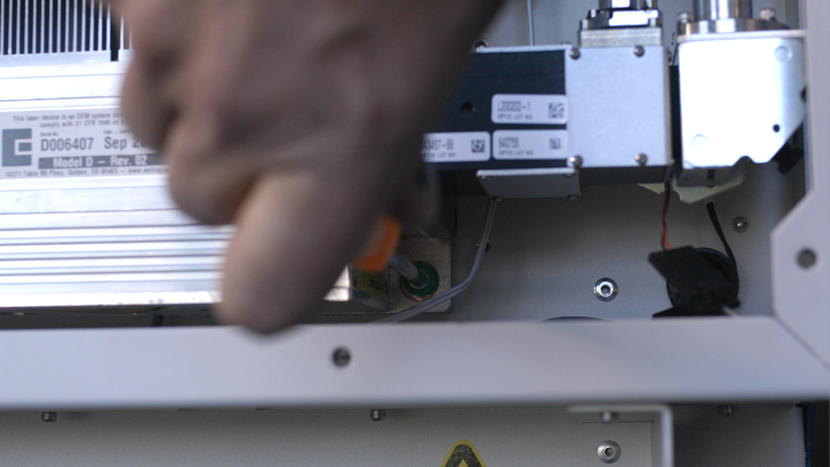
Once the captive screws are loose, the laser needs to be moved to the left so the socket head screw, set into the machine’s chassis, can clear the opening in the laser mount. There is a socket head screw at each end of the laser. The one in the front is hidden by the lasers heat sinks. The heat sinks are the fins at the top of the laser.
Once the laser is moved to the left, lift it a little to clear the screwhead, and pull the laser toward you to remove the laser from the machine.
With the old laser tube removed, now we’re ready to install the new laser tube into the machine.
Install New Laser Tube
Place the laser into the machines chassis so that its positioned over the Cap screws in the chassis. Keep in mind that there is also a cap screw at the front that is hidden behind the lasers heat sink.

Slide the laser to the right as far as it will go and tighten the Green captive screws to secure the laser to the machine’s chassis.
At the right-hand side of the laser, reconnect the Red Dot Pointer wiring harness.
At the left-hand side of the laser tube, reconnect the data cable and power harness to complete the laser tube installation.

Once the laser is installed, a laser alignment must be performed to obtain maximum performance from your machine.

