In this lesson, we'll unpack the Mini and Helix machines.
Mini
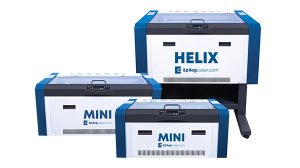
We’ll begin with the Epilog Mini.
Start by using scissors or a utility knife to cut the box straps. Stand clear of the straps, as they may pop out at high speed when cut.

Then remove the strapping and the wooden box topper.

Next, cut the tape securing the box closed, open the box and remove the cardboard topper with attached foam inserts.


Cut the tape holding the bag closed and spread the bag over the sides of the box.


The Mini 18 and Mini 24 range in weight from 70 lbs. to 90 lbs.
With the help of an additional person, lift your Mini laser system out of the box and place it on a sturdy level surface.

Make sure not to discard the packaging material at this time.

Open your Mini laser system’s top door, and remove the included items from the cabinet, then open the box of included items.

Mini Included Items

Your Mini laser system includes:
- A Power cord
- Ethernet cord
- USB cord
- Air Assist Tube
- Lens Cleaner
- Laser Beam Alignment Target
- Driver CD Disc
- Quick Start Guide
- Owner’s Manual
- Training Site Signup Card & Kit
- Vendor Material Kit (Note: Material samples may vary)
Helix
If you have an Epilog Helix, this part is slightly different.
Cut the box straps.

Remove the wooden box topper, then also remove the cardboard box.


Then remove the top foam pads and the four wood and foam corner supports.

Remove the plastic bag, then cut and remove the plastic wrapping.


Unscrew and remove the raised wooden edge located on one side of the pallet.


Remove the wheel ramps from underneath the machine.

Make sure all four wheels are in the locked position.

Lift the Helix on one side and remove the foam padding underneath.

Lift the Helix on the other side and remove the rest of the foam padding.

Affix the ramps to the side of the pallet by inserting the metal edges into the slits located where the wooden edge used to be. Make sure the ramps are aligned with the wheels.


Unlock all four wheels.

Wheel the Helix off the pallet and down the ramps. Be sure to pull the machine, not push.