Occasionally, you may send a job to the Epilog Dashboard and the artwork does not appear in the work area or the preview thumbnail, and the run time shows as 0:00. This is generally caused by selecting the incorrect printing orientation or by selecting an incorrect page size in the print dialog box. In most cases, the artwork did transfer into the Dashboard but at the incorrect location.
In this article, we will demonstrate the proper software setup from CorelDRAW and Adobe Illustrator, as well as some general settings to check when using other third-party graphic design software.
Explanation of the Symptoms
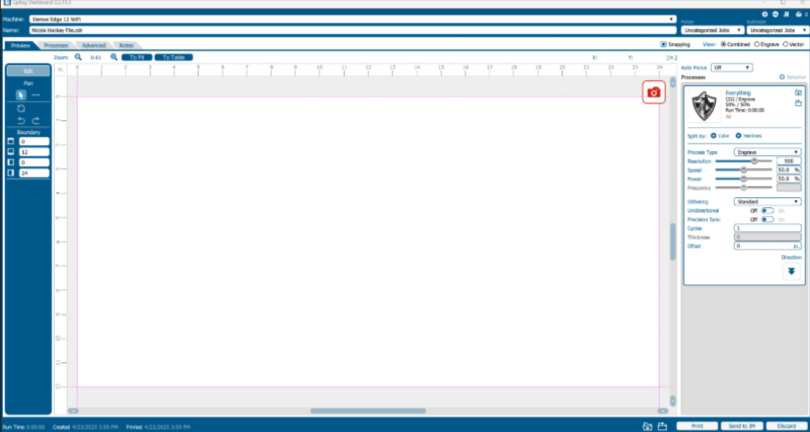
When encountering this issue, you may see something similar to the image below—here we can see the artwork in the preview thumbnail, but the artwork does not appear in the work area:
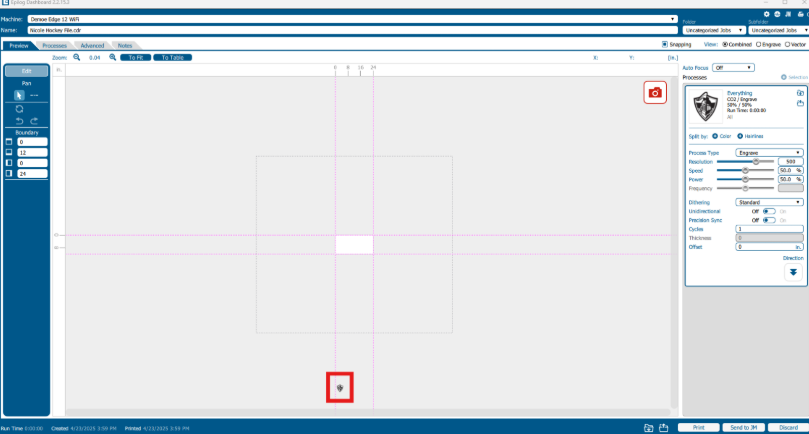
However, if zoomed out, we can see that the artwork did transfer to the Dashboard, but was placed far outside of the work area:
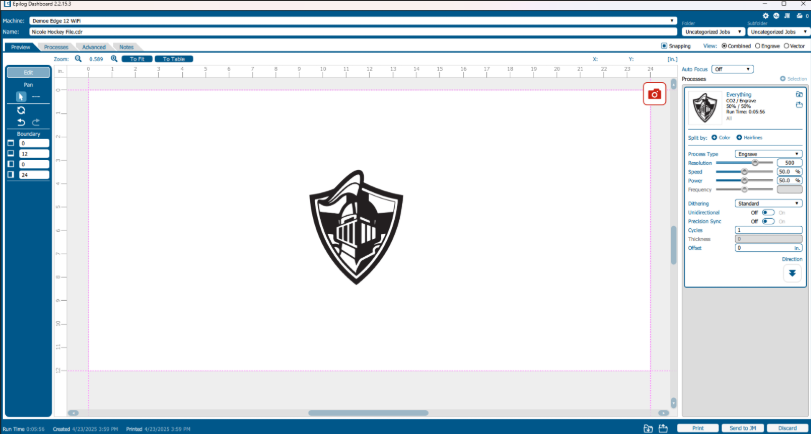
A quick way to fix this issue is to select the artwork and drag it into the work area:

After dragging the artwork into the work area, you can place the artwork where it is needed for your application, edit the job settings, and send it to the engraver:
CorelDRAW
1. Open CorelDRAW
2. Select Tools > Options > Global > Printing > Printer Compatibility
3. Select Epilog Engraver as the printer and check “Printer can match document page sizes”
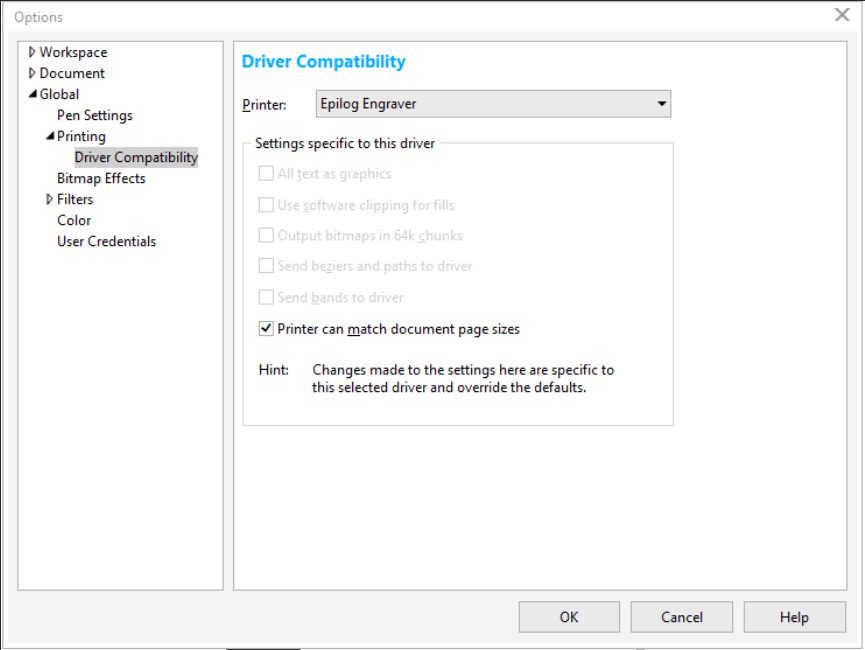
4. Select OK
5. When printing, choose Epilog Engraver as the printer and select:
- Match orientation and size (Custom, Portrait) OR
- Match orientation and size (Custom, Landscape)
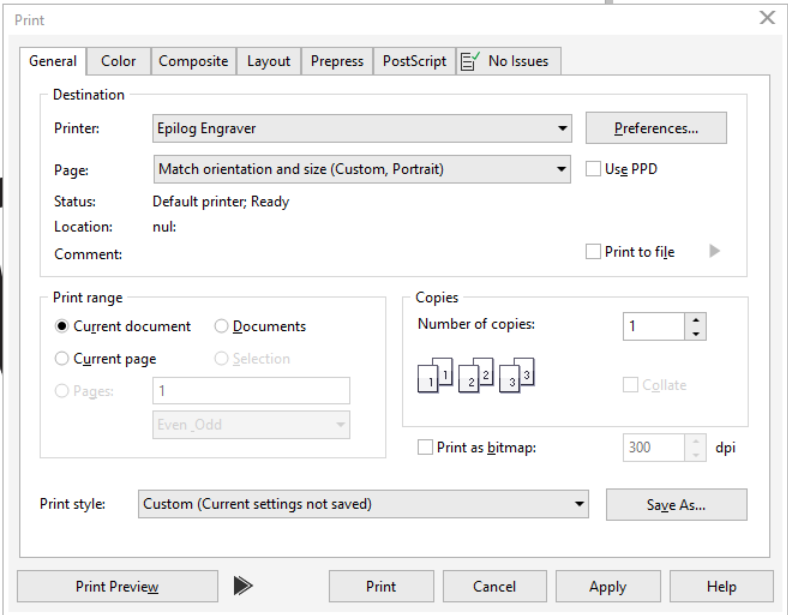
6. Select Apply to save these as the default print settings
7. Click Print to send the job to the Epilog Dashboard
Adobe Illustrator
1. When printing, select Epilog Engraver as the printer and choose Media Size “Custom”
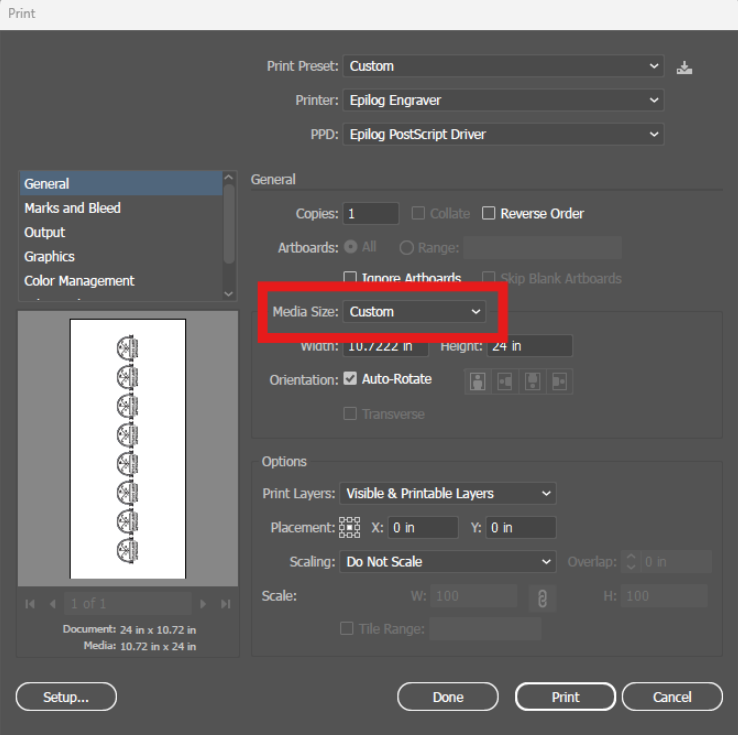
In some cases, Illustrator may display the print preview with the wrong orientation. This is usually safe to ignore—the artwork will appear correctly in the Epilog Dashboard as it was laid out in the design file.
Other Software Packages
The following steps provide a general way to access postscript page size settings. Your software may differ, so consult the documentation or support team for more help:
Select: Printer properties > Layout > Advanced > Paper Size > PostScript Custom Page Size
- Set correct height and width of page
- Click OK