To create a direct Ethernet connection to your Epilog laser, you will need to assign a static IP address to your computer. The TCP/IP port address you set on the PC is not the same as the laser’s IP address. This guide explains how to configure the TCP/IPv4 settings on Windows 10.
TCP/IP Port Setup
-
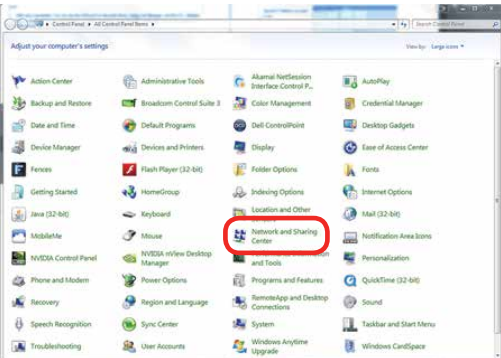
Open Network and Sharing Center from the Control Panel.
-
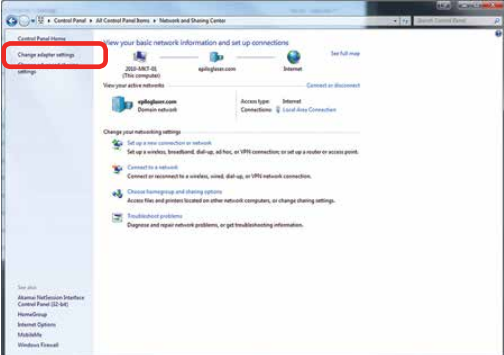
Click Change adapter settings.
-
Right-click the Local Area Connection (or the connection labeled Unidentified Network) and choose Properties.
Note: If you see multiple adapters, unplug and replug the Ethernet cable to identify the laser’s connection.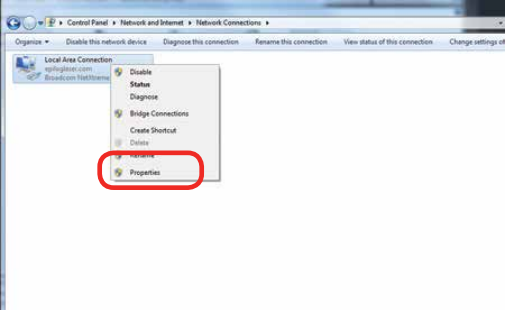
-
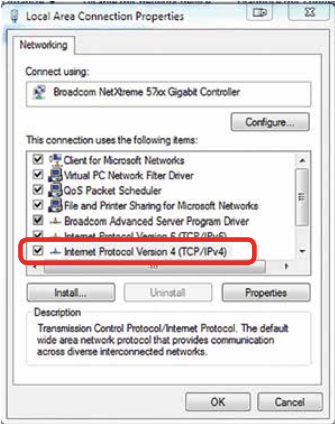
Select Internet Protocol Version 4 (TCP/IPv4) and click Properties.
-
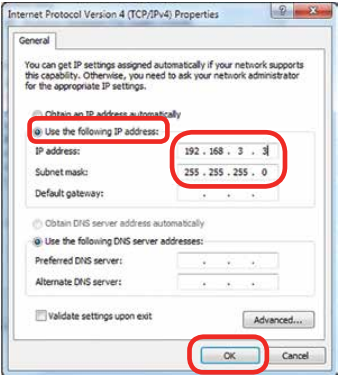
Choose Use the following IP address and enter 192.168.3.3 as the IP address.
Note: The final octet must differ from the laser’s IP address—this is intentional. -
Set the Subnet mask to 255.255.255.0, then click OK to save the settings.