
In deze handleiding vind je stapsgewijze technische instructies voor het vervangen van de luchtgestuurde magneetklep op je Ascent-lasersysteem.
Veiligheid gaat voor alles: Zorg ervoor dat het lasersysteem volledig is uitgeschakeld en dat de stekker uit het stopcontact is gehaald voordat je interne elektronische onderdelen aanraakt of loskoppelt. Raak geen blootliggende onderdelen van de voeding aan.
Hoe je het verwijdert
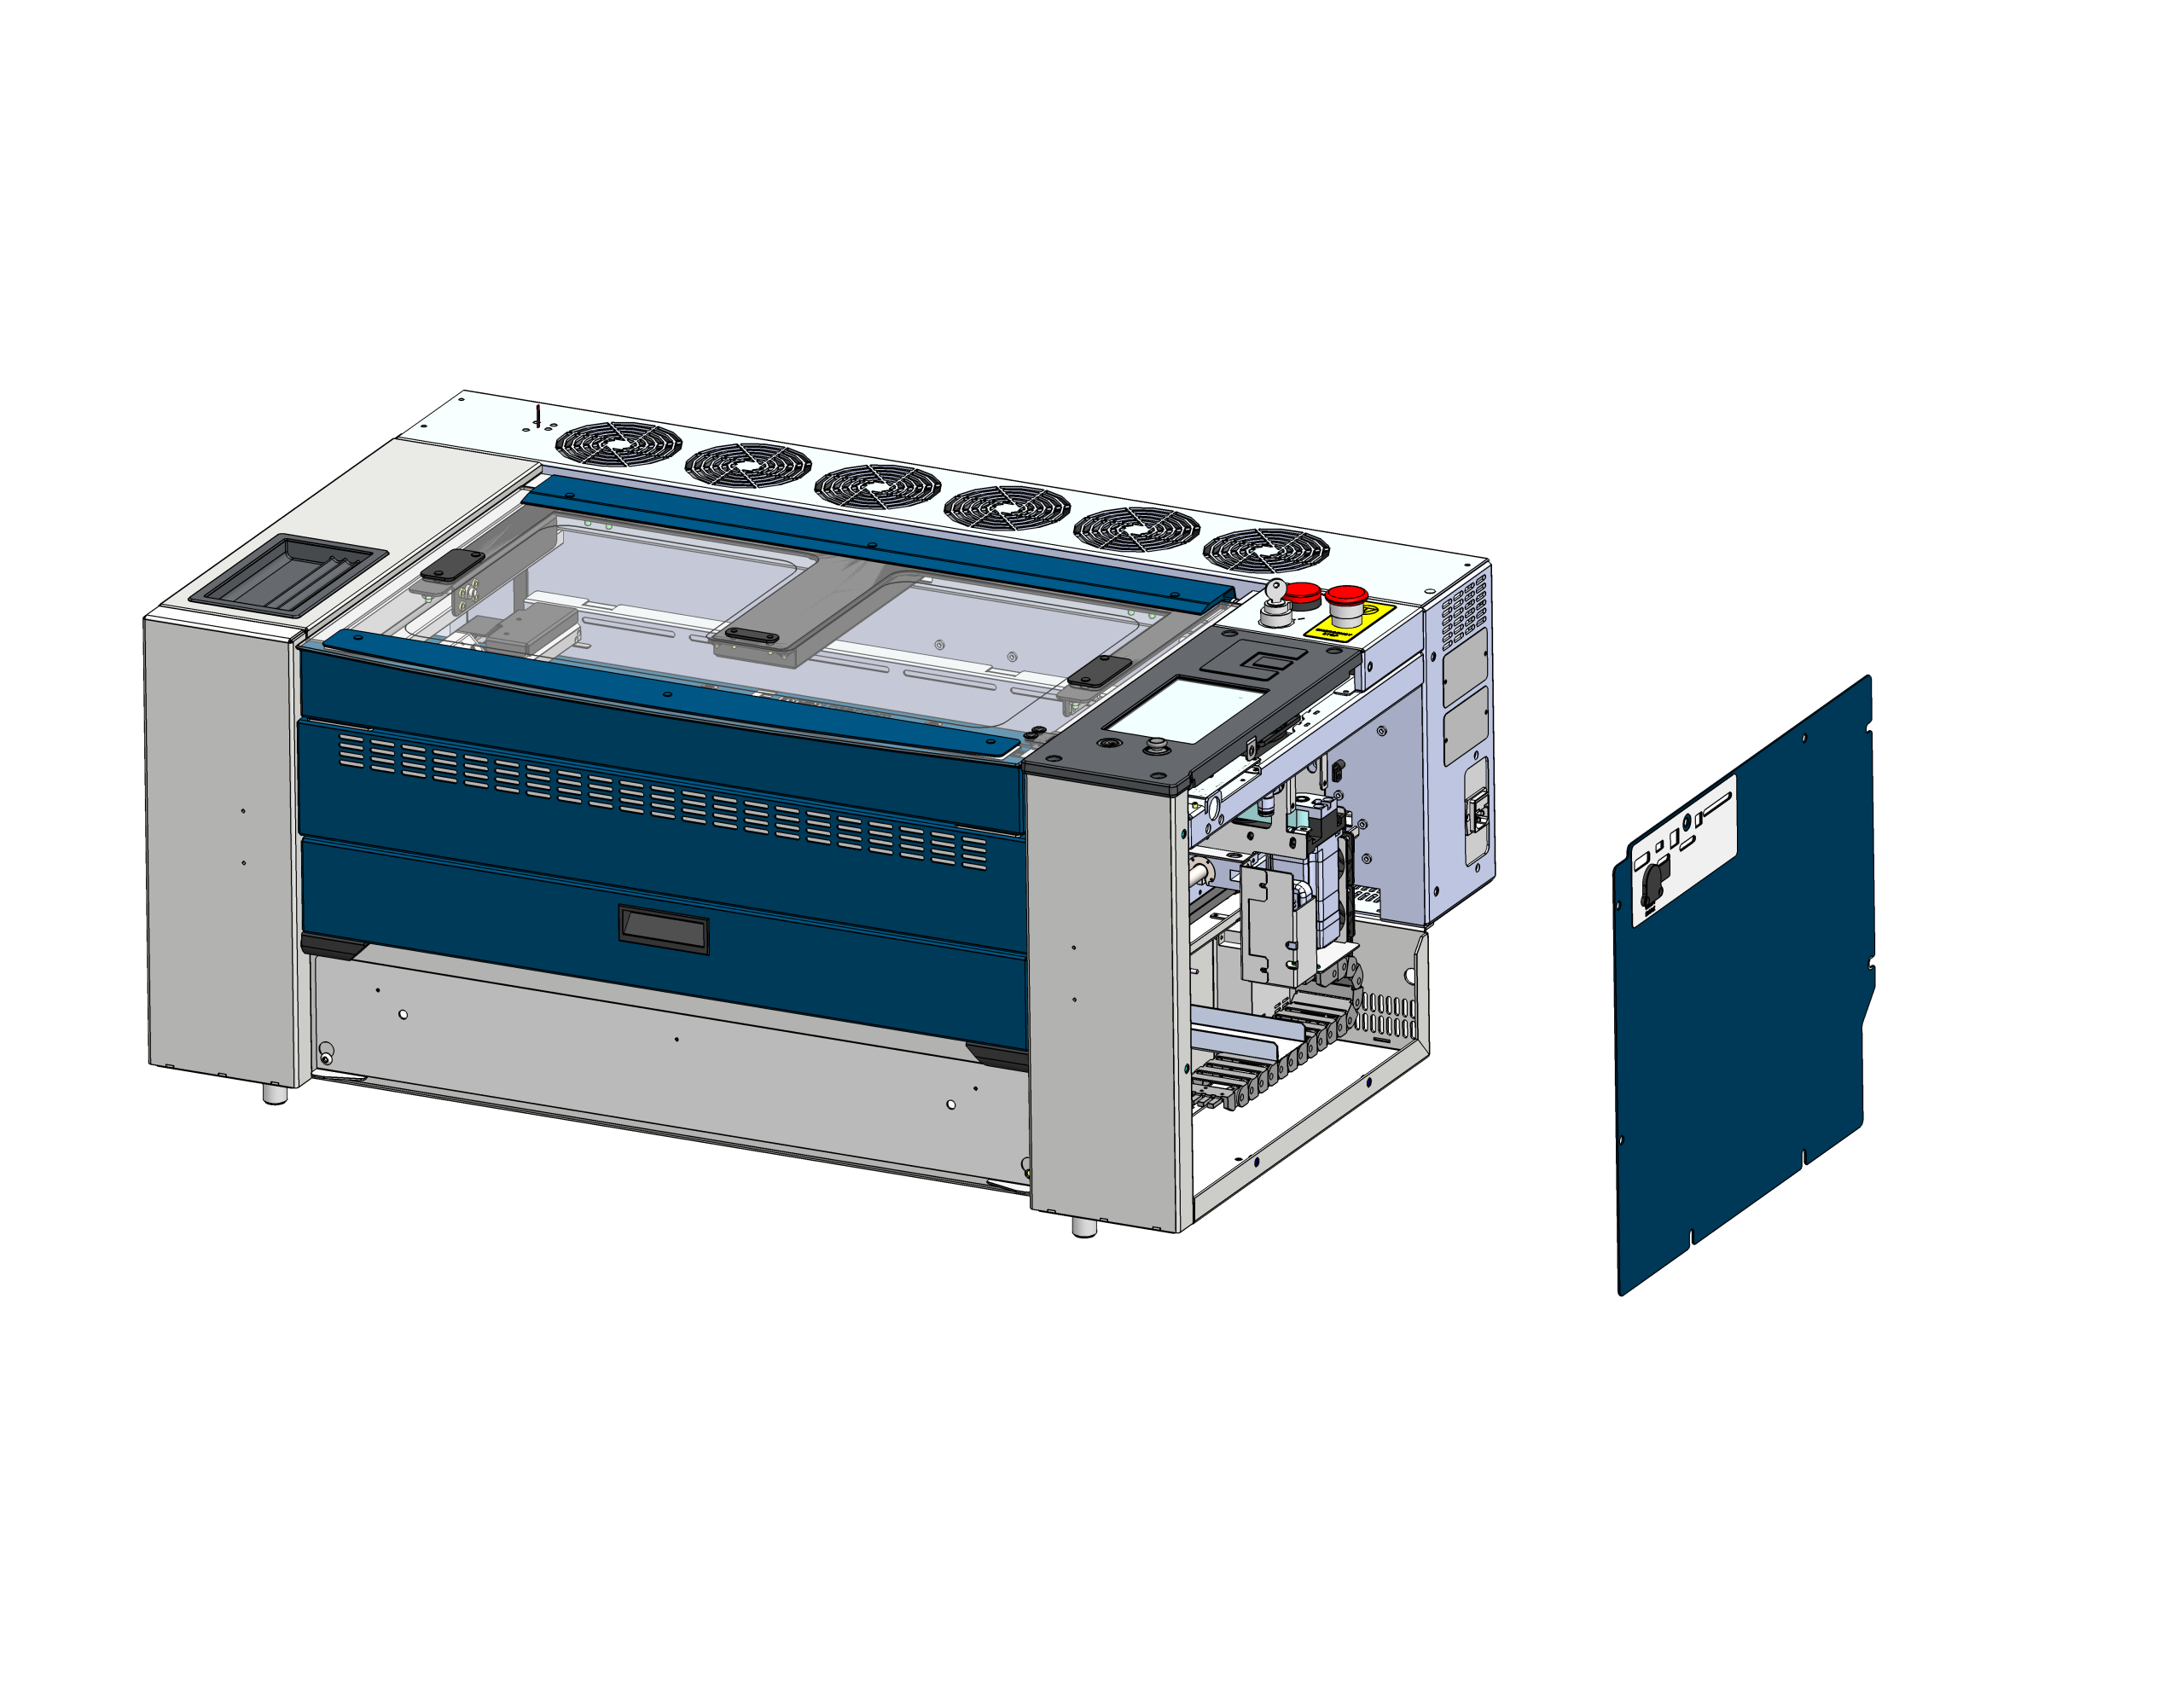
Paneel verwijderen
Zoek het rechter zijpaneel van het laserchassis en haal het eraf.
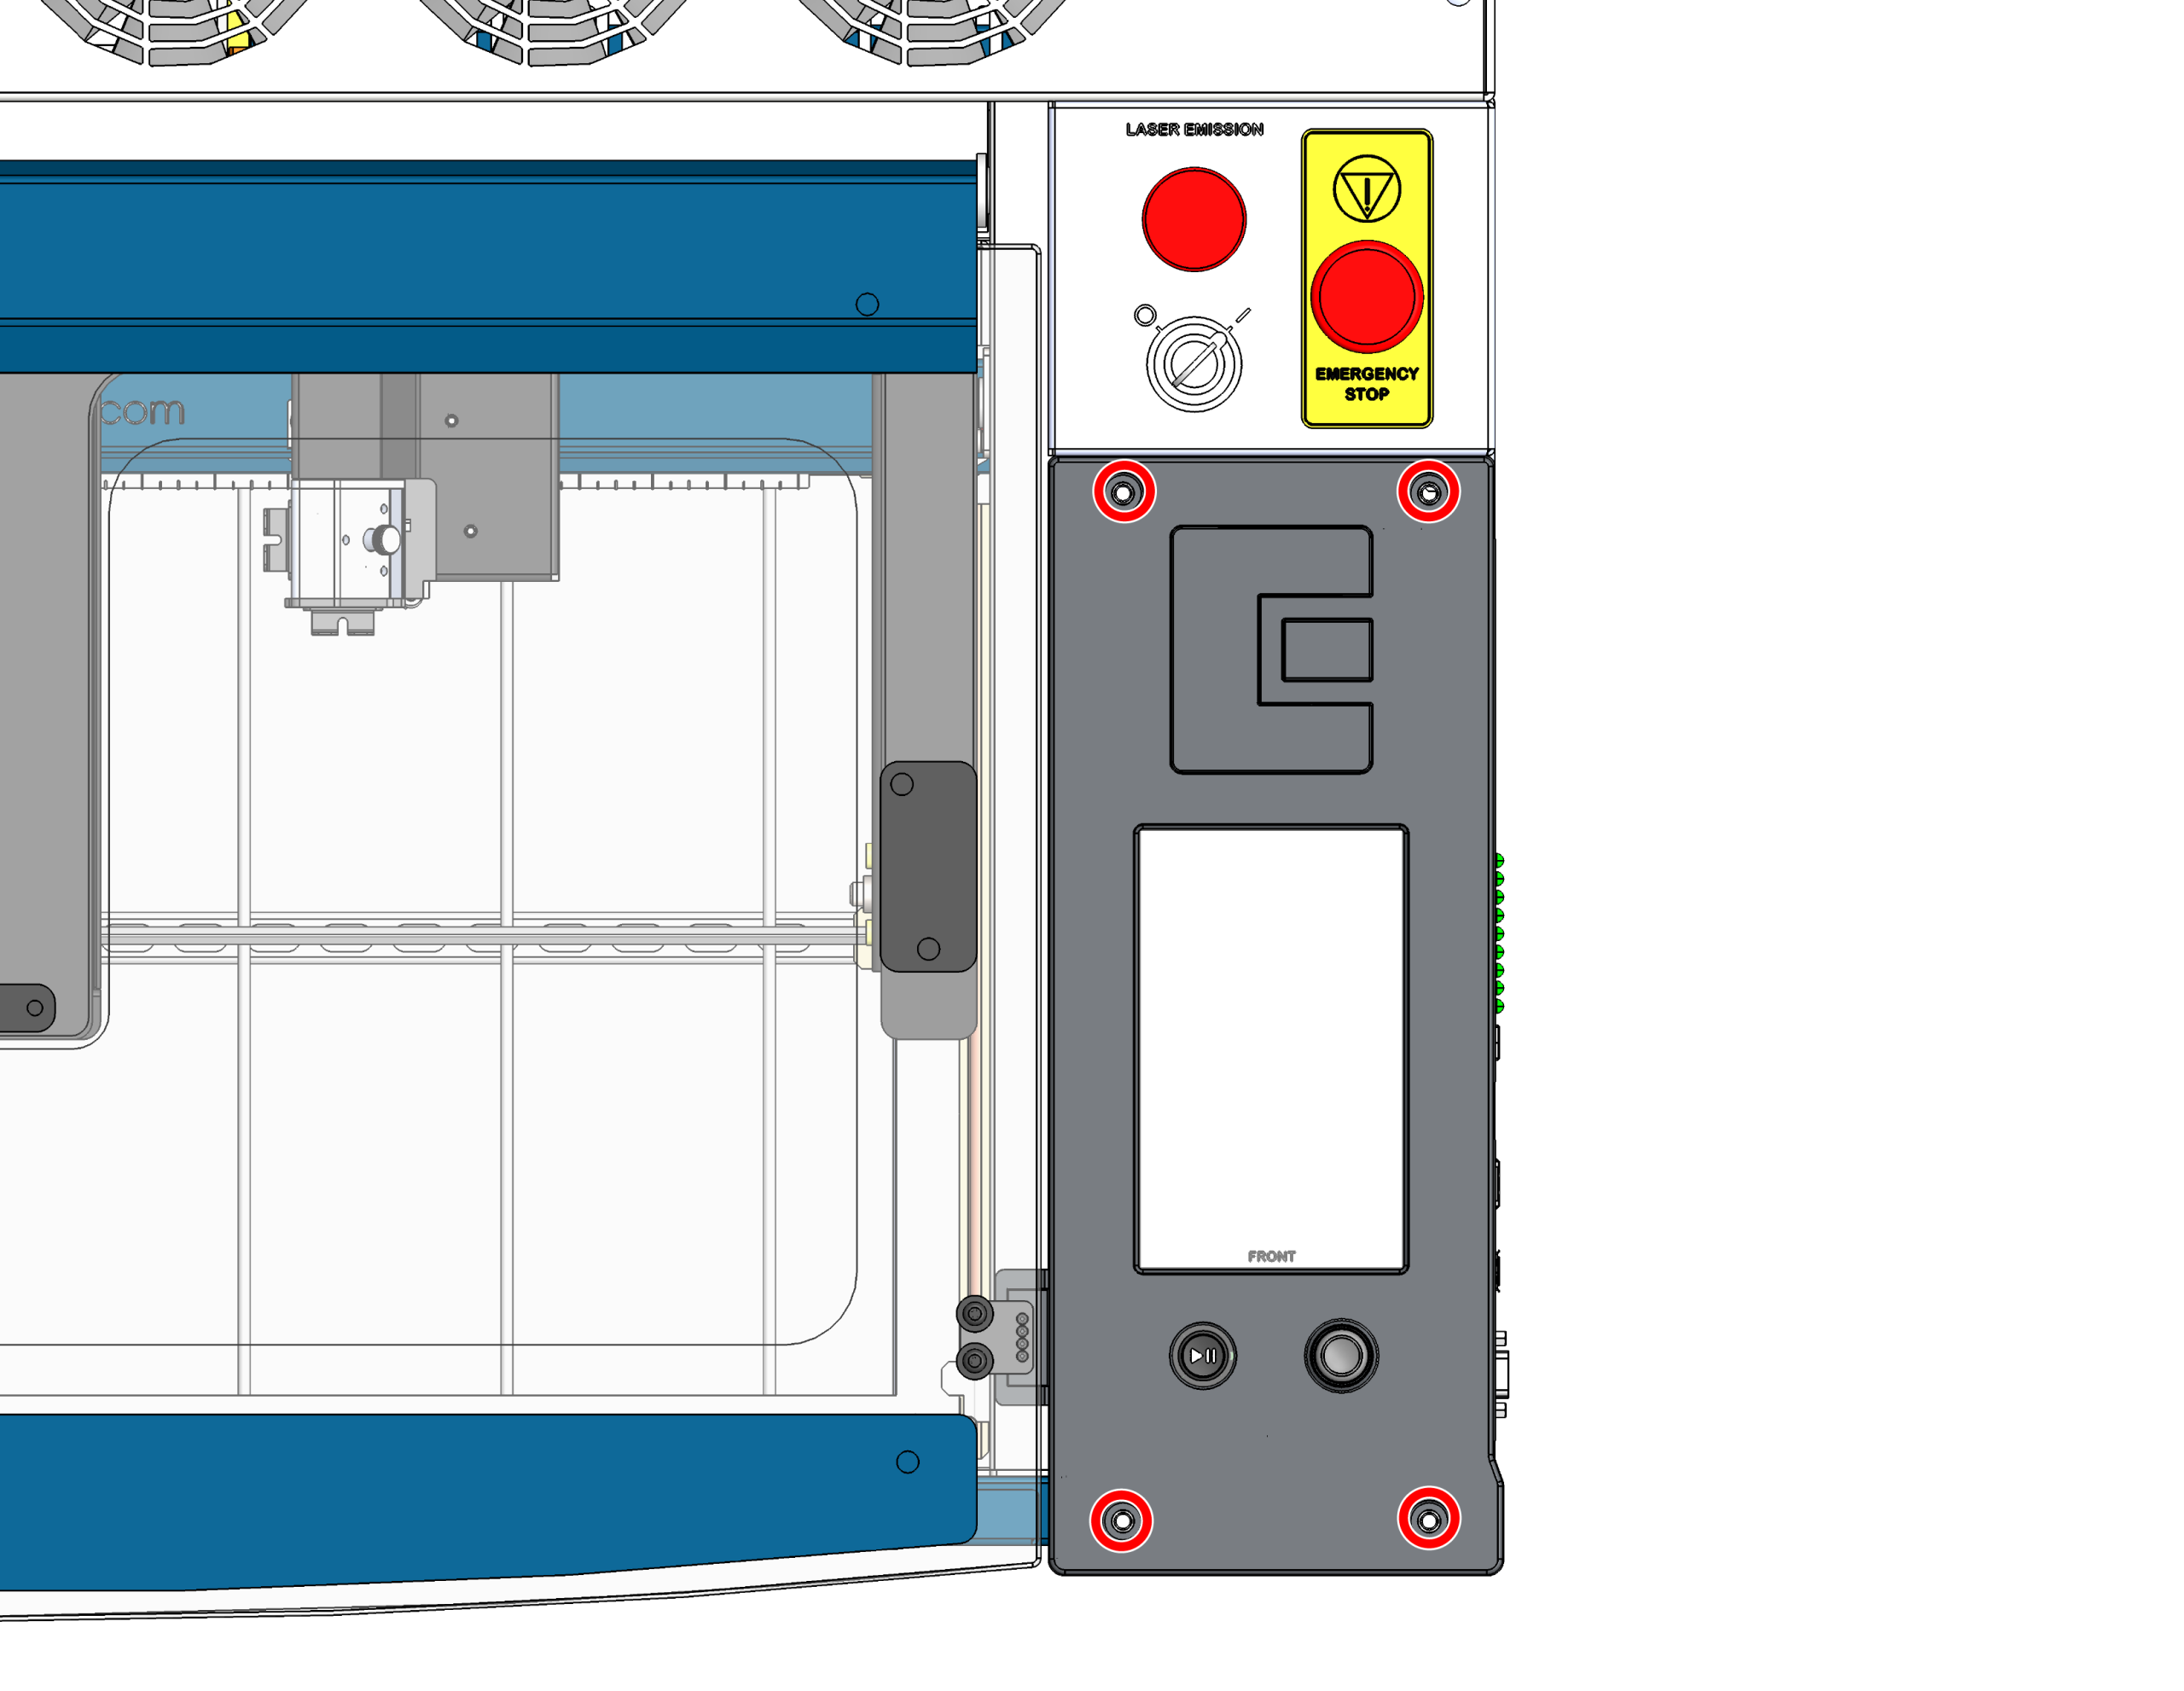
Draai de schroeven van de besturingskaart los
Draai de 4 schroeven los waarmee de besturingskaart aan het chassis vastzit.
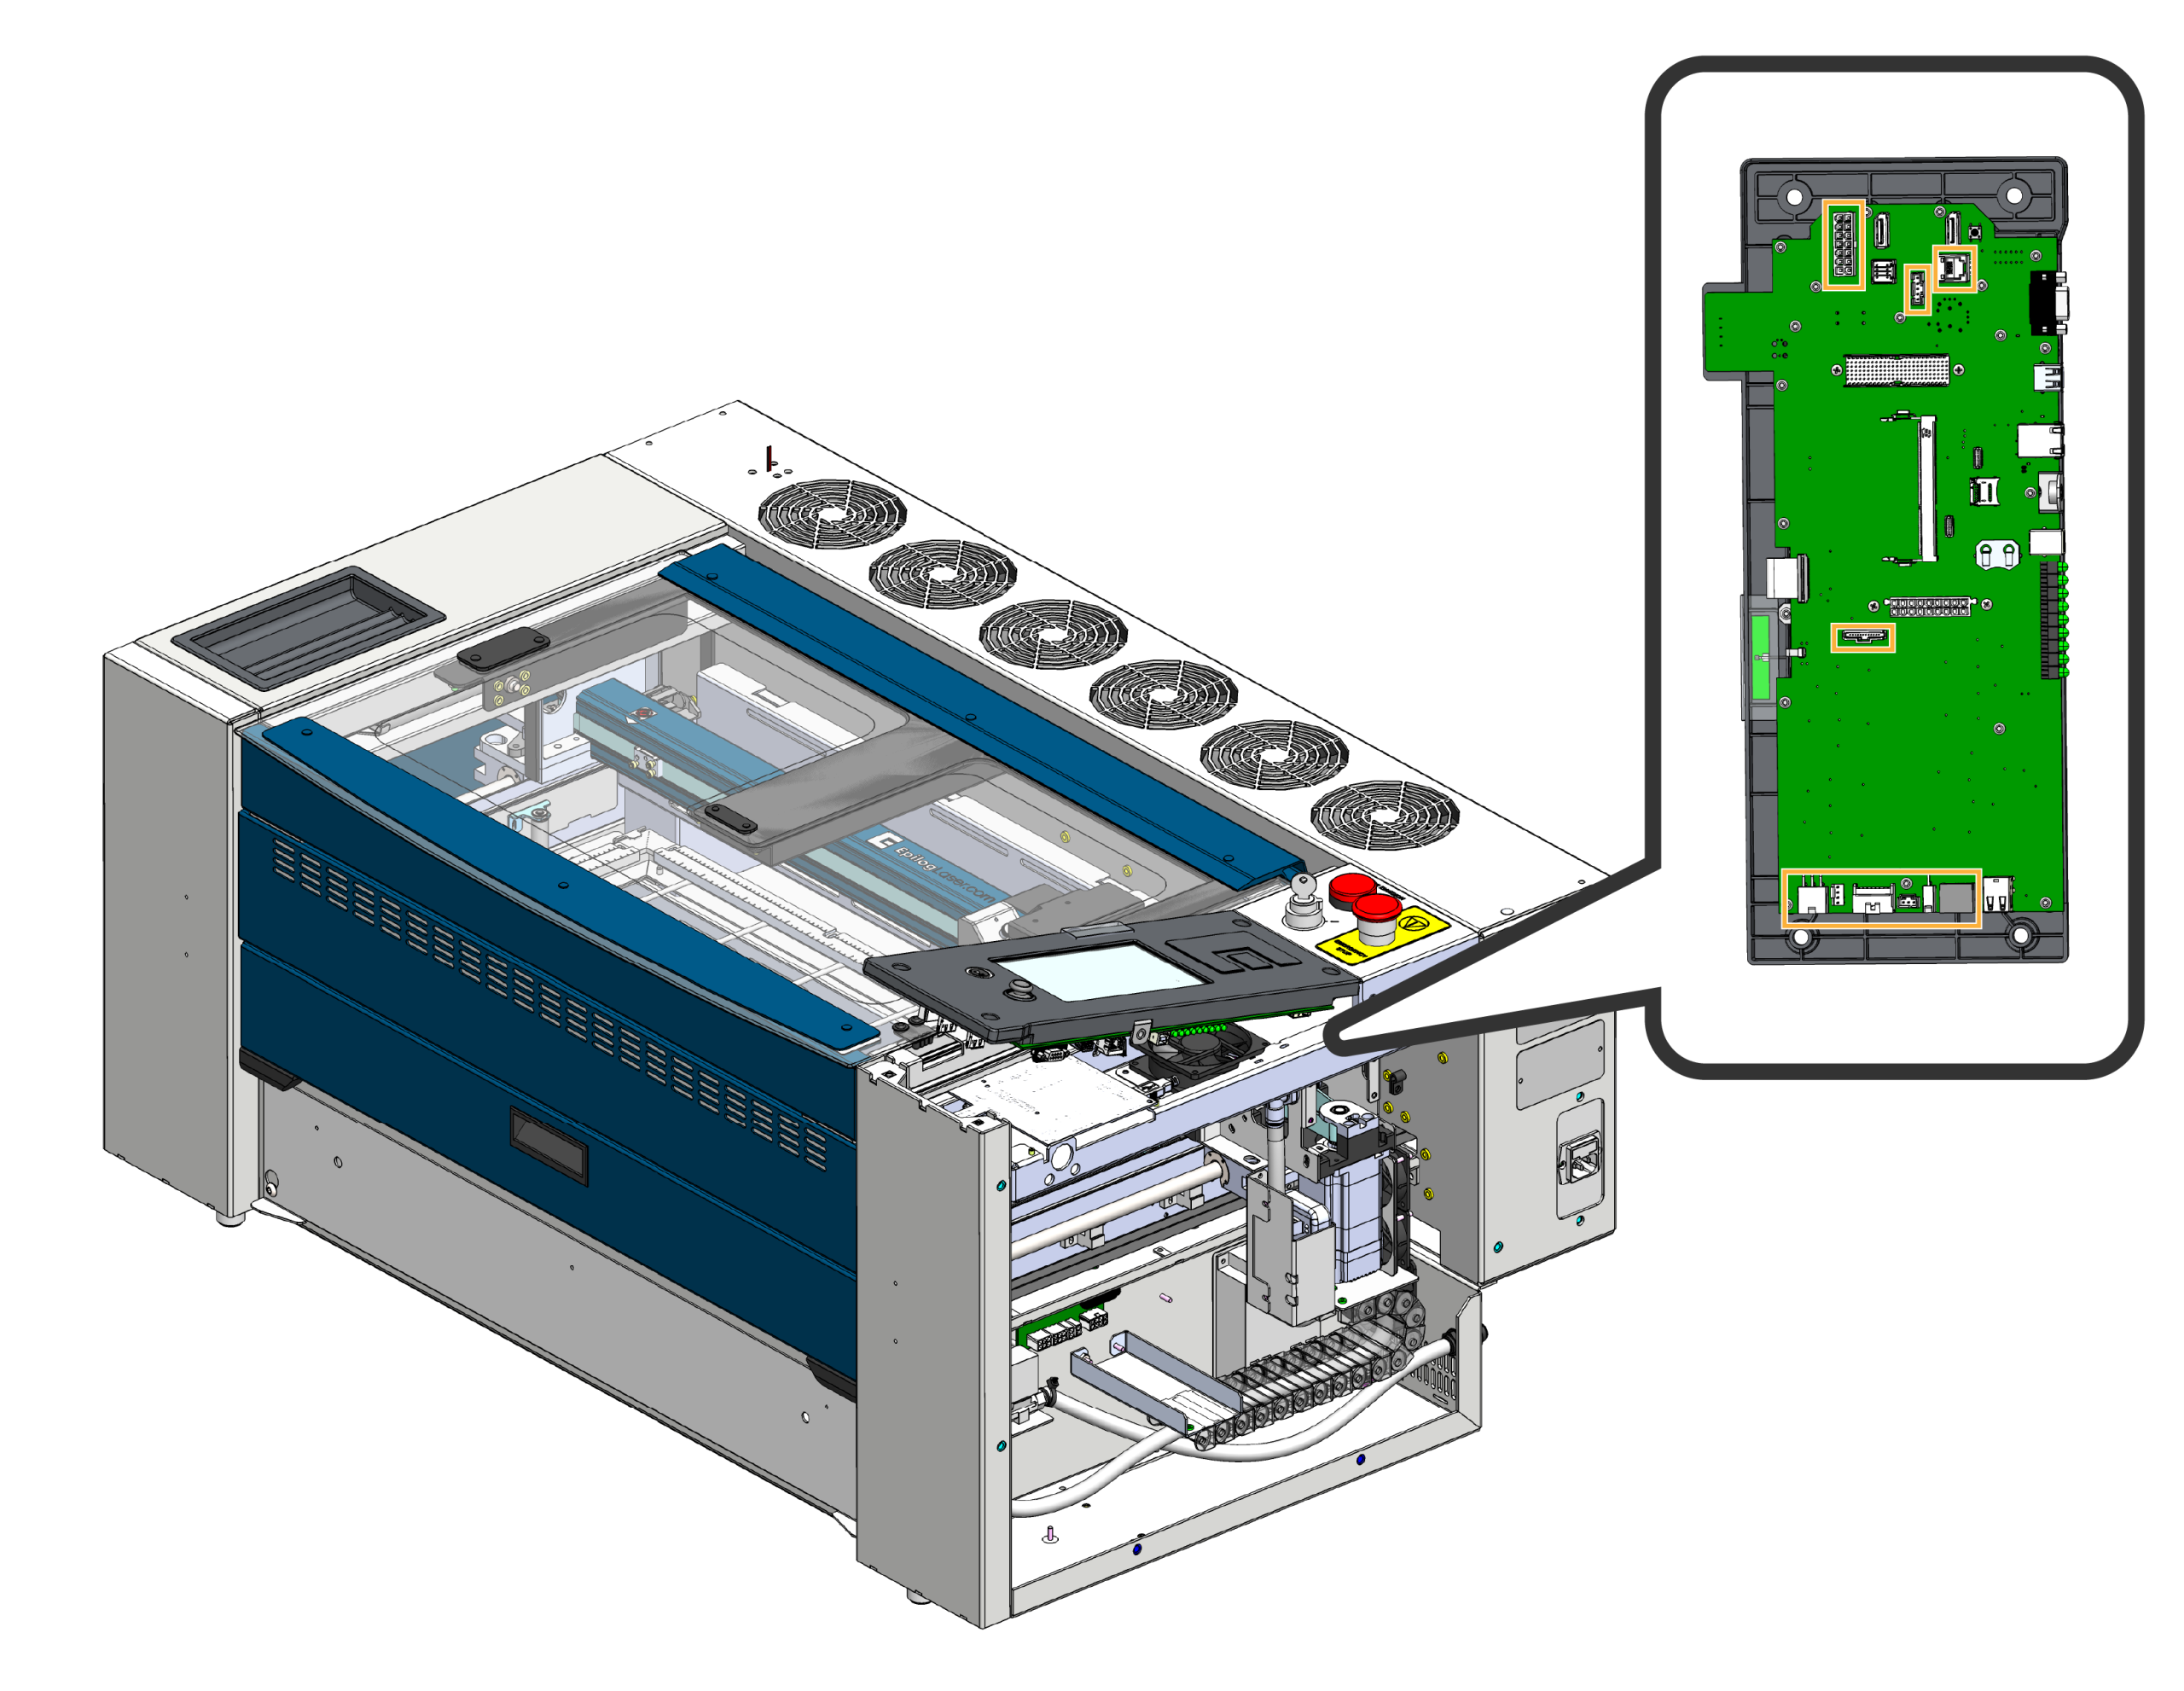
De kabelboom loskoppelen
Kantel de voorkant van de besturingskaart voorzichtig omhoog en koppel de kabelbomen los die op de besturingskaart zijn aangesloten.
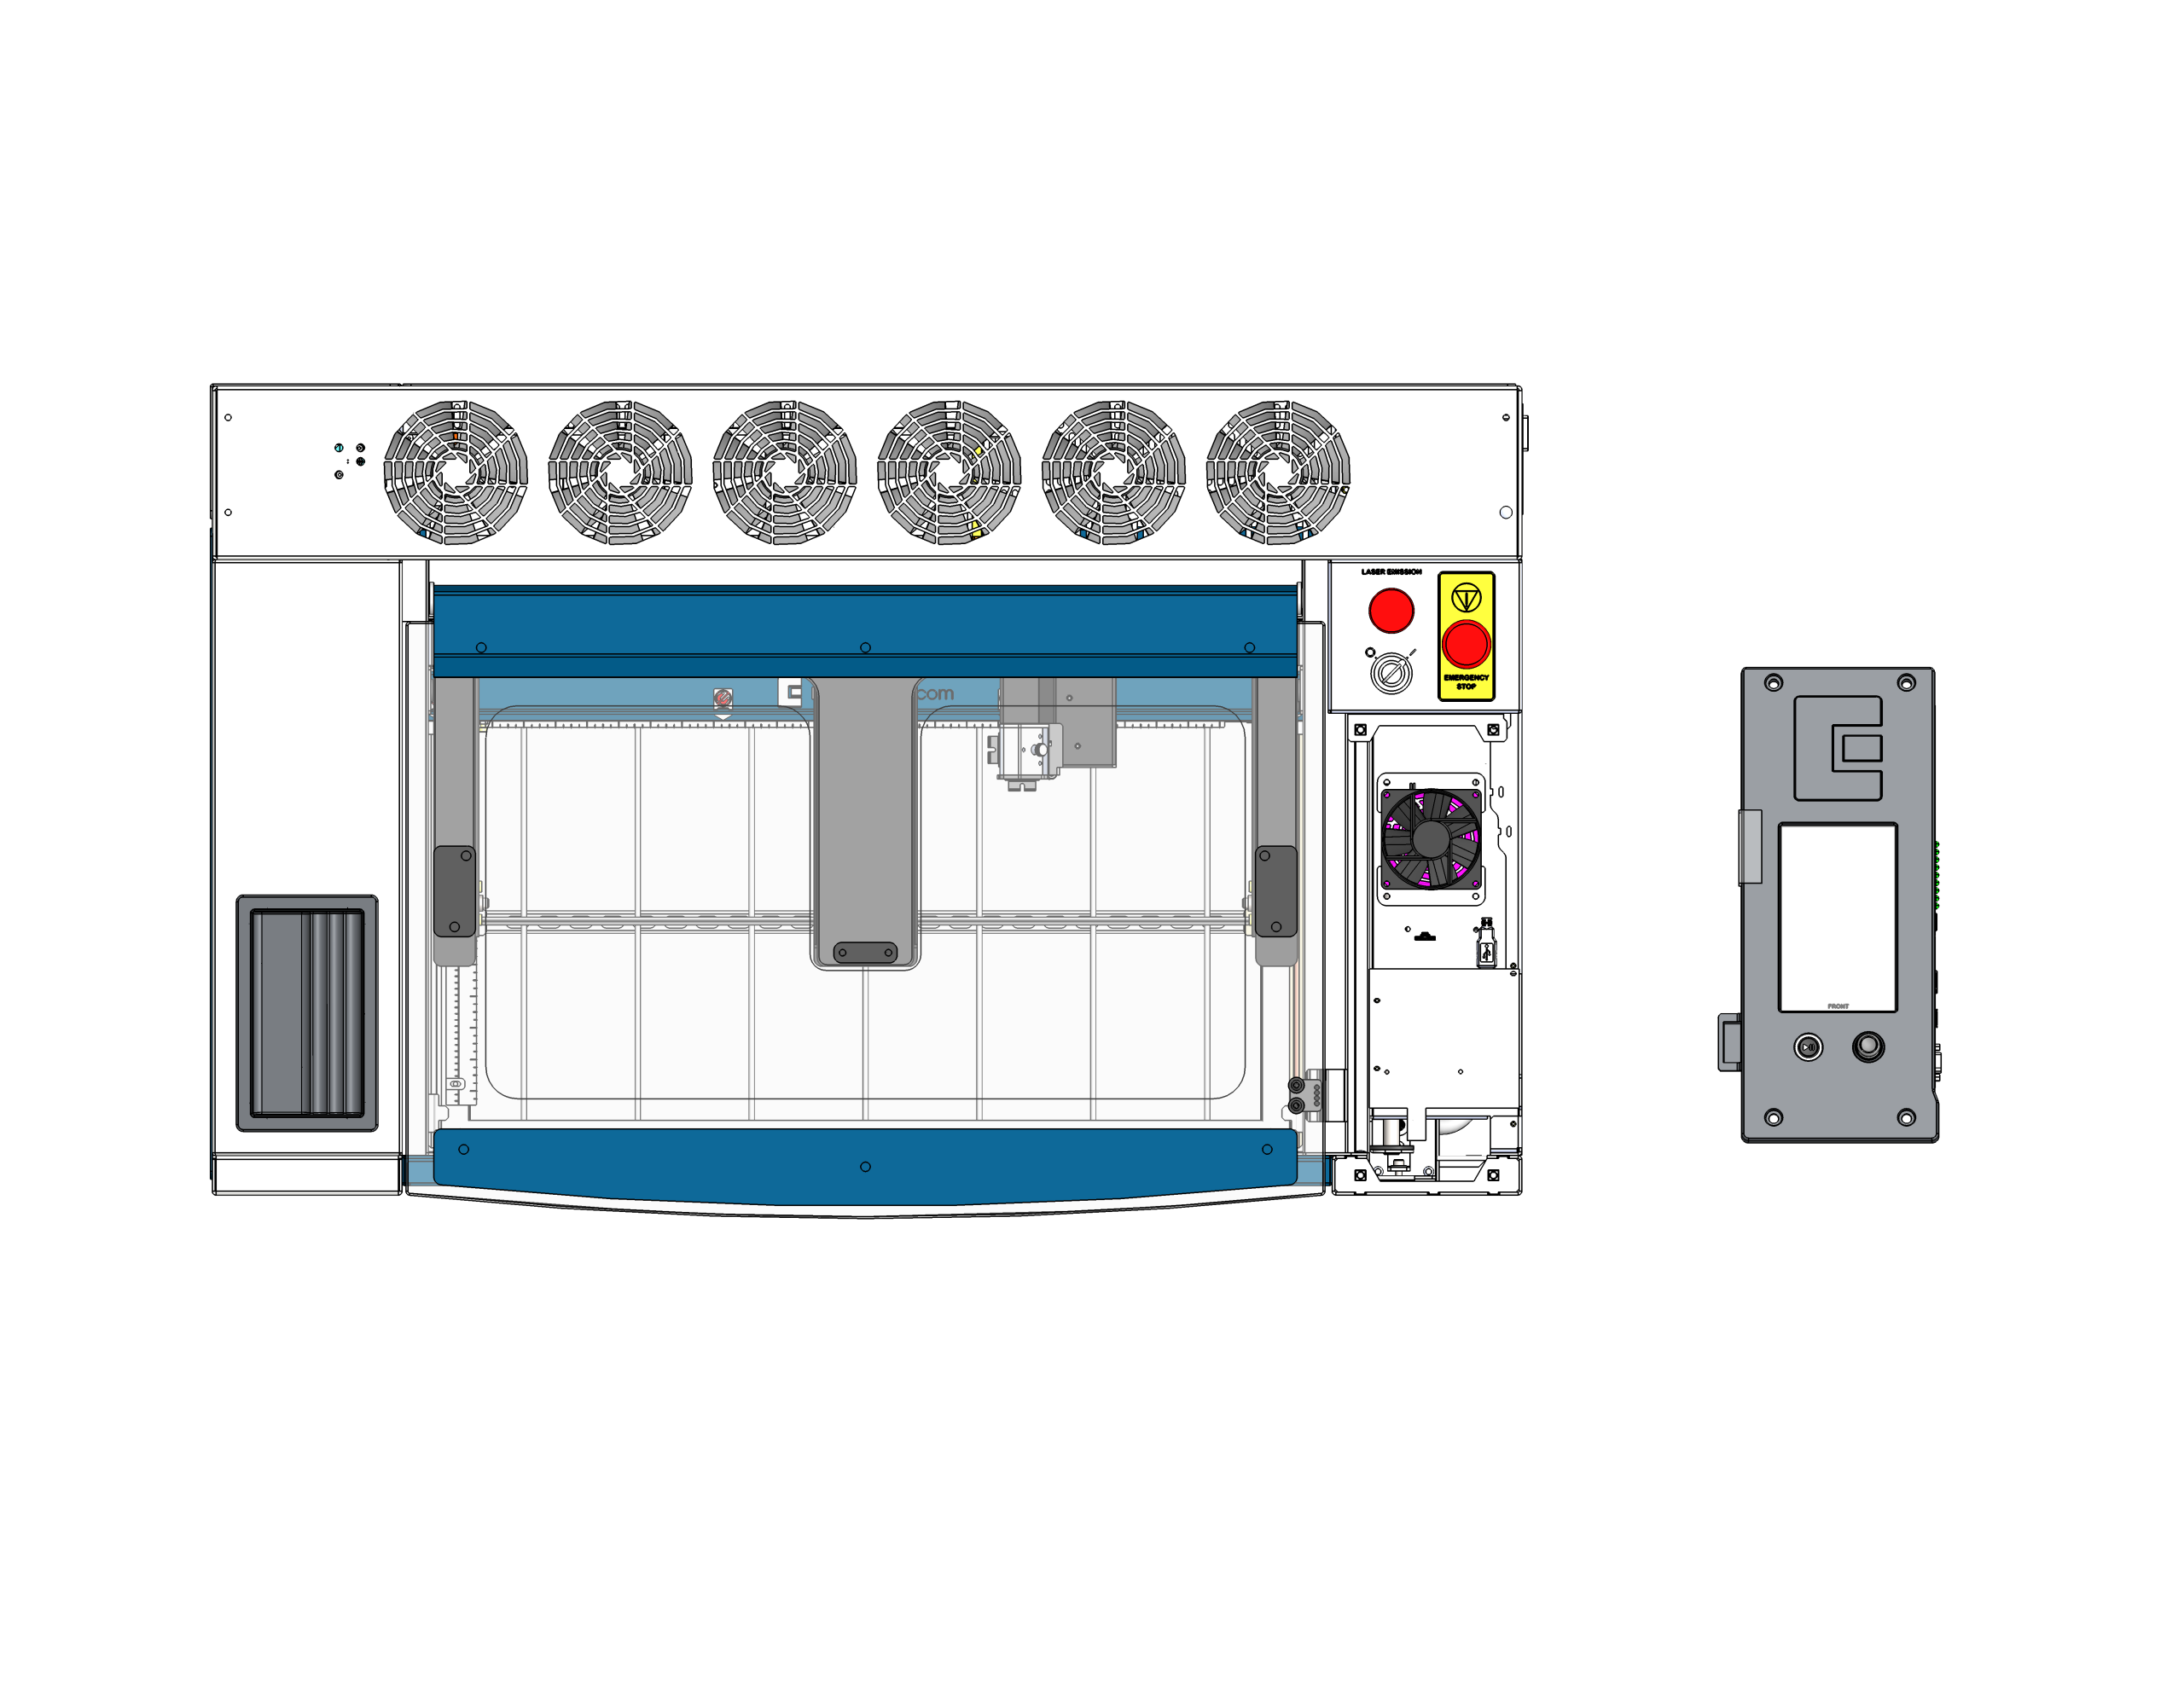
Verwijder de besturingskaart
Haal de besturingskaart uit de machine en verwijder hem helemaal.
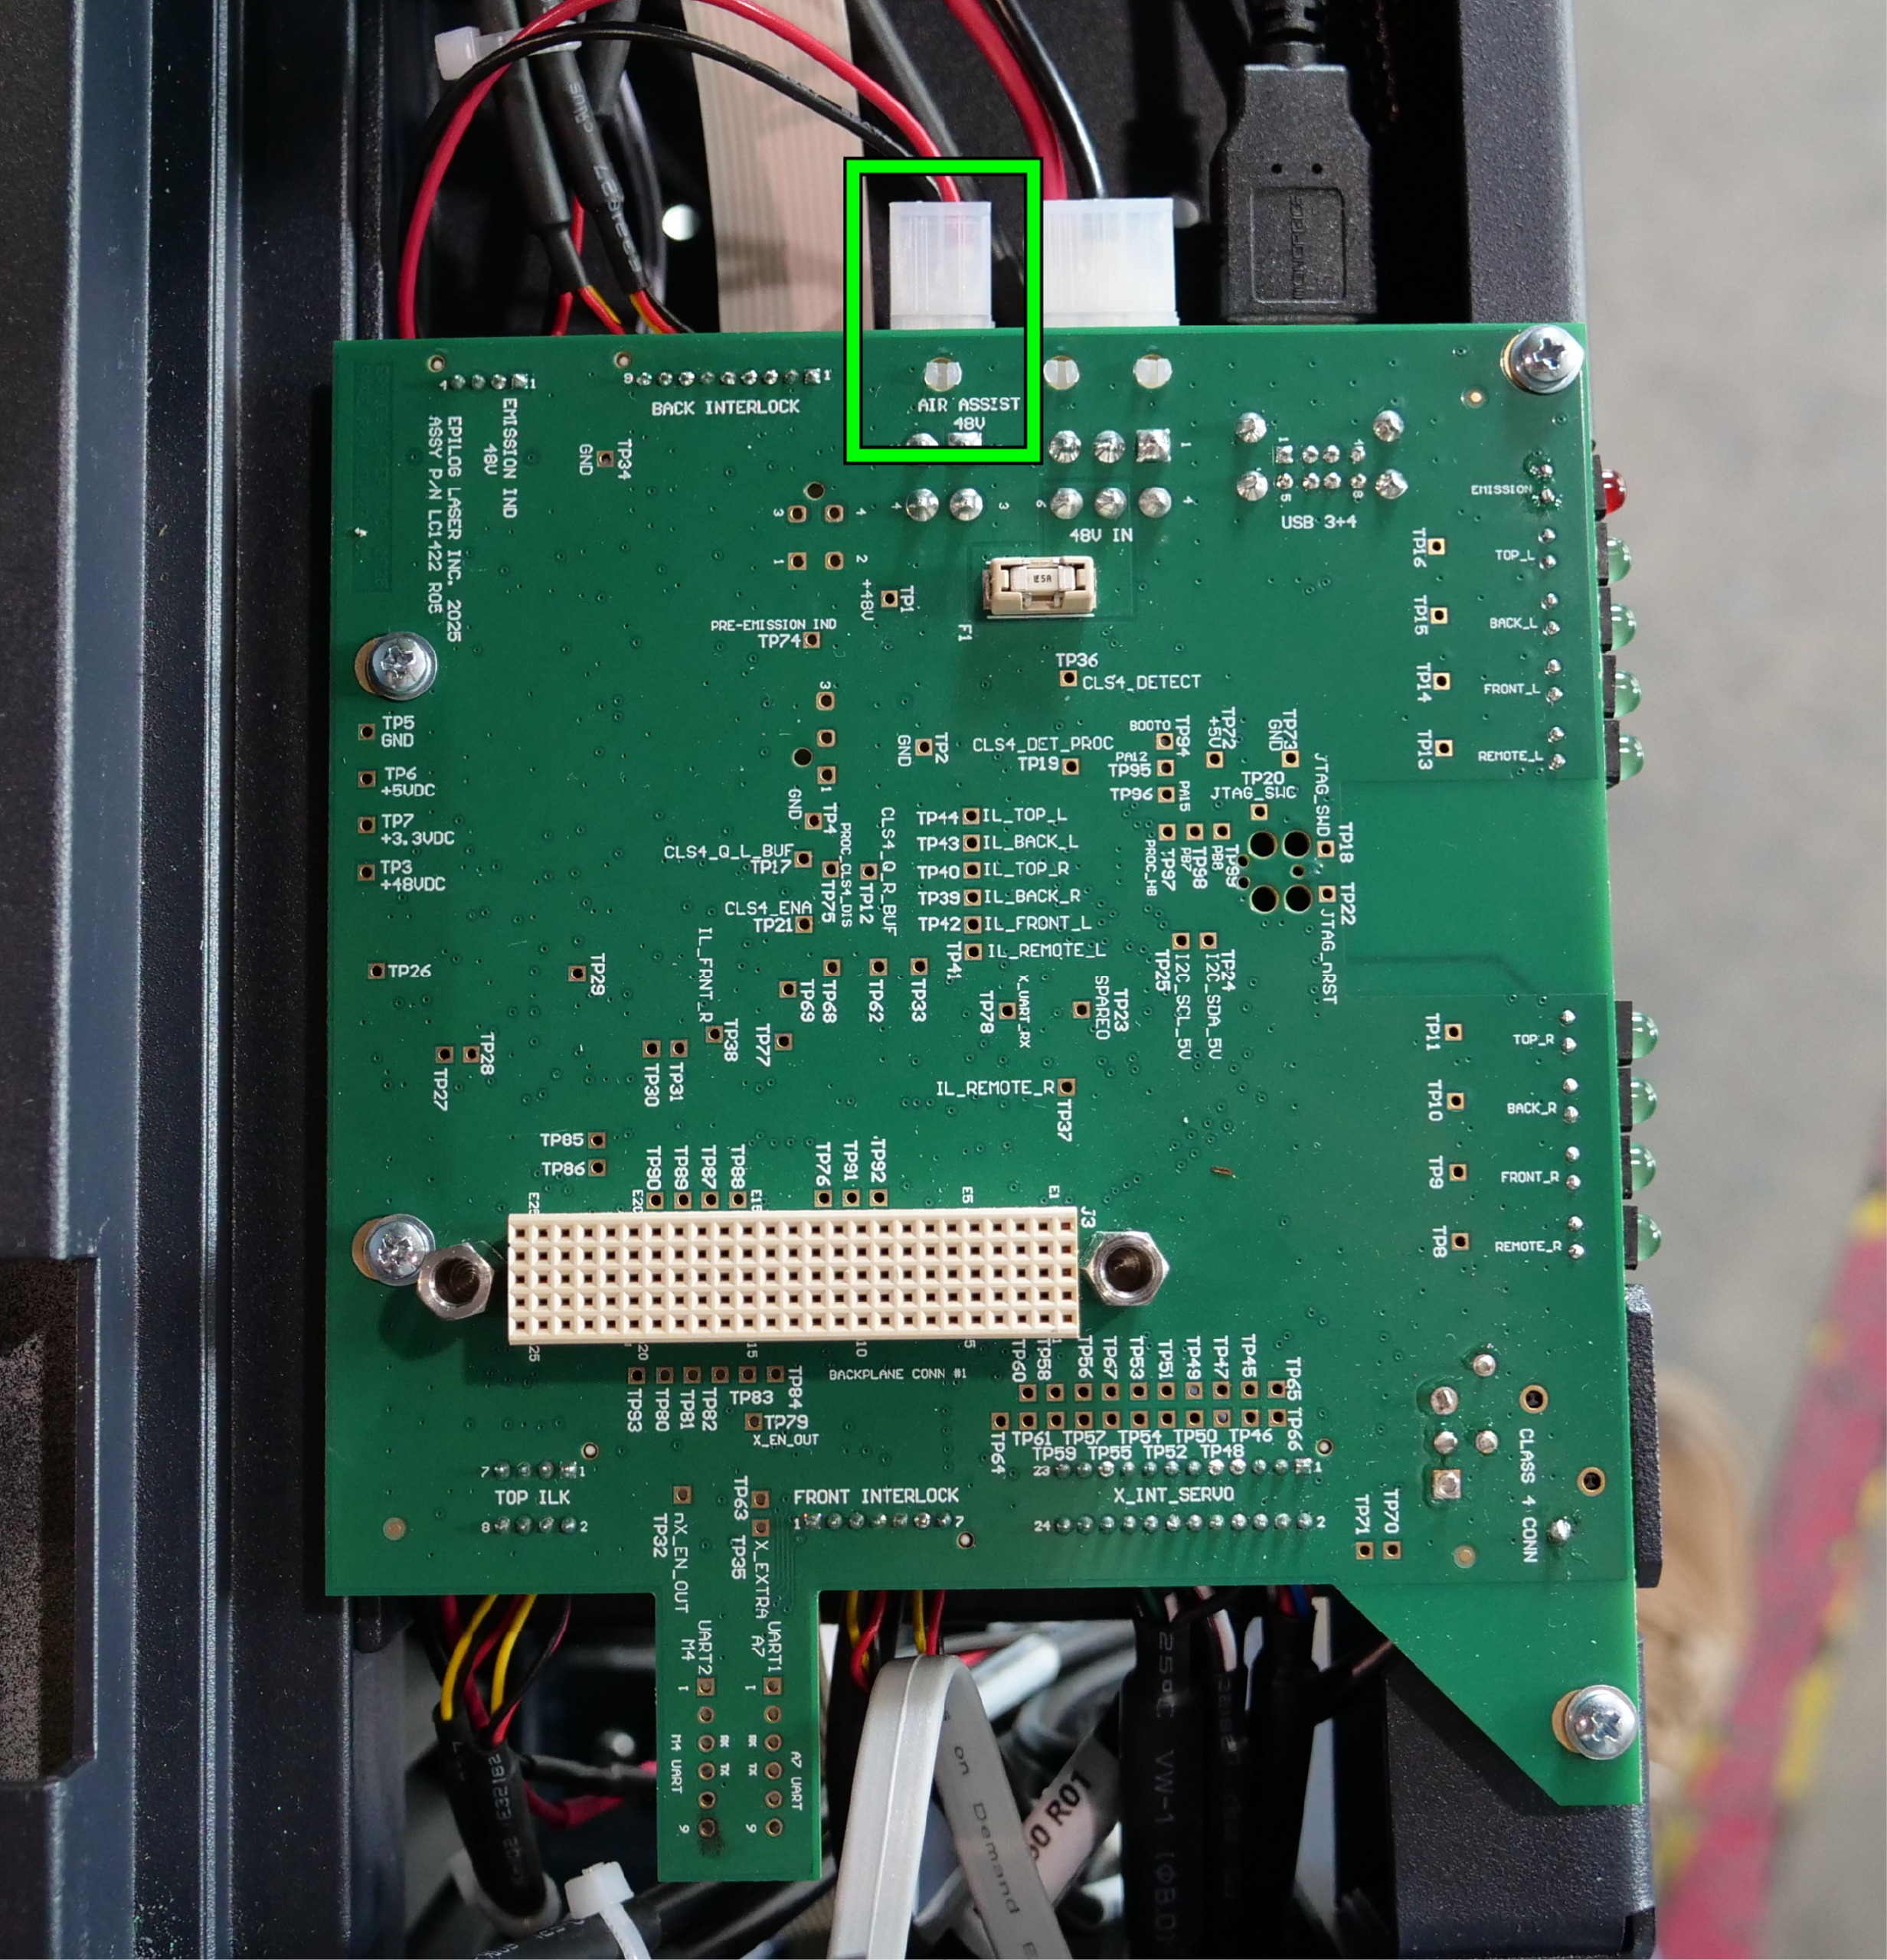
Koppel de solenoïde los
Koppel de magneetklep voor luchtondersteuning los van de achterplaat. Op de achterplaat staat ‘Air Assist Solenoid’ aangegeven.
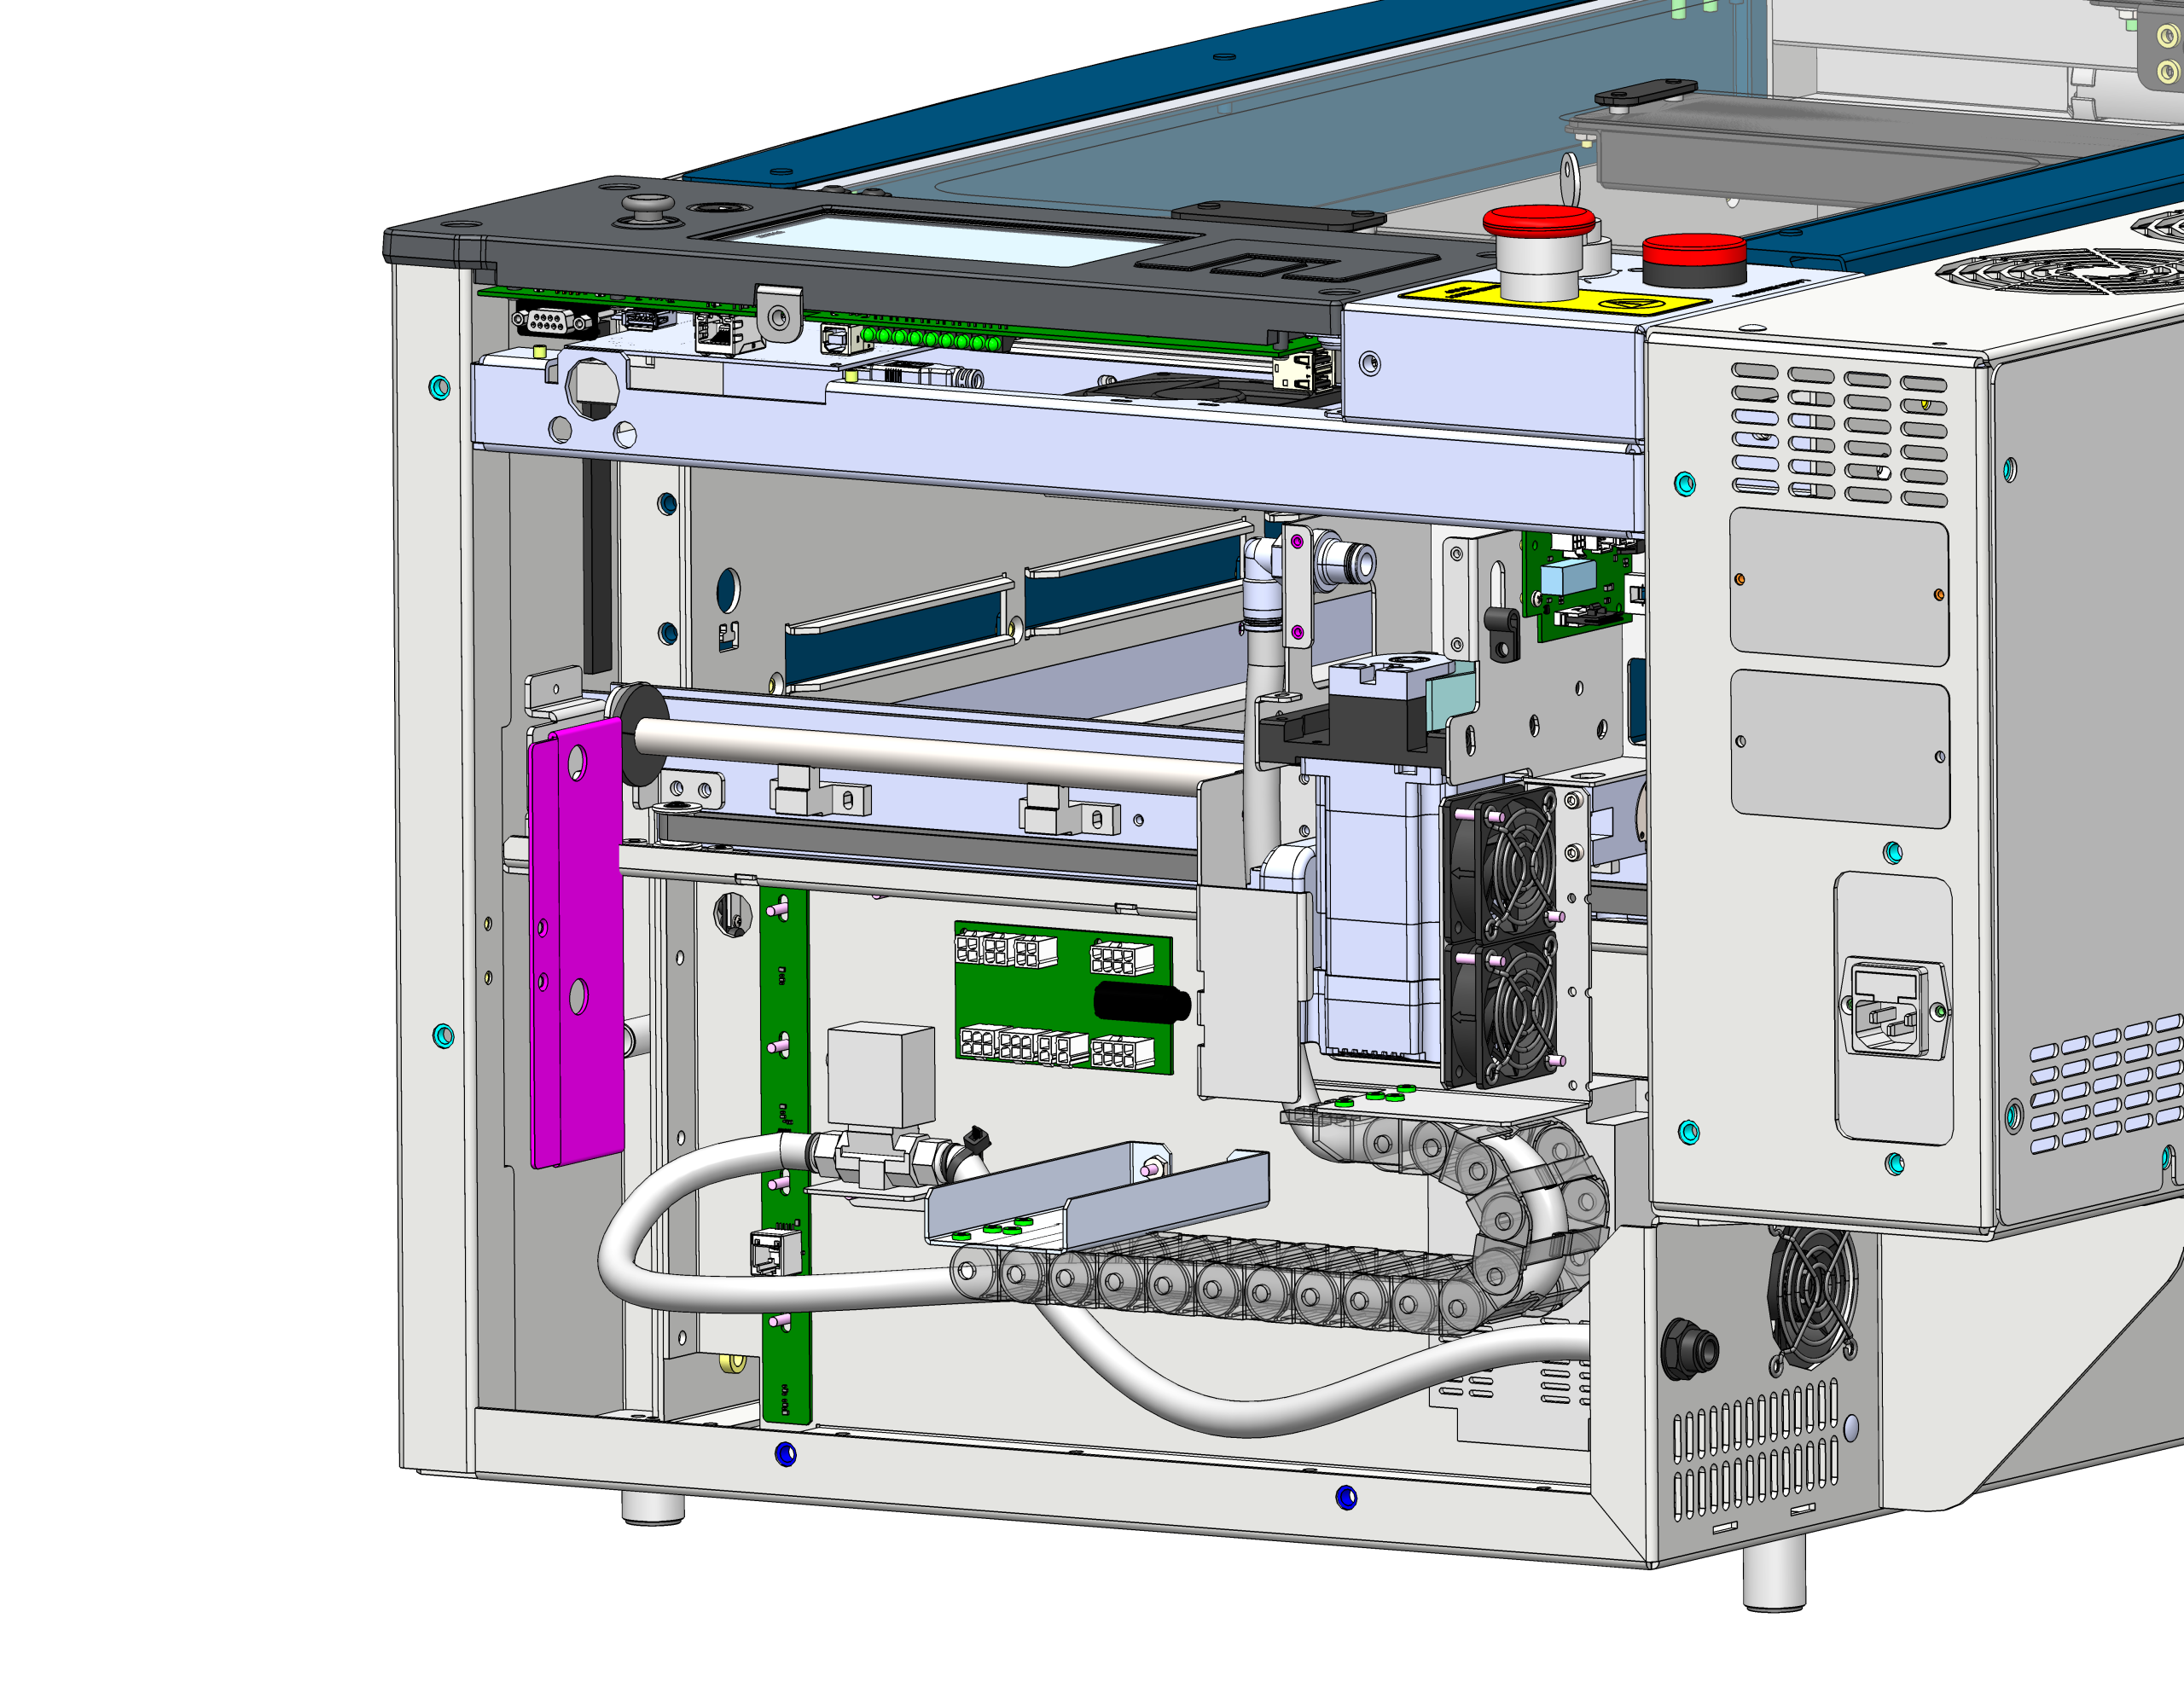
Verwijder het paneel van de kabelafdekking
Zoek het paneel van de interne kabelafdekking en verwijder het, zodat je de kabelbossen van het chassis kunt zien.
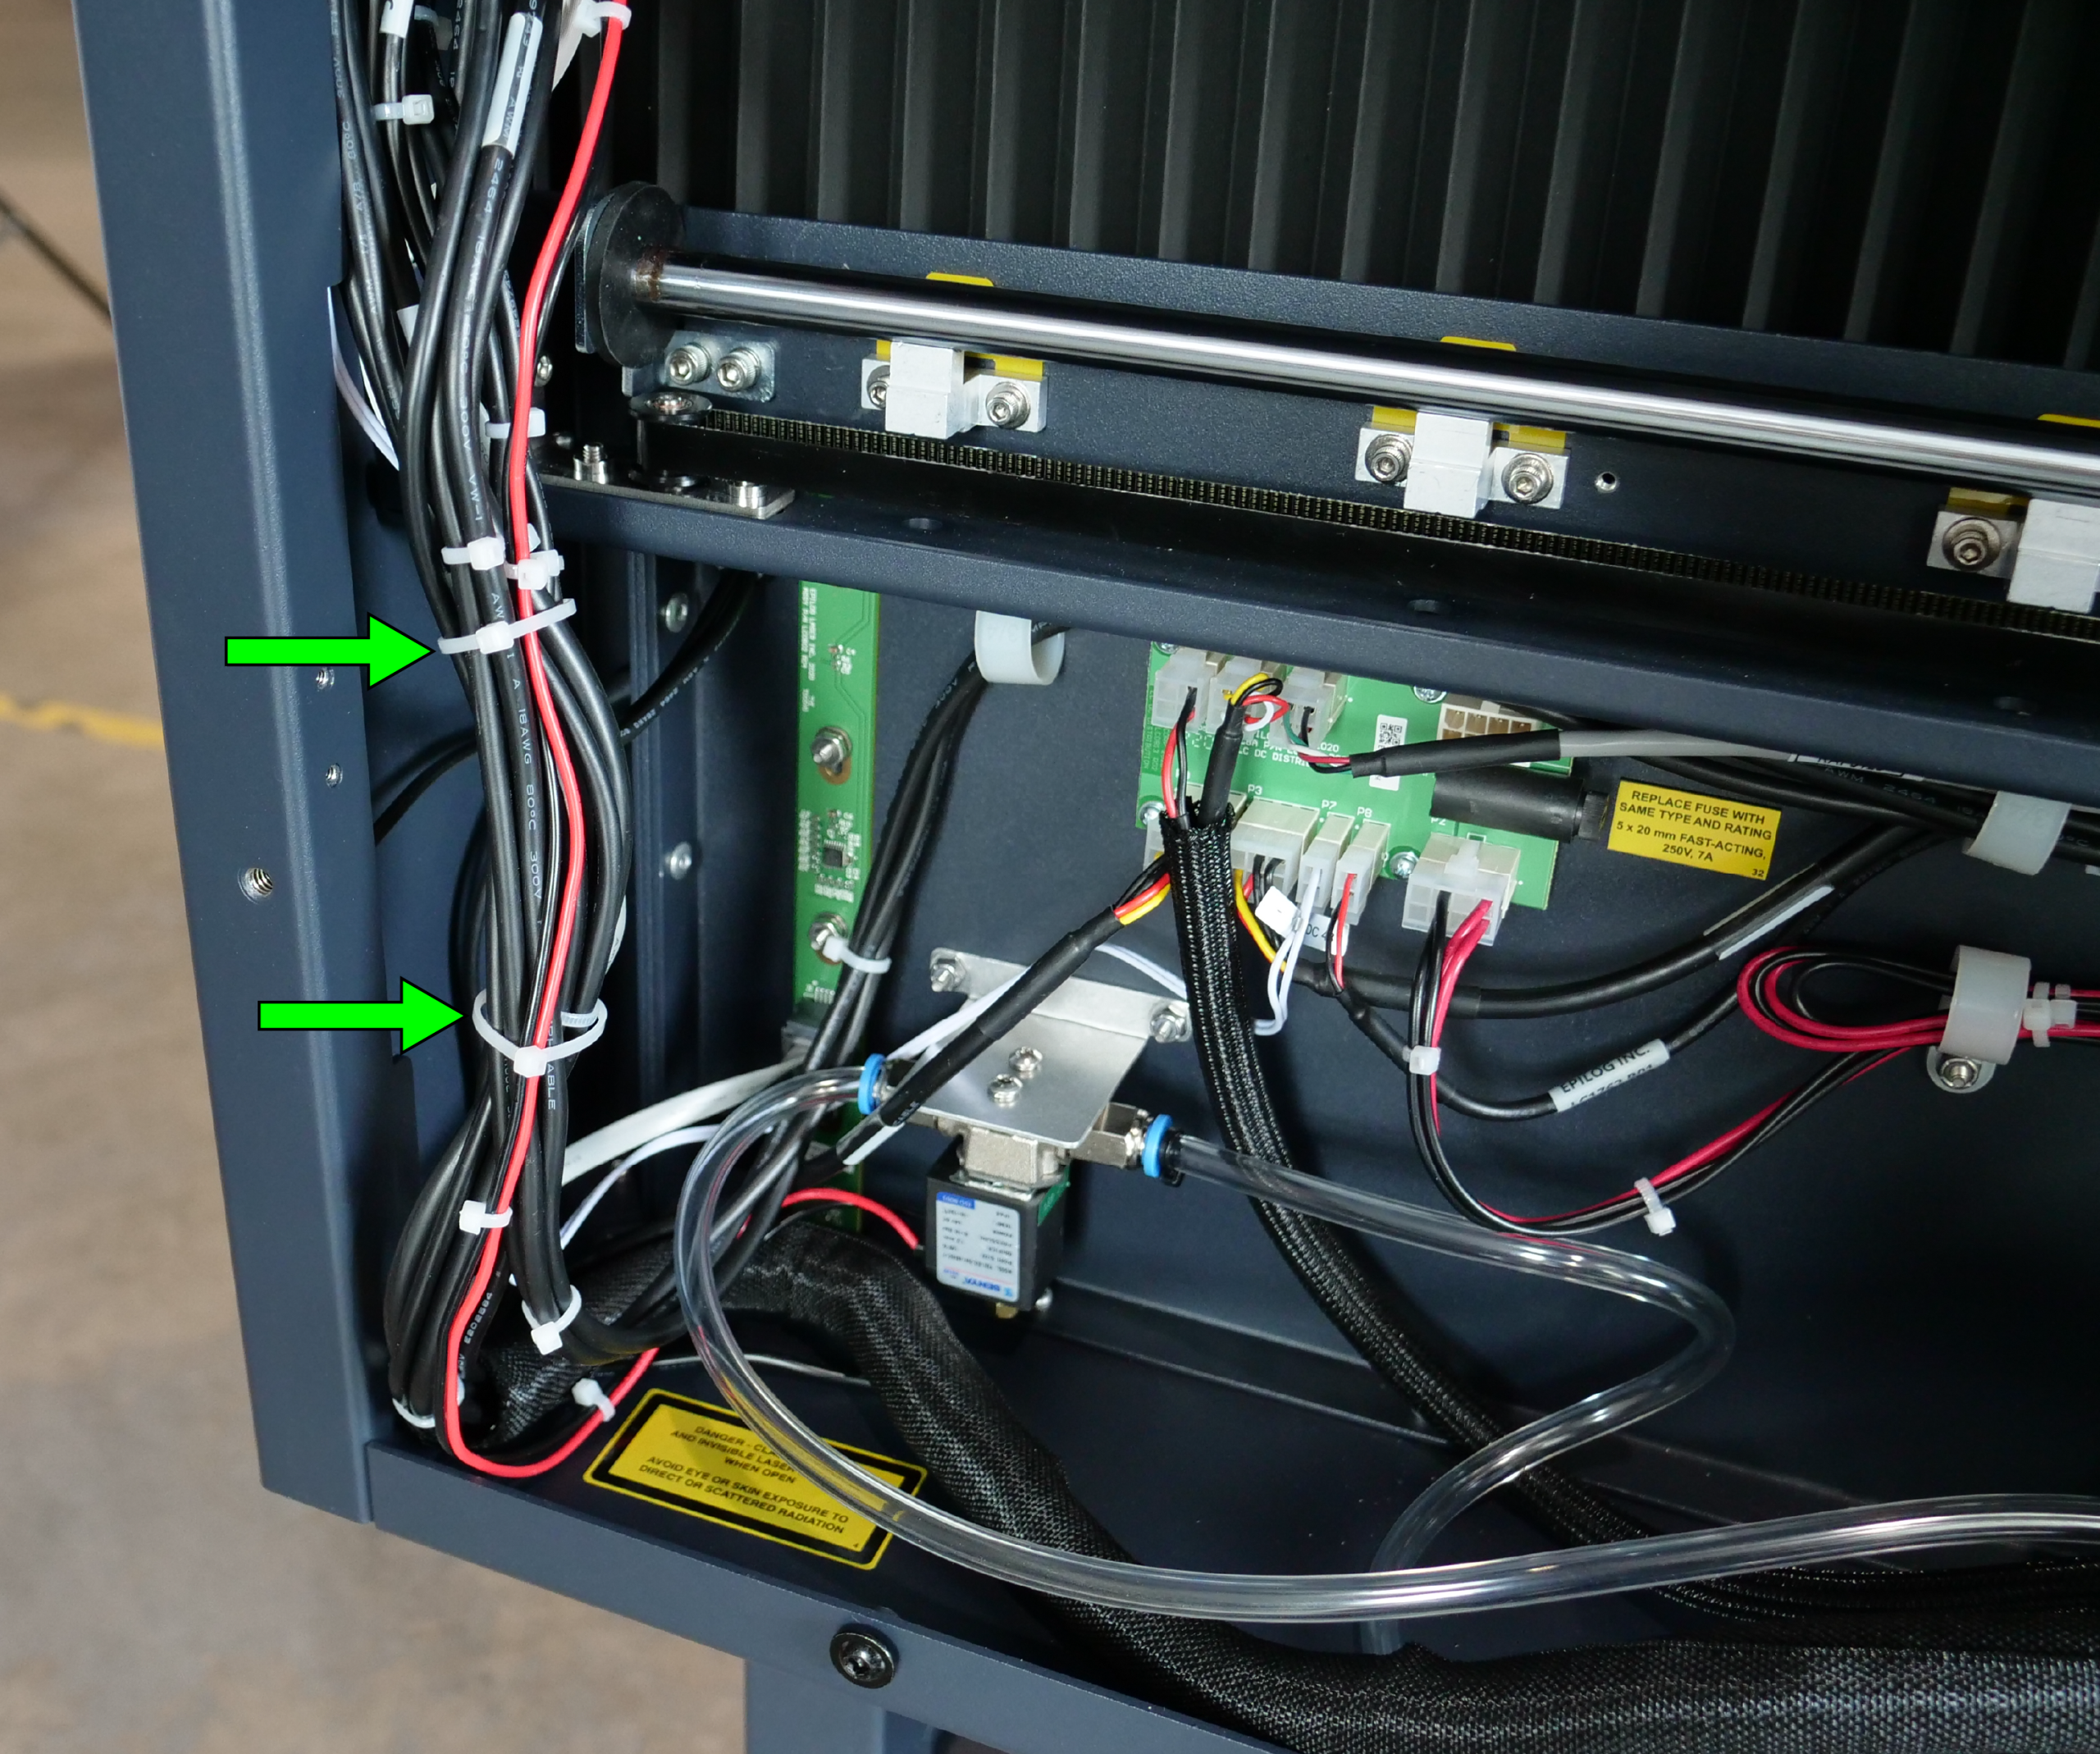
Kabelbinders doorknippen
Knip de kabelbinders van de kabelbundel voorzichtig door en zorg ervoor dat je geen van de omliggende draden beschadigt.
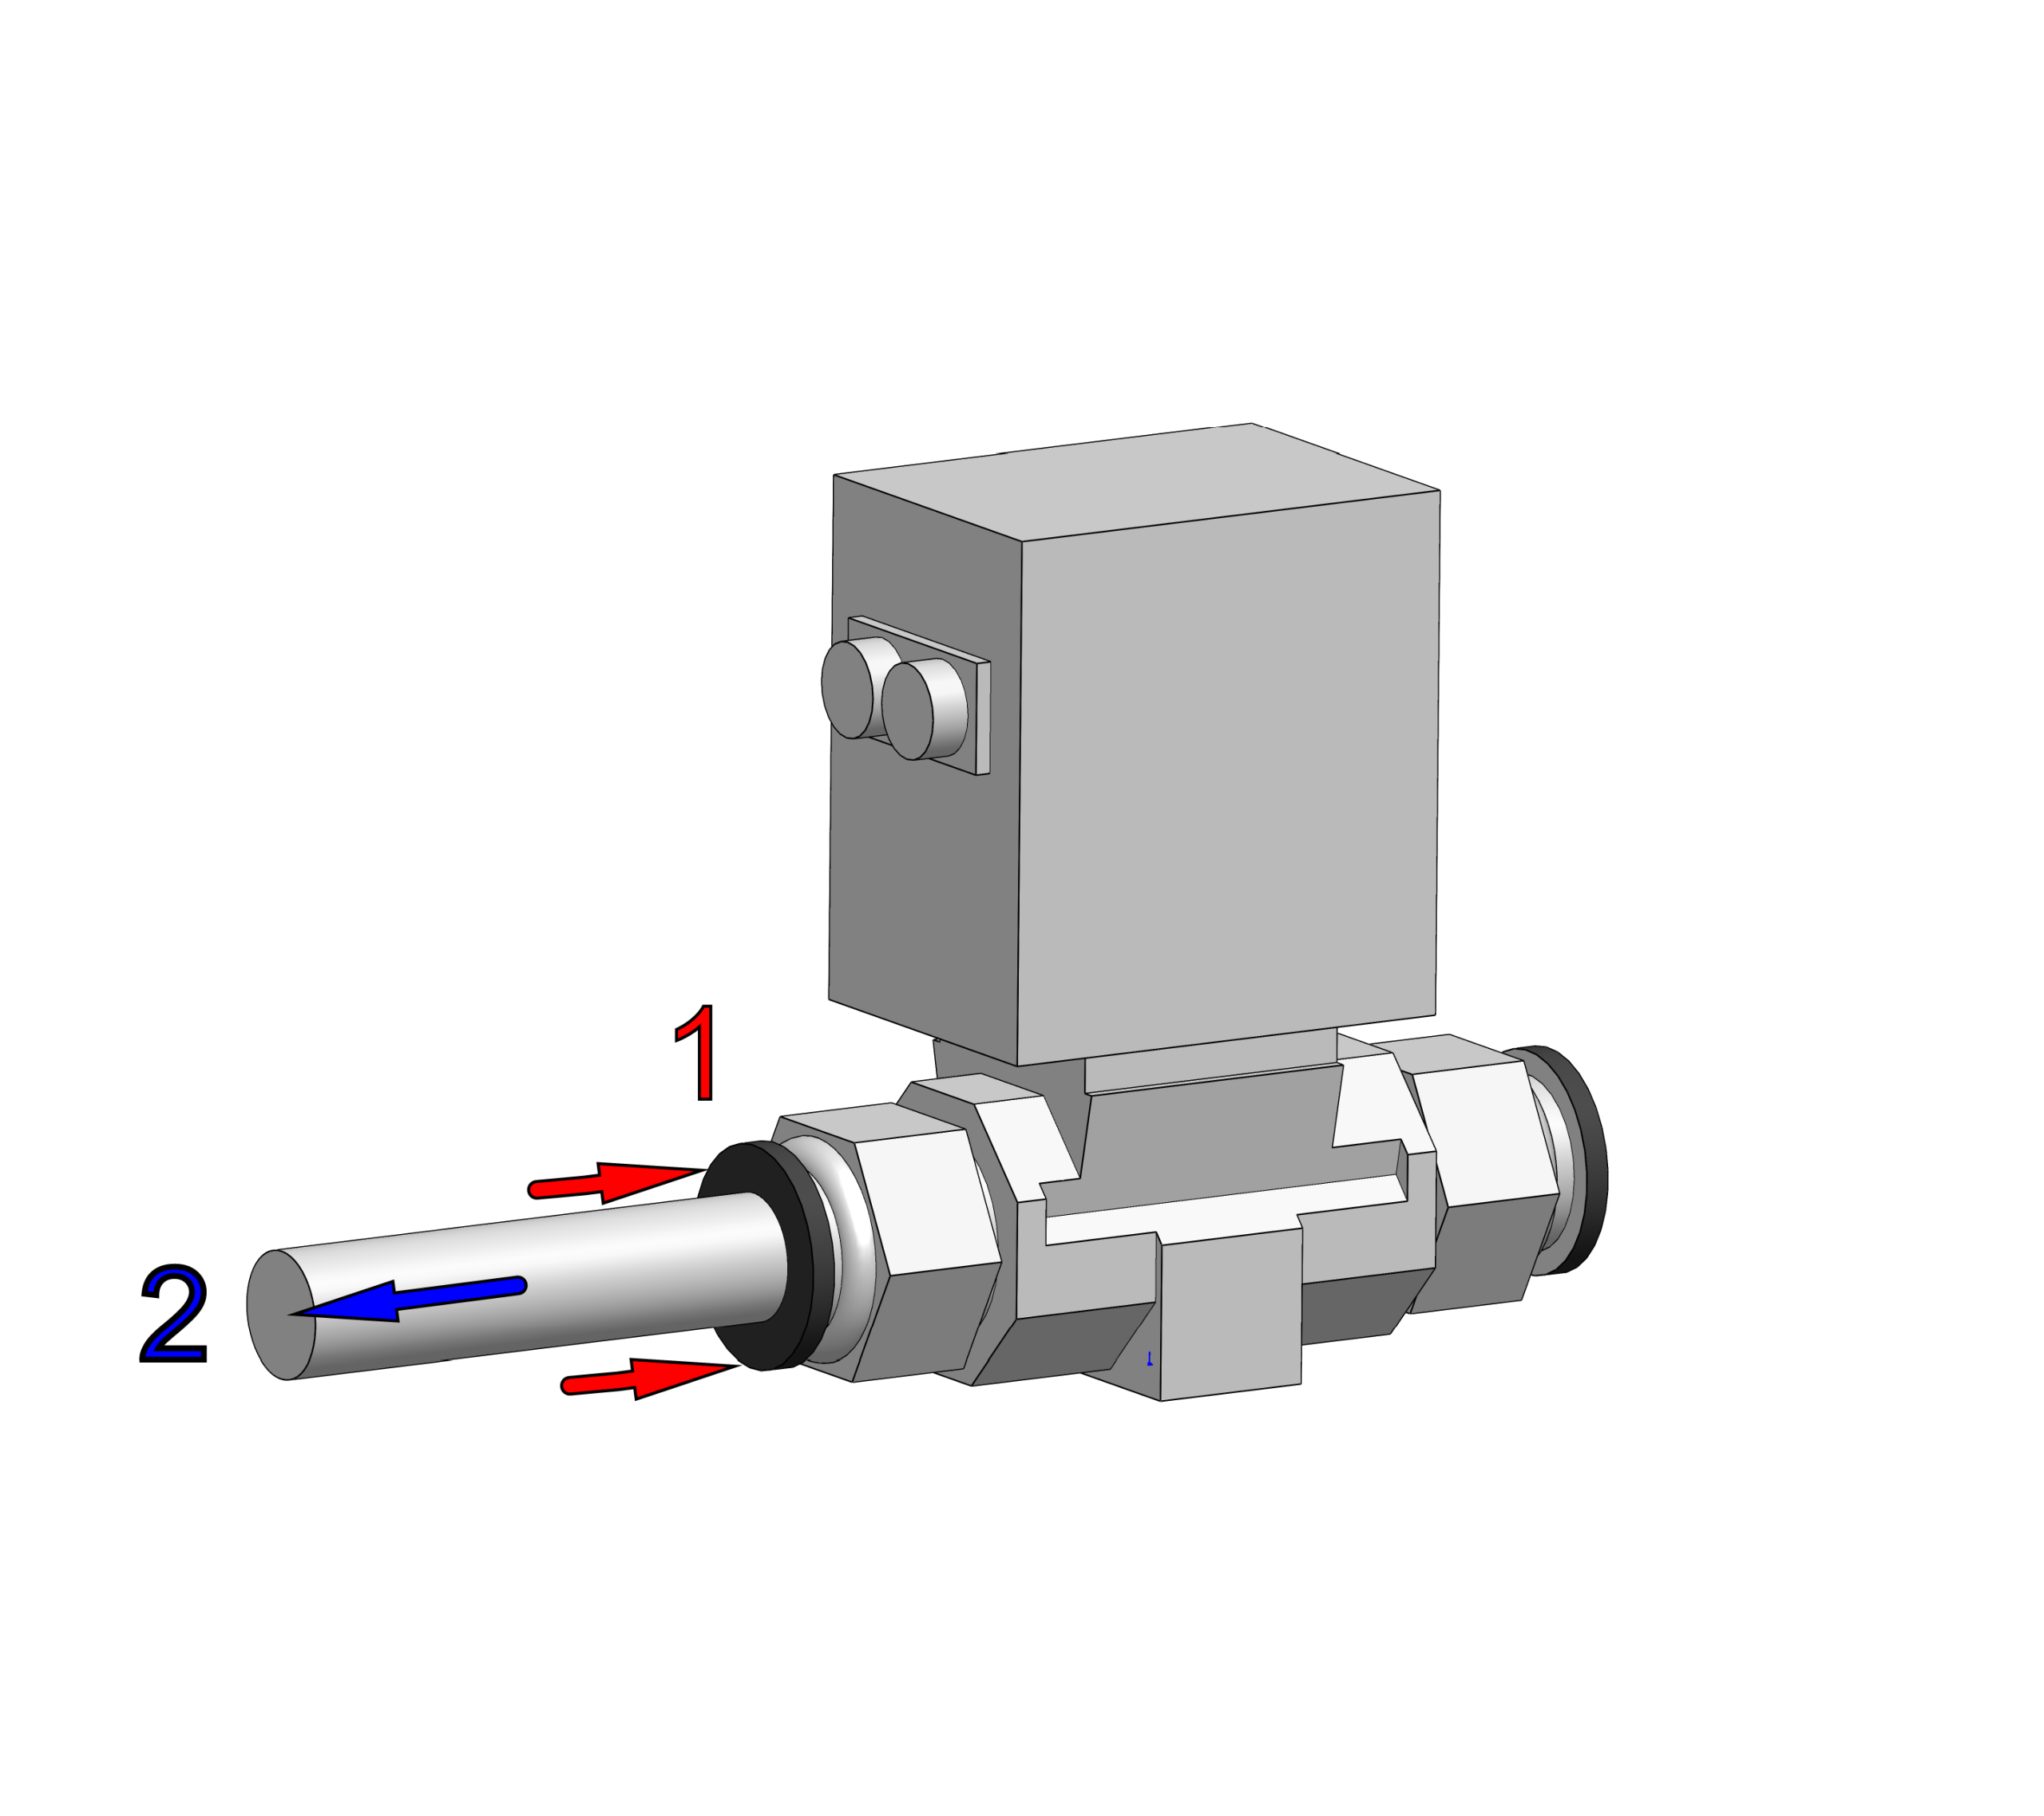
Slang loskoppelen
Druk op de klem en trek aan de slang om de verbinding los te maken.
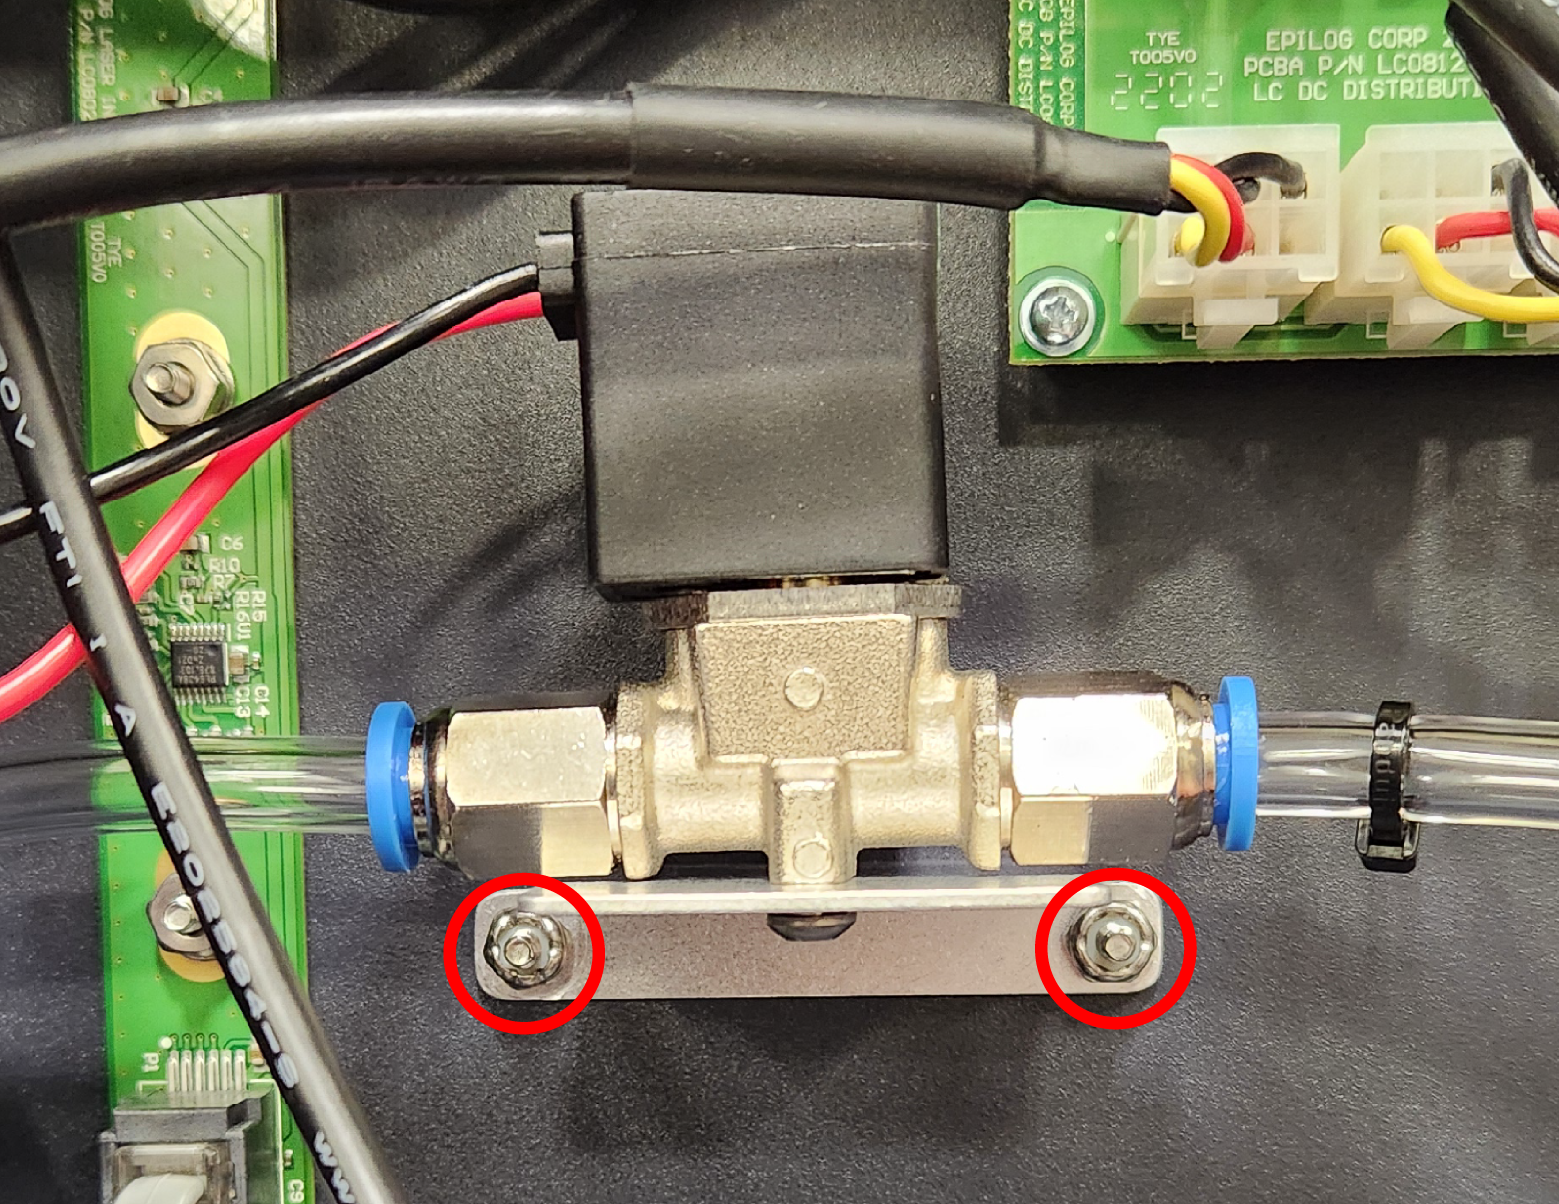
Verwijder de magneetklep
Draai de moeren los waarmee de magneetventielbeugel vastzit en til de beschadigde magneetventielunit uit het chassis.
Installatieprocedure
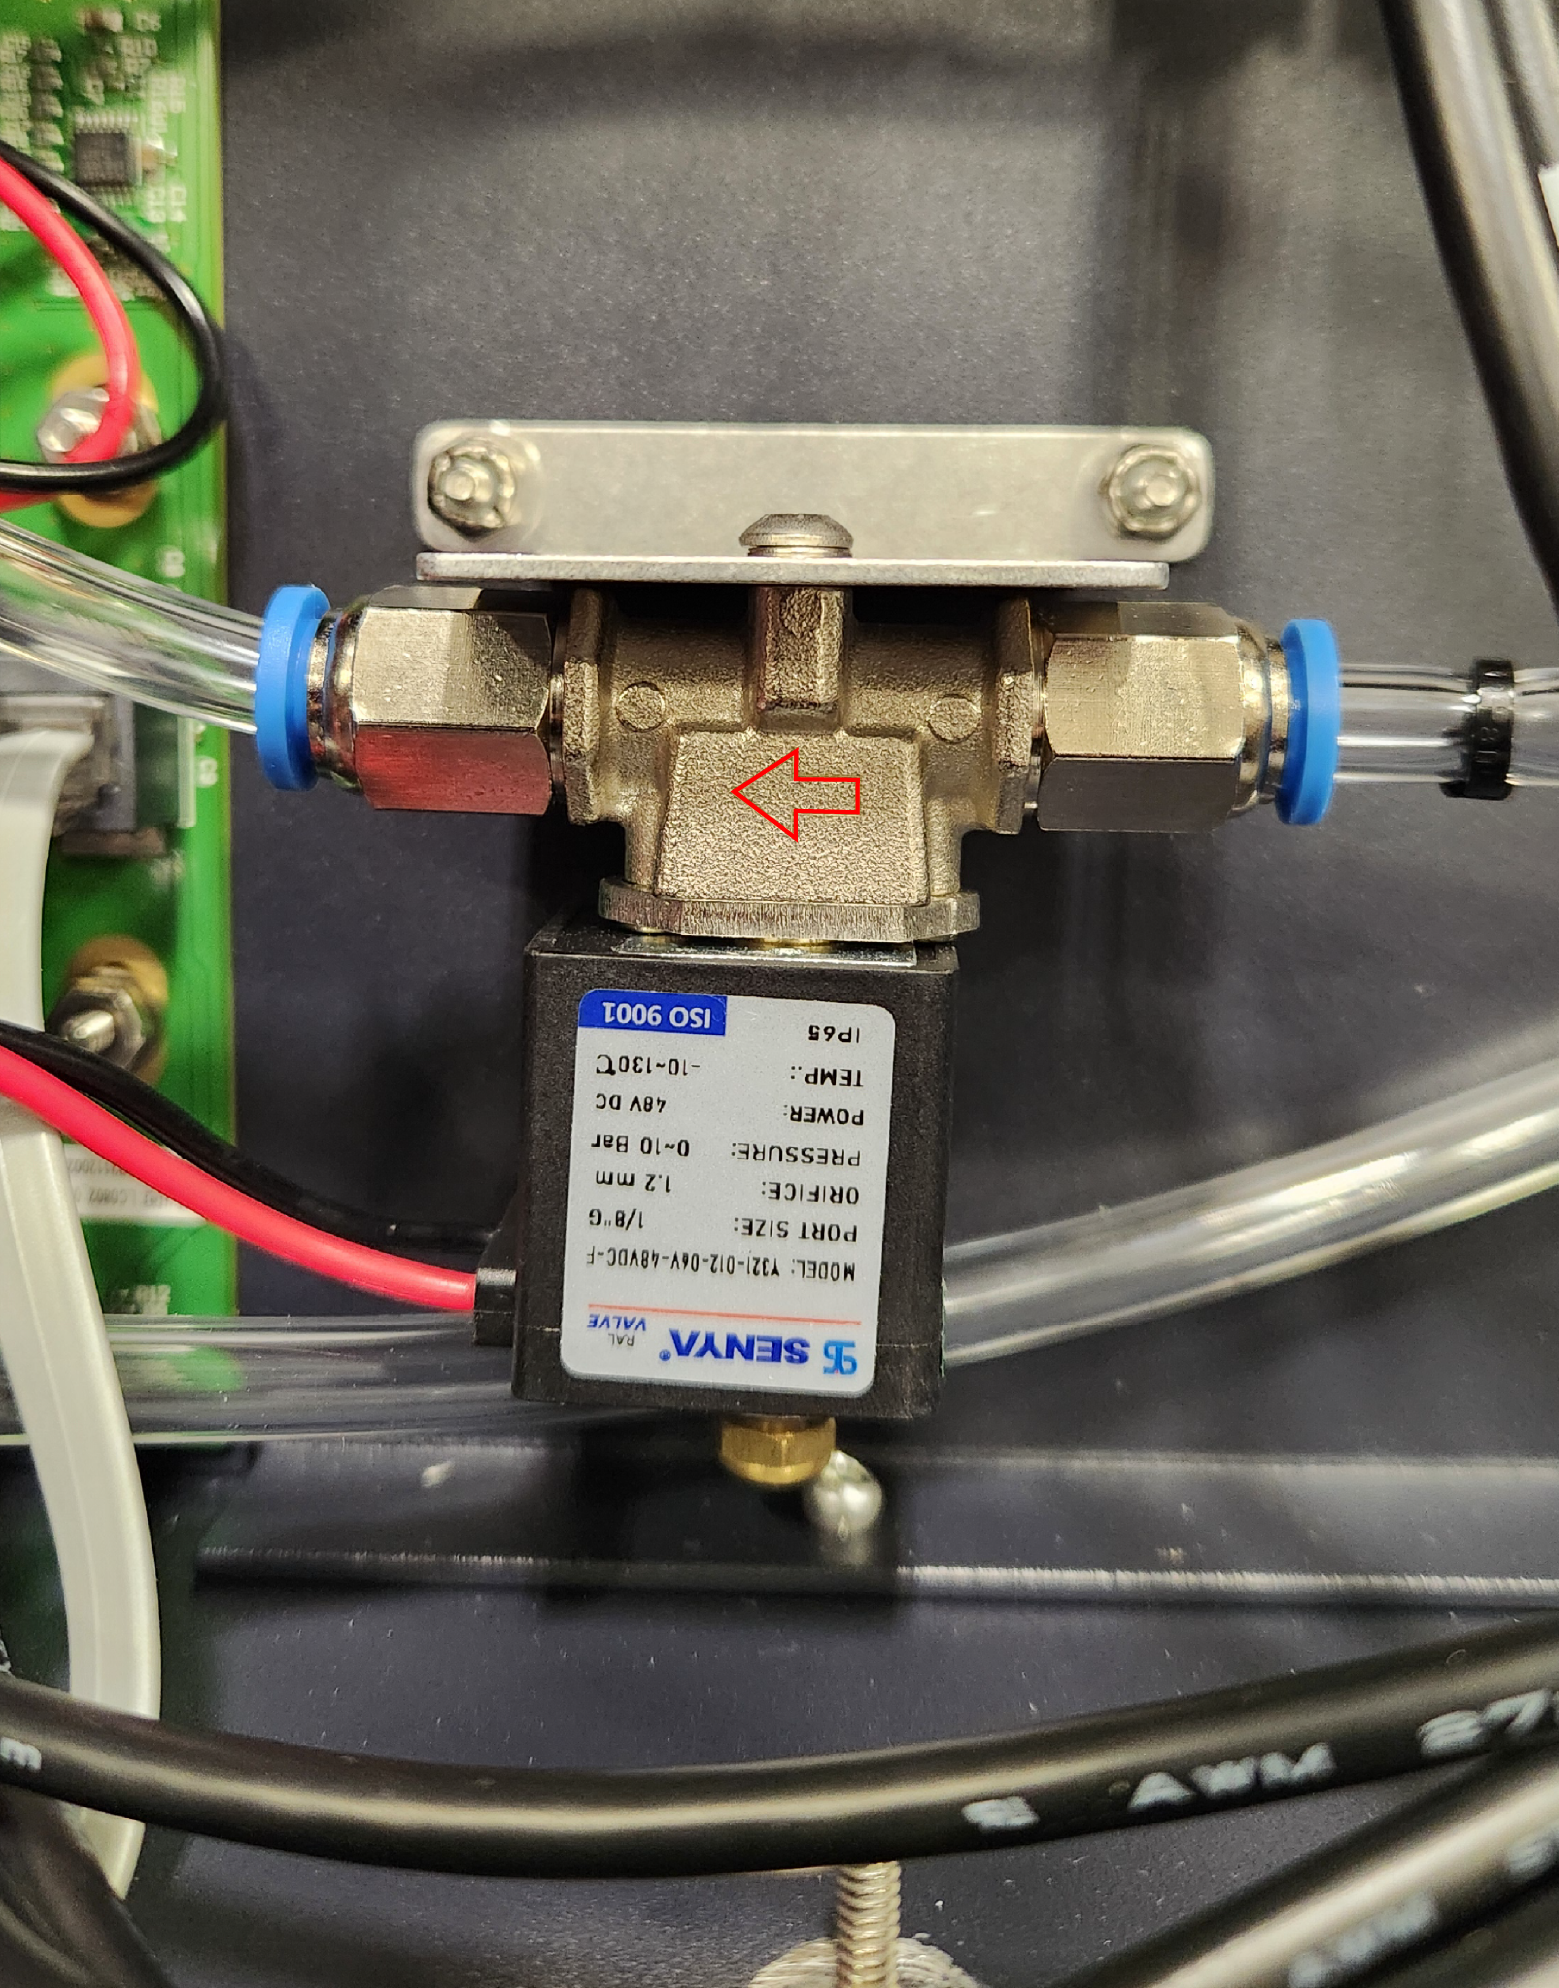
Installeer de vervangende eenheid
Plaats de vervangende magneetklep op de bevestigingsbouten van het chassis en draai de bevestigingsmoeren stevig vast.
Opmerking:
De vervangende solenoïde moet zo worden geplaatst dat de beugel aan de bovenkant van de solenoïde zit. De originele solenoïde had mogelijk een andere stand. Zorg ervoor dat de pijl die op de solenoïde is gedrukt naar de voorkant van de machine wijst.
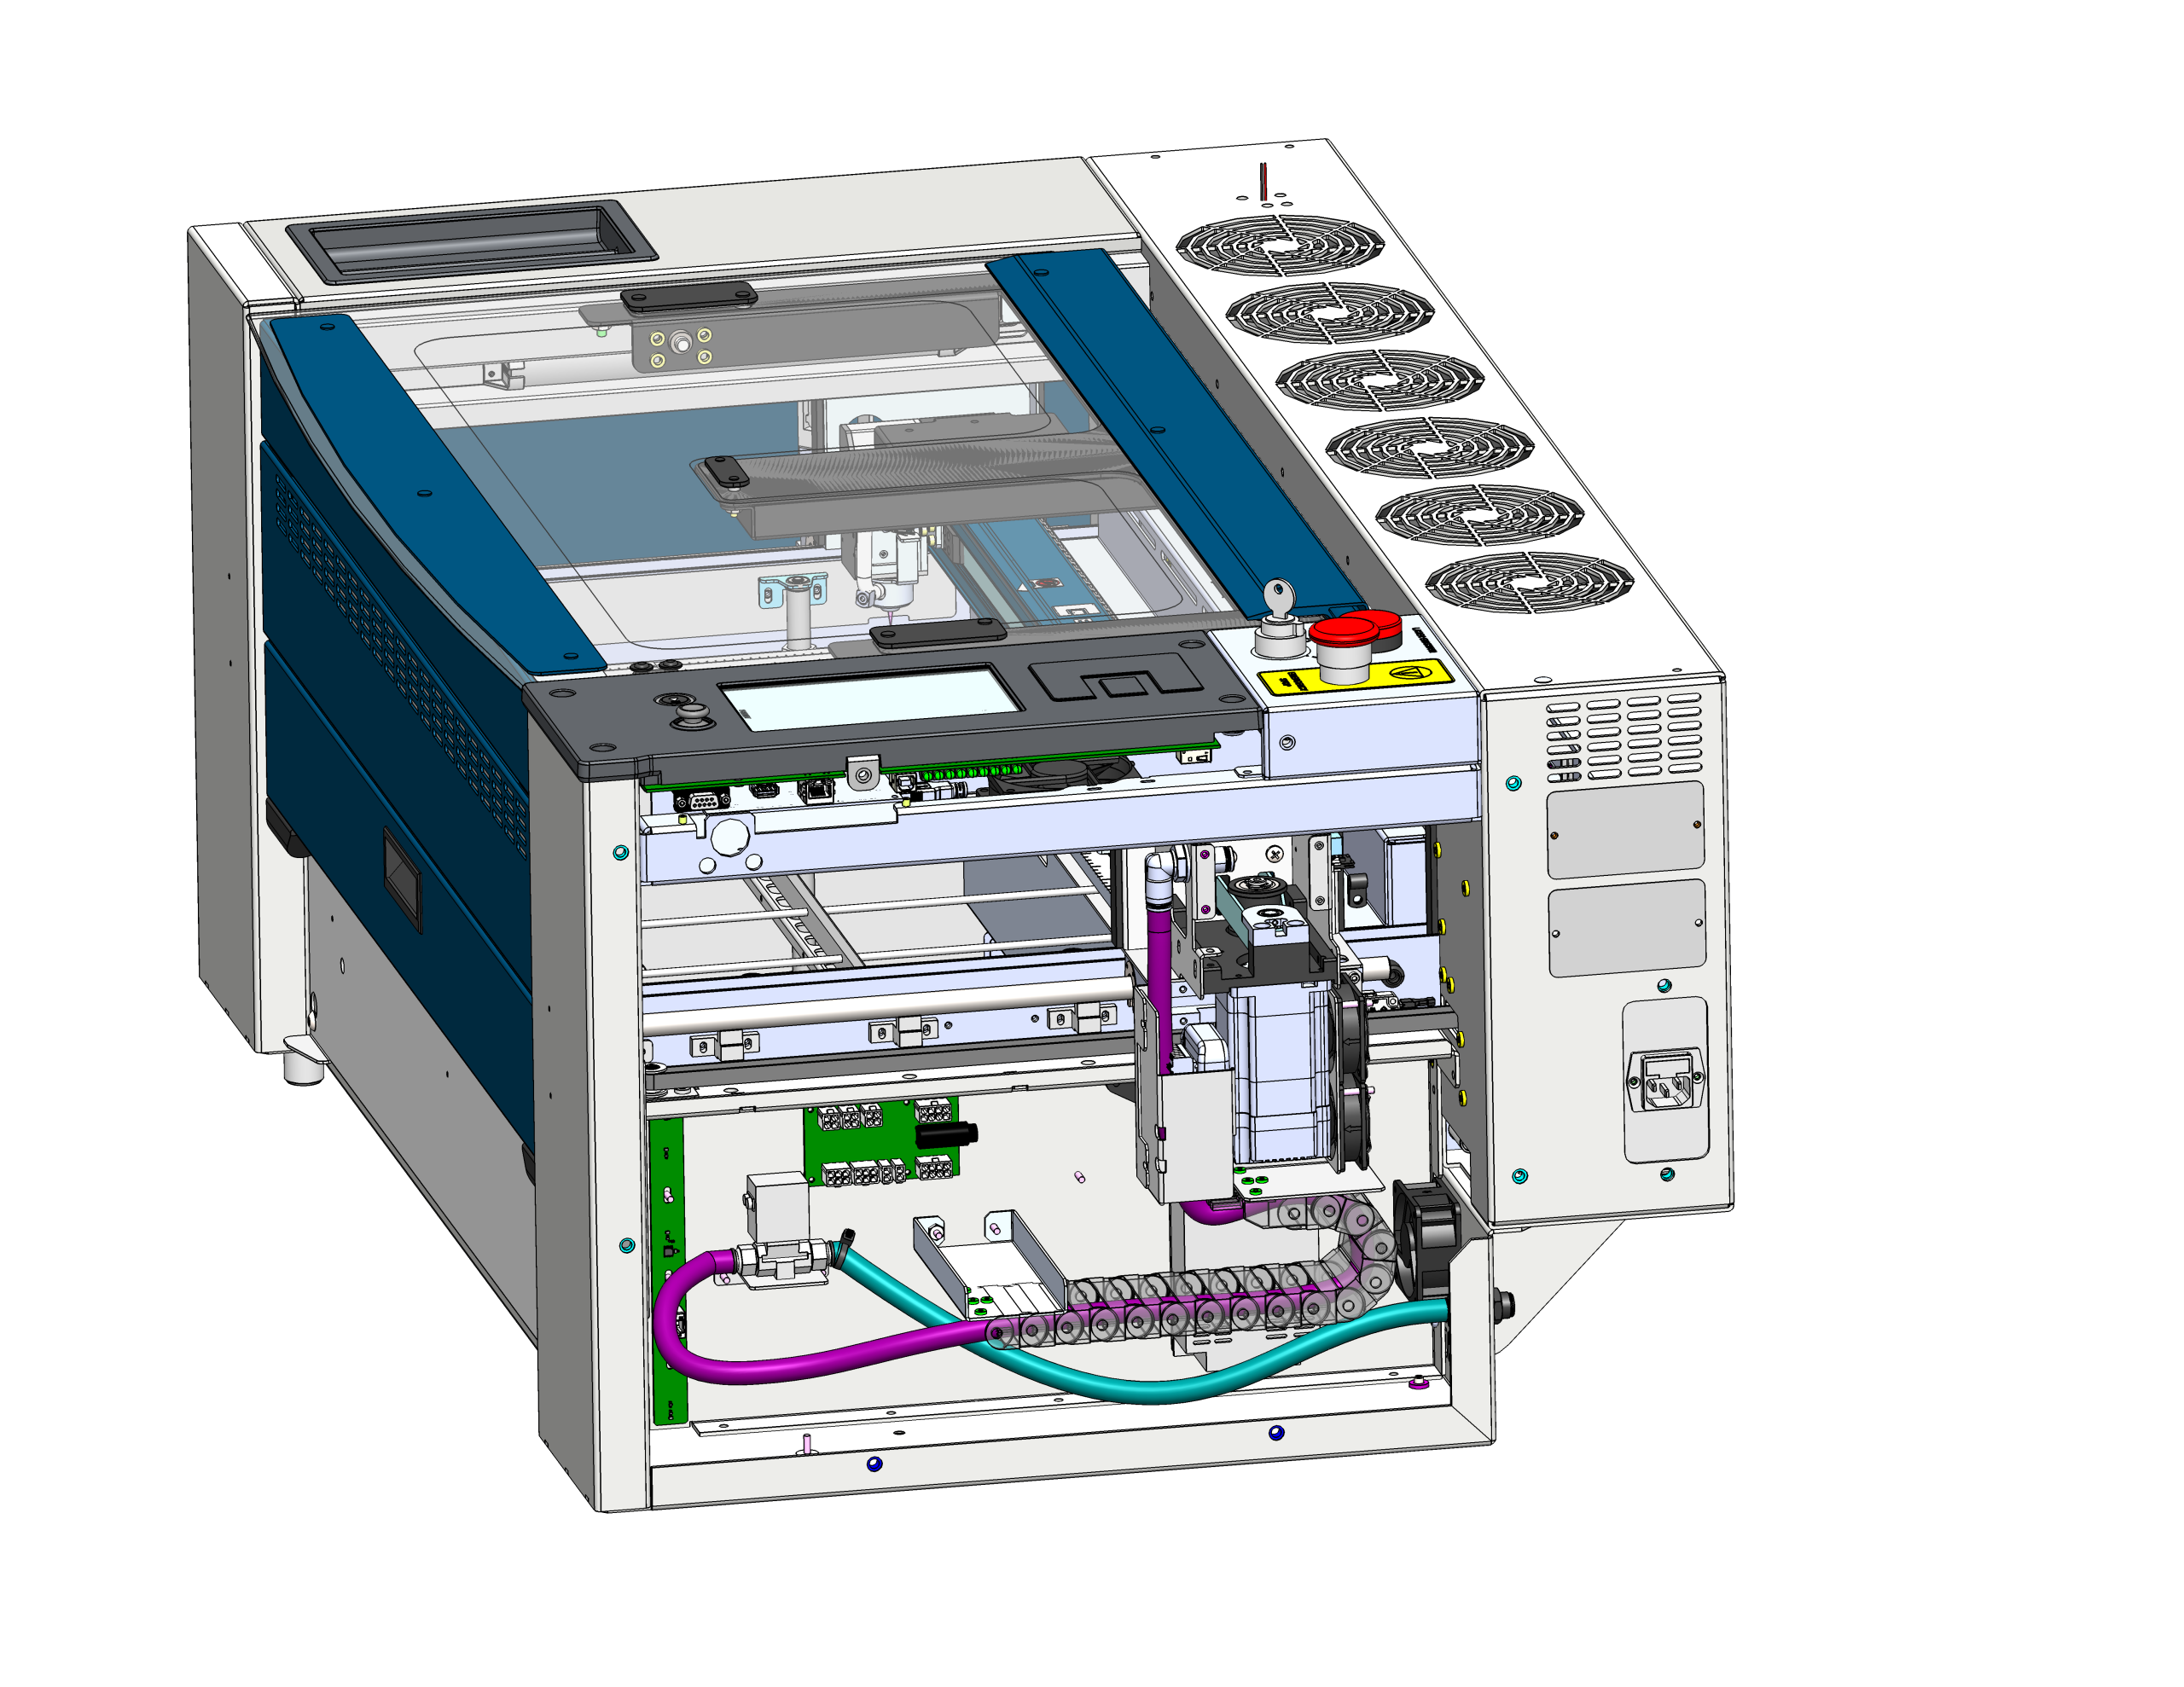
Slang bevestigen
Bevestig de slang aan de magneetklep. Als je een standaard luchtondersteunde pomp gebruikt, moet de slang met de kabelbinder aan de rechterkant van de magneetklep worden bevestigd. Voor meer informatie over het bevestigen van de slang kun je het document ‘Ombouw van standaard naar werkplaatslucht’ raadplegen, waarnaar je rechts een link vindt.
Sluit de solenoïde weer aan
Leg de nieuwe kabelboom aan en steek de stekker van de luchtbedieningsmagneetklep weer stevig in de achterplaat.
De bedrading opnieuw aansluiten
Breng de printplaat voorzichtig dichterbij en sluit de kabelbomen weer aan op de printplaat.
Zitplaatsbesturingspaneel
Plaats de printplaat precies boven de schroefgaten. Druk hem gelijkmatig en stevig aan, zodat de printplaat goed vastzit aan de achterplaat.
Beveiligde besturingskaart
Plaats de 4 schroeven weer terug en draai ze vast om de volledig op zijn plaats gezette besturingskaart aan het chassis te bevestigen.
Veilig vastmaken
Nu alles is aangesloten, gebruik je nieuwe kabelbinders om de bedrading van de solenoïde netjes langs de hoofdkabelbundel vast te zetten.
De kabelafdekking weer monteren
Plaats het paneel van de interne kabelafdekking weer terug en zet het vast over de kabelbundels heen.
Zijpaneel vervangen
Plaats het rechter zijpaneel van de machine weer terug en zet het vast.
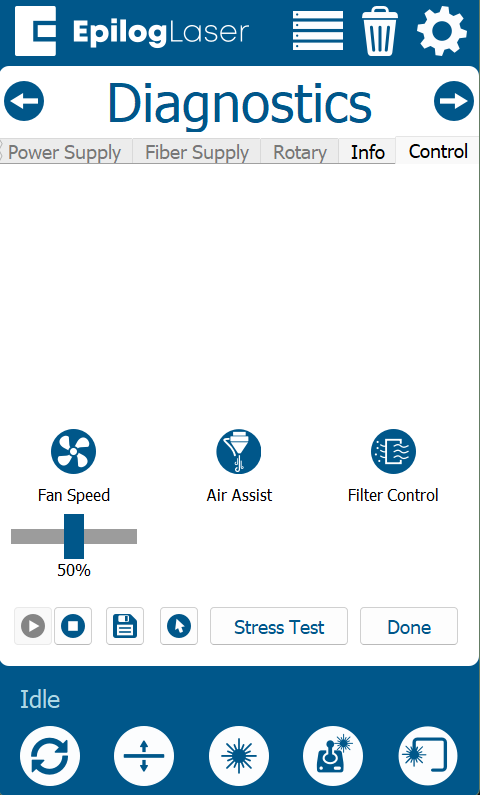
Laatste controletest
Sluit het apparaat weer aan op het stopcontact en zet het aan. Ga naar de diagnostiekomgeving om een digitale testcyclus uit te voeren:
Tandwielpictogram Houd ‘Instellingen’ ingedrukt Diagnostiek Tabblad ‘Besturing’ Klik op ‘Air Assist’.
Beweeg de bedieningshendel handmatig heen en weer en controleer of de perslucht de neuskegel van de laserwagen volledig opent en sluit.