This guide will walk you through the process of removing, installing, and programming the X-Axis Drive Board for Fusion Edge and Pro 24 / 36 models. Proper precautions, including the use of an anti-static strap, are essential to ensure the safe handling of electronic components.
Drive Board Replacement Procedure
Models: Edge 12, 24 & 36, Pro 24 & 36
Important: An anti-static strap is required when working with any PCB to prevent static discharge damage.
-
Using the Anti-Static Strap
- Remove the anti-static strap from packaging.
- Place around your wrist and adjust for comfort.
- Ensure the clamp is closed and the metal plate contacts your skin.
- Attach the alligator clip to bare metal on the engraver chassis.
-
Preferred location: chassis bolt connected to the ground behind the right panel.
-
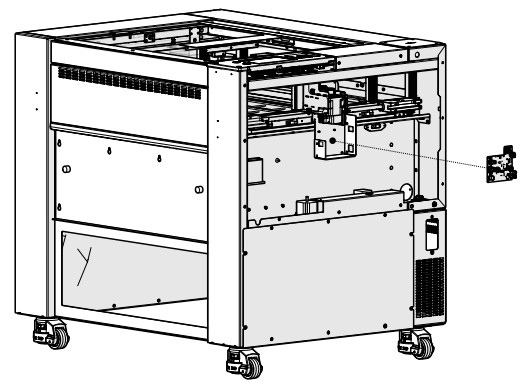
X-Axis Drive Board Removal
- Turn off and unplug the engraver.
-
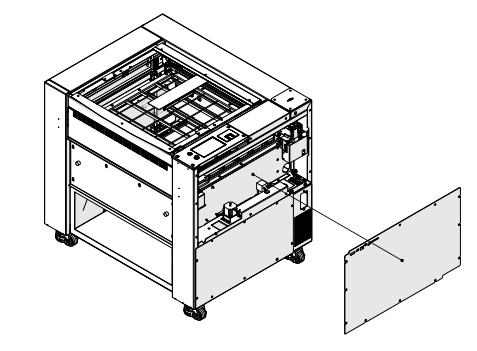
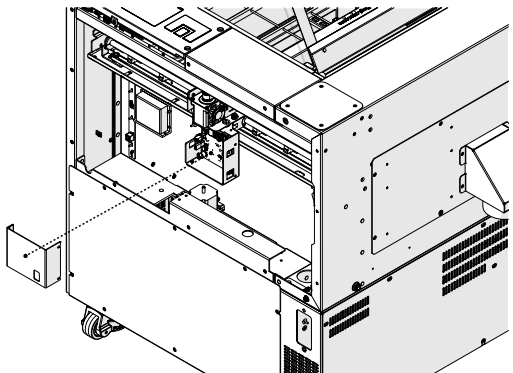
Remove the right panel of the engraver.
-
Loosen (do not remove) 4 Phillips screws on the drive board cover.
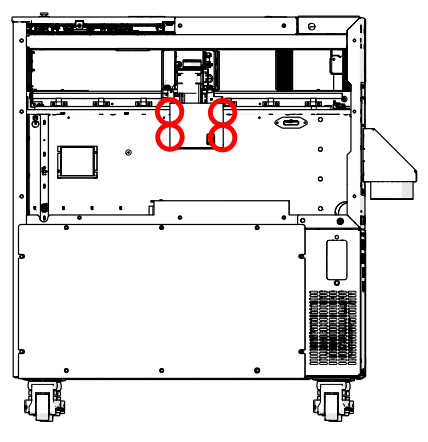
-
Remove the drive board cover.
- Wear anti-static strap and connect to a grounded surface.
-
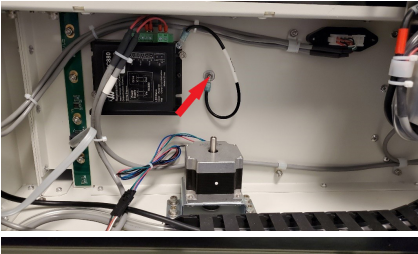
Remove 6 electrical connections on the drive board.

-
Remove 5 Phillips screws holding the board.
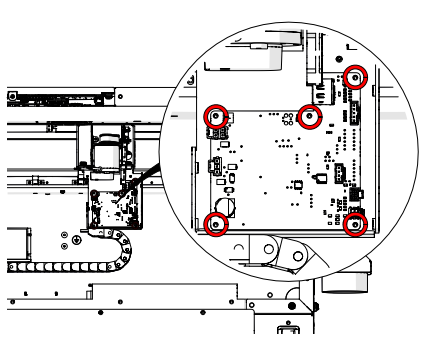
-
Remove the x-axis drive board.
-
X-Axis Drive Board Installation
-
Wear anti-static strap and ground yourself.
-
Install new drive board and secure with 5 Phillips screws.
-
Reconnect 6 electrical connections.
-
Reattach the drive board cover and tighten the 4 screws.
-
Replace the right panel and reconnect power.
-
-
Programming the X-Axis Drive Board
-
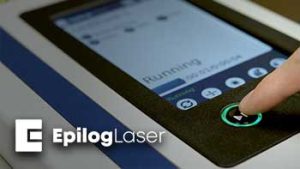
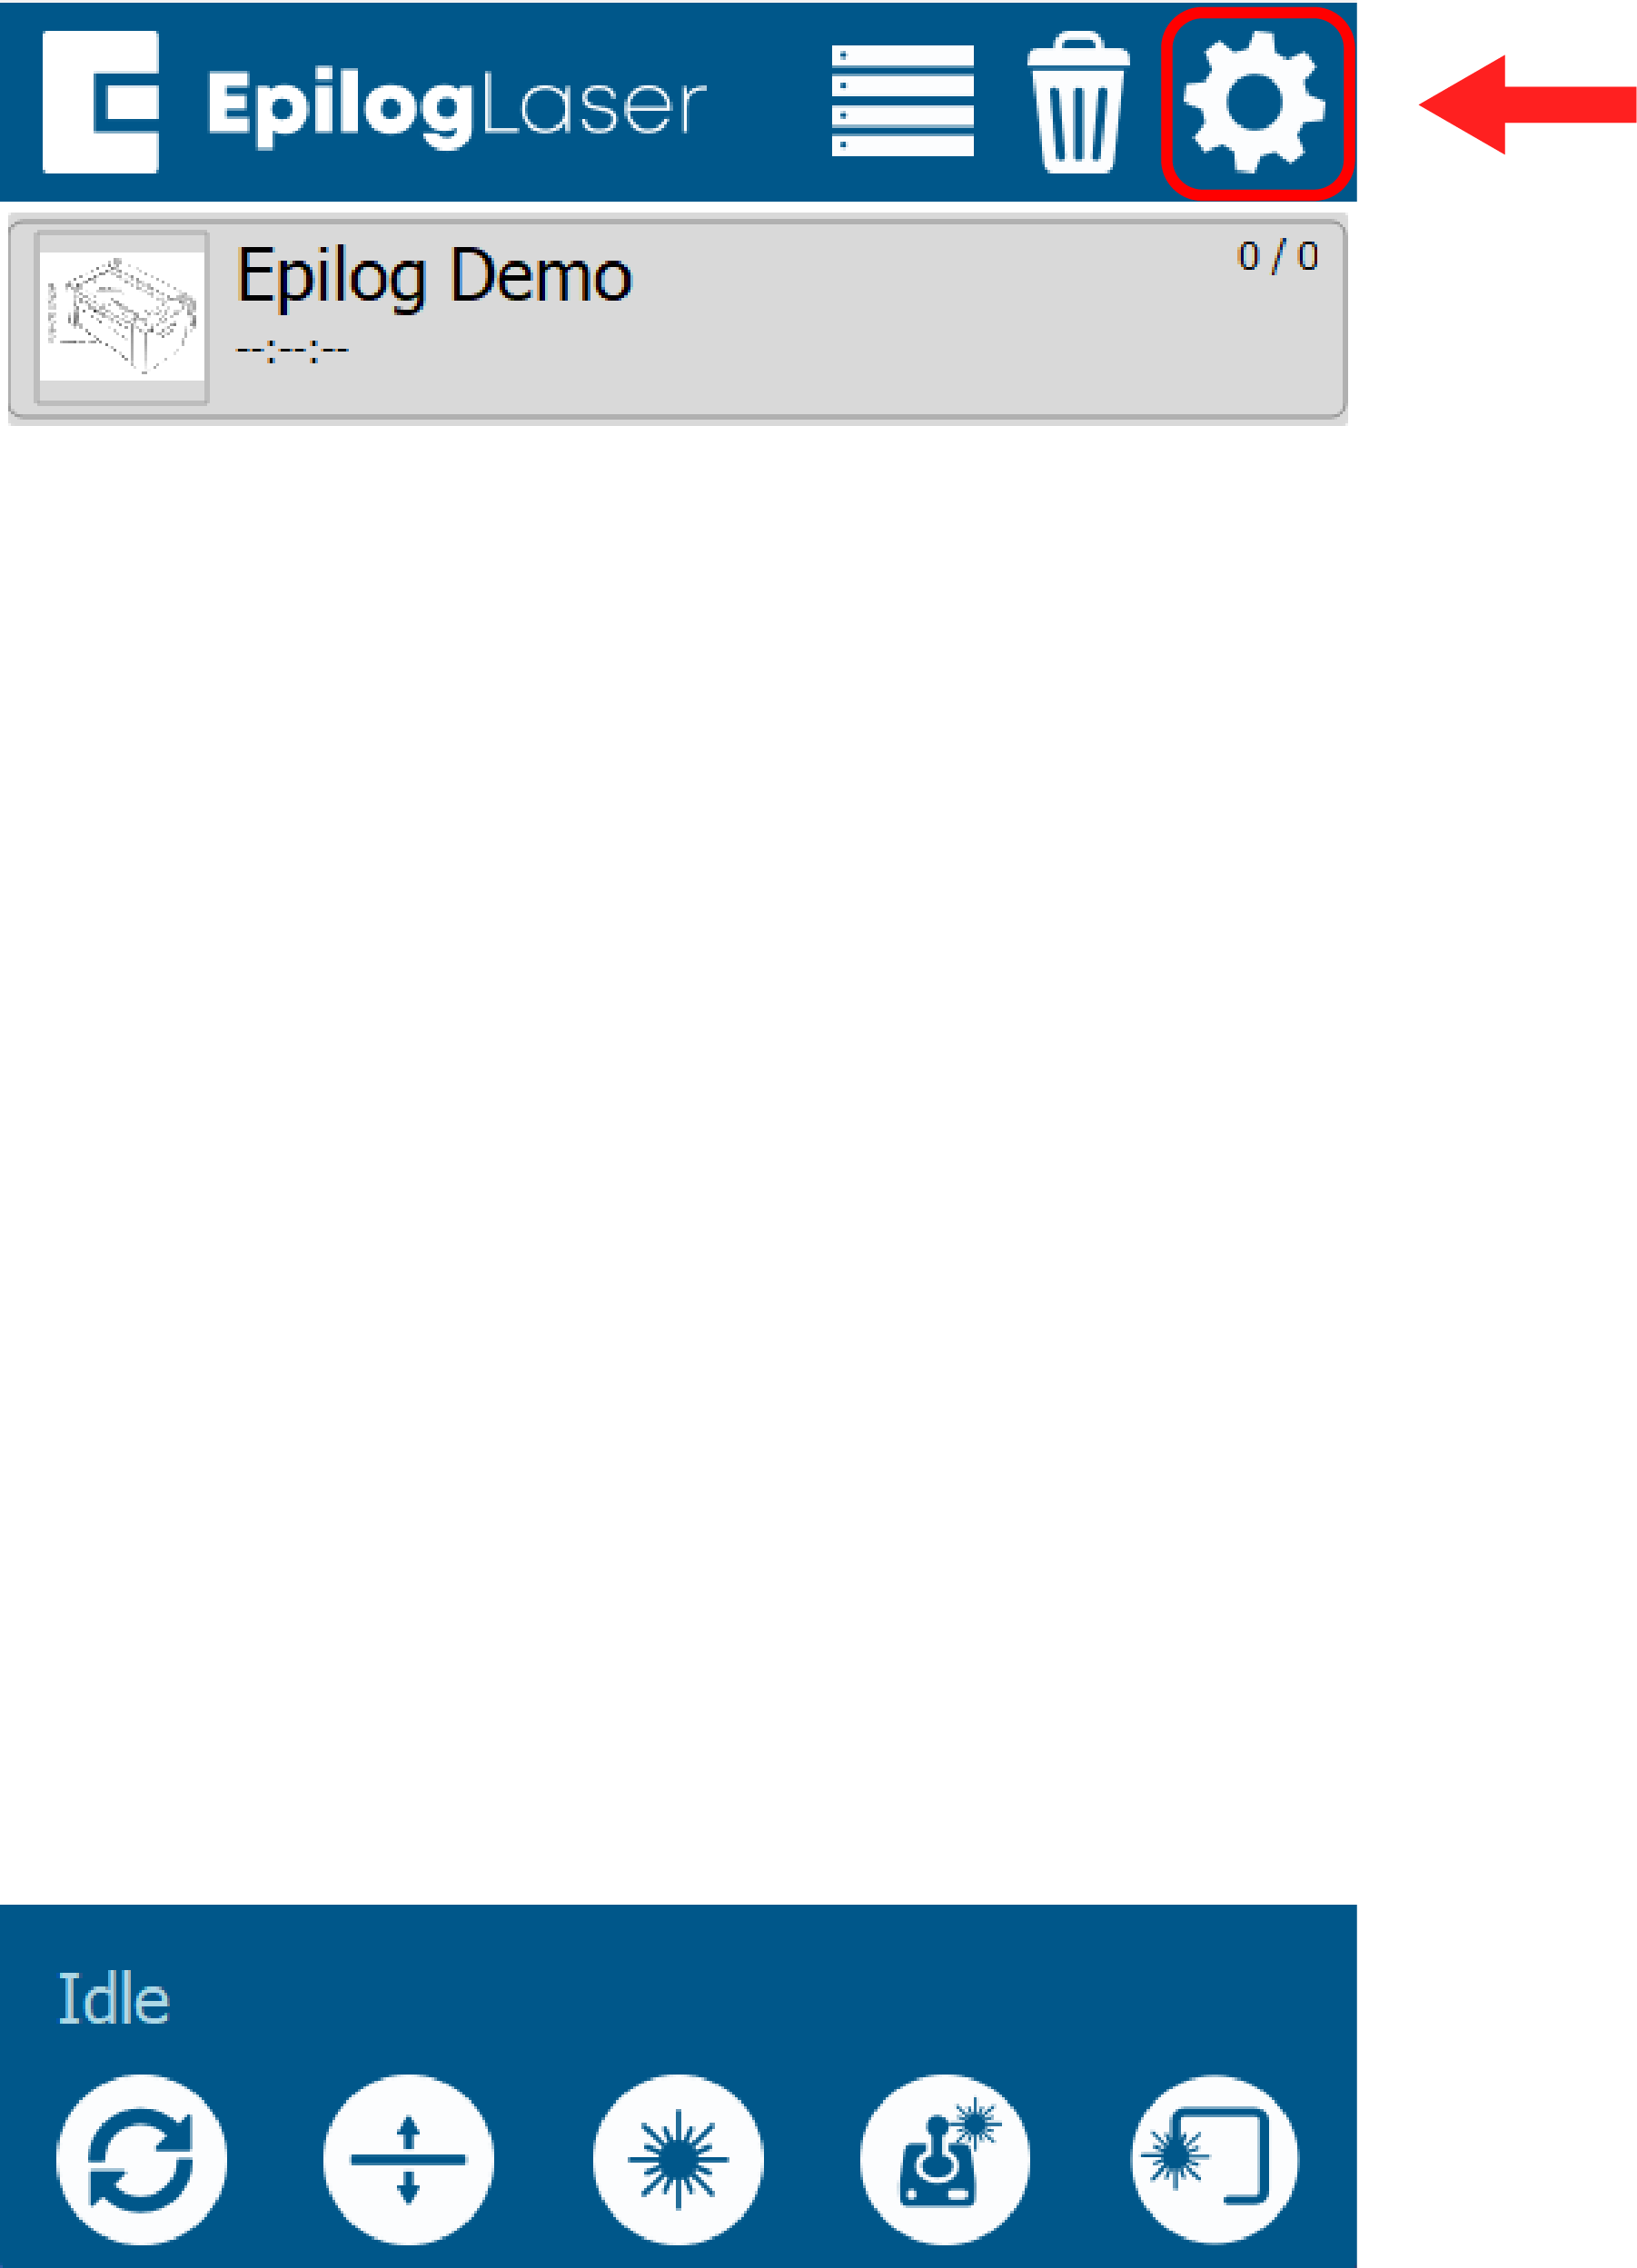
At the display panel, press the gear icon in the upper right-hand corner of the display to open the Settings menu:
-
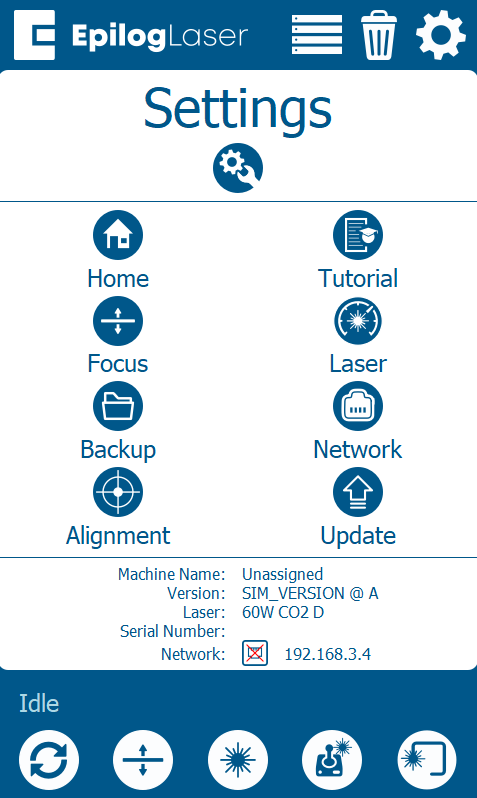
Press Update:
-
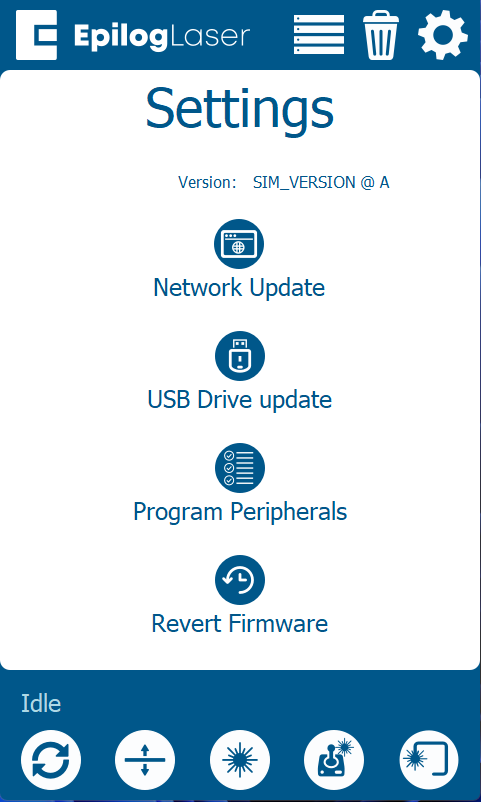
Press Program Peripherals:
-
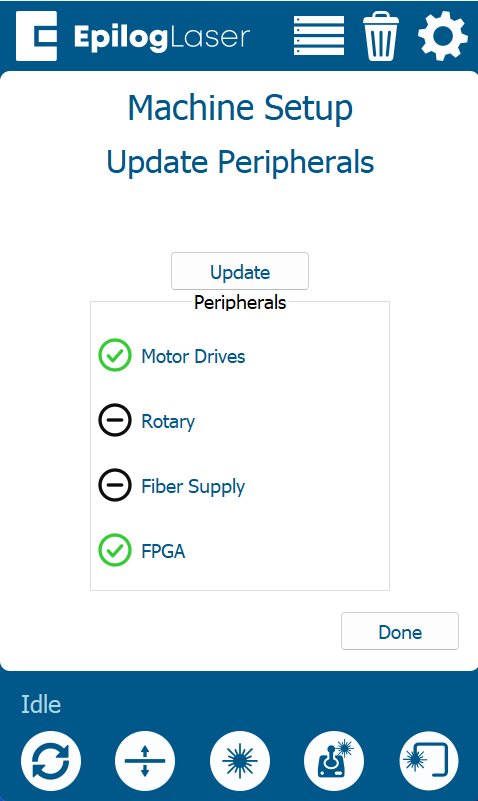
Once in the Peripheral Update menu, select all available components and press Update:
-
Allow the engraver to run the update process.
Warning: When running a peripheral update, do not power off the engraver. During a peripheral update, it is common for the display to power off. Once the update has been applied, the engraver will prompt to restart.
- Once the engraver prompts you to restart, power cycle the engraver.
-