Table of Contents
- Introduction
- Safety
- Getting Started
- Setting Up Your Laser System
- Unpacking the Fusion Ascent
- Choose Where to Locate the System
- Connecting the Exhaust
- Connecting Electrical Power
- Connecting the Laser to Your Computer
- Power on the Laser
- Set the IP Address
- Install the Software Suite & Set Up Your Laser
- Sign Up for Driver Updates and Register Your System
- Control Panel
- System Features
- Machine Maintenance
- Specifications
- Technical Support
- Warranty
- Material Settings
- Calibration
Carriage Camera Calibration
The following procedure must be performed first for all Fusion Ascent machines. Turn on the engraver, and let it complete the startup process.
- On the display, press the gear icon to enter the Settings Menu.
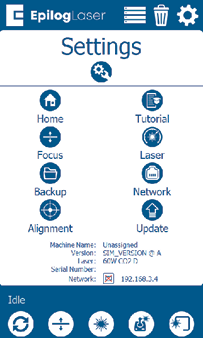
- Long Press the “Settings” text for 2-3 seconds to enter the Advanced Settings Menu.
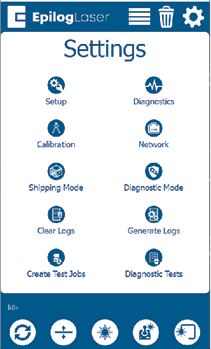
- Click on “Calibration” followed by “Calibrate Cameras” to enter the Camera Calibration menu. If using 1.1.2.8 or older, just tap “Calibrate Cameras”.
- Place an 8” x 5” (200mm x 125mm) piece of anodized aluminum in the top left corner of the table.
- Close the top door of the engraver.
- Press OK to begin the carriage camera calibration and the engraver will move the table to the appropriate focal height for calibration.
- The engraver will mark the anodized aluminum with a pattern that the carriage camera analyzes for calibration. Once the job is complete, a success message should appear.
- Follow the on-screen prompts to continue to the overhead camera calibration.