Estimated time: 15–20 minutes • Skill: Basic
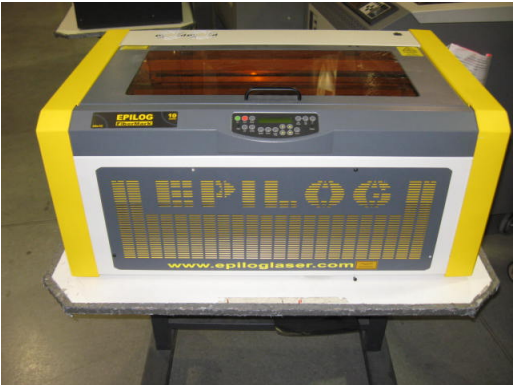
This guide explains how to replace the Y-motor on the Epilog FiberMark laser system. The Y-motor drives the X-Axis assembly forward and backward. Following these instructions will help you safely remove the old motor and install the new one.
Procedure
- Disconnect the machine from its power source.
-
Remove the front service panel.
Remove the four Phillips head screws to detach the front panel.
-
Remove the right side panel.
Remove the six Phillips head screws. There are four screws on the side and two on the rear of the panel.
-
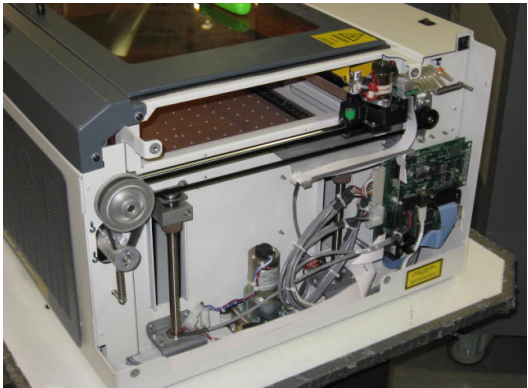
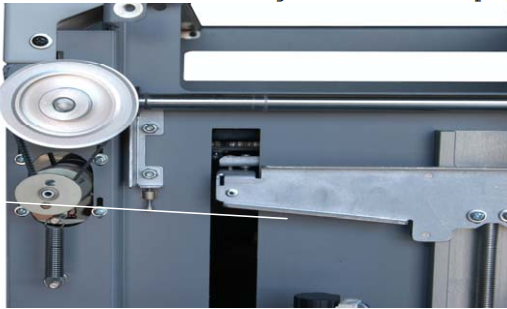
Locate the Y-Motor.
Picture 3 illustrates the location of the Y-Motor.

-
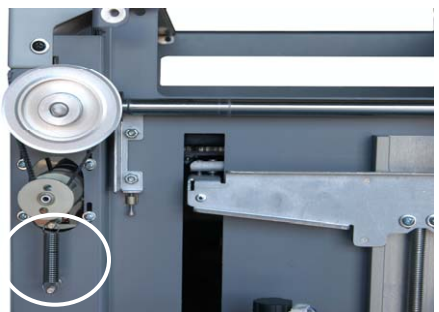
Remove the motor tension spring.
Unhook the spring holding the motor and let it hang from the bottom peg, as shown in Picture 4.
-
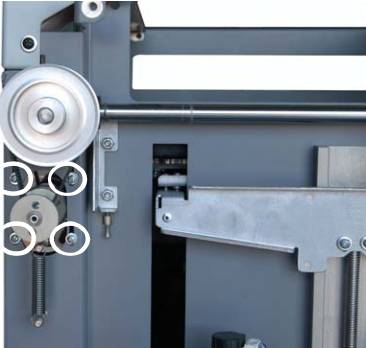
Remove the motor mounting bracket.
Remove the four Philips screws holding the motor bracket and remove the belt from the pulley above the motor. Reference picture 5 to see where the screws are located.
-
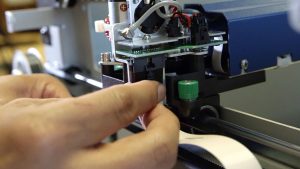
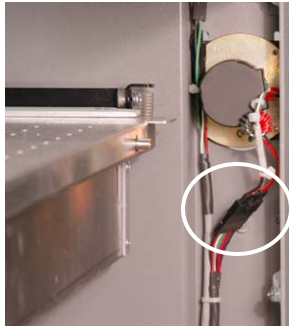
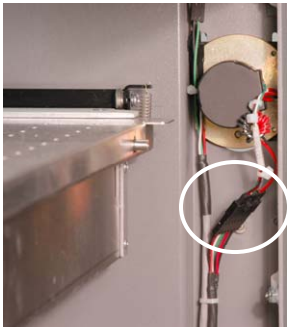
Disconnect the motor lead.
This connector is inside the machine and has a lock. Depress the lock and then pull the connectors apart.
- Remove the motor assembly from inside the machine.
Installing the new motor
-
Install the new motor assembly.
Place the assembly in from the front of the machine. Loop the belt over the pulley and loosely install, but do not tighten, the 4 Y-Motor mounting screws.
-
Attach the spring.
Place the spring on the lower peg, then pull the spring up over the top peg, letting it fit into the rear groove on the peg.
-
Apply tension and seat the belt.
Allow the spring to apply tension to the belt. Do not pull down on the motor. Move the X-axis assembly back and forth in the machine three to four times to make sure that the belt is fully seated.
-
Tighten mounting screws.
Securely tighten the 4 screws highlighted in Picture 10.
-
Reconnect the motor lead.
Plug the motor’s electrical connector back in as shown in picture 11.
- Replace right side panel.
- Replace front panel.
-
Finalize the installation.
Start up the engraver to ensure proper operation. This completes Replacing the Y-Motor in your FiberMark Laser engraver.