Introduction
This document provides detailed instructions for the removal and installation of the Y-Axis Flex Cable in the Epilog Mini/Helix and FiberMark Laser Engravers. Proper alignment and handling of the cable are essential to maintaining the machine’s performance and functionality. By following these steps carefully, users can ensure a smooth replacement process while preventing potential damage to the engraver’s components.
Y-Axis Flex Cable Removal
-
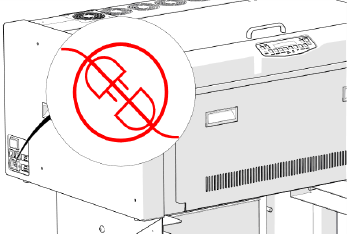
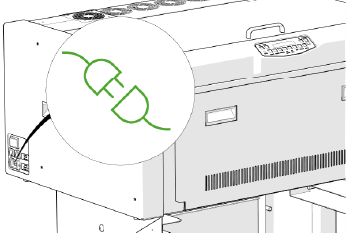
Disconnect power.
-
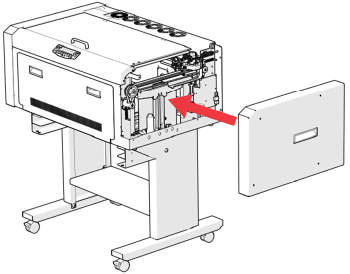
Remove right-side panel.

-
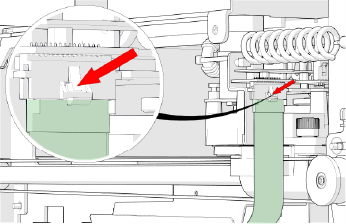
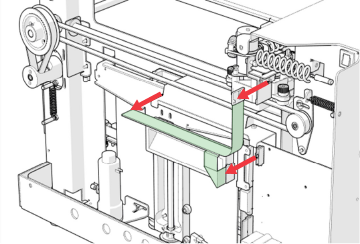
Disconnect cable from X-Axis.
-
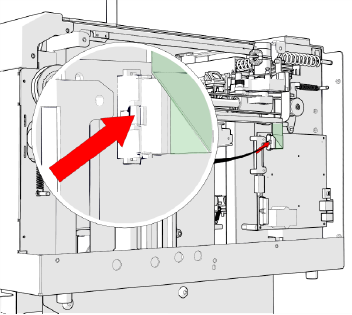
Disconnect cable from Control Board.
-
Remove cable.
Installation
-
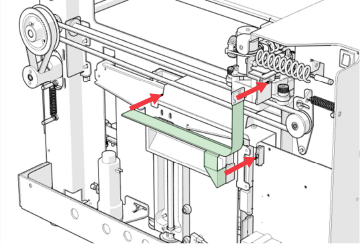
Install cable.
-
Connect cable to Control Board.
-
Connect cable to X-Axis.
-
Install right-side panel.
-
Connect power.
Was this helpful?
Thanks for your feedback!