This procedure details steps to replacing the Y-belts. The Y-belt controls the movement of the I-beam from the front and back of the machine. Before starting on this procedure, disconnect the power cord from the machine.
-
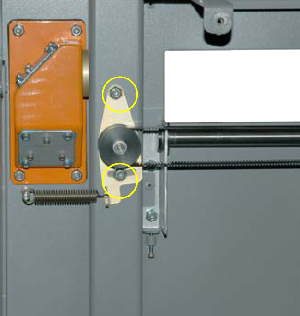
Remove both side panels.
-
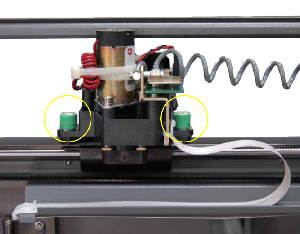
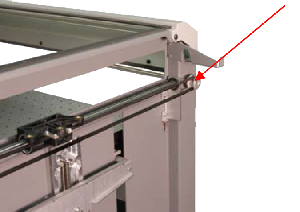
Loosen the green captive screws on the right side of the X-beam.
-
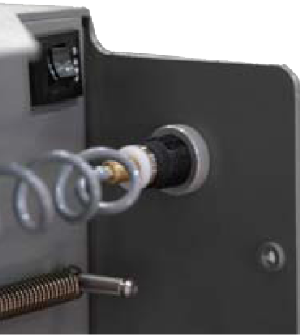
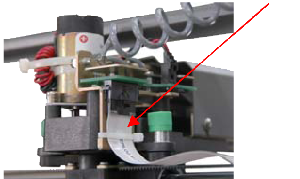
Remove the Air intake by pressing in the white ring and pulling out the hose.
-
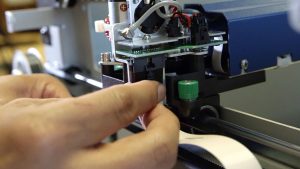
Cut the electrical tie around the white ribbon cord.
-
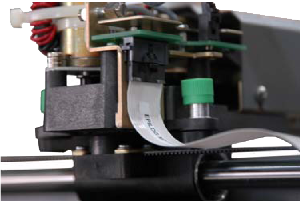
Disconnect the white ribbon cord.
-
Loosen the green captive screw on the left side of the X-beam.
-
Remove the X-beam. Use caution when pulling out the I-beam, avoid hitting the frame rail. The easiest way to pull the X-beam out is to get the left side out first then tilt the X-beam almost vertical, pulling the motor side out slowly.
-
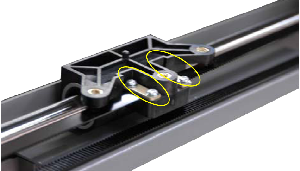
Removing the belt on the right side of the machine:
-
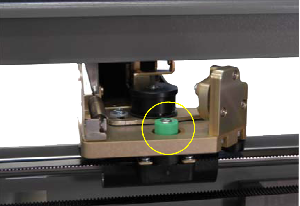
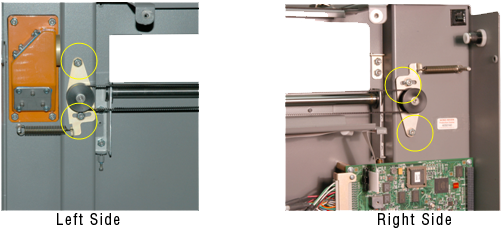
a. Loosen the two nuts with a 5/16 nut driver on the pulley tensioning system (Do Not remove these nuts).
-
b. Press the pulley to the left and simultaneously tighten the top nut. Tighten the bottom nut. The belt should be slack.
-
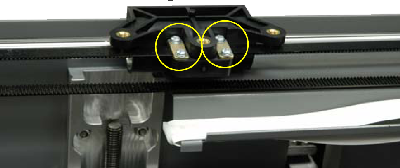
c. Remove the four screws on the X-beam bracket. Remove the plates. The belt will come out easily.
-
-
Replacing the belt on the left side of the machine:
- a. Loosen the two nuts with a 5/16 nut driver on the pulley tensioning system (Do Not remove these nuts).
- b. Press the pulley to the right and simultaneously tighten the bottom nut. Tighten the top nut. The belt should be slack.
-
c. Remove the four screws on the X-beam bracket. Remove the plates. The belt will come out easily.
-
Replace the belt with a new belt
-
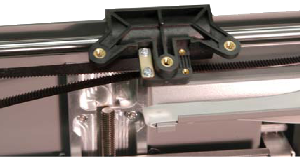
a. Put the right side of the belt into the left side of the X-Beam bracket with the grooves of the belt toward the floor. Screw in the plate.
-
b. Take the left end and loop it around the left silver pulley.
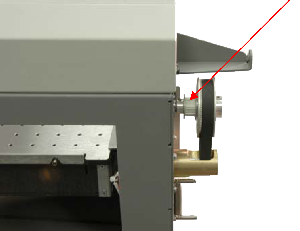
For the right side of the machine, loop the belt around the smaller spindle.
-
For the left side of the machine, loop around small silver spindle.
- c. Bring the left end of the belt to the left side of the machine and loop it around the black pulley.
- d. Push both X-beam brackets to the back of the machine to ensure the X-beam fits straight
- e. Place the left end of the belt into the right side of the X-beam bracket and screw in the plate.
-
-
Loosen the two nuts on the pulley tensioning system with a 5/16 nut driver.
-
Gently push the pulley out to tighten the belt. Simultaneously tighten the two nuts.
-
Slide both of the X-beam brackets to the back of the machine.
-
Place the X-beam back on its brackets.
-
Tighten the green captive screws on each side of the X-beam.
-
Reconnect the white ribbon cord.

-
Replace the air intake.

-
Replace the side panels.