This guide outlines the step-by-step procedure for replacing the X-Axis linear guide on a Fusion Pro laser with the increased aperture. The linear guide is a critical component that ensures smooth and precise movement of the laser carriage. Over time, it may require replacement due to wear or damage. Follow the instructions below carefully to disassemble the necessary components, install the new guide, and reassemble the machine safely and correctly. Always power down and unplug the system before beginning maintenance.
Removal Procedure
-
Power OFF the machine and disconnect the power cord.
-
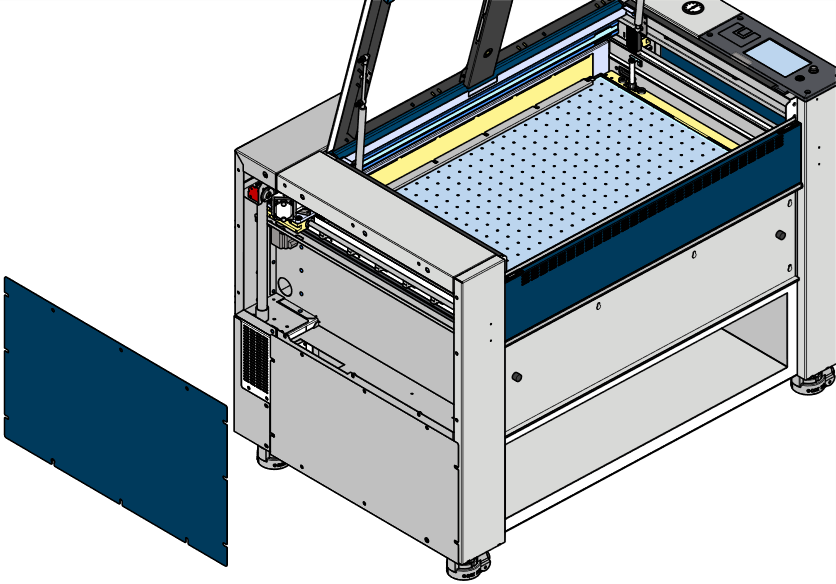
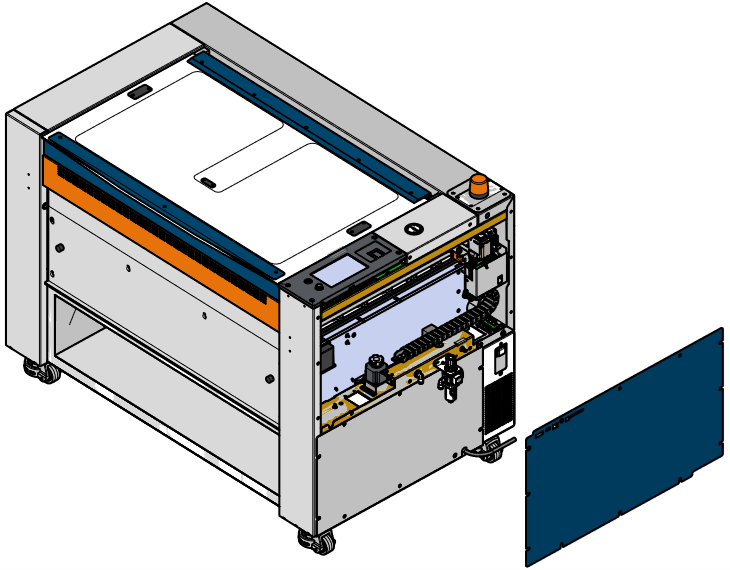
Remove the right and left side panels.
-
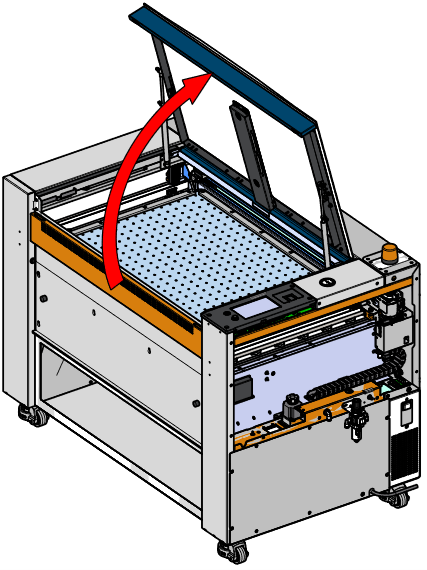
Open the top door.
-
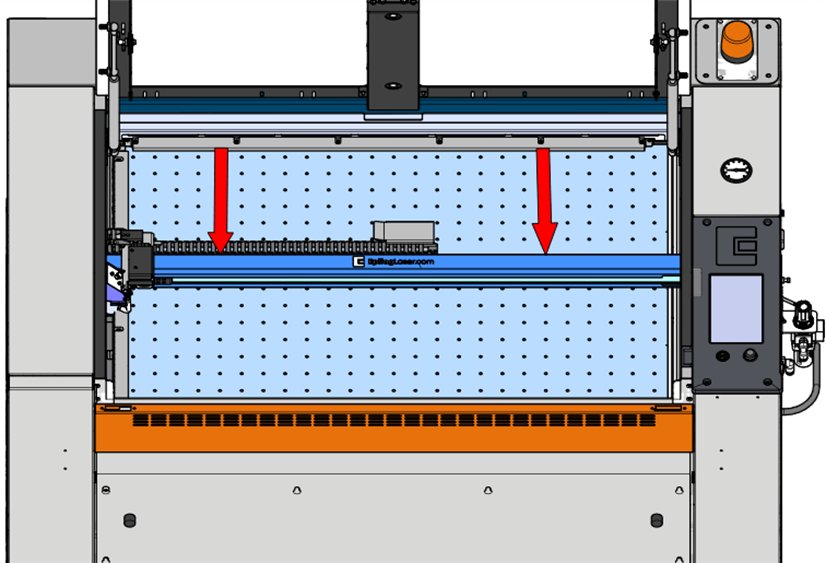
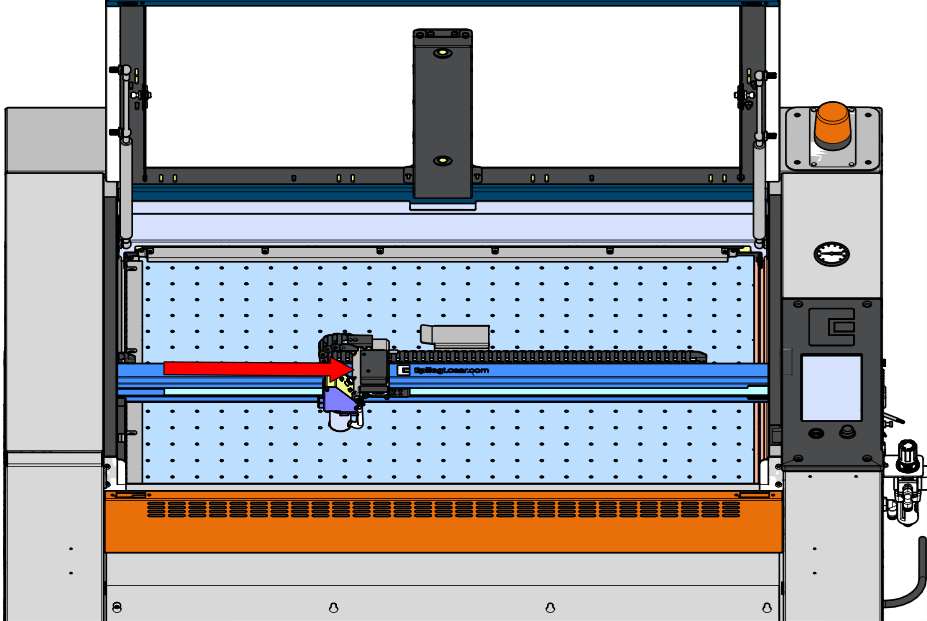
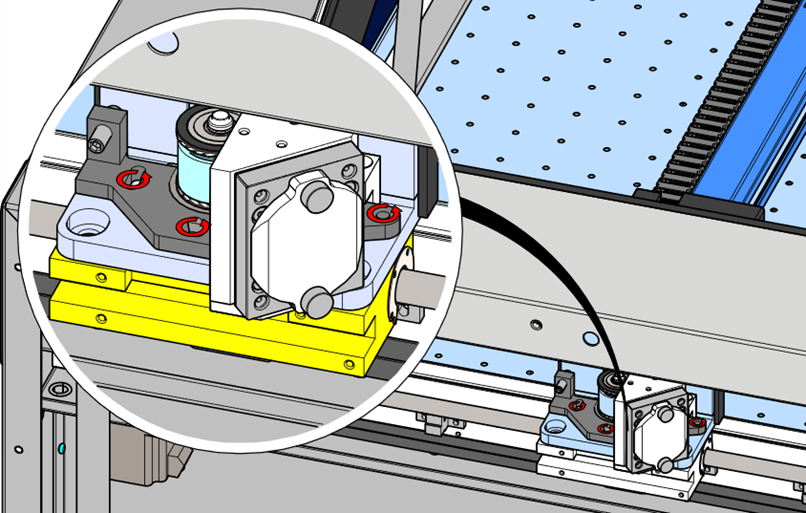
Pull the rail to the middle of the machine.
-
Move the carriage to the center.
-
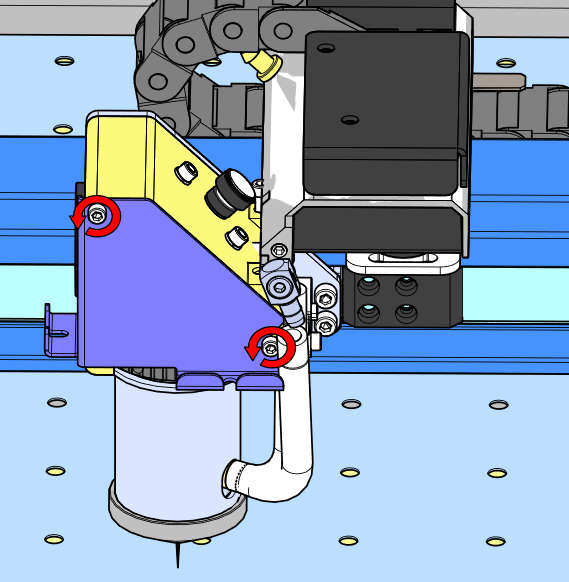
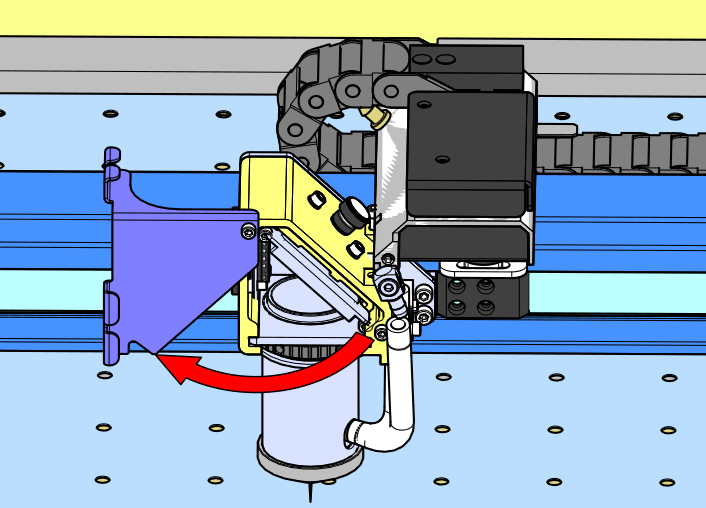
Loosen the thumb screws and open the mirror cover.
-
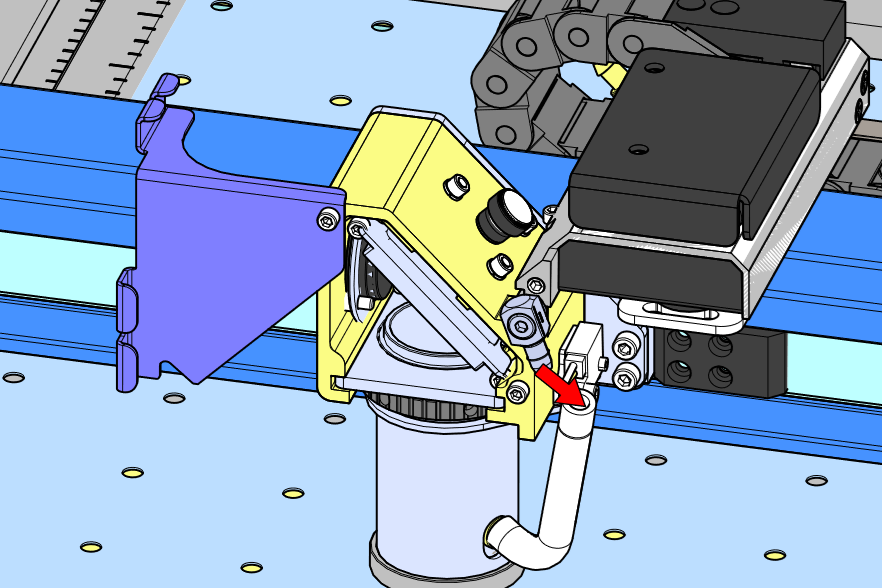
Disconnect the air assist tubing.
-
Loosen the lens nut and remove the lens.

-
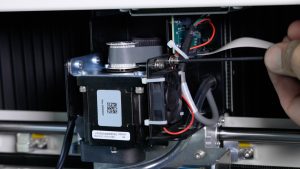
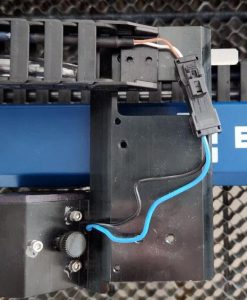
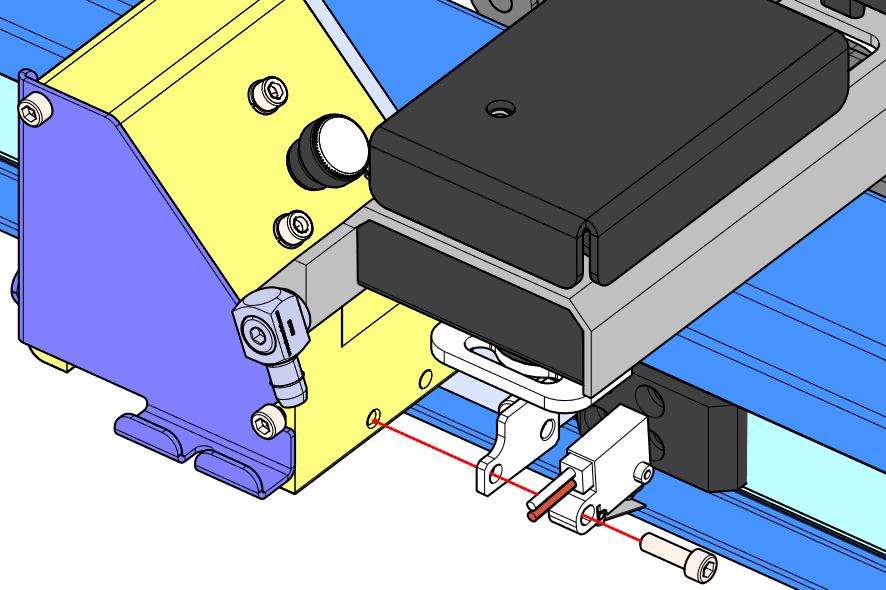
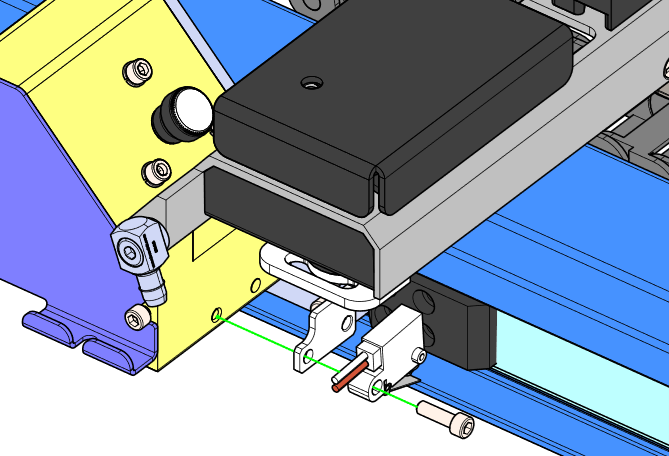
Remove the autofocus switch.
-
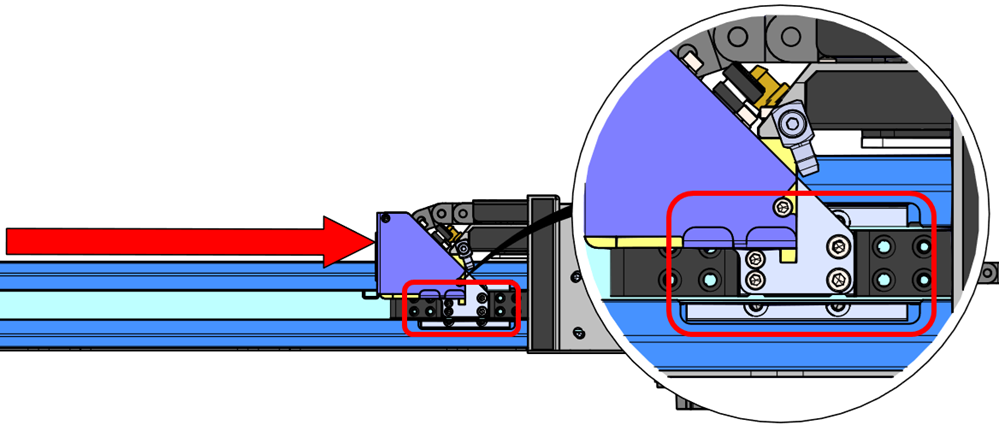
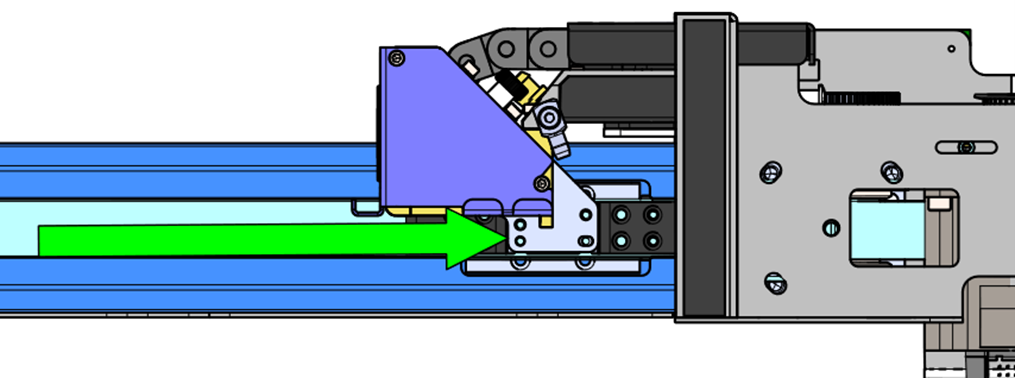
Move the carriage to the right-side of the machine.
-
Remove the carriage mounting screws.
-
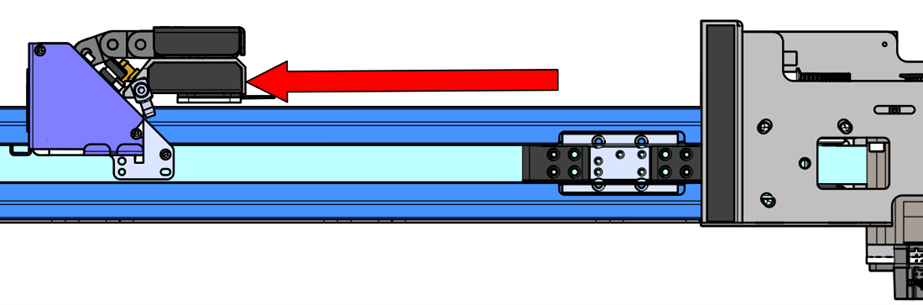
Move the carriage to the left.
-
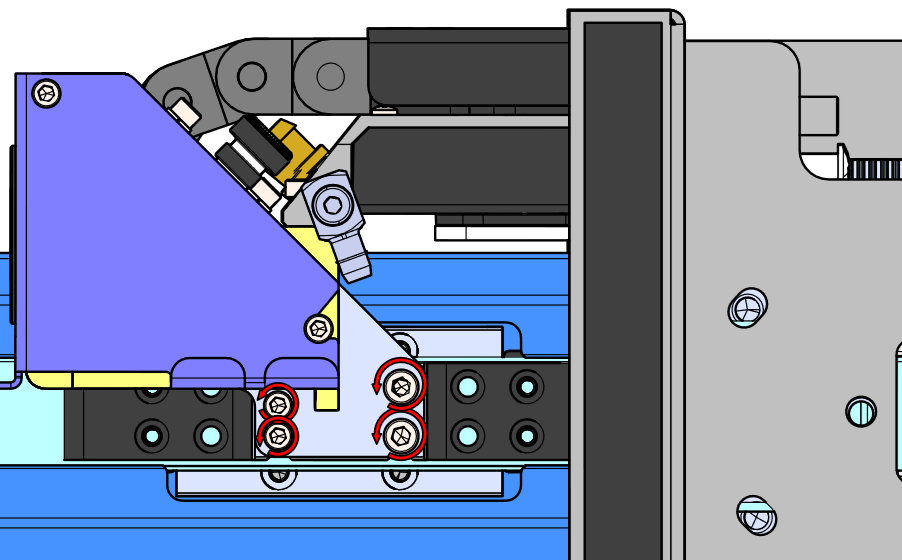
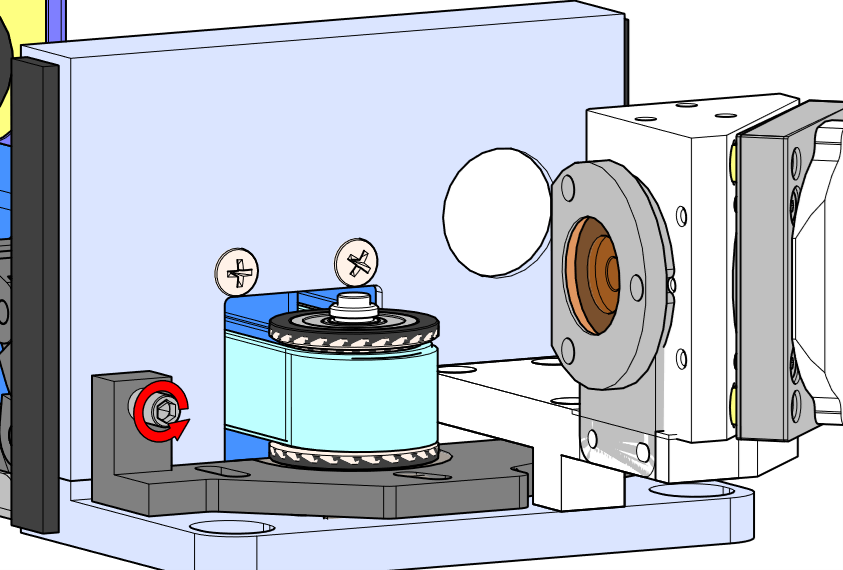
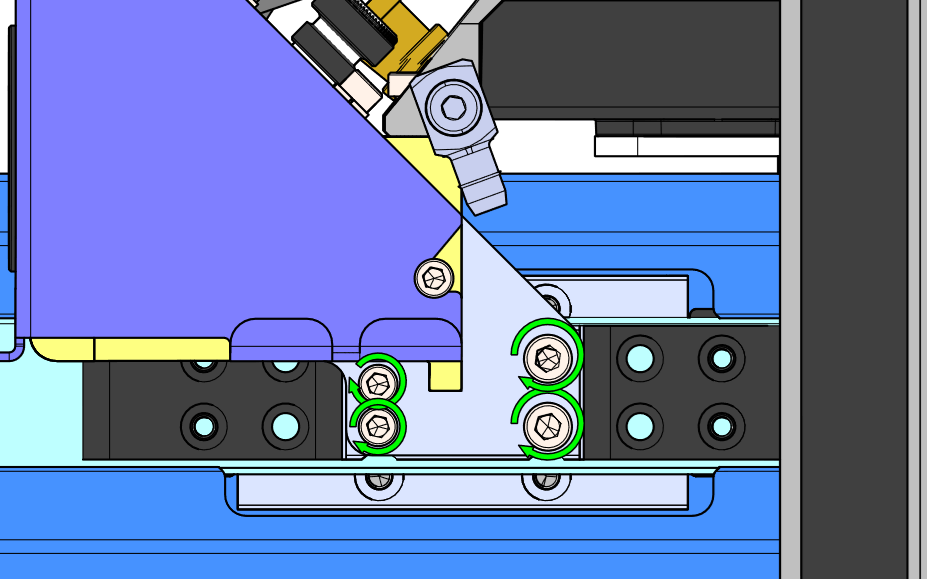
Loosen the three screws on the belt tensioner.
-
Loosen the belt tensioner screw.
-
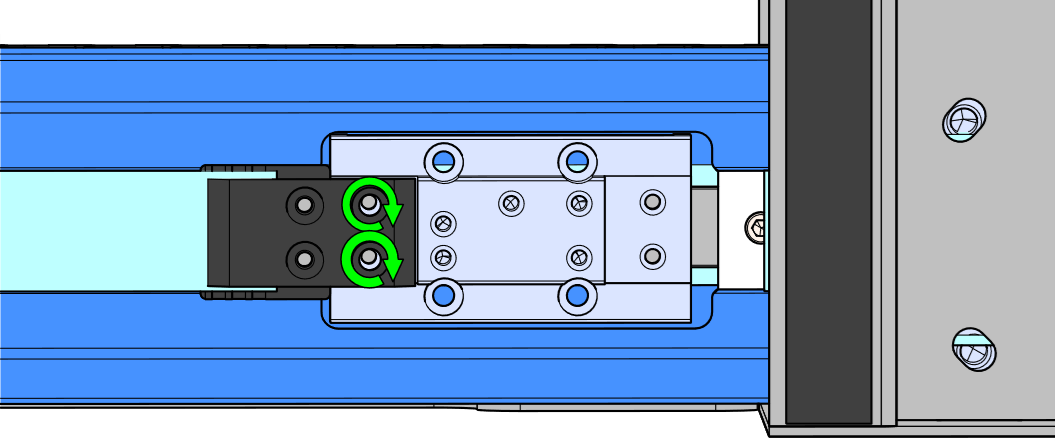
Remove the belt clamp screws, and belt.
-
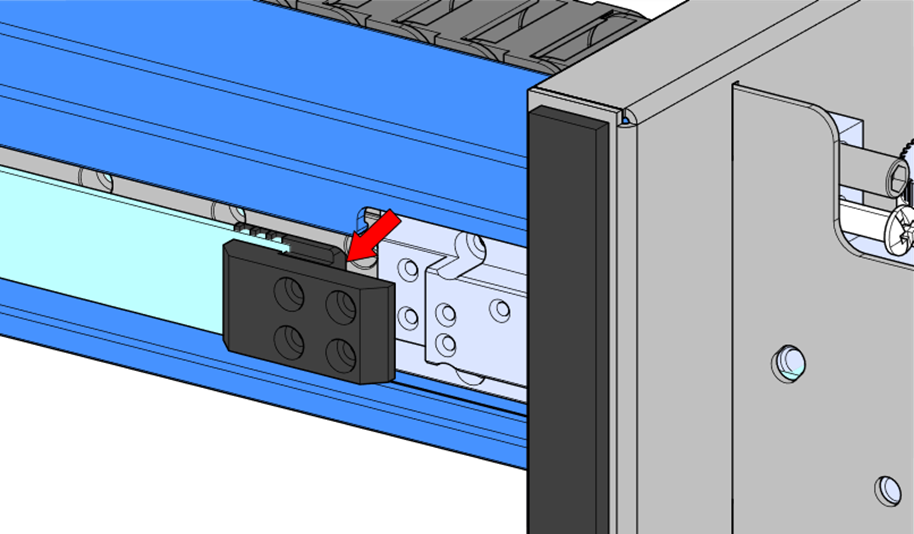
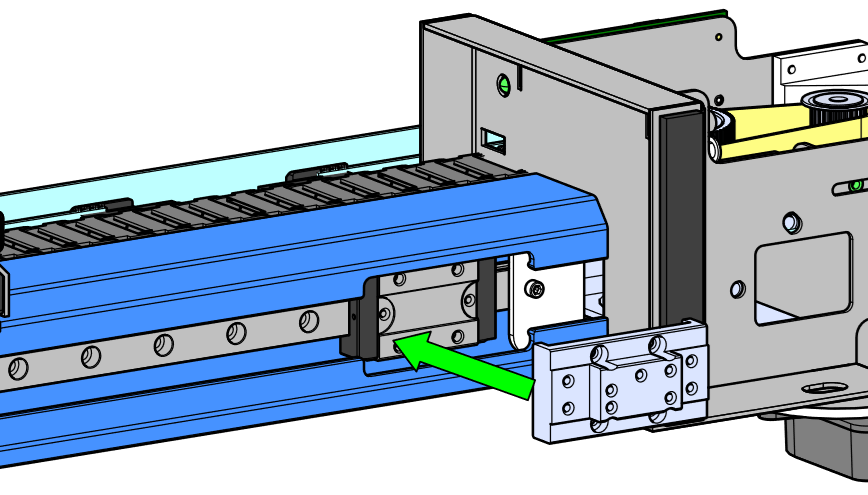
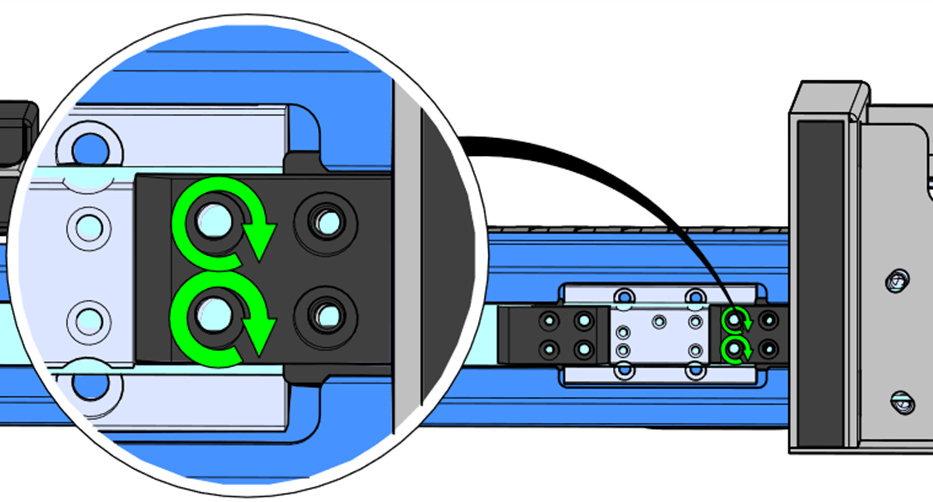
Remove carriage mounting block.
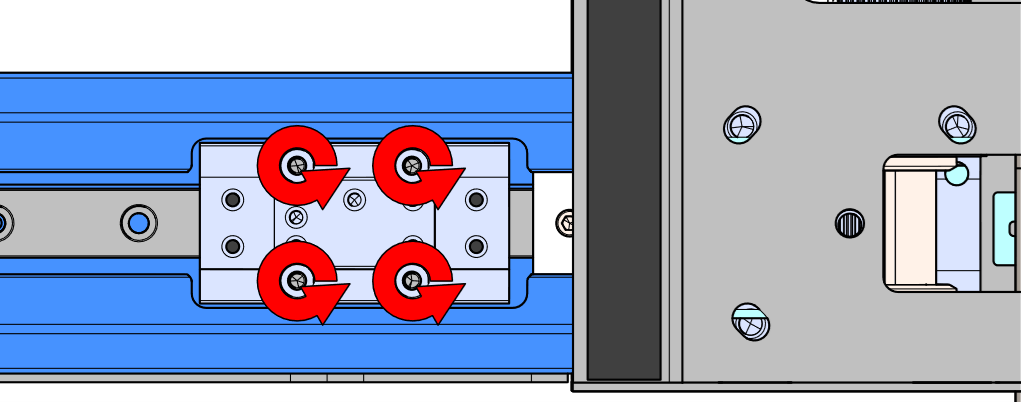
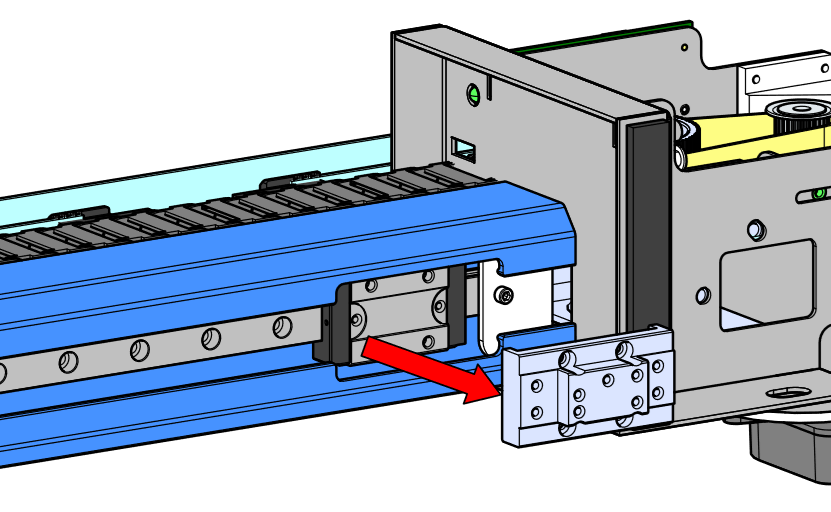
-
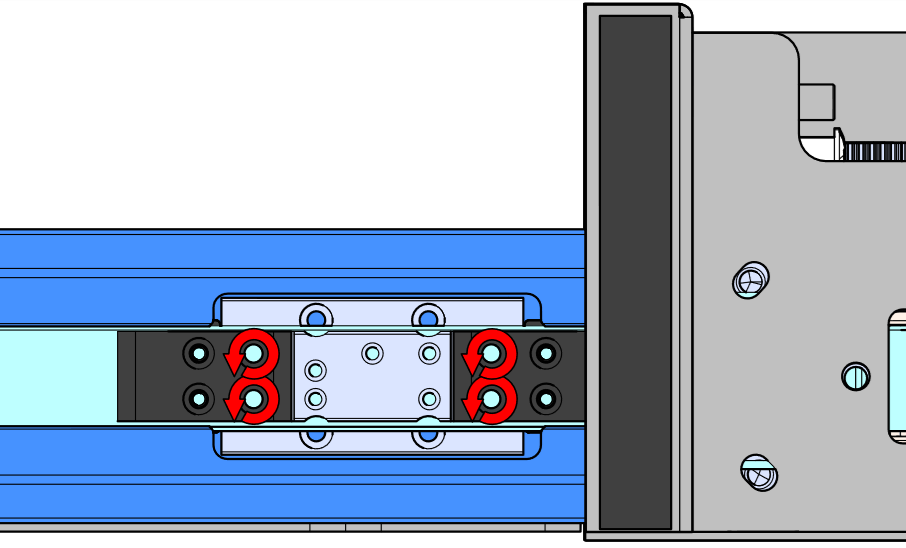
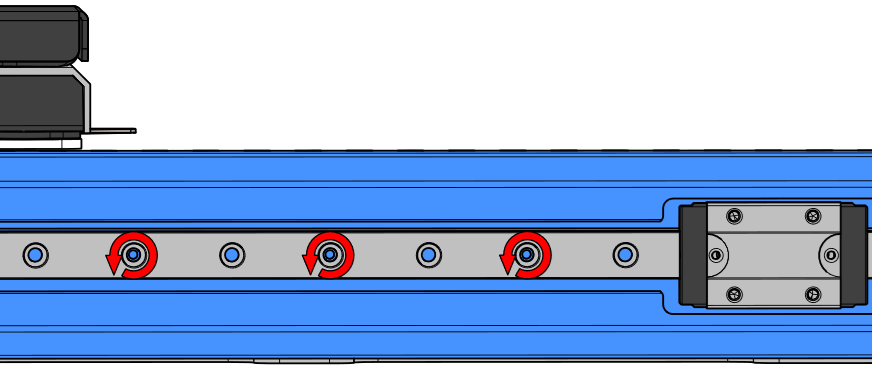
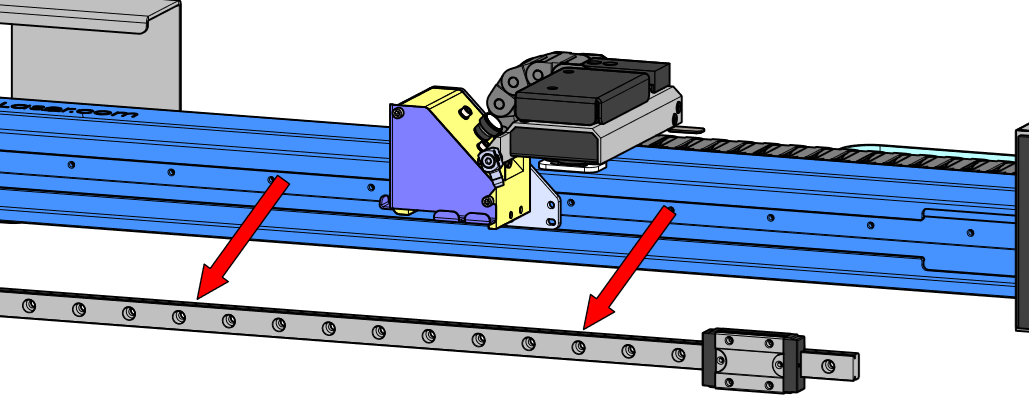
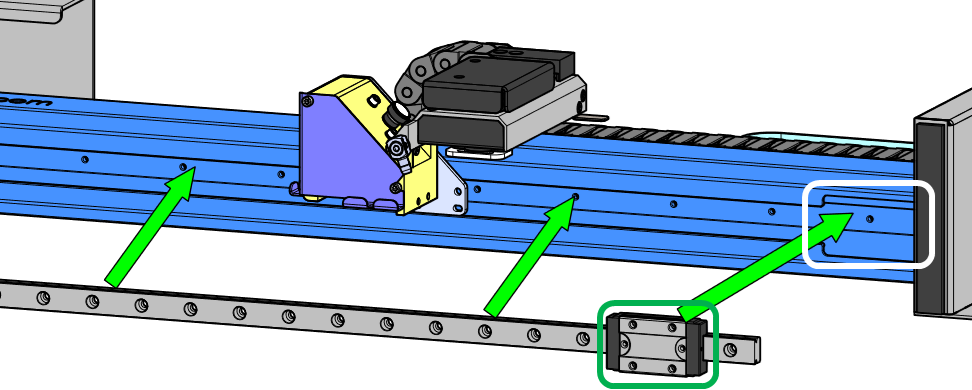
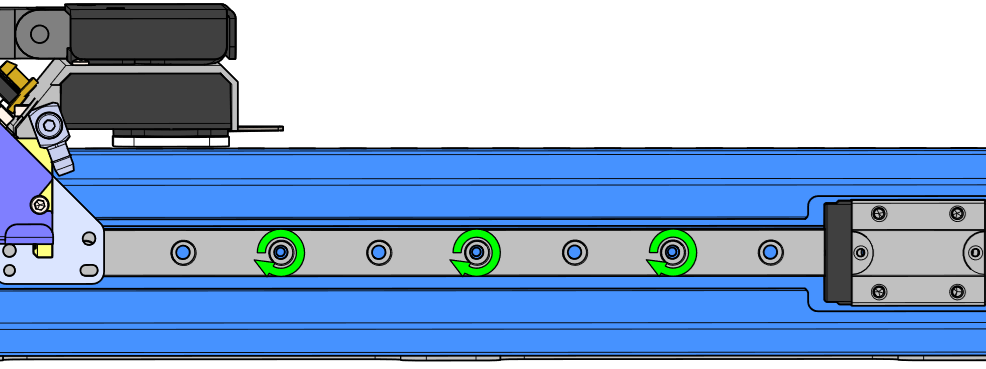
Remove hardware securing linear guide.
Install Procedure
-
Install hardware to secure the replacement linear guide.
-
Install the carriage mounting block.

-
Install the belt clamp screws.
-
Move the carriage to the right side of the machine.
-
Install the carriage mounting screws.
-
Install the autofocus switch.
-
Reattach the right and left side panels.
-
Reconnect the power cord and power ON the machine.