
The X-Axis Reducer Belt is a crucial component in ensuring the smooth and precise movement of the engraving machine. Over time, it may require replacement due to wear and tear, ensuring that the engraver continues to perform at optimal efficiency. This guide provides step-by-step instructions for safely removing and installing the X-Axis Reducer Belt on Epilog Laser models Edge 12, 24 & 36, and Pro 24 & 36. Follow these instructions carefully to maintain the reliability and performance of your engraver.
X-Axis Reducer Belt Installation Removal
- Turn off the engraver.
- Disconnect the engraver from the power source.
-
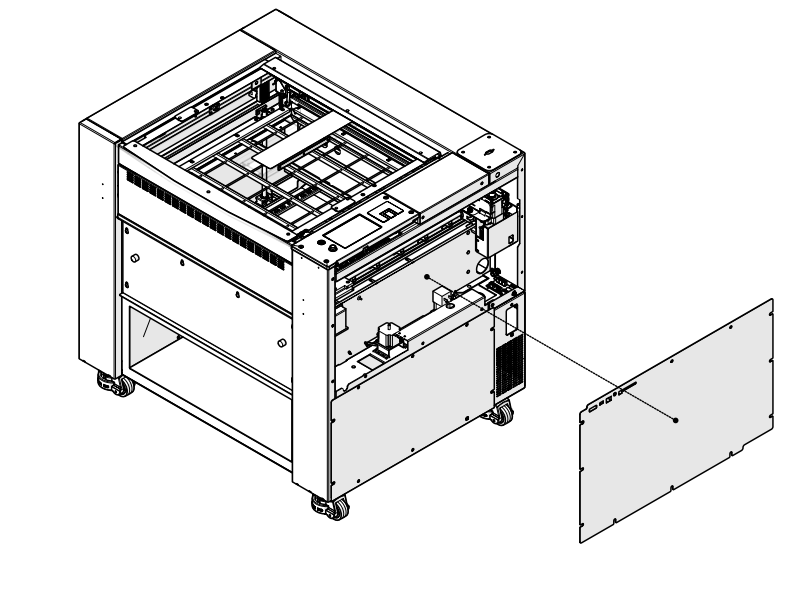
Remove the right side panel of the engraver.
-
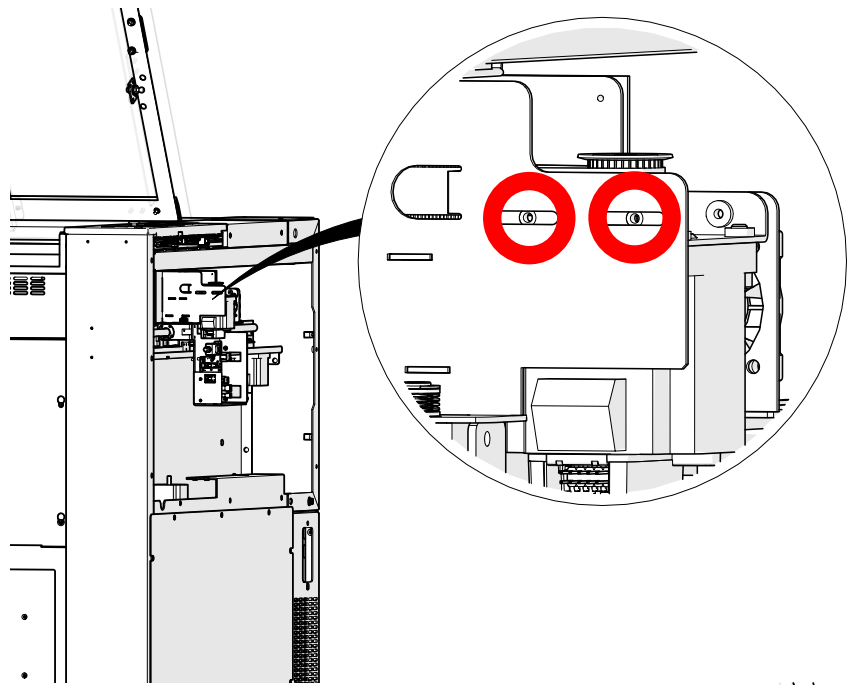
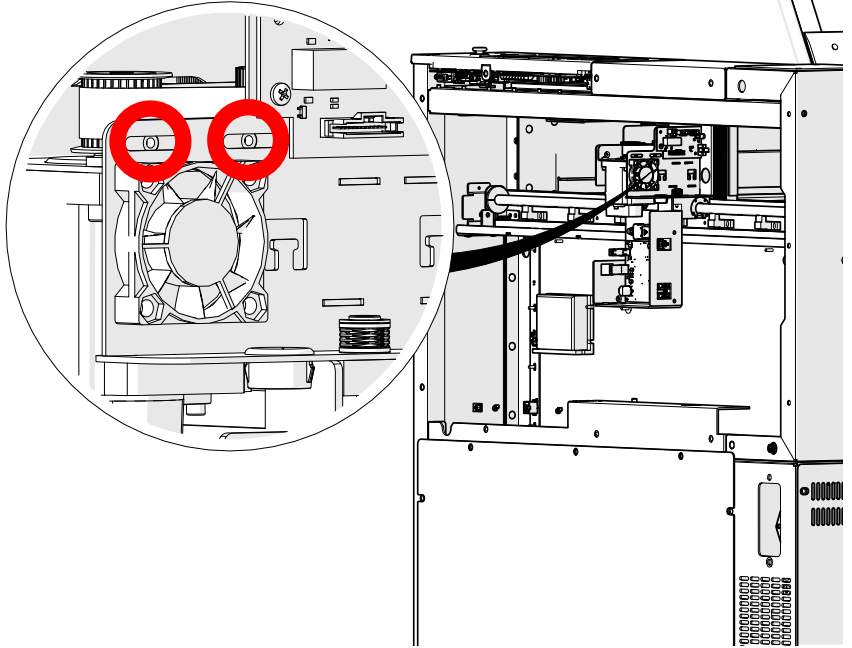
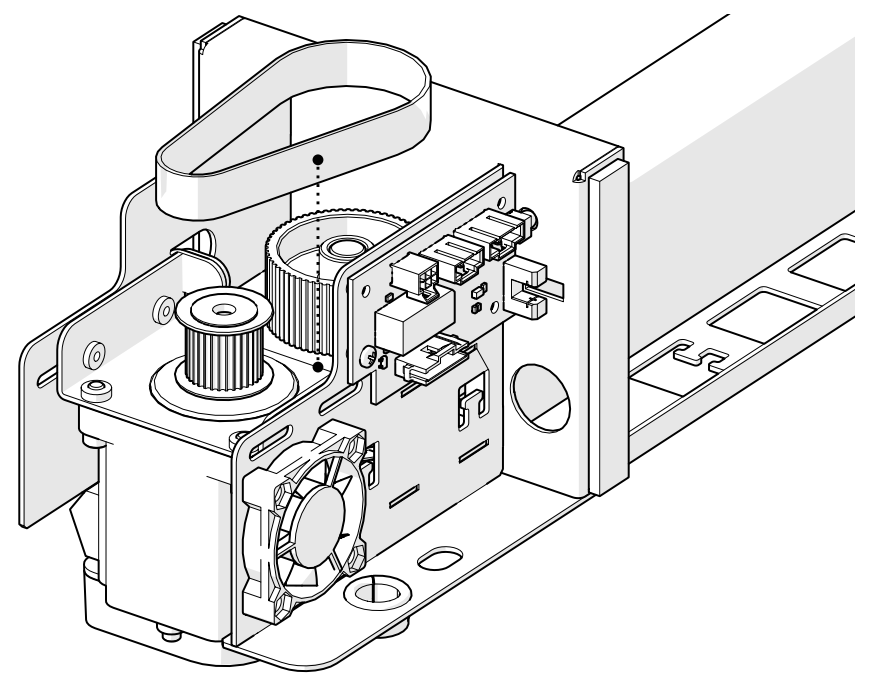
Loosen, but do not remove the four (4) 7/64” Allen screws that secure the x-axis motor to the x-axis assembly.
-
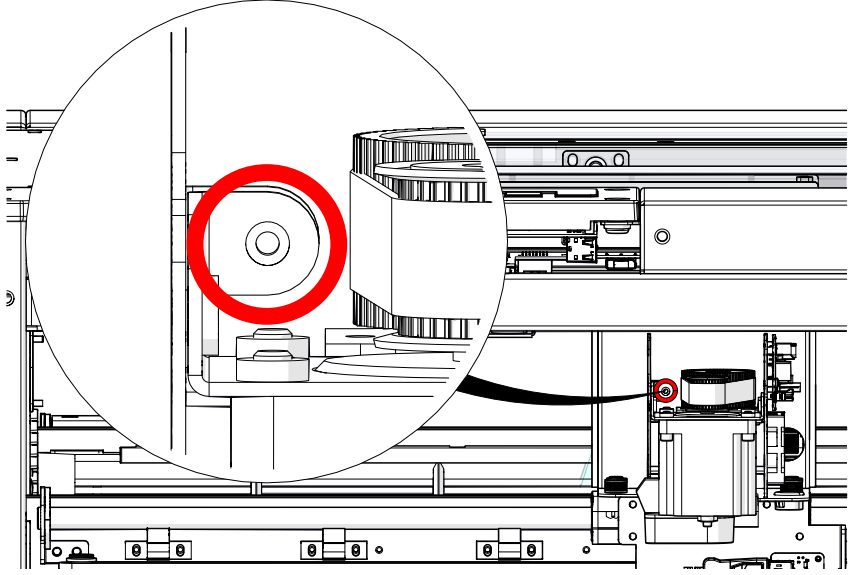
Loosen the 7/64” Allen screw on the reducer drive belt tensioner.
-
Remove the reducer drive belt.
X-Axis Reducer Belt Installation
-
Install the reducer drive belt.
-
Tighten the 7/64” Allen screw on the reducer drive belt tensioner until the slack is removed from the reducer belt.
-
Tighten the four (4) 7/64” Allen screws that secure the x-axis motor to the x-axis assembly.
-
Install the right side panel of the engraver.

