Estimated time: 15 minutes • Skill: Beginner
This procedure walks you through replacing the Auto Focus Plunger on your laser system.
Following these steps carefully will ensure proper installation and reliable autofocus
operation after the replacement is complete.
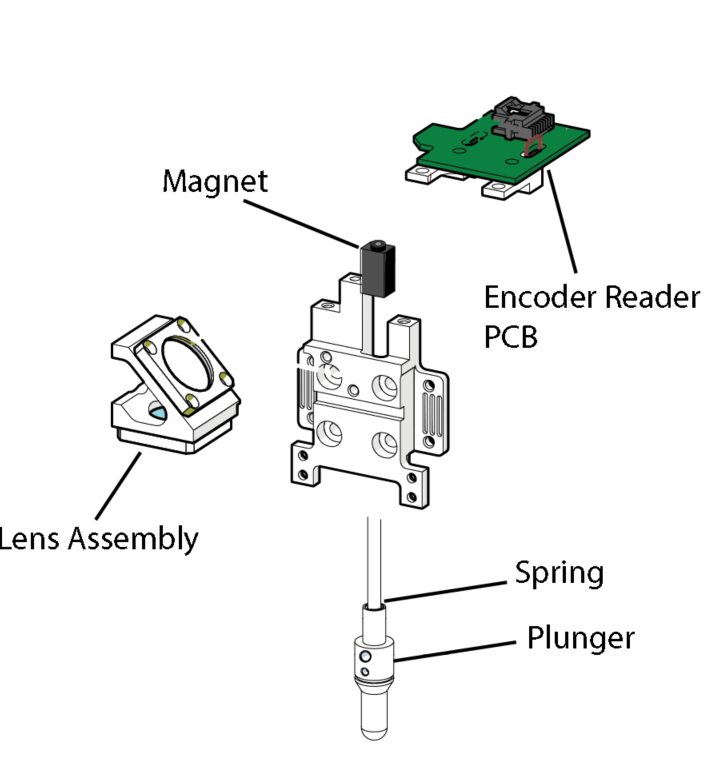
Component Overview
Preparation
-
Power on the machine
Turn the laser system on and allow the machine to home.

-
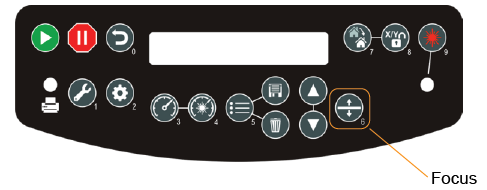
Enter Focus mode
Press the Focus button on the control panel.
-
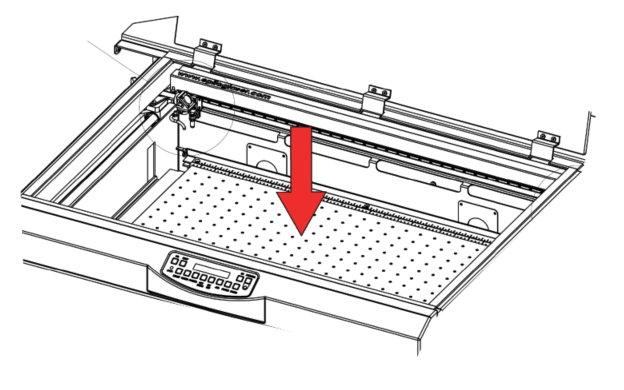
Lower the table
Lower the table approximately 2–3 inches to create clearance for access to the carriage.
-
Power off the machine
Shut down the system before performing any mechanical work.

Auto Focus Plunger Replacement
-
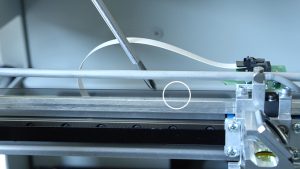
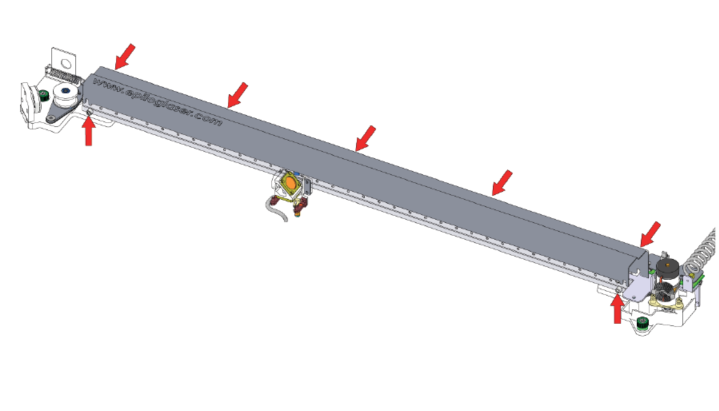
Remove the rail cover
Loosen the seven (7) Phillips screws securing the rail cover, then remove the cover.
-
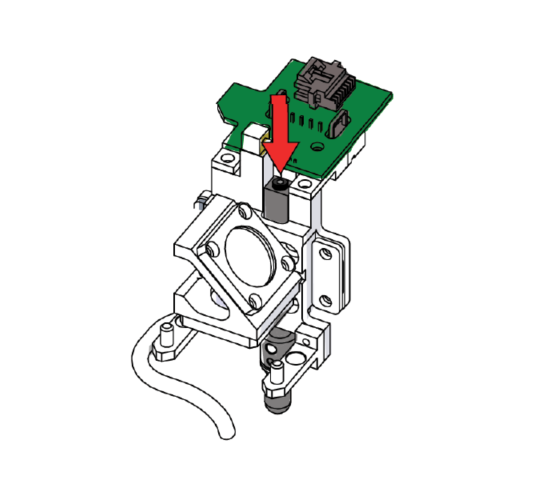
Remove the magnet screw
Using a 5/64" hex key, remove the screw securing the Auto Focus Plunger magnet.
-
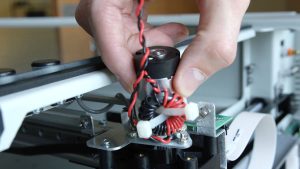
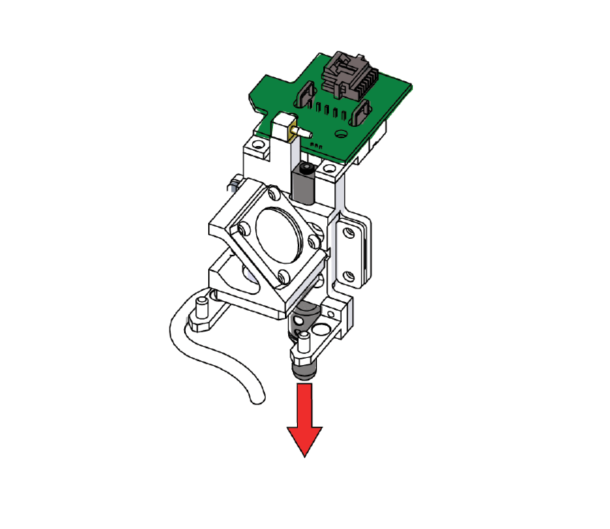
Remove the Auto Focus Plunger
Slide the existing Auto Focus Plunger out of the carriage.
-
Install the replacement plunger
Insert the new Auto Focus Plunger into the carriage.

-
Reattach the magnet
Apply light upward pressure to the plunger and reinstall the magnet using the 5/64" hex screw.
Ensure the magnet is oriented toward the back of the machine.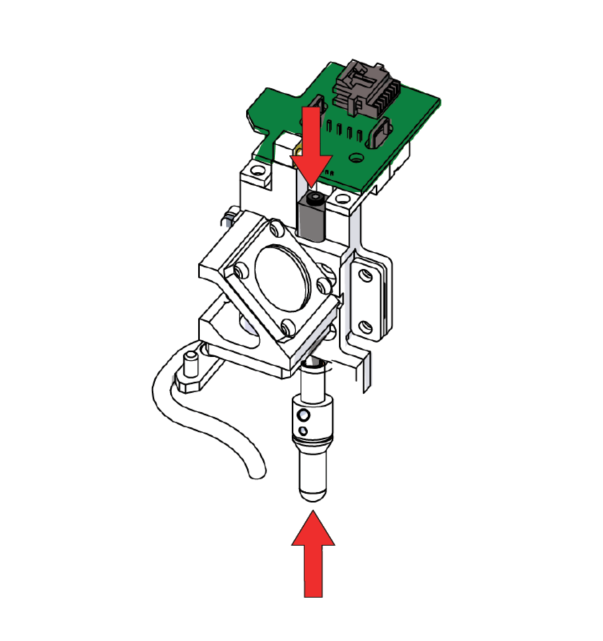
-
Reinstall the rail cover
Reattach the rail cover and secure it using the original screws.