
This guide will walk you through the replacement of the X/Y Limit PCB on your Zing. The X/Y Limit PCB is located on the right side of your X-Axis rail underneath the right-side panel.
Removal
-
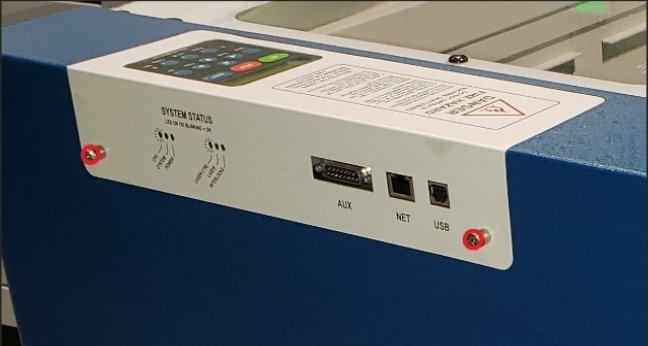
Unplug the engraver from its power source. Next, remove the Control Assembly by loosening the two captive Phillips head screws shown in Picture 1. Slide the control Assembly straight out and place it in a safe location. Once the Control Assembly is out of the way, take both Side panels off by unscrewing the three Phillips head screws on each side, and the one in the back on each panel.
-
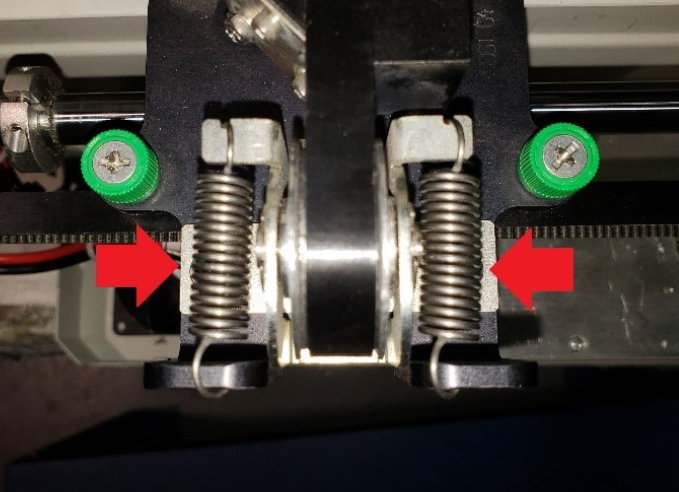
Once the side panels are off, free the X-axis belt pulley on the left side of the machine. To do so, start by loosening the 2 Phillips head screws shown in Picture 2 that are located under the belt tension springs. Next, push the pulley towards the inside of the engraver, until the springs are fully extended, and the belt is loose. With the X-axis belt loose enough to remove the X-axis Motor, re-tighten the screws to hold the pulley down. This will add enough slack to the belt to allow you to remove the X-axis motor.
-
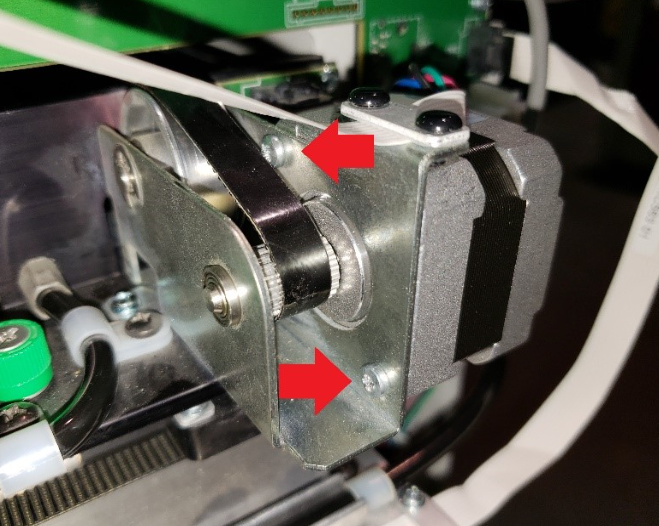
With the belt loose, unplug the X-axis motor, and the ribbon cable from the X/Y Limit PCB located next to the X-axis motor on the right side of the engraver. Next, remove the X-axis motor by unscrewing the 2 Phillips screws shown in below. Once the screws are gone, carefully pull the X-axis motor out of its mount towards the rear of the machine.
-
Now that the motor is clear, you can remove the old X/Y Limit PCB by removing the three Phillips head screws shown below

Installation
-
Carefully mount the new X/Y Limit PCB and re-install the X-axis motor with the belt around its pulley. Plug the X-axis motor and ribbon cable back into the X/Y Limit PCB.
-
Re-adjust the X-axis belt tension. You can do so by loosening the two Phillips screws that secure the X-axis belt pulley on the left side of the X-axis rail. Next, push the X-axis belt pulley to the right hand side of the engraver to extend the belt tension springs and let go! Once everything settles, re-tighten the two Phillips head screws under the springs to secure the X-axis belt pulley. You may now re-install the side panels and Control Assembly.
