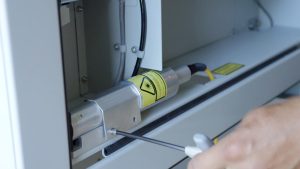
This guide covers the removal of the IPG laser out of the Fusion M2 and the subsequent installation of the JPT laser.
Safety First: Ensure the machine is completely powered off and disconnected from the power cable before starting.
Fiber Handling Warning: Be extremely careful when handling the yellow fiber cable. Do not kink or severely bend the fiber cable as it will cause permanent damage.
Removal of IPG out of the Fusion M2
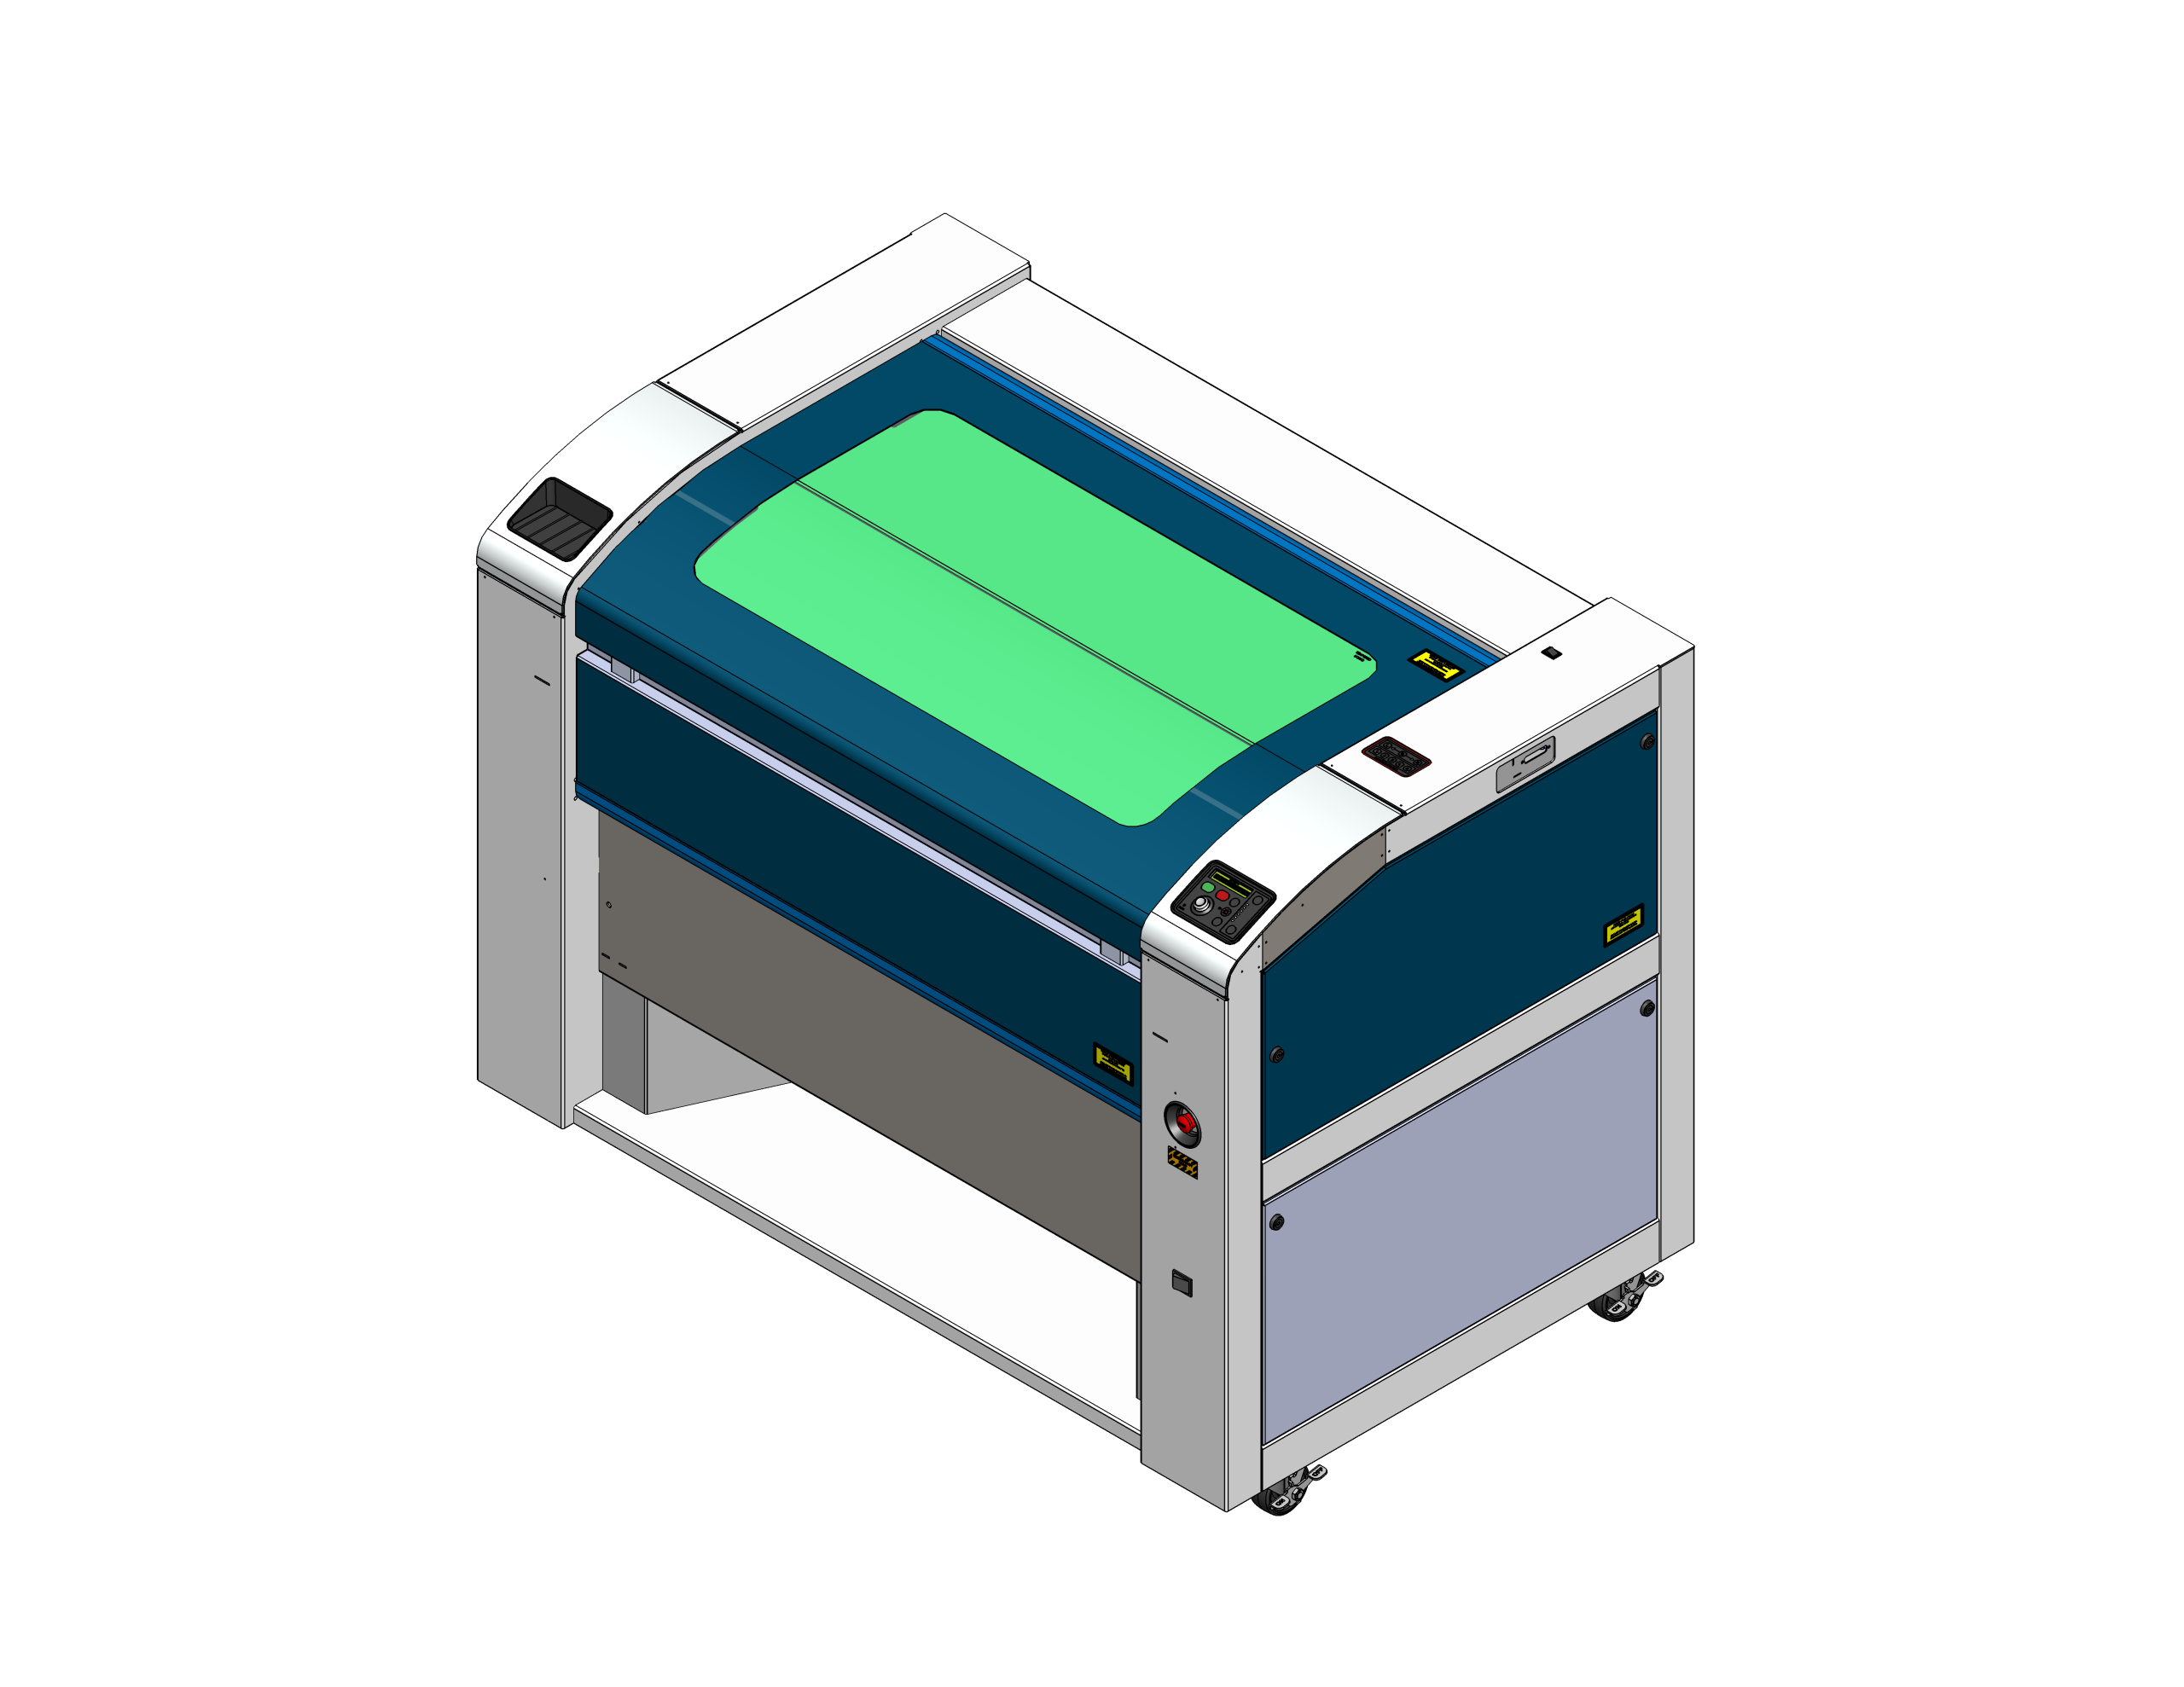
Power Off Machine
Power off the machine and disconnect the power cable.
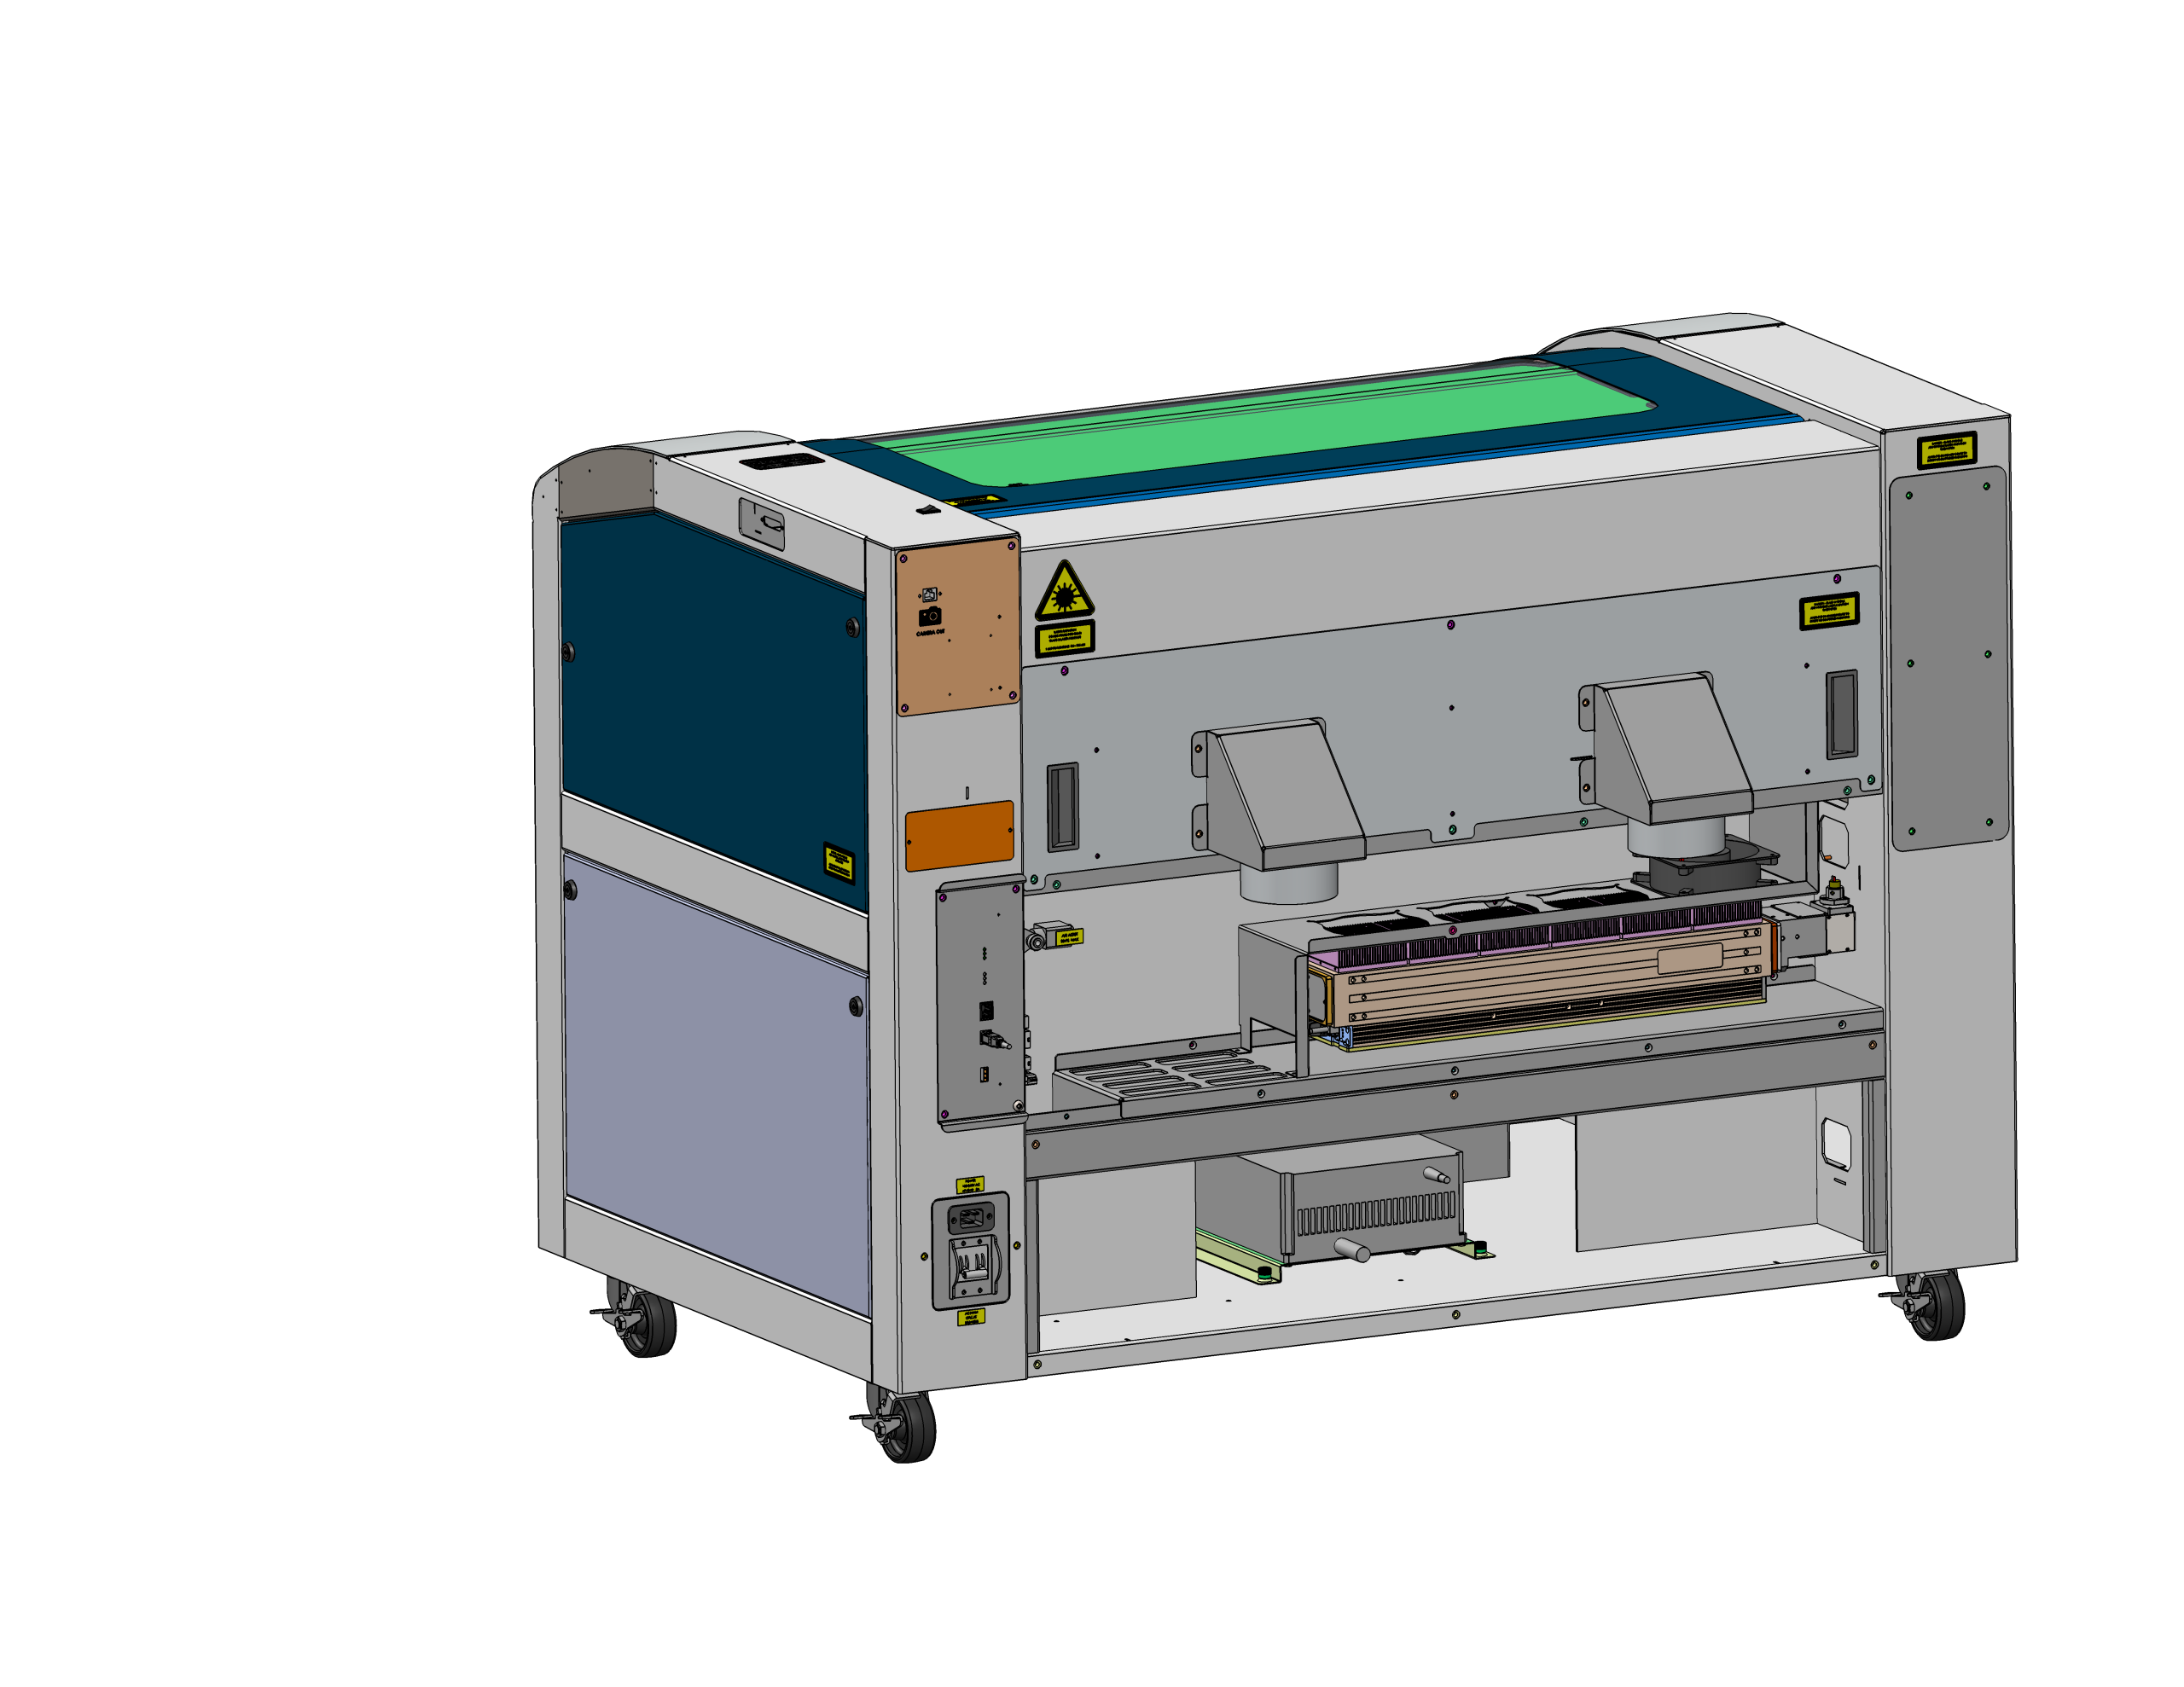
Remove Back Panel
Remove the lower back panel.
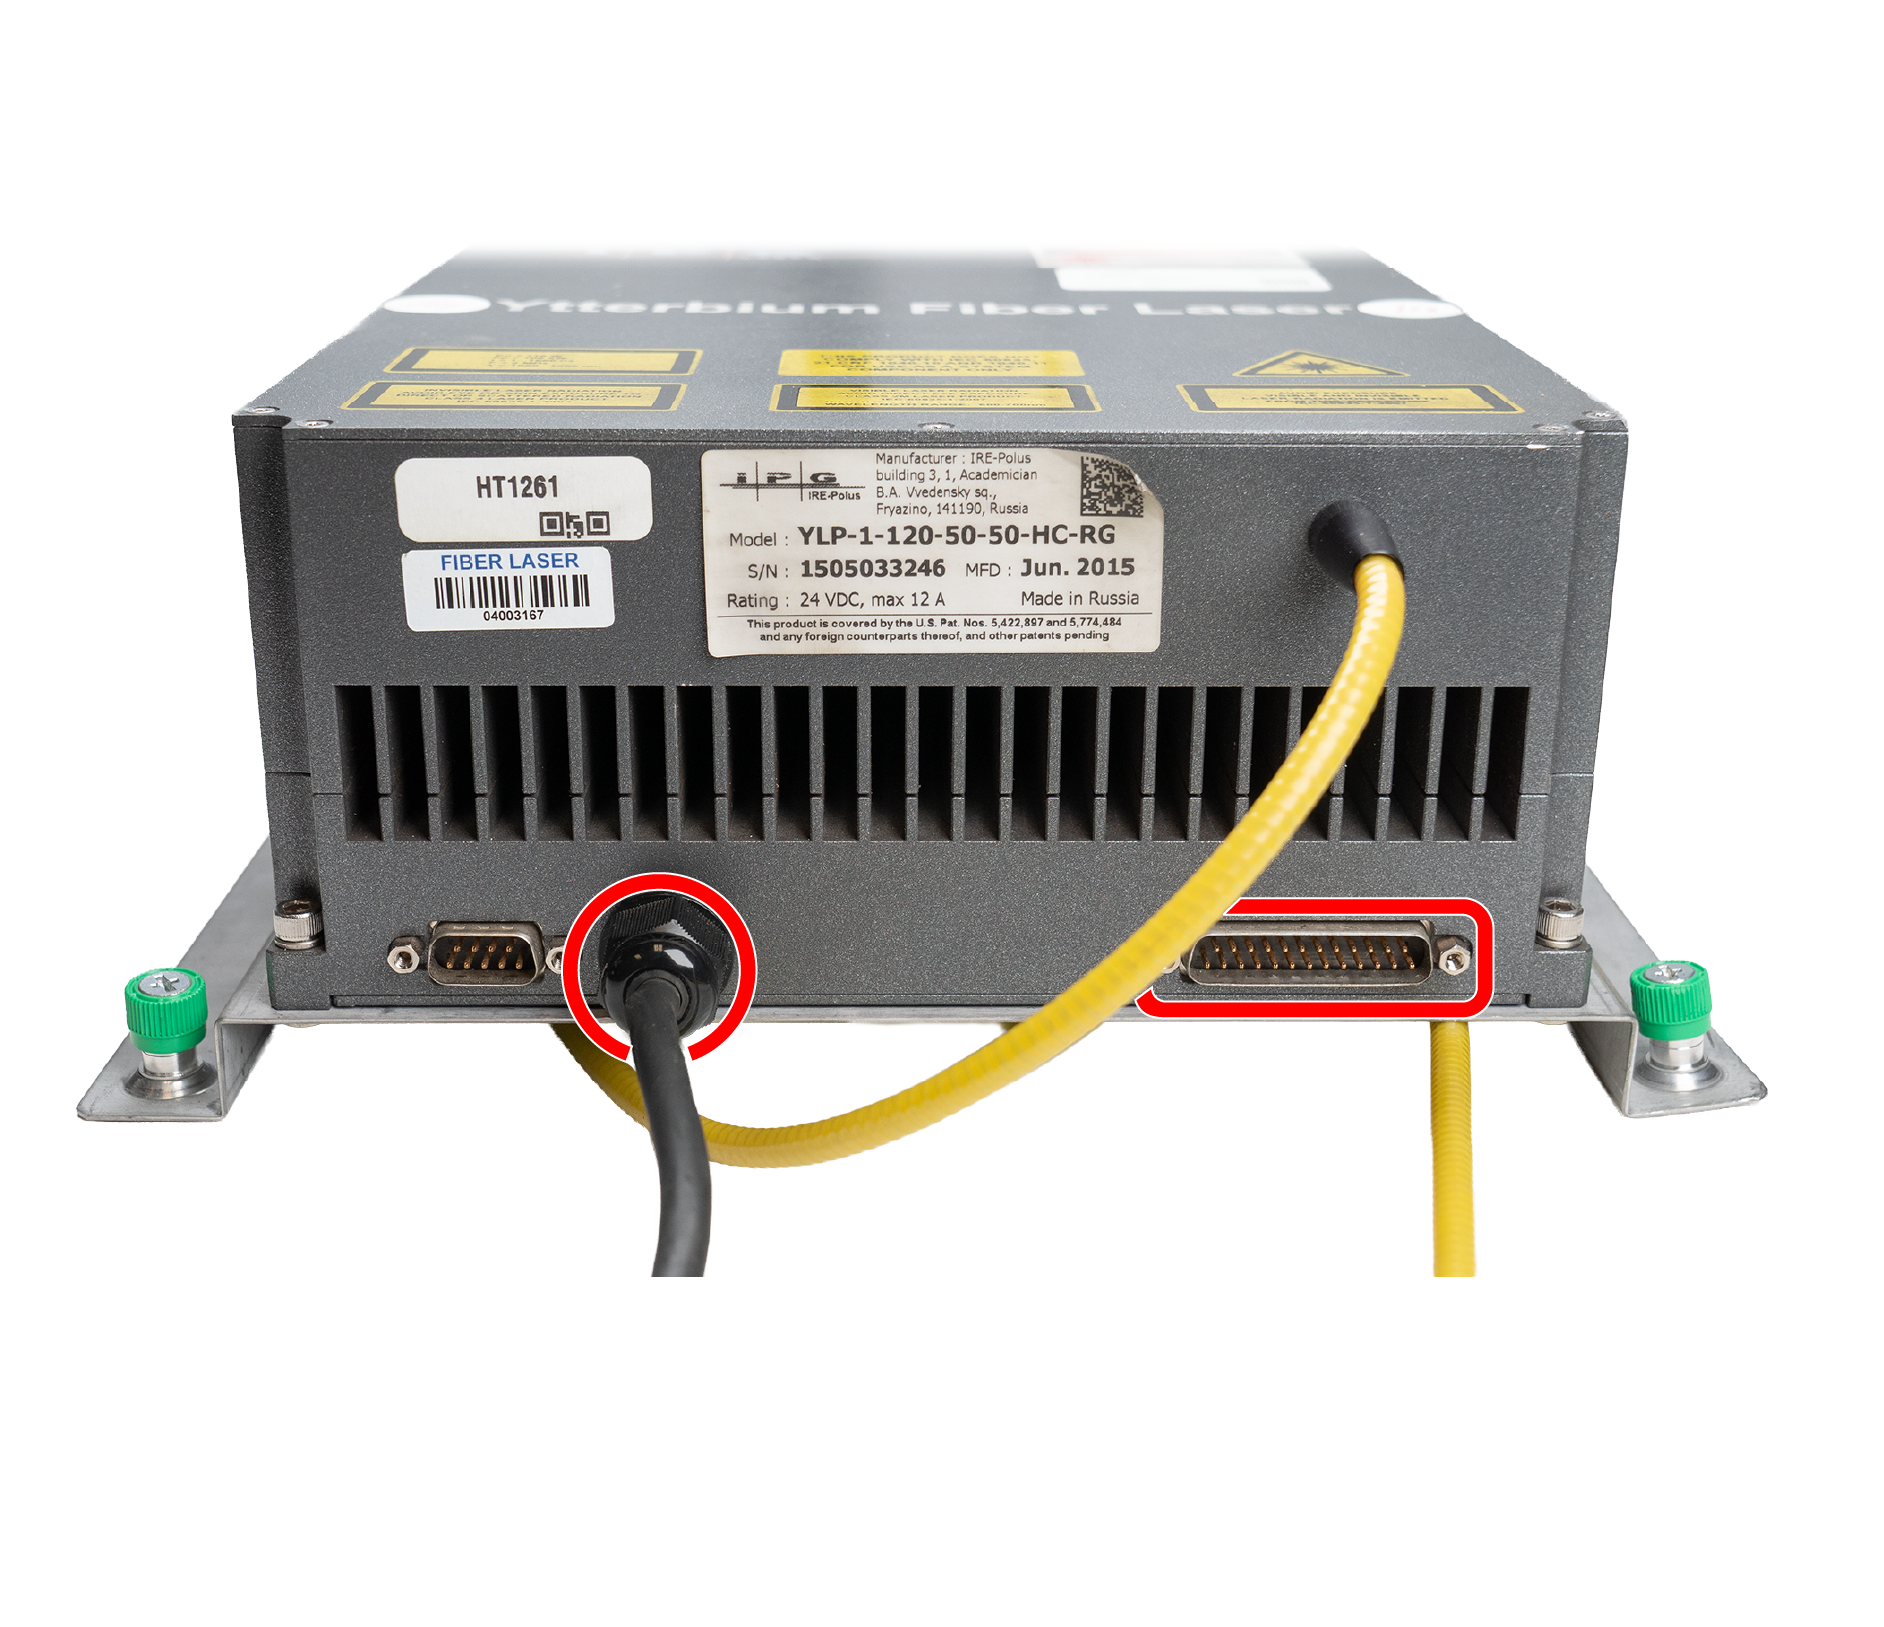
Disconnect Power & Signal
Disconnect the fiber power and signal cable.
Note: The signal cable on the right unscrews from the fiber source. The power cable on the left must be followed to its connection point and disconnected there.
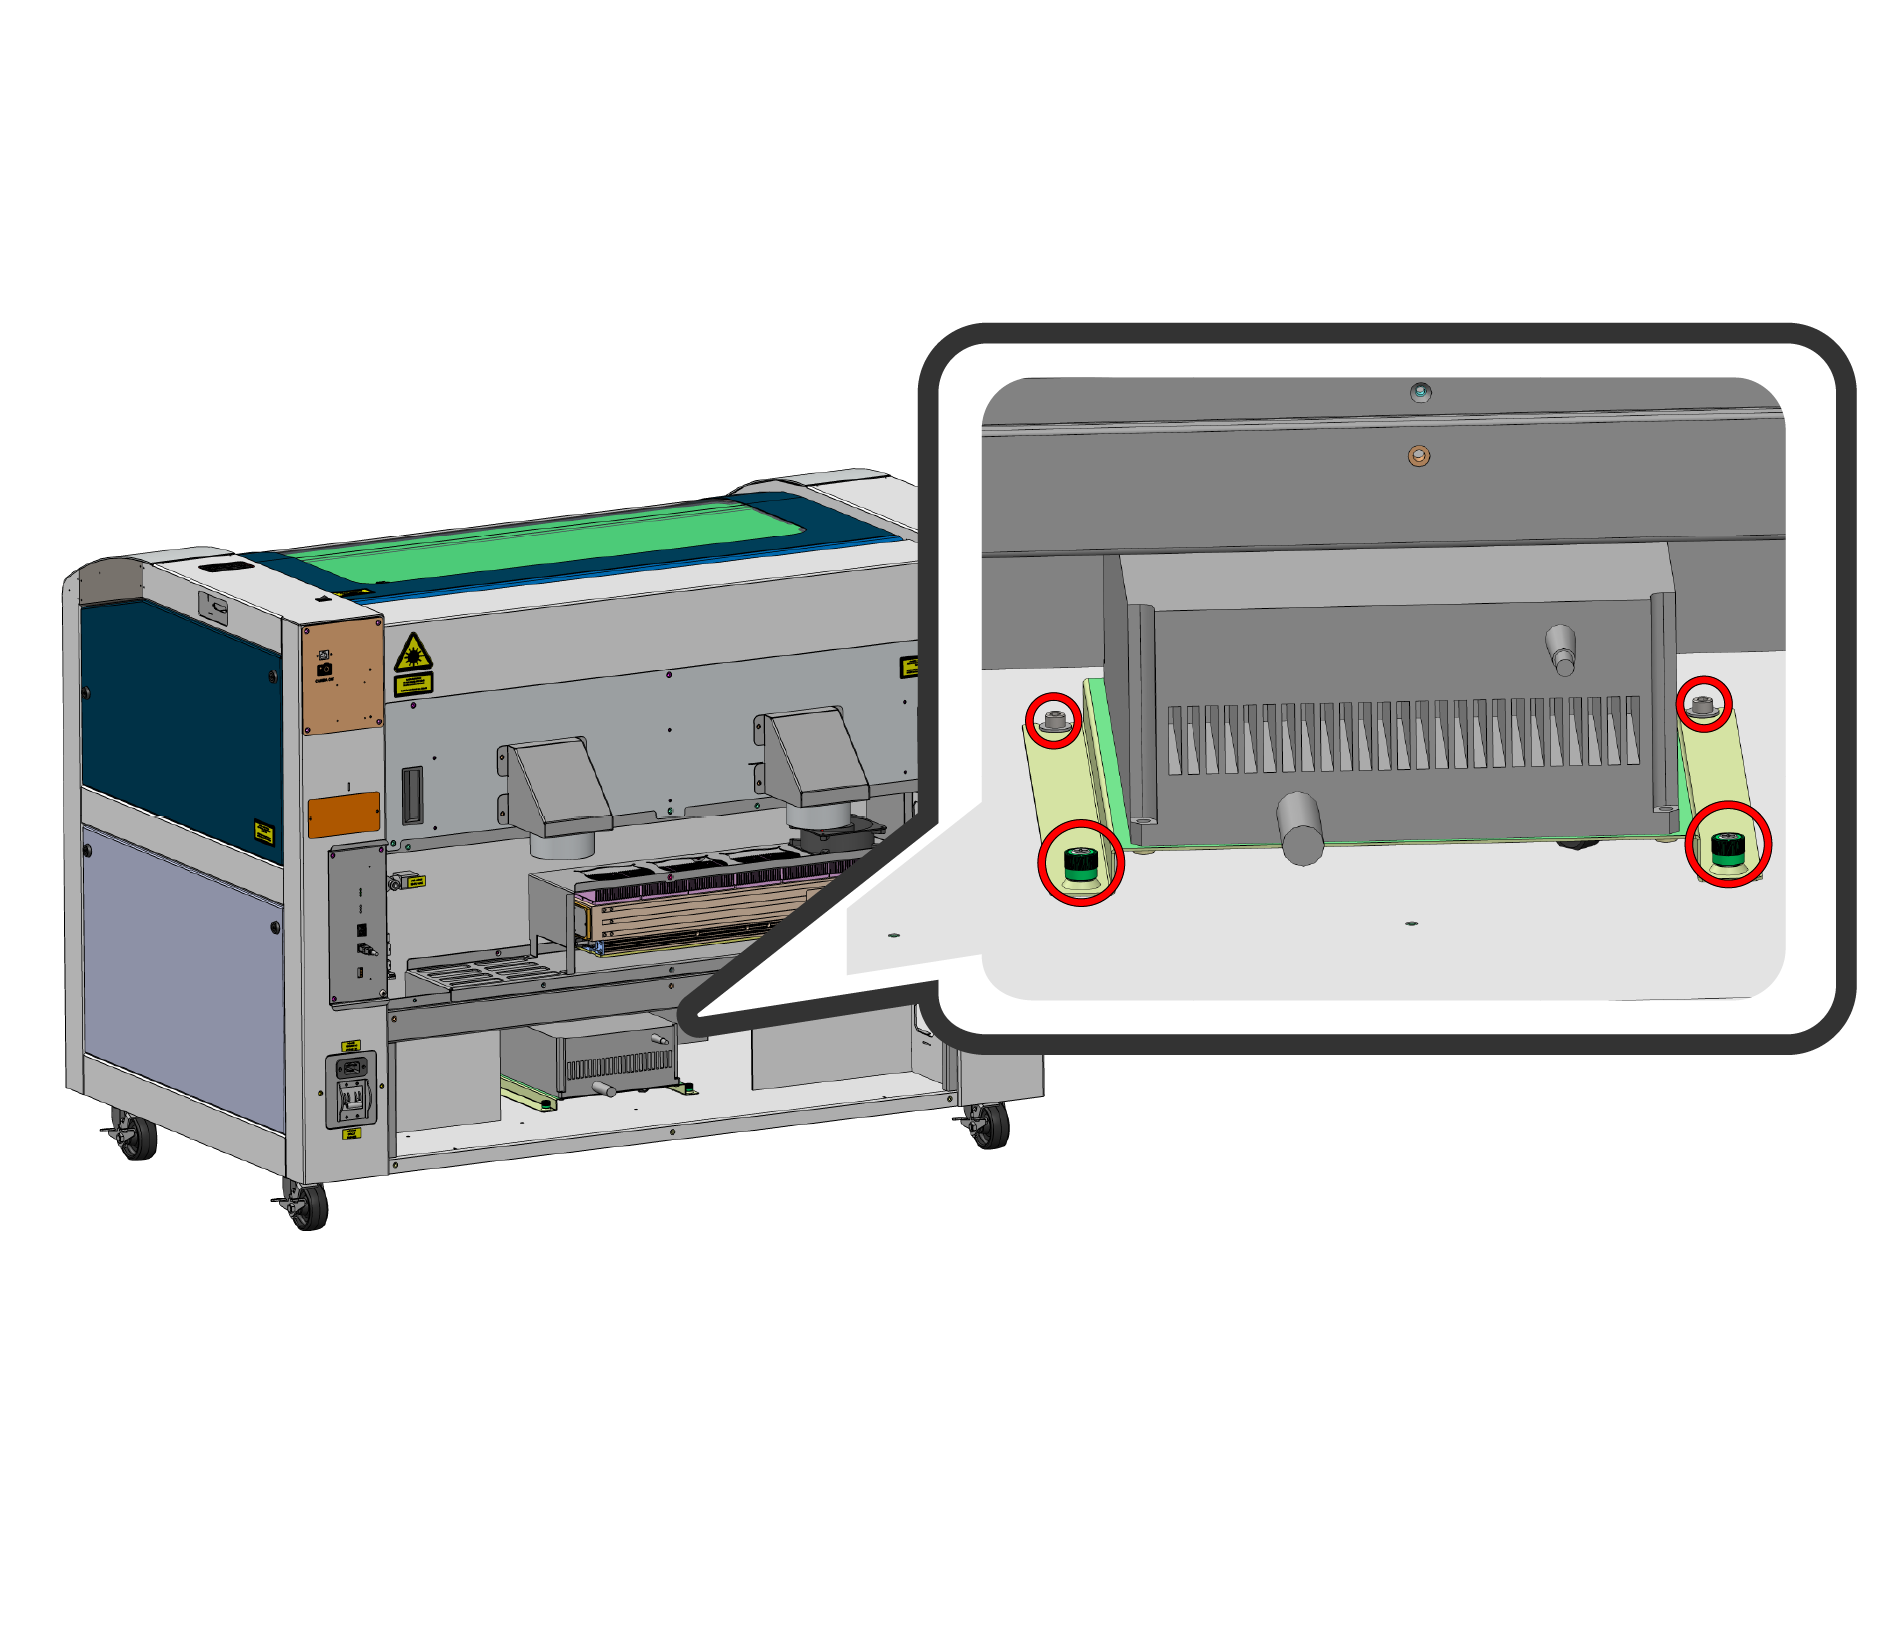
Remove Laser Screws
Remove the four screws securing the laser. There are two green captive phillips screws and two hex screws.
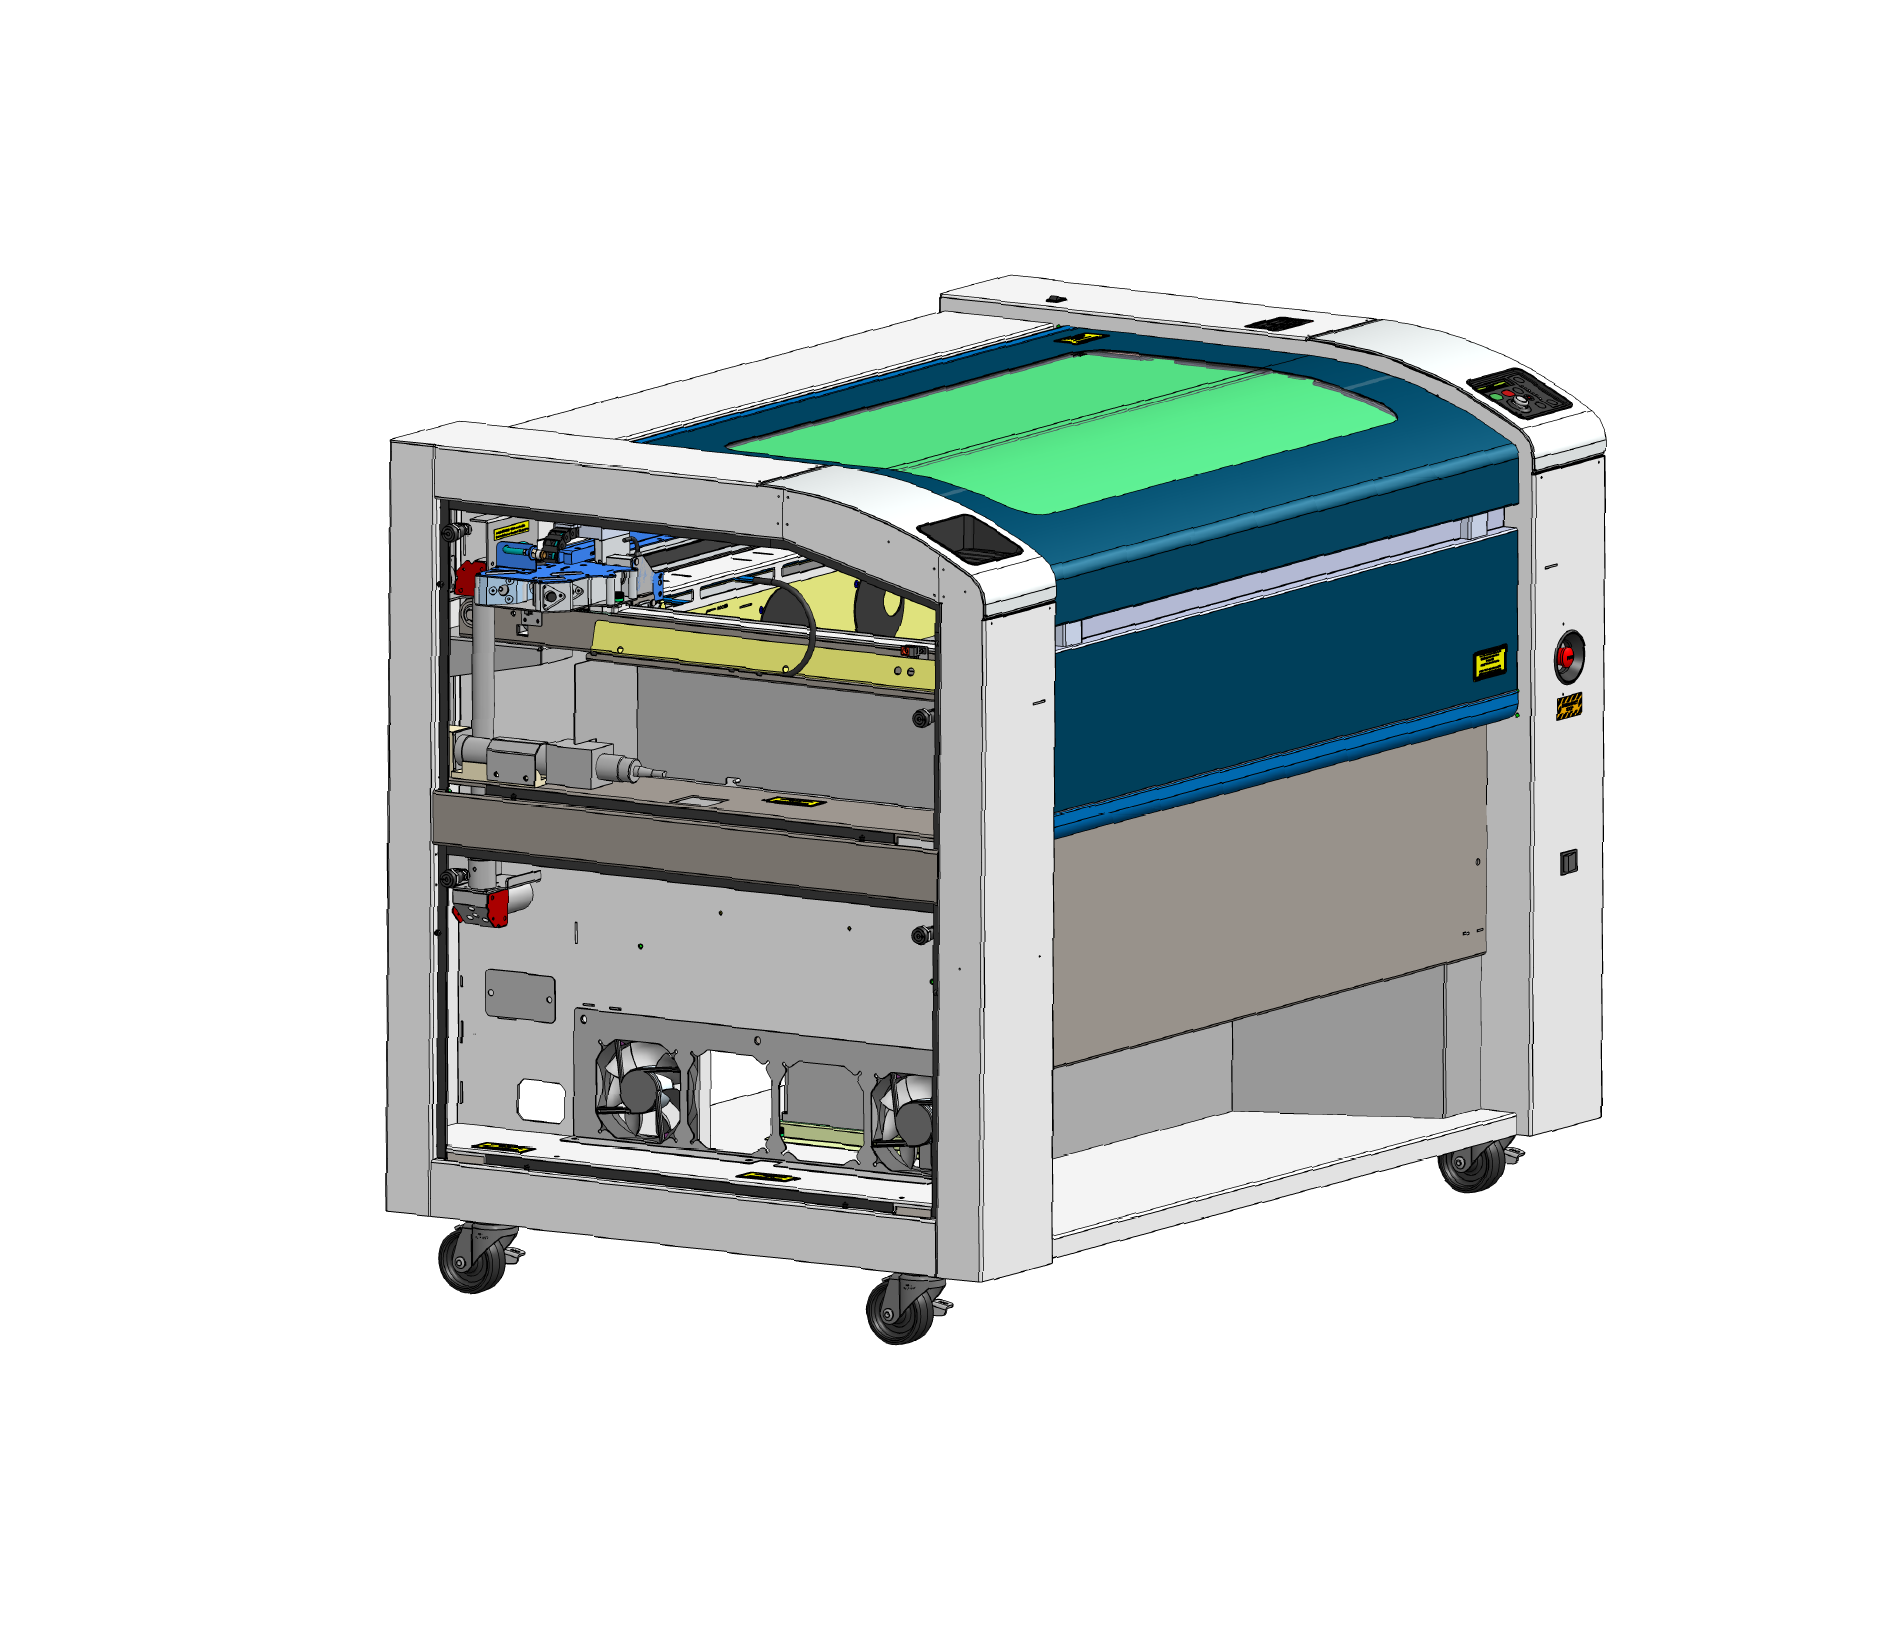
Remove Left Side Panels
Remove both the upper and lower left-side panels.
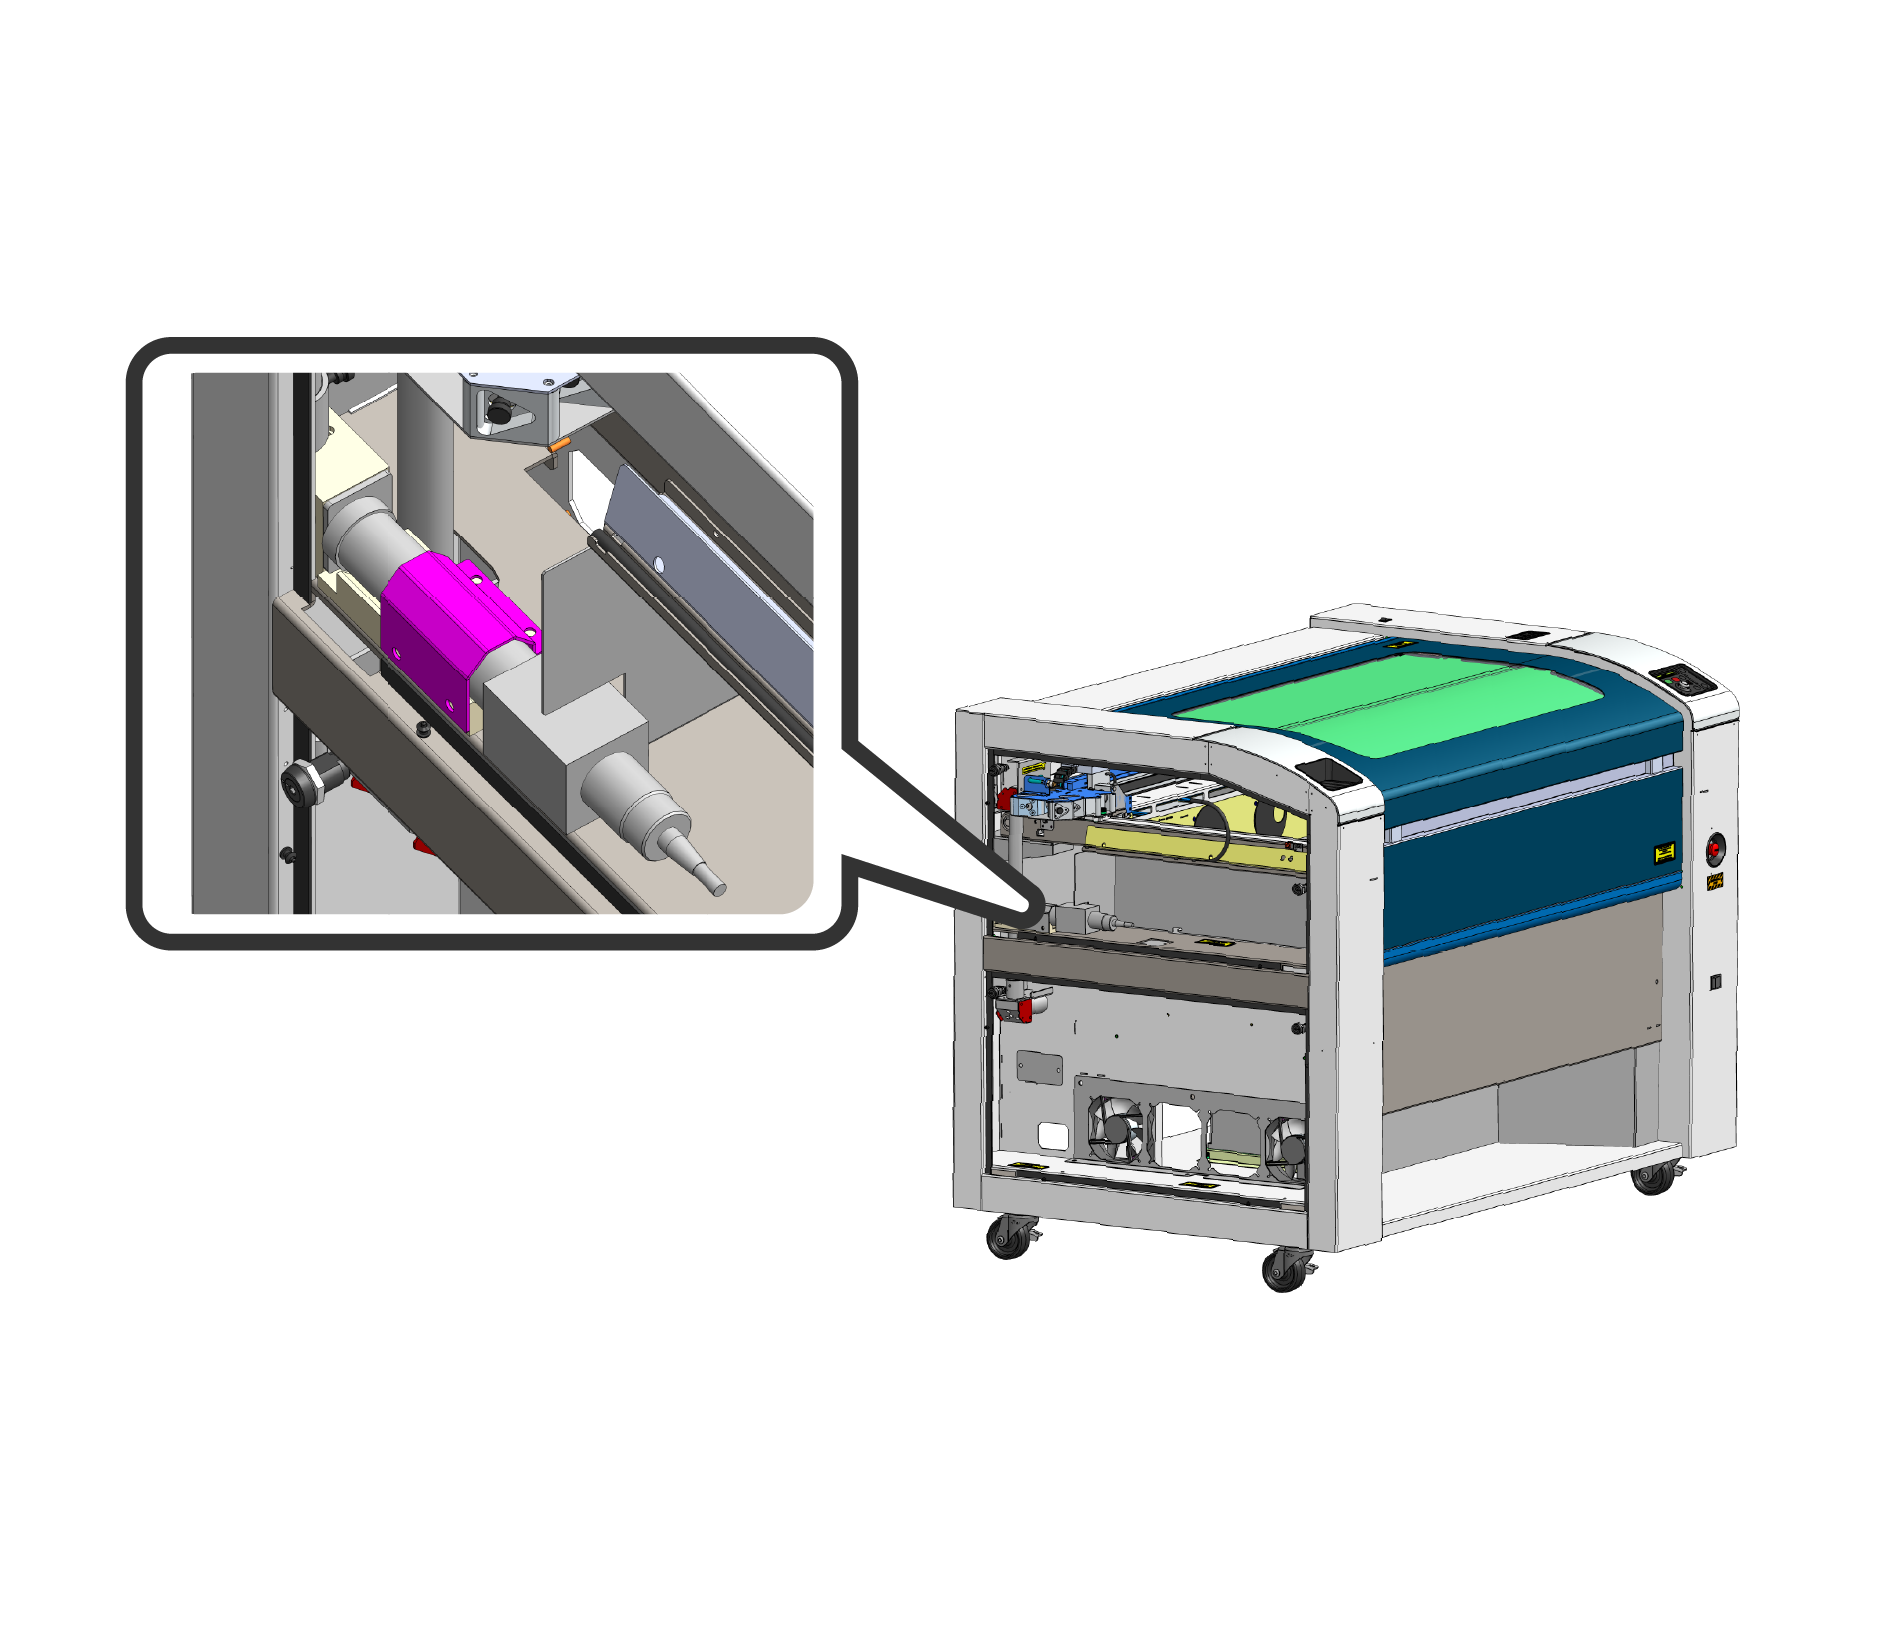
Loosen Bracket Screws
Loosen the four screws securing the fiber head bracket.
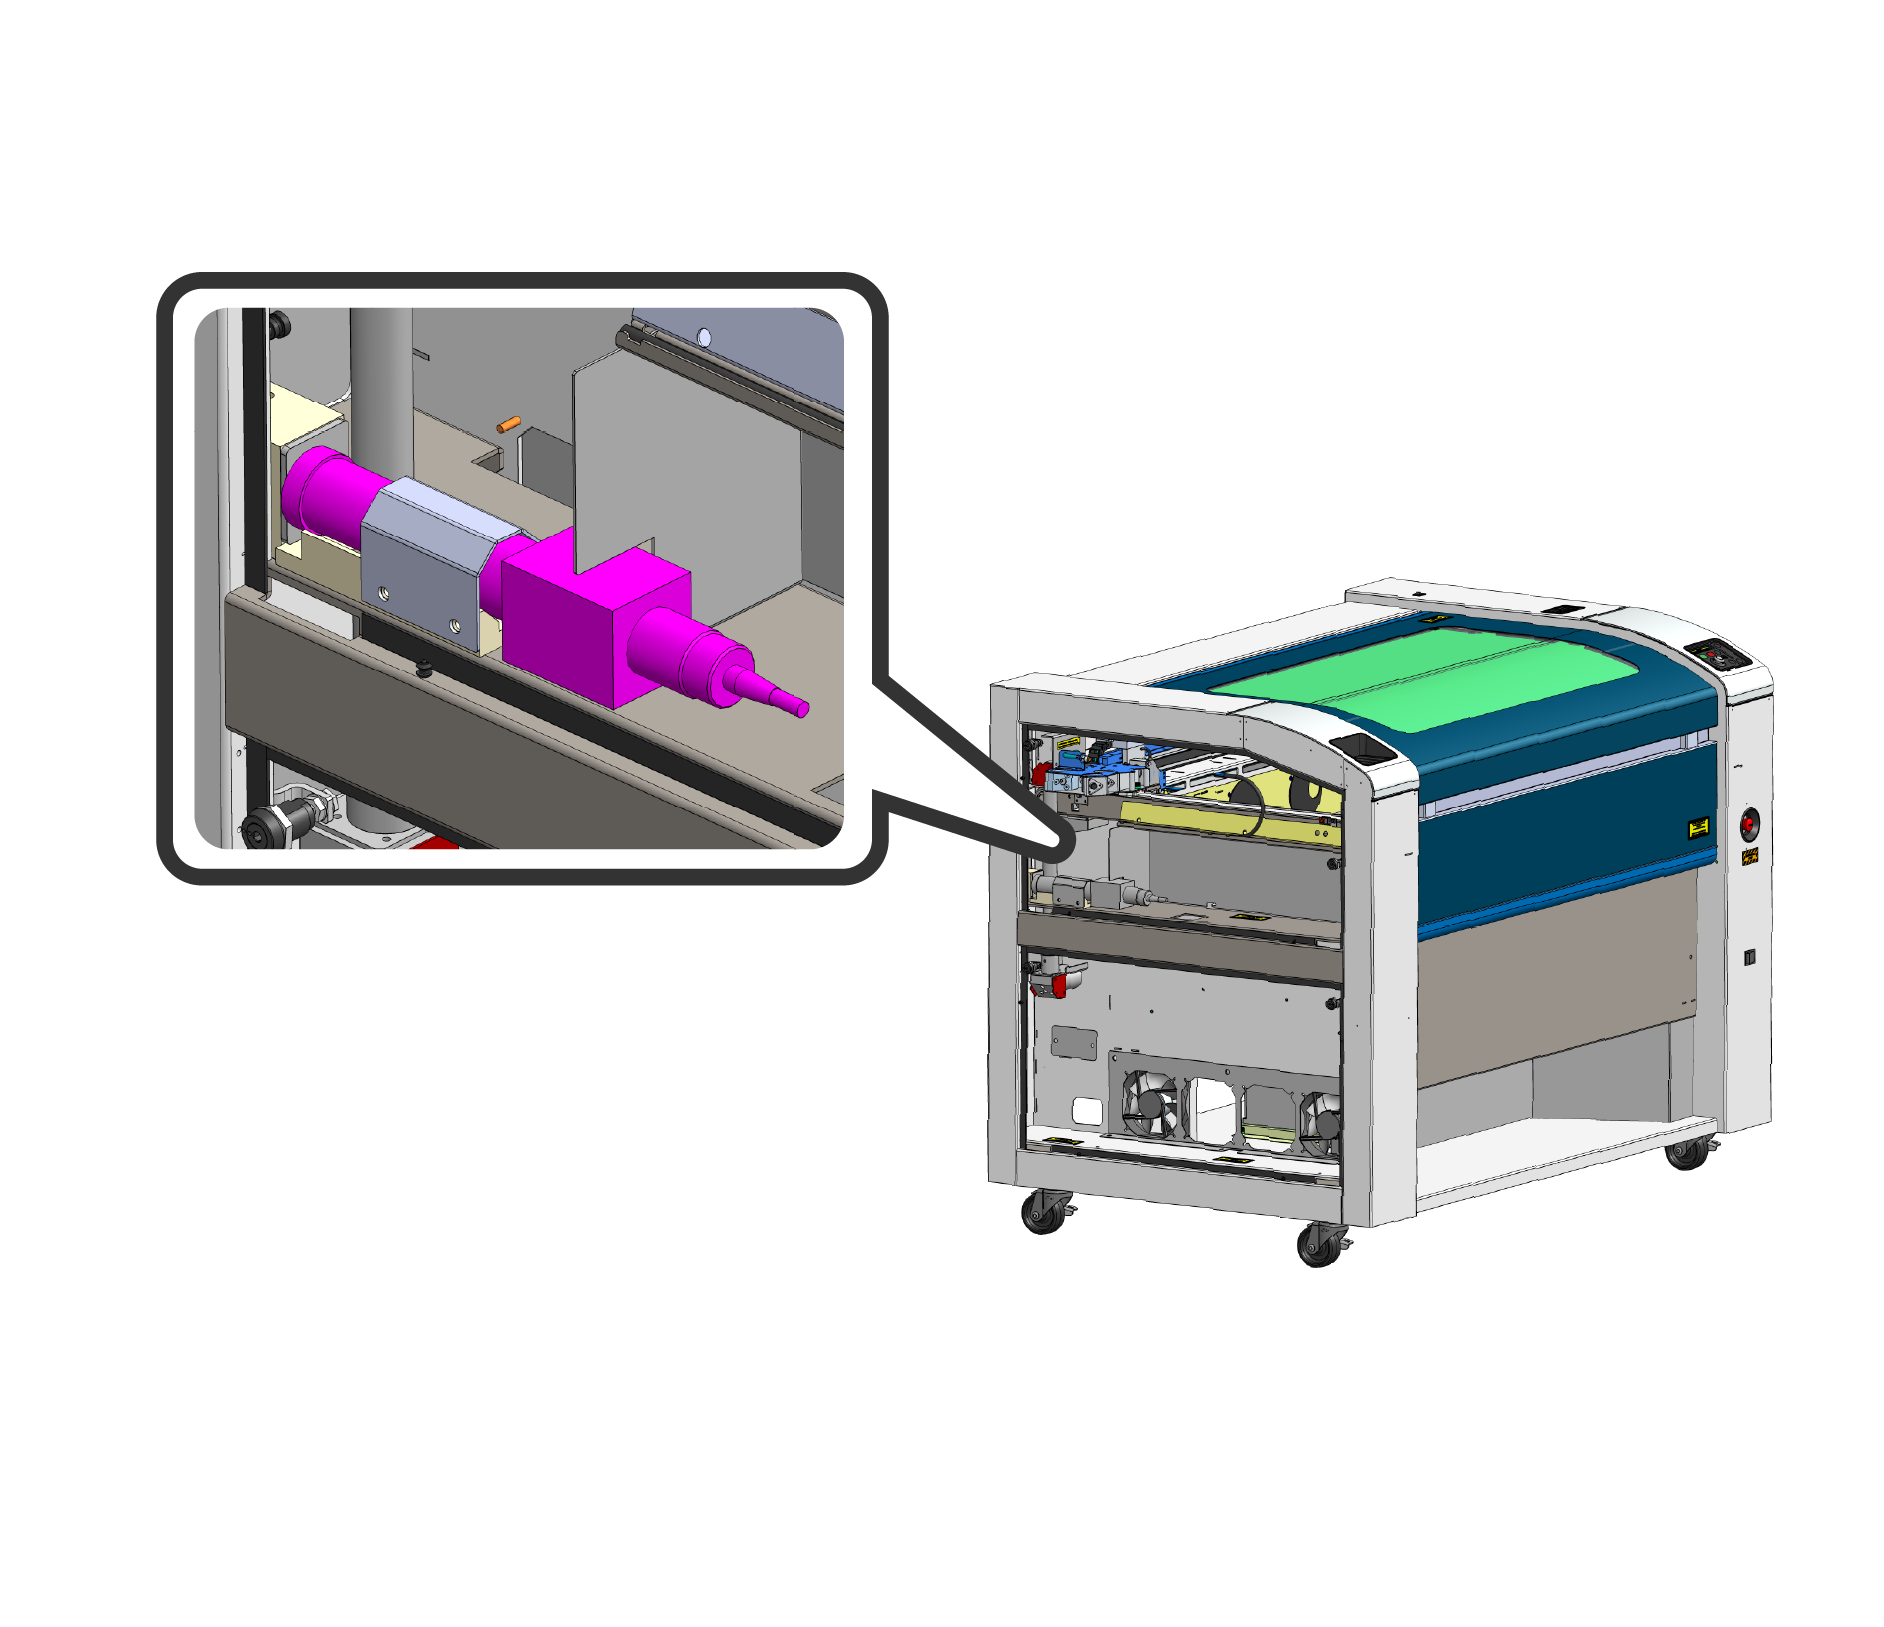
Remove Fiber Head
Feed the fiber head out of the machine through the cutouts in the chassis. Be careful not to kink or bend the fiber cable.
Installation of JPT
Now that the IPG is removed, proceed with the installation of the JPT laser.
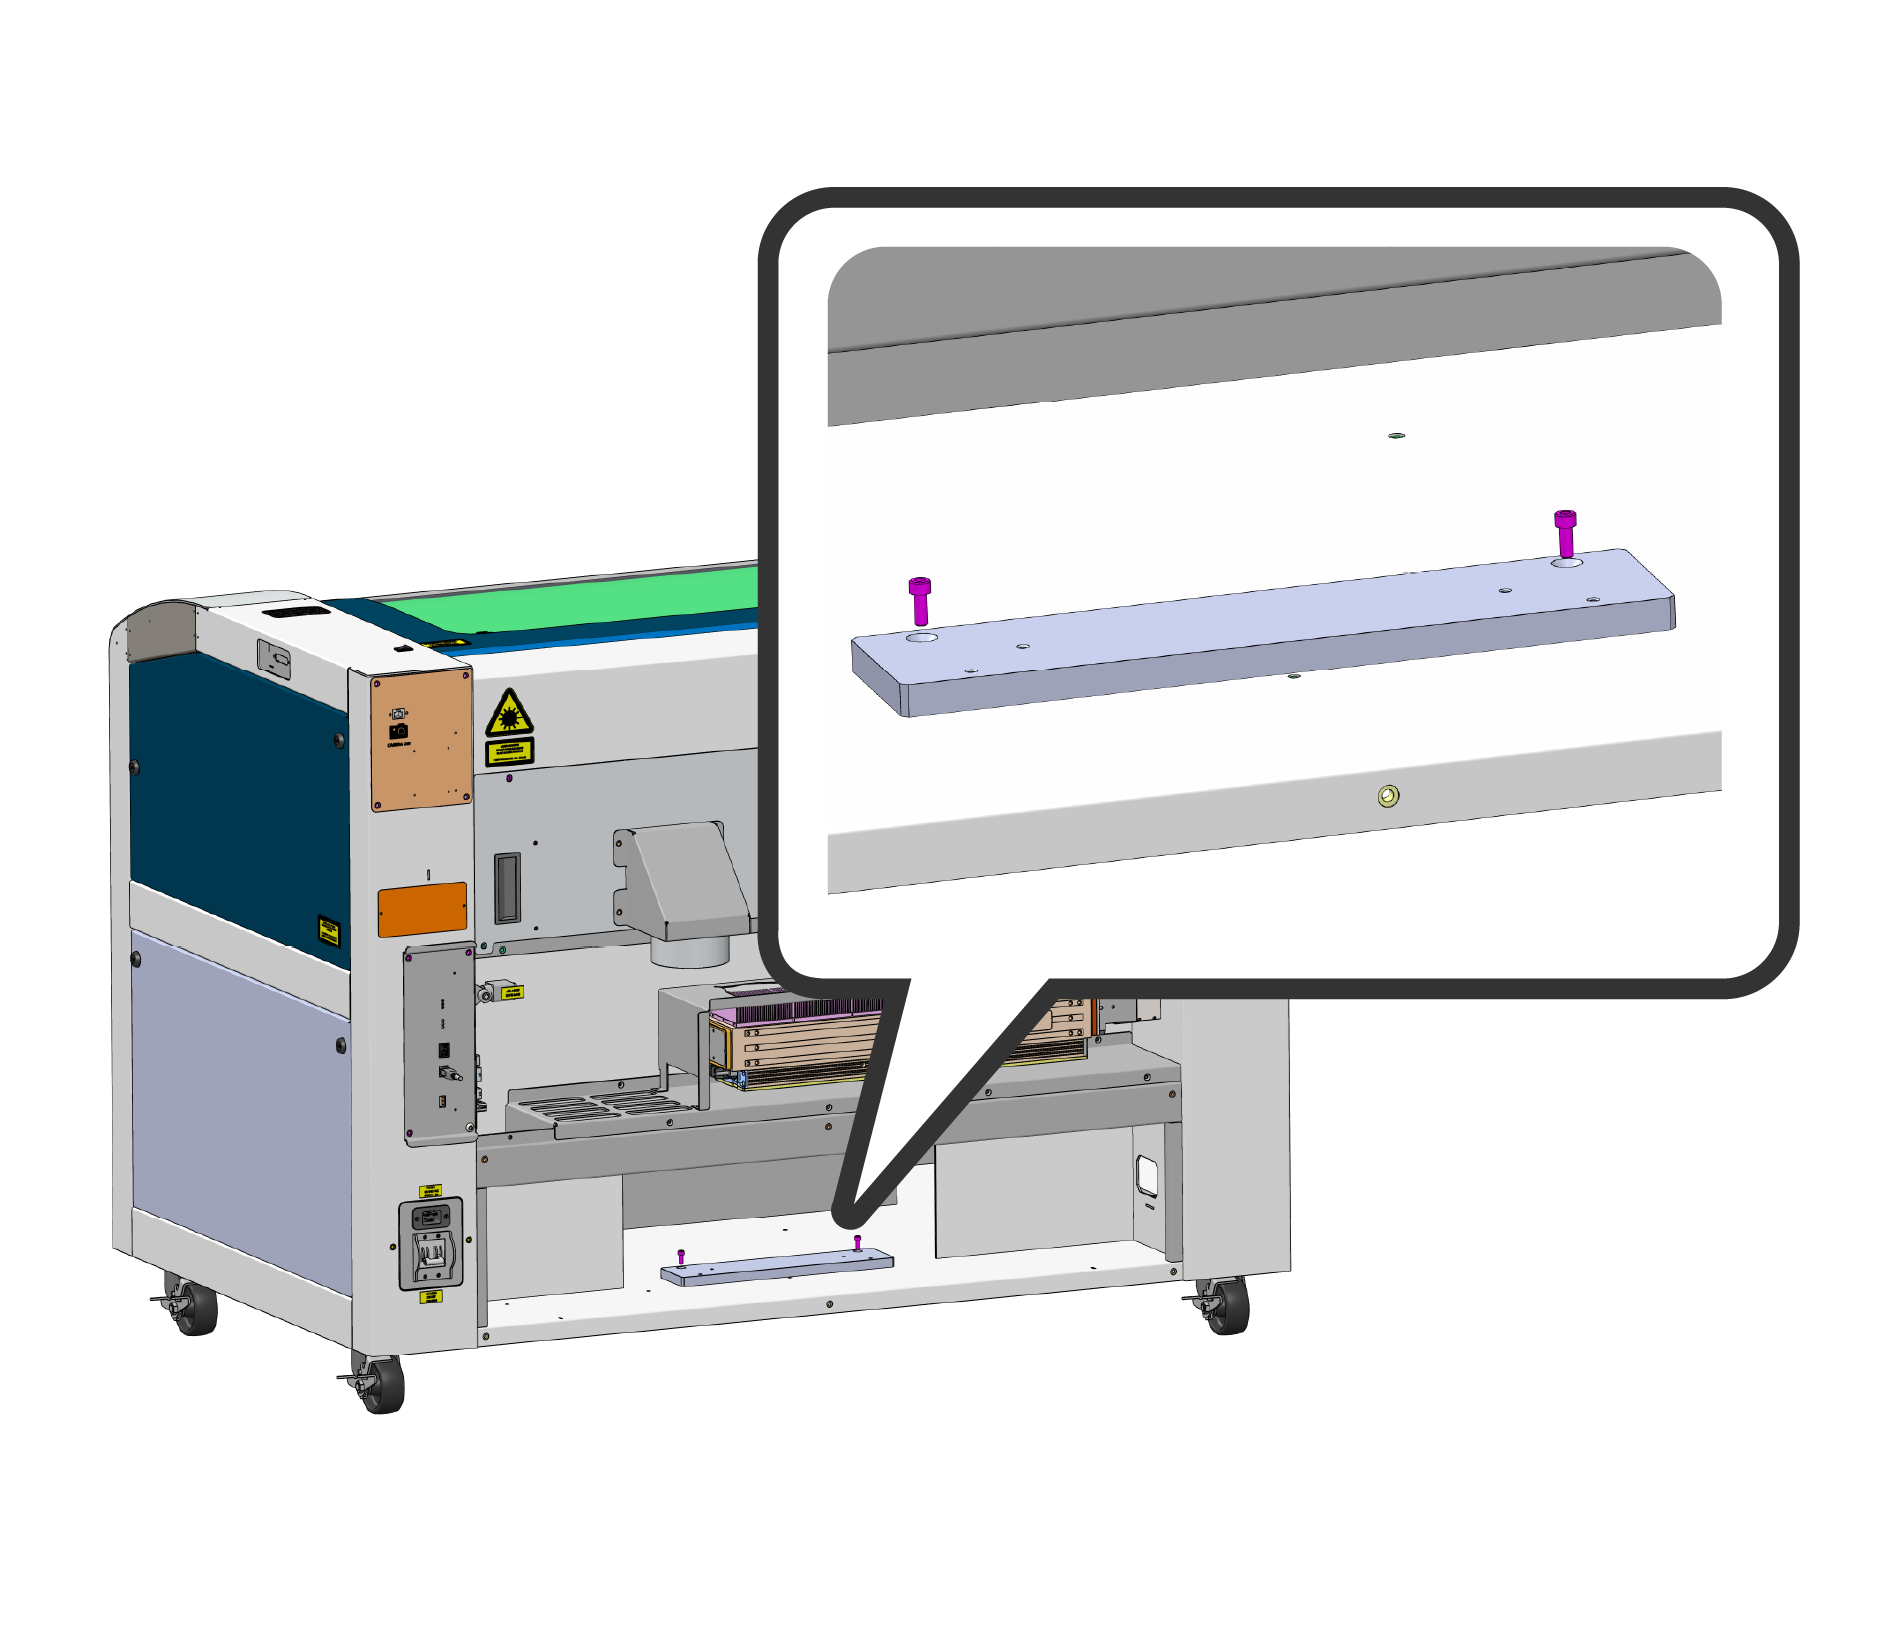
Install Adapter Bracket
Install the fiber adapter bracket with the screws provided.
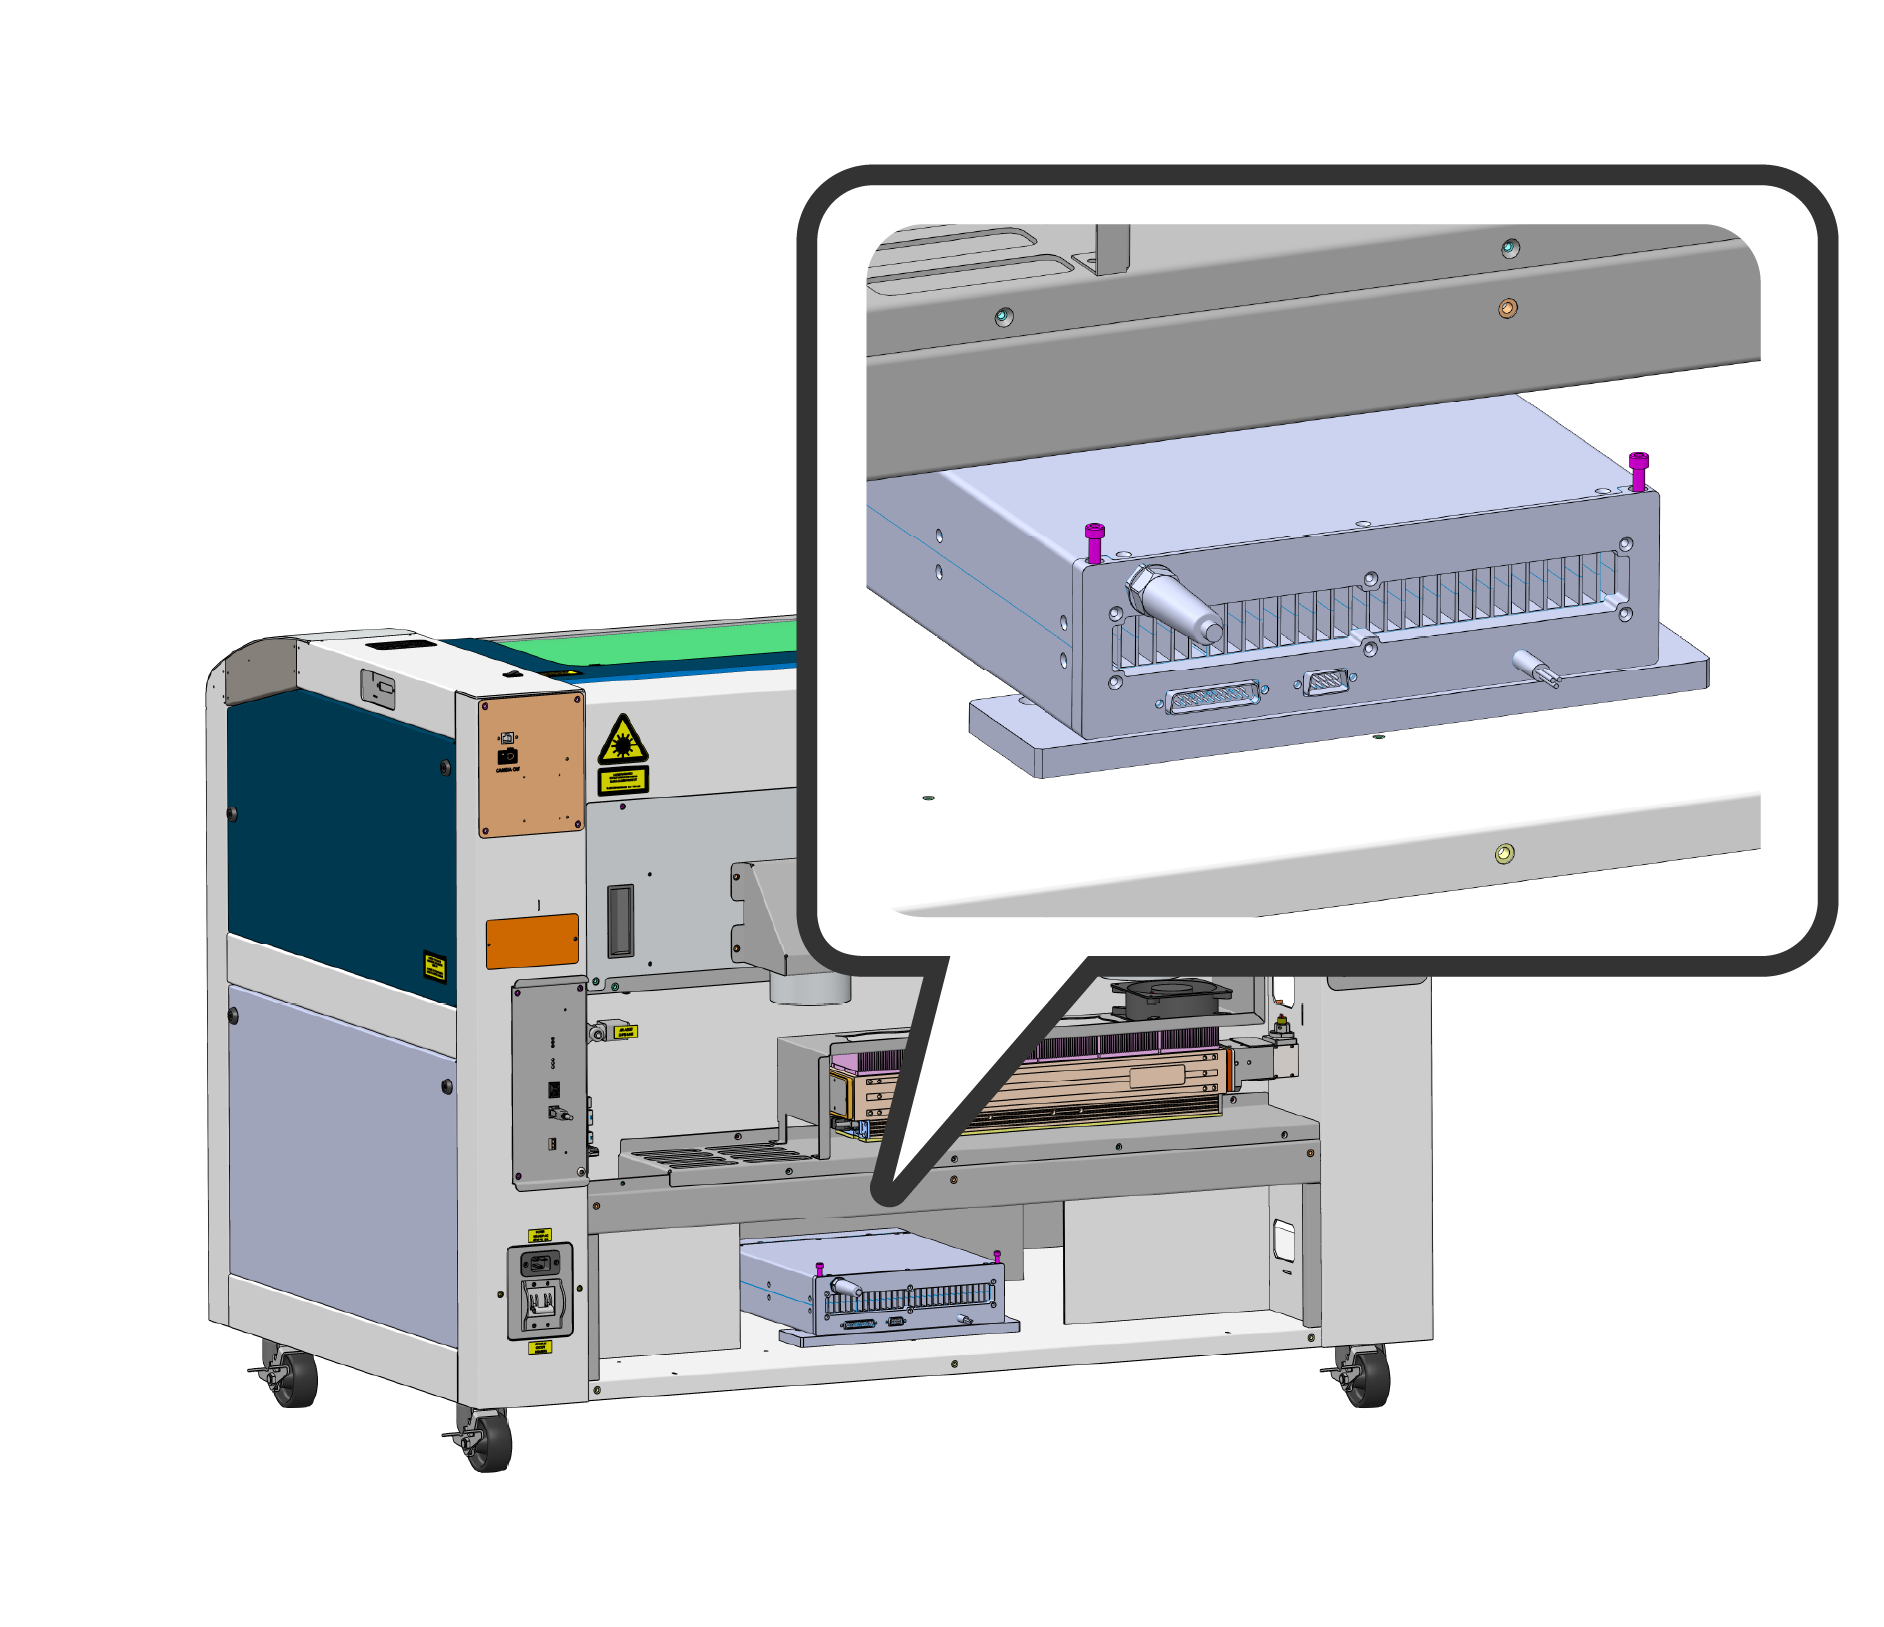
Attach Fiber Supply
Attach the fiber supply to the bracket using the provided 9/64 hex wrench and hardware.
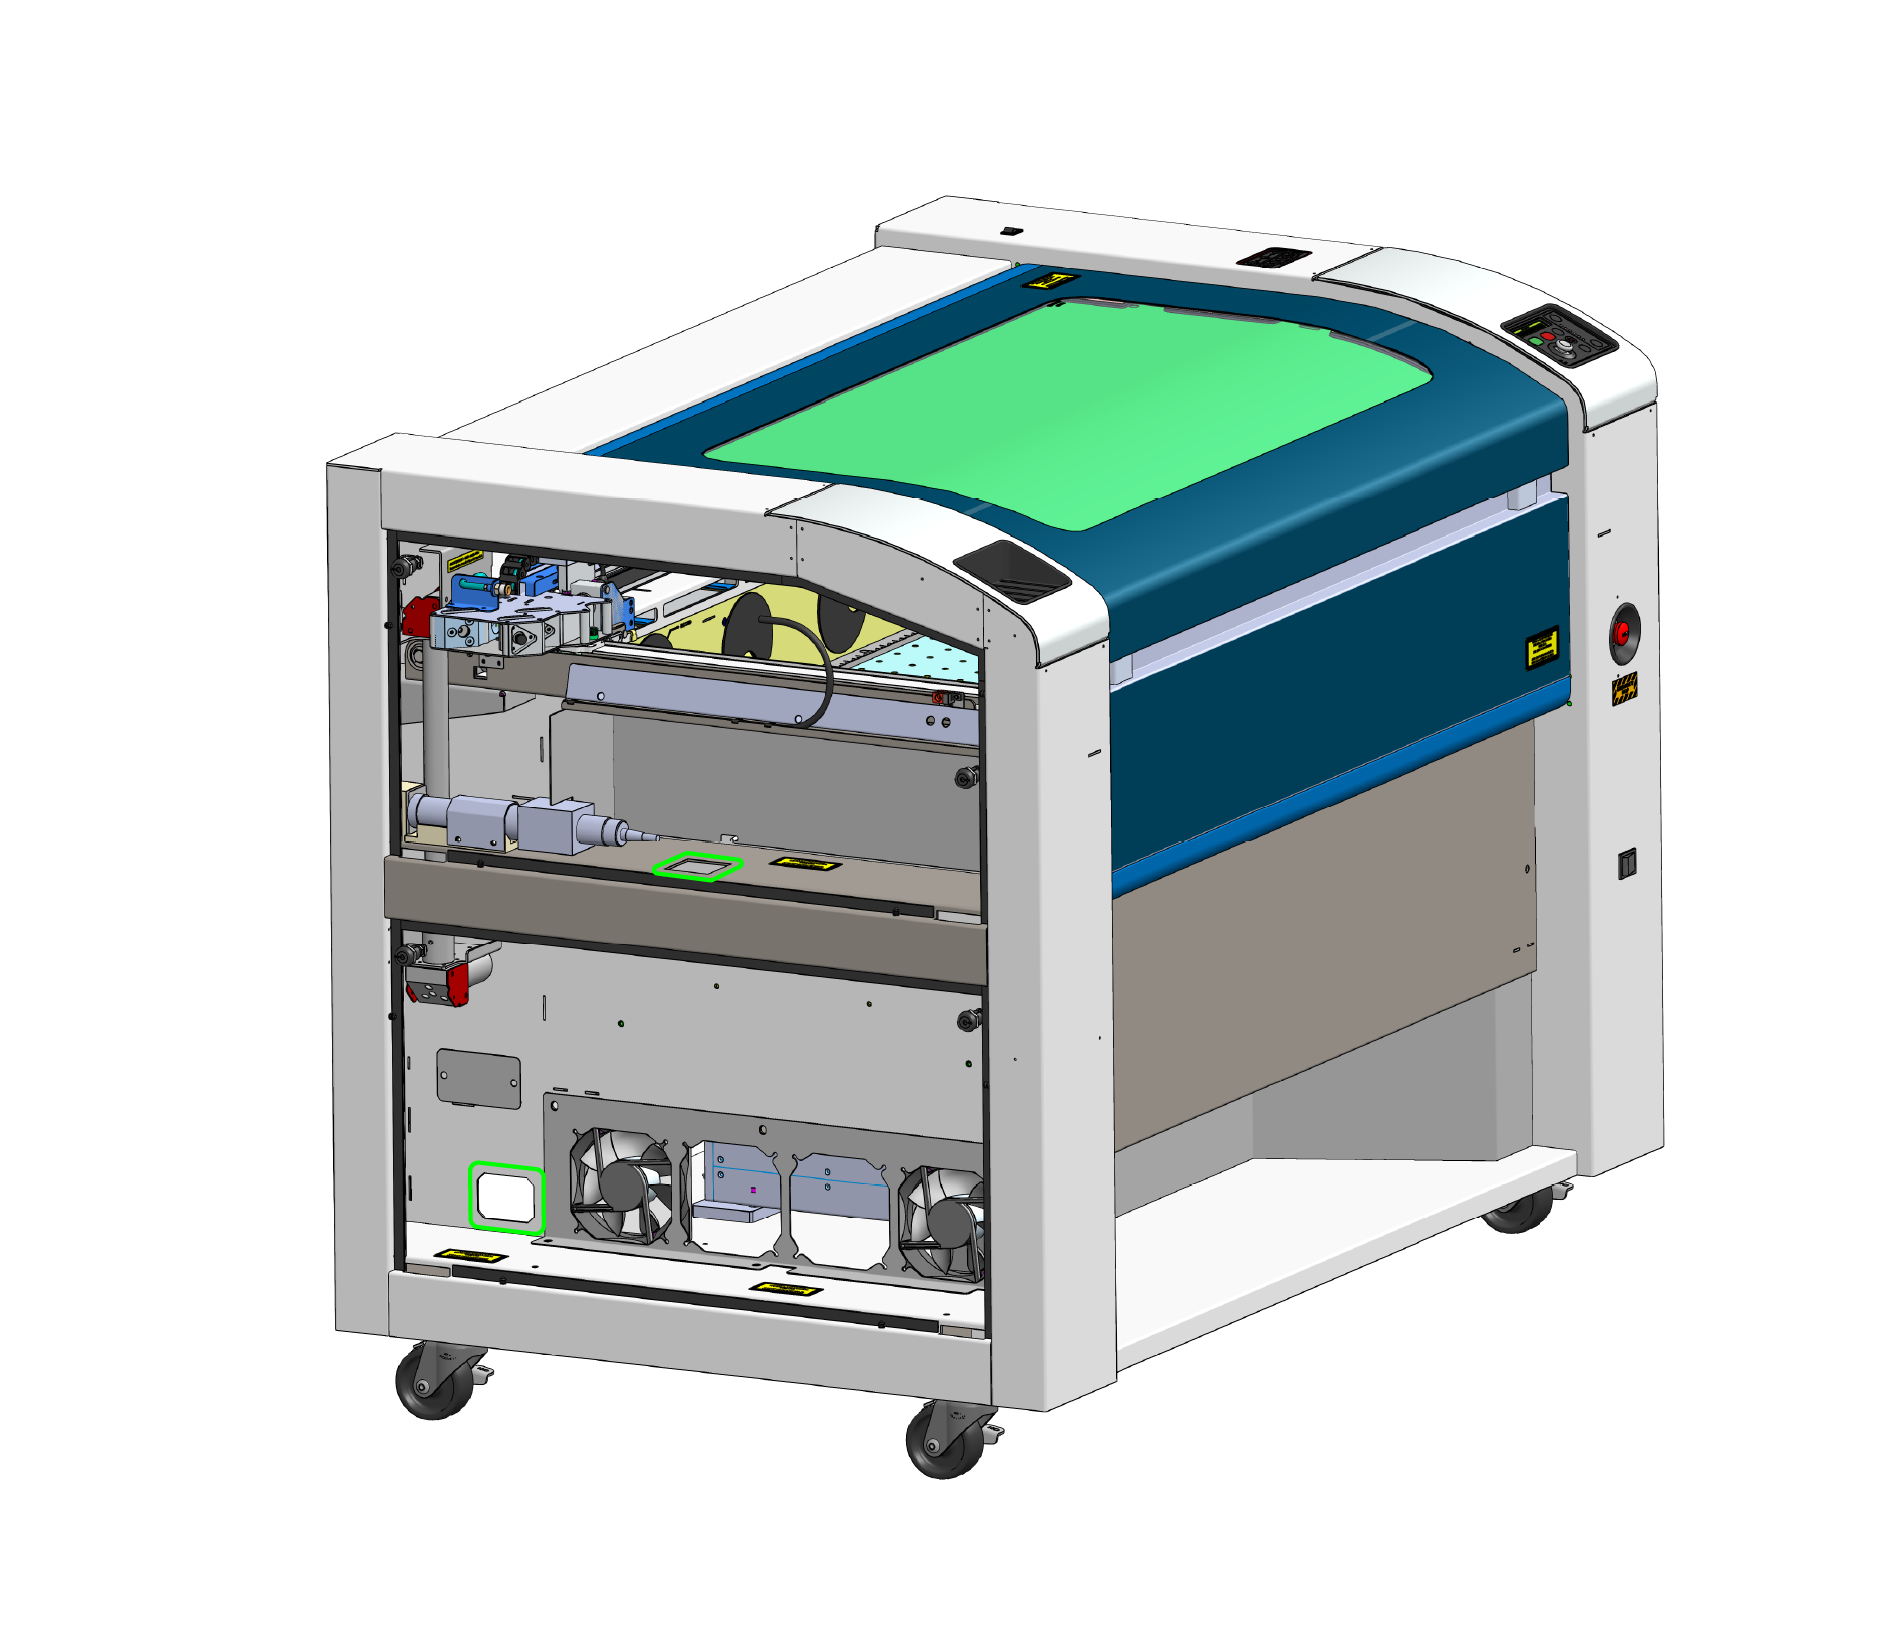
Route Fiber Head
Feed the fiber head back up through the cutouts.
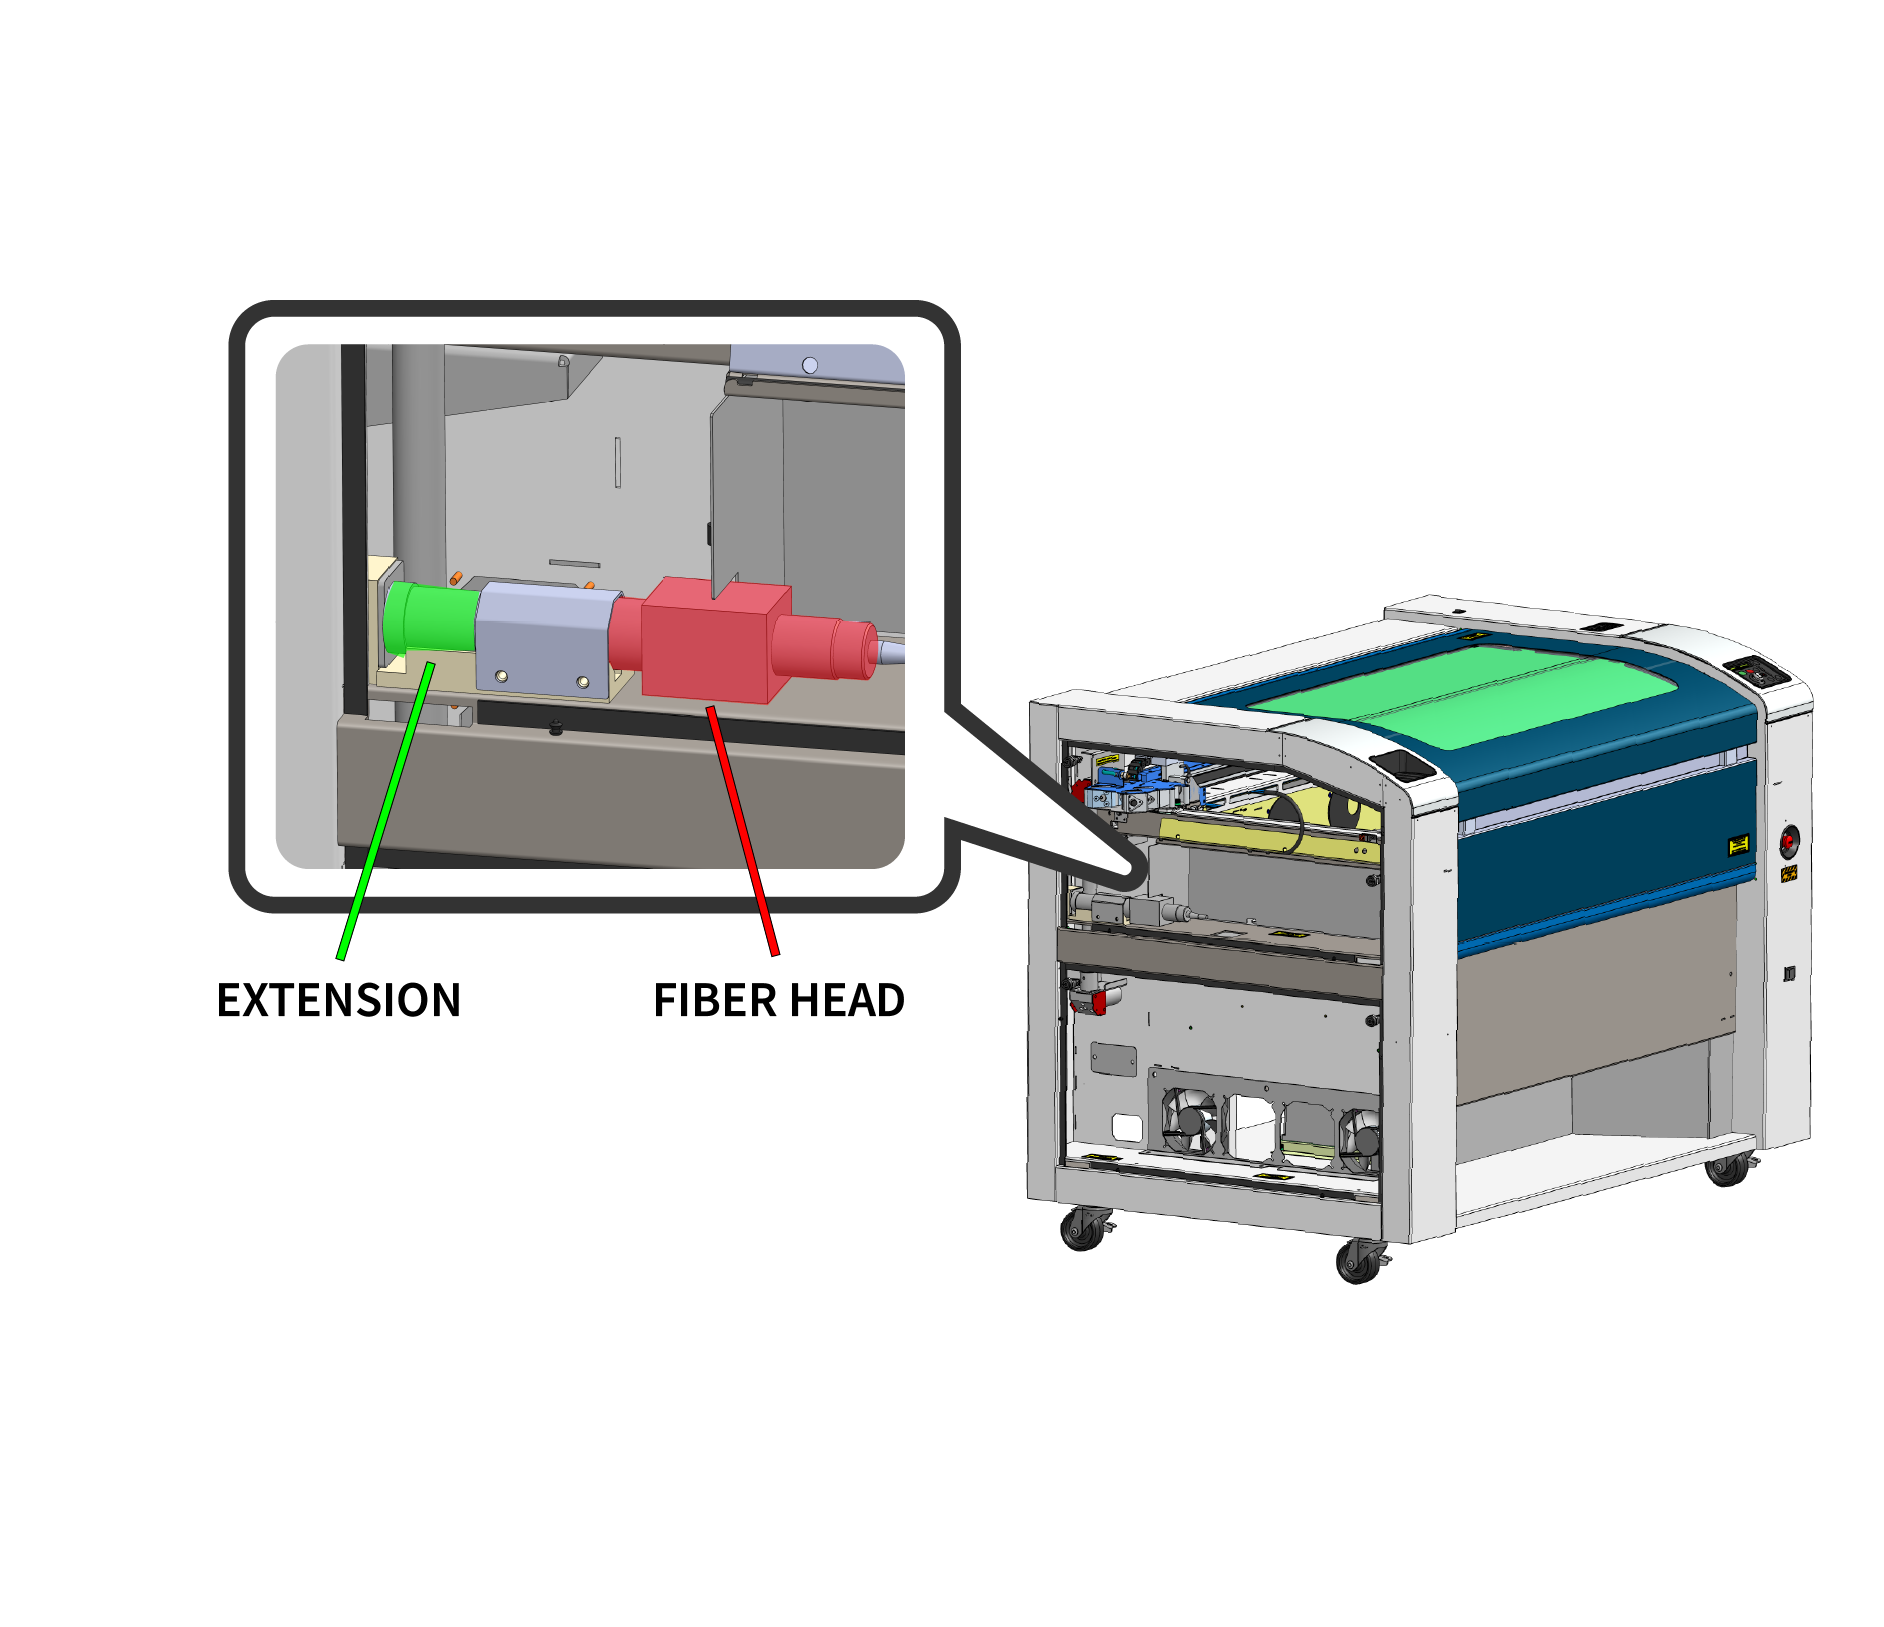
Secure Fiber Head
Insert the fiber head extension tube and fiber head into the bracket and secure the bracket.
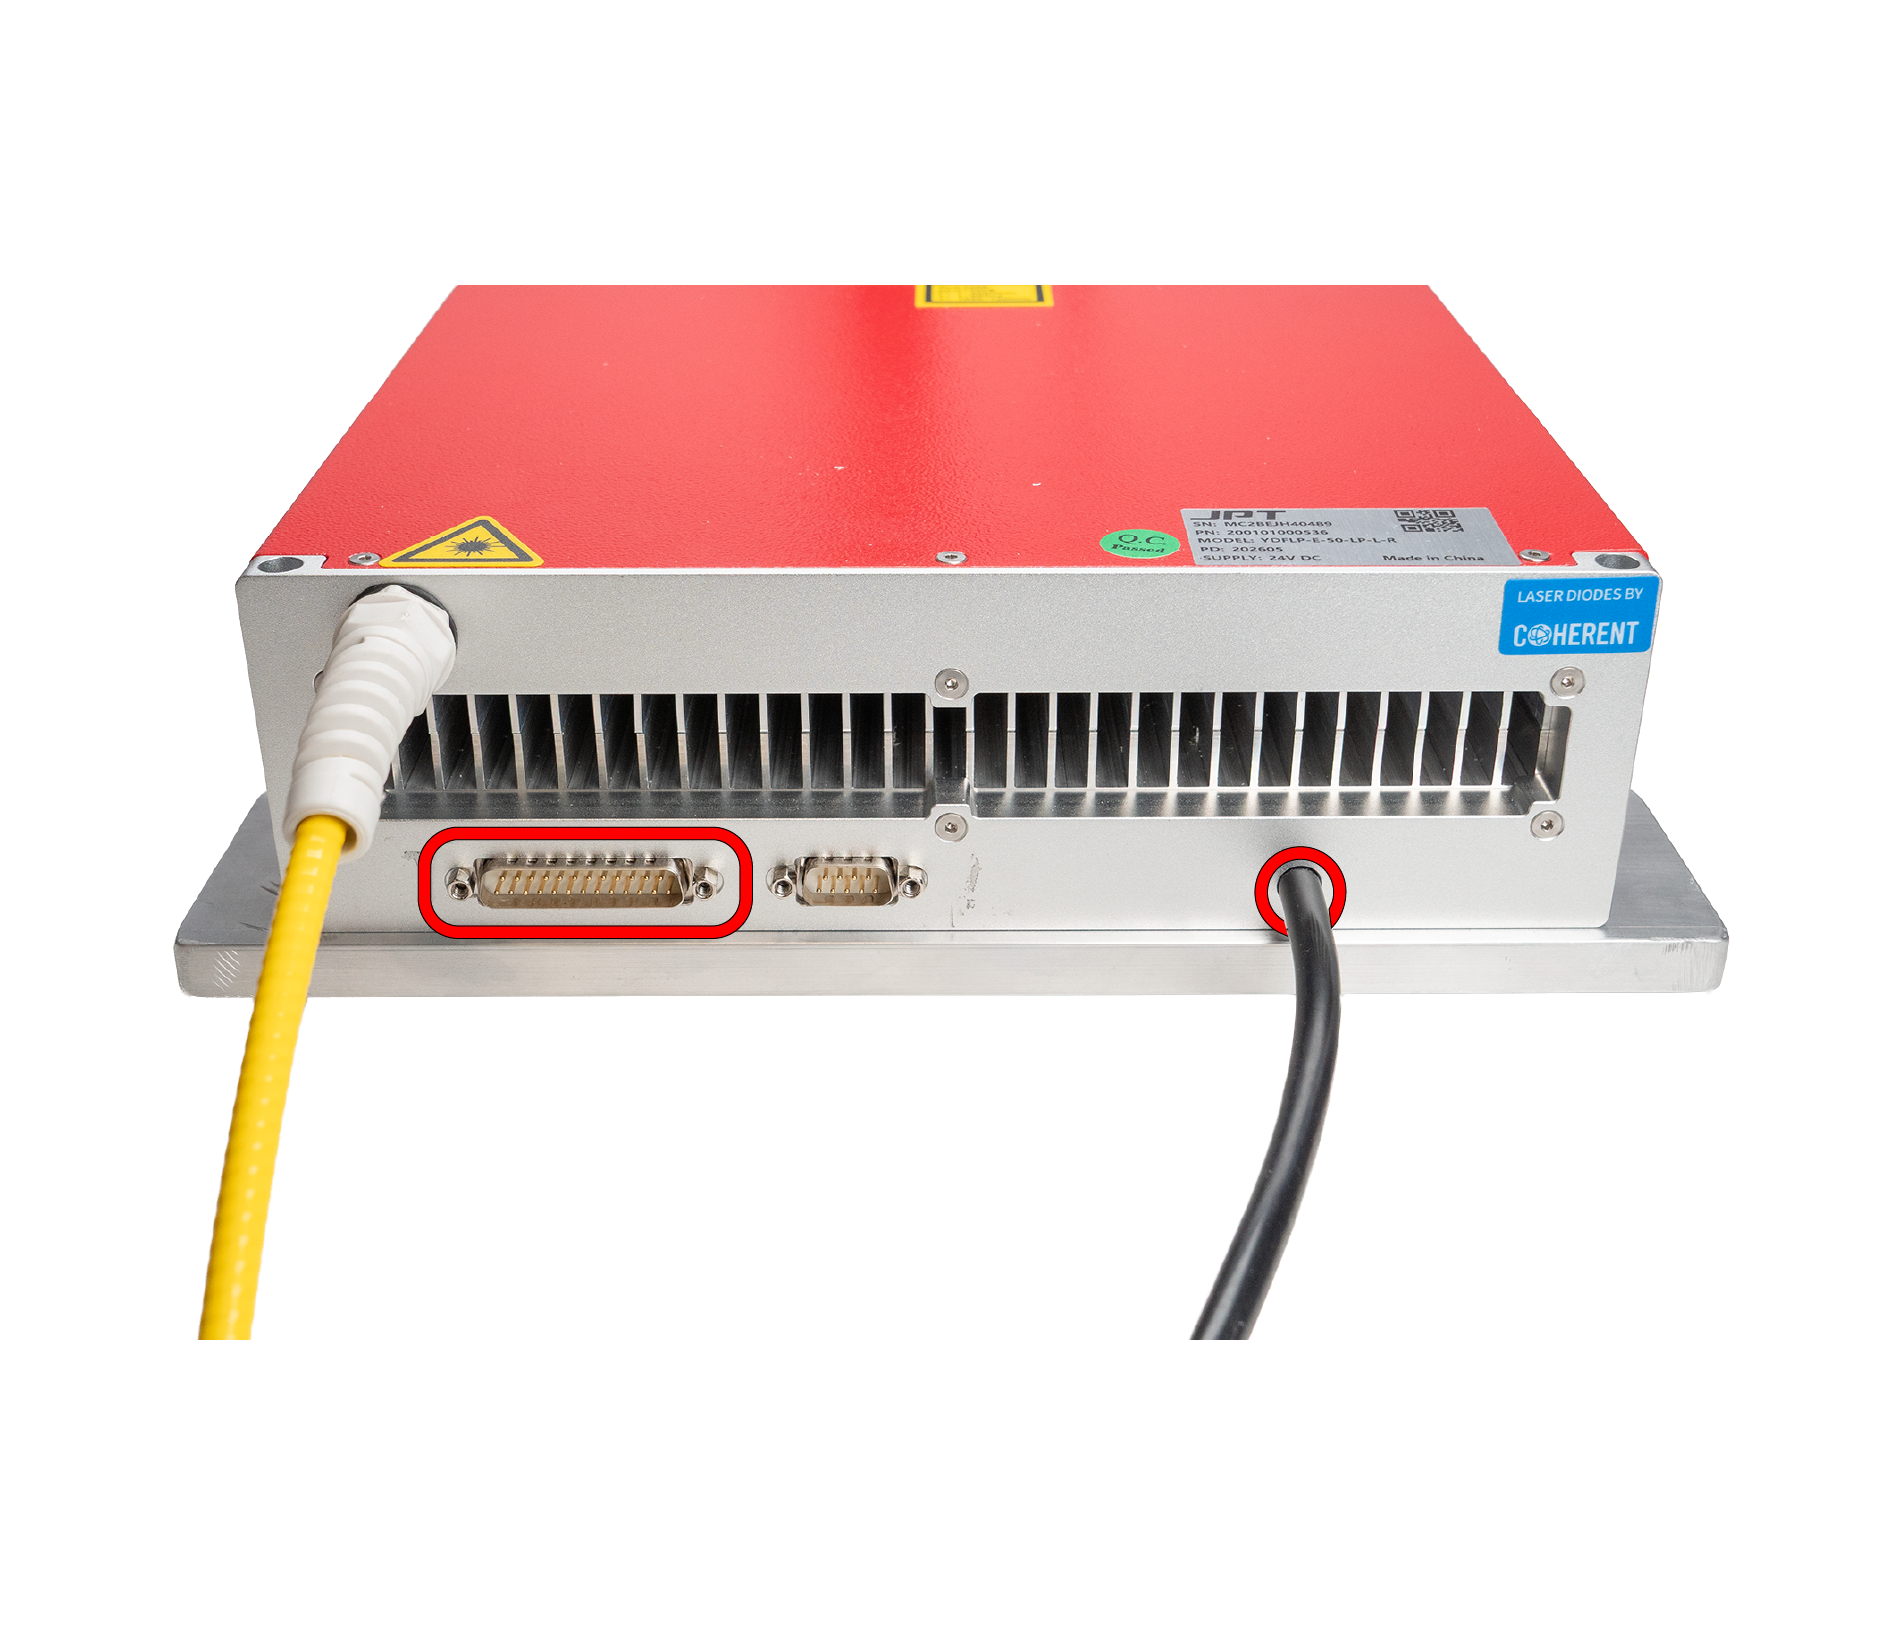
Reconnect Cables
Reconnect the signal and power cables.
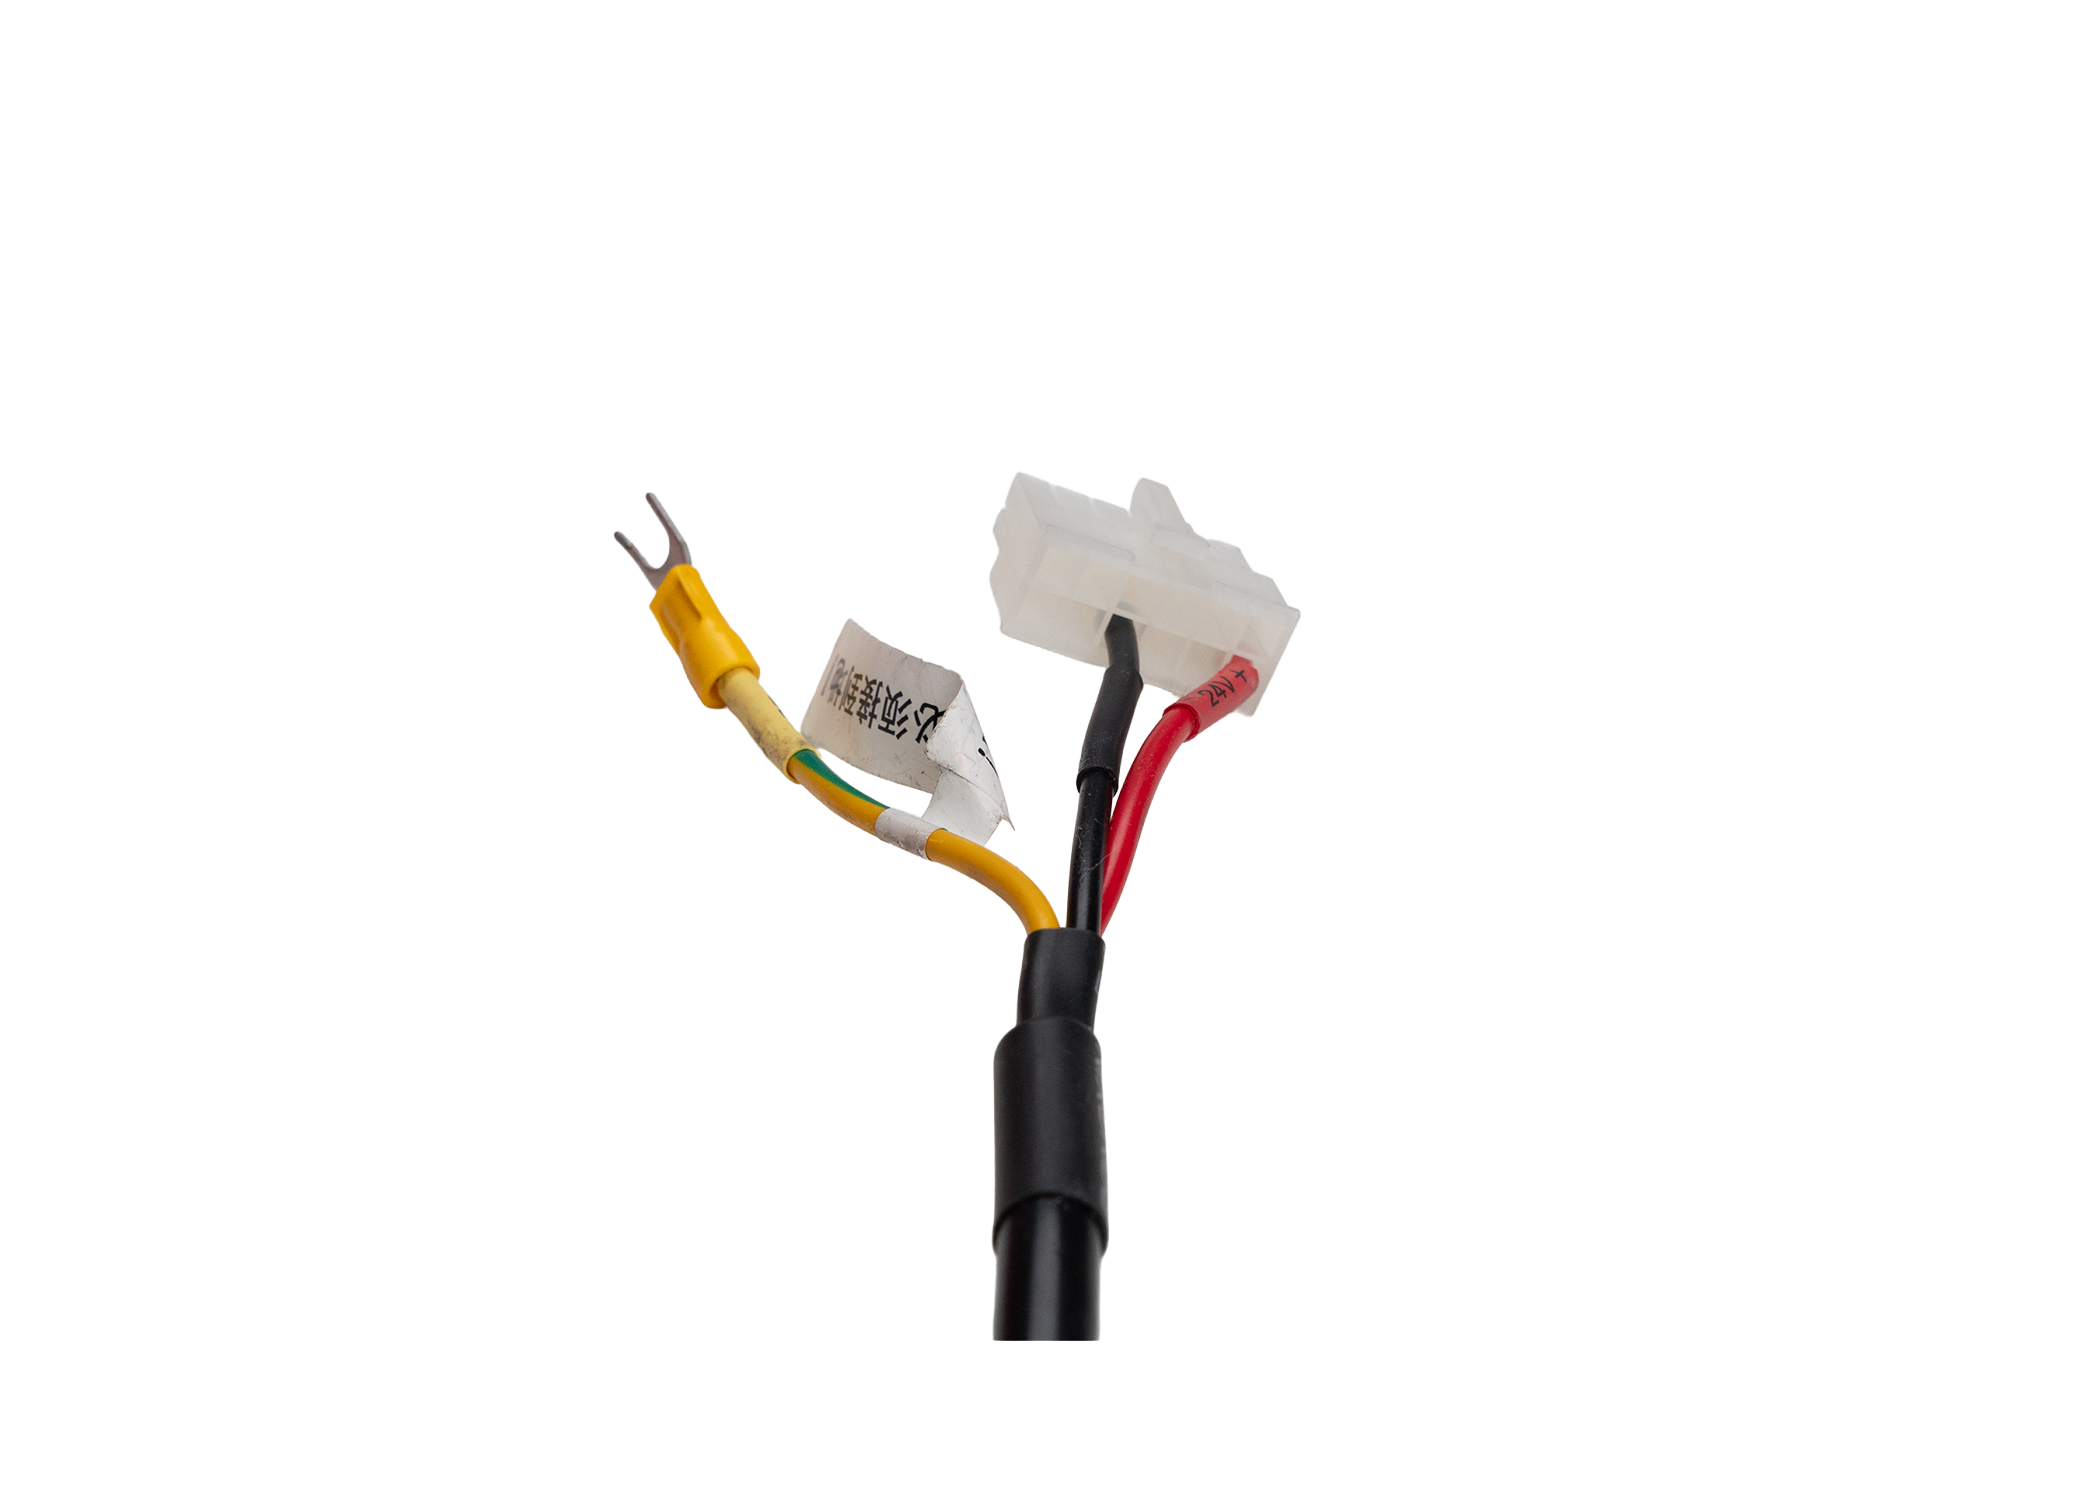
Attach Grounding Cable
Attach the additional yellow grounding cable to the chassis in the unused hole next to the fiber supply.
Final Verification & Alignment
Before replacing the panels, follow the alignment guide, attached on the right, to ensure the fiber laser is properly aligned. Once complete, reattach all machine panels.