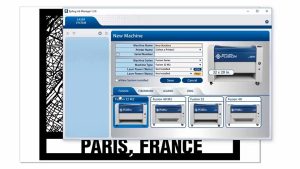
This is the Epilog Zing Print Driver, where you will set all of your laser controls.

General Tab
We’ll start on the General tab.
First, at the top left corner of the driver, you’ll find the “Resolution” settings, which can be set from 100 to 1000 DPI. The higher you set the resolution, the higher your engraving quality will be. Typically, you will use 400 or 500 DPI for most materials you engrave.

Next, the “Job Type” area is where you choose between Raster, Vector, or Combined modes, which includes both engraving and cutting within the same job.

The “Raster Setting” area is where you will set your speed and power settings, from 1 to 100%. You can find suggested speeds and powers for different materials in your manual.

The “Engrave Direction” setting can be set to Top-Down or Bottom-Up by clicking the arrow button or using the drop-down menu.

The “Image Dithering” setting is a drop-down menu where you can choose between different ways for the laser to interpret the dot pattern in your file. There are three clipart modes: Standard, Brighten, and Low Res when running lower resolution images. The next three modes, Floyd Steinberg, Jarvis, and Stucki are all used for different types of photographs.

Next, you can set your Vector settings. Start with your speed and power settings, setting each from 1 to 100%.

The Vector cutting frequency ranges from 10 to 5000 Hz. This is the pulse rate of the laser as it cuts. A low frequency will produce a dotted line, often used for scoring paper, while a high frequency, where the laser beam is on continuously, is often used for cutting acrylic to create a flame polished edge. If you choose frequency automatic, the laser will automatically adjust the pulsing of the laser to a value of 5000.

The “Vector Sorting” checkbox will determine the order of your cut lines. With Vector Sorting off, the laser will cut in the order that your objects or lines were created.

In the drop-down box, you can select the sorting mode. It is set to “Optimize” as the default. Selecting “Inside-Out” sorting will first cut out the most interior items, then outer ones. For example, the letter O will first cut the interior circle, followed by the outer one.
Selecting “Optimize” sorting chooses the next closest starting node.
Choose Frequency Automatic to automatically set all frequency settings to the full 5000 Hz.

The “Piece Size” setting is where you will set your page size dimensions to match the page size of your design.

Under the “Options” area, the Center-Engraving checkbox will enable the center-engraving features of the laser. Choose your new home position and the laser will center your engraving around that position. You can choose between left-center, top-center, page-center, and center-center positioning.

Then you can choose to send the project directly to the Laser…

…or to also send the print job to the Job Manager by checking “Send to Manager” for quick access later.

Advanced Tab
Next, we’ll move on to the Advanced tab at the top of the screen.
The first area of this tab is the “Raster Type” setting. Typically you will be operating the laser in Basic mode.

3D mode changes how the laser looks at the grayscale images in your design, and will change the laser power applied to each dot, creating a 3D gradient effect on your material.

Stamp mode is used to enable the laser’s rubber stamp settings.

Under “Stamp Settings”, the Shoulder setting adjusts the angle of the sides of the stamp.

The “Widening” setting adjusts the boldness of the characters.

Selecting the “Mirror” checkbox automatically inverts the artwork for you.

Selecting the “Fence” checkbox tells the laser you have created an outer border for each stamp on the sheet.

When you receive a notification of a firmware update on your system, select the “Update Firmware” checkbox, then load the file to start the firmware installation process.

Under Language, you can change the language displayed on the print driver.

For users that prefer the Legacy print driver Epilog has provided, select the “Classic UI” checkbox.

The “Configurations” area of the driver allows you to save and access material and job settings. When your settings are perfect for a project, save them for the next time you need to run that job. You can also load our suggested material settings for materials into the driver from the driver download page on our website.

Color Mapping Tab
Finally, we’ll look at the “Color Mapping” Tab at the top.
Color Mapping lets you set different speeds and powers to different colors within your artwork. Click the checkbox to enable the “Color Mapping” settings.

Change the speed, power, frequency, and focus for each color and whether the color will activate in raster, vector, or combined mode.

When you’re done adjusting your settings, click the right arrow to apply your new settings.

This was a basic overview of the Epilog Zing print driver. When you are done adjusting your settings, click the OK button to print the job to the laser or to send it to the Job Manager.