Introduction
Epilog Pulse App Guide
Streamline your workflow by sending jobs directly to your laser from any modern web browser.
System Requirements & Setup
Compatibility
- Firmware: Version 1.1.0.2 or newer
- Browser: Chrome, Edge, Safari, or Firefox
- Processor: Intel Core i3/i5/i7, AMD Ryzen/FX/A-Series, or ARM
Connection Required
Before utilizing the Pulse application, you must establish communication between your computer and the laser. If you have not done this yet, please use our setup wizard.
Launching the Pulse App
-
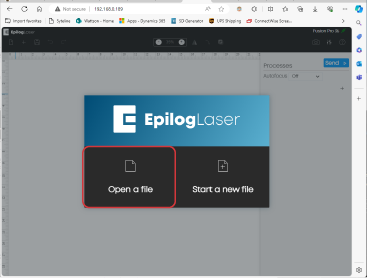
Open your Web Browser: Type
http://followed by the laser’s IP address into the address bar (e.g.,http://192.168.3.4) and press Enter.-
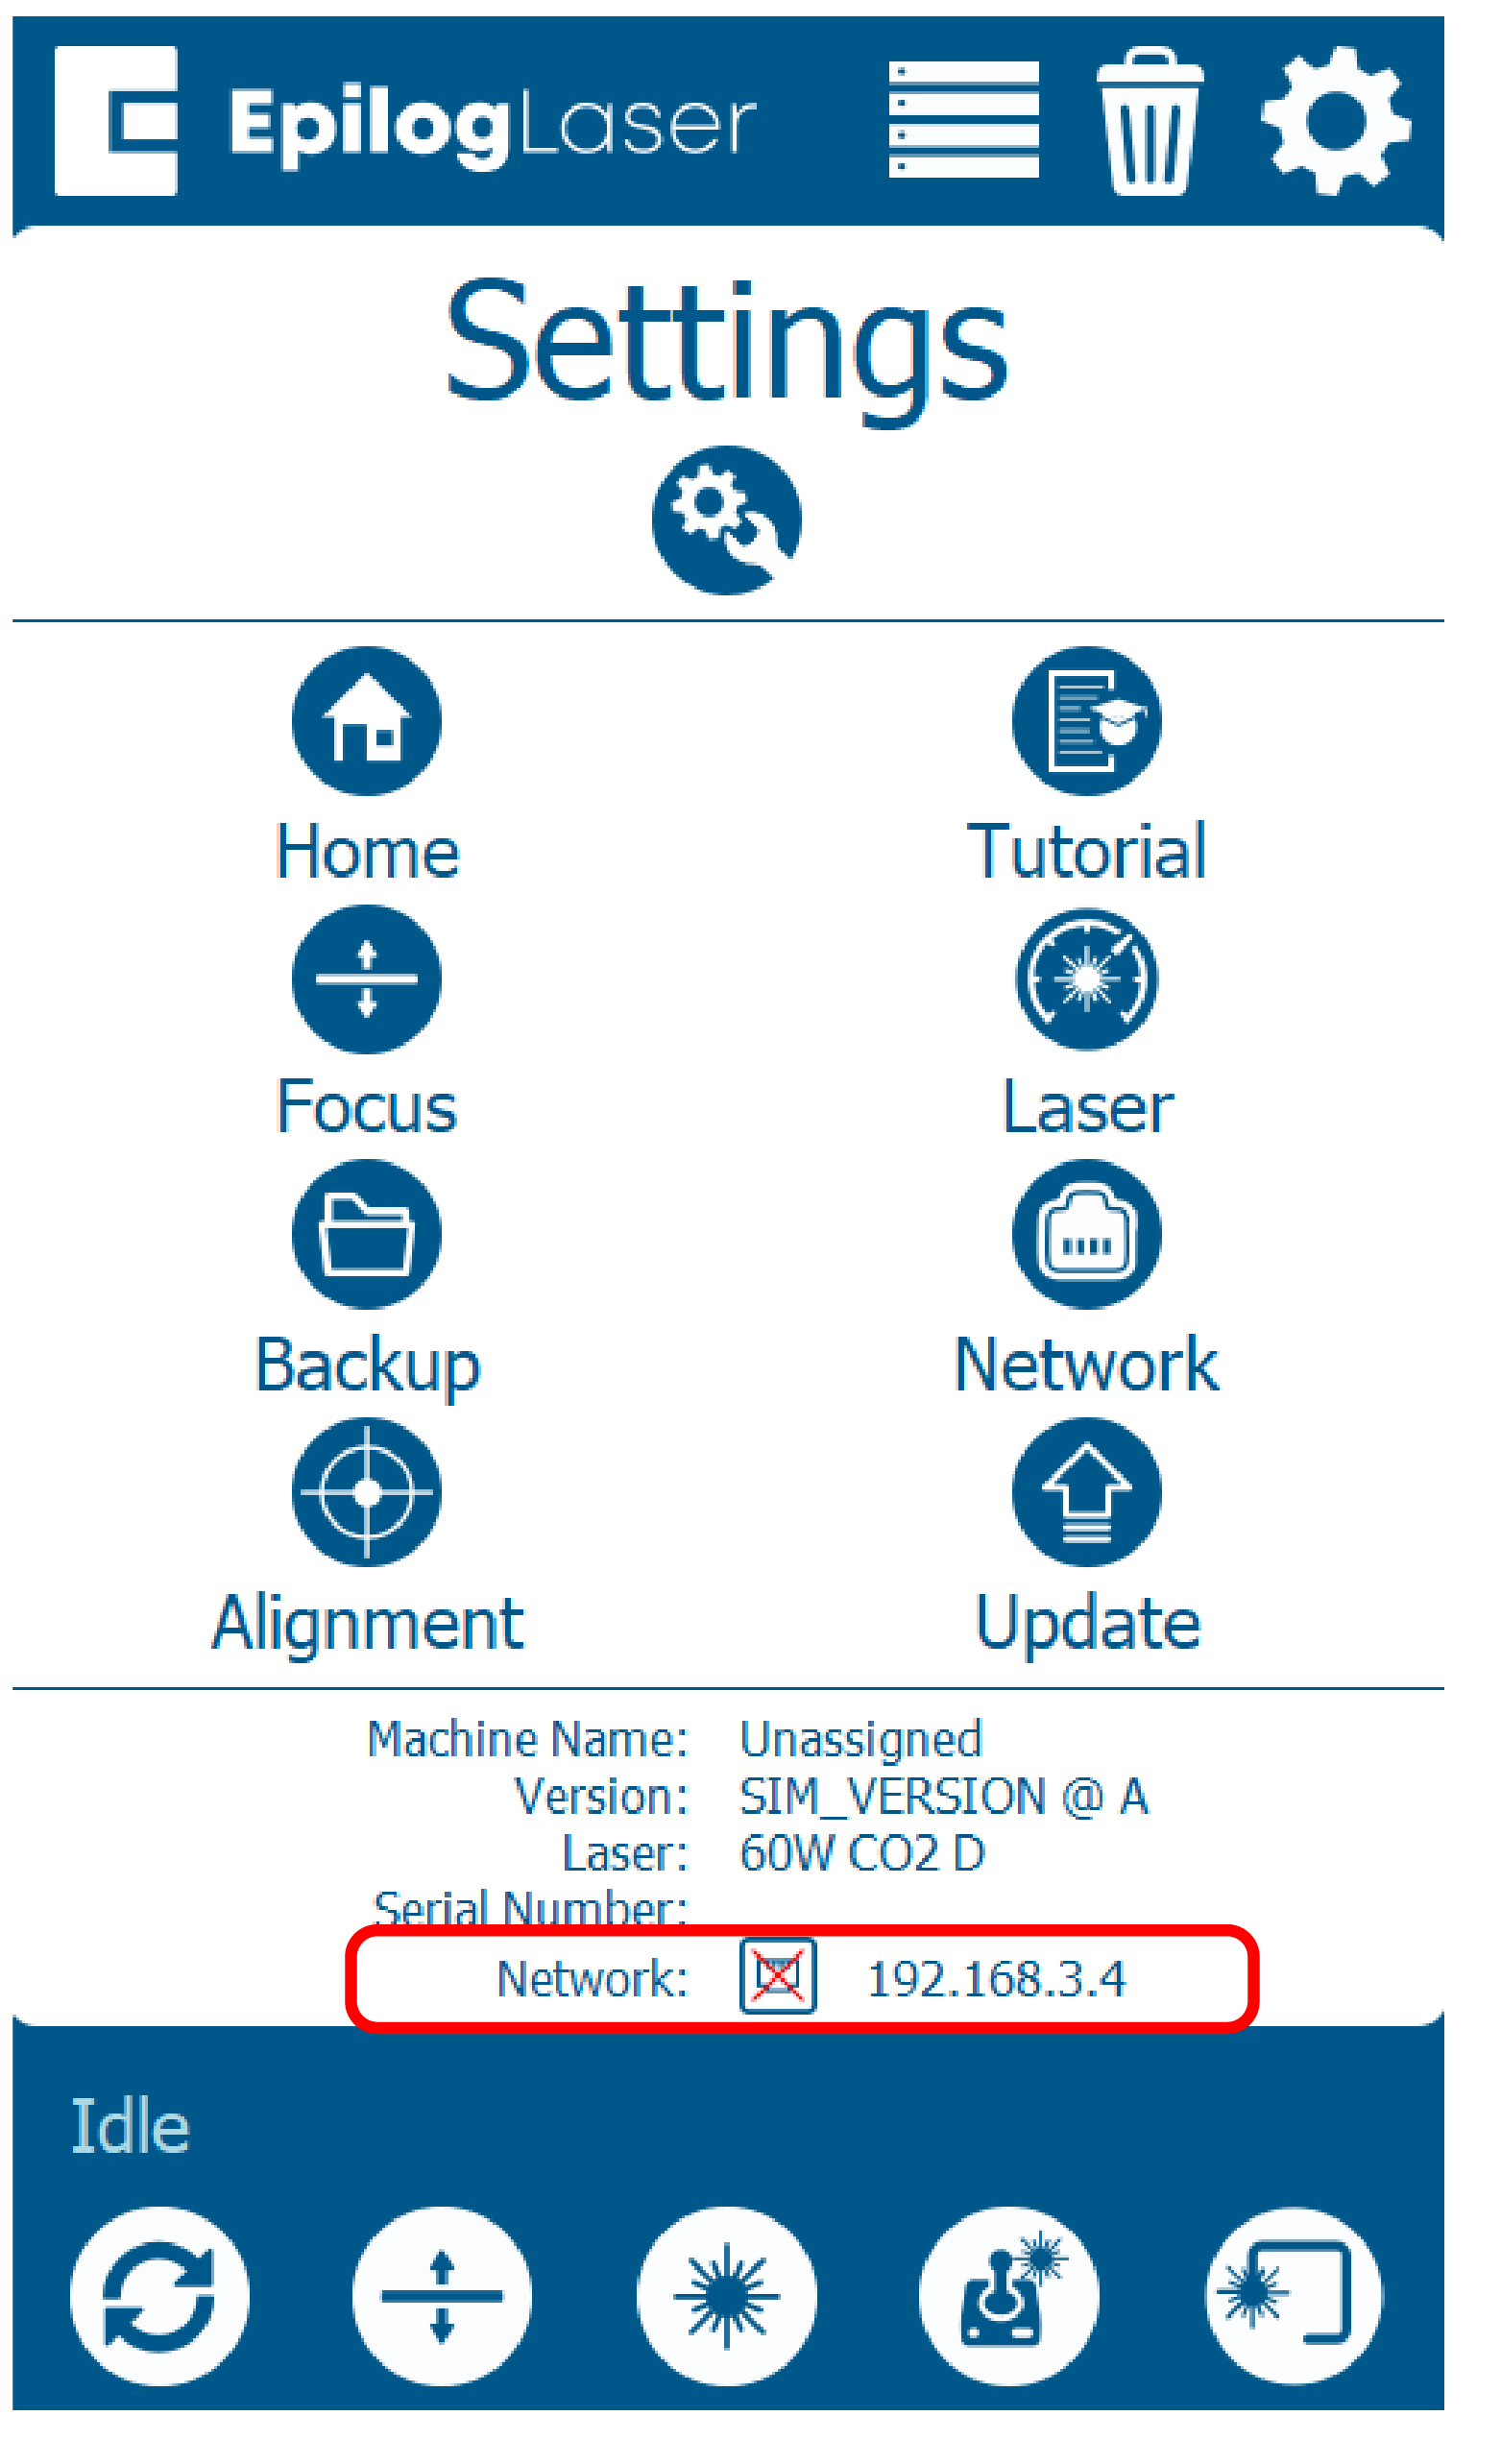
Need help finding the IP Address?
To locate your laser’s IP address, go to the laser’s display panel:
- Click the gear icon.
- The current IP address will be displayed on the screen at the bottom under Network:
-
Need help finding the IP Address?
Processing Your Job
-
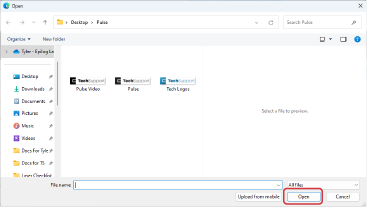
Import Artwork: Click Open File, select your design, and click Open.
Supported formats: SVG, GIF, BMP, JPEG, PNG, TIFF.
-
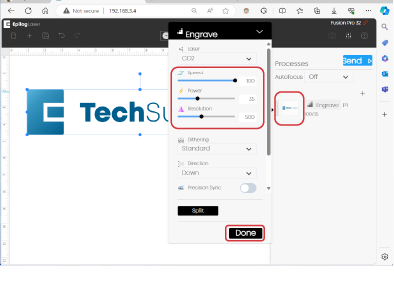
Configure Settings: In the right-hand column under Processes, click the thumbnail for Engrave/Cut. Set your desired speed and power, then click Done.
-
Send to Laser: Click the Send button at the top of the interface.

Running the Laser
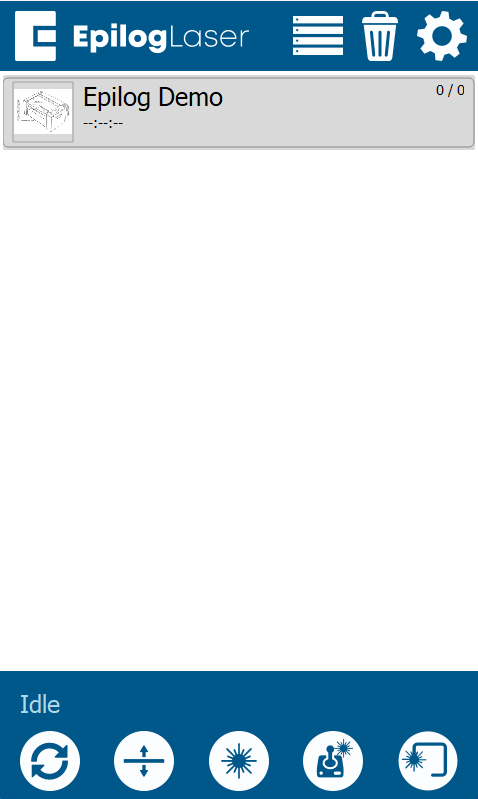
- Verify the file is now visible on the laser’s display panel.
- Load your material into the machine.
- Select the job on the display panel.
- Press the Play/Pause button on the laser to begin running the job.
Was this helpful?
Thanks for your feedback!